Forum Discussion
8,453 Replies
- Here's the results after sanding some of the ChemLink over the screws. That's going to take a little while, but I want this about as flat as possible.

- Here you can see some of the ChemLink that I had put on the roof originally.
When I put the plywood on the roof, I screwed it down, and then covered the joints and screw heads with ChemLink.
Here is what that looked like. You can see that I sanded the Por 15 a little to scuff up the surface so glue will stick properly.
I also need to sand the ChemLink off to make that even with the plywood as well. As you ca see, the ChemLink is a little rough.
Then again, it is still tough to get off. Trying to cut a little off the top to bring it closer to level isn't fun, and then using 40 grit sandpaper to remove a little more to make it level works fairly well.
It does, however, take a little time to do so.
- Today, I pulled back the TPO roofing, and began to sand the plywood on the roof.
Having the scaffolding around 3 sides was really great! Up the ladder one time, and then I could access any area that I wanted. Wahoo!
Was it worth it? You bet. Even with the extra expense and extra time to get it ready. Yes, I am pleased with it.
- One thing I had to change, though. I finally broke down and removed the entry door.
There was just too much stuff inside to keep entering and exiting through one of the windows. LOL.
I pulled the door off, and just put up a piece of Coroplast for easy removal, but will keep any rain out. (hopefully, there won't be any before I am done.
- On the passenger side, at the co-pilot's window is the same setup, with a 2 x 3 screwed to the scaffold, and clamped to the wall.
The last of these 4, is at the Living Room window on the co-pilot's side and is secured the same way as the other 3.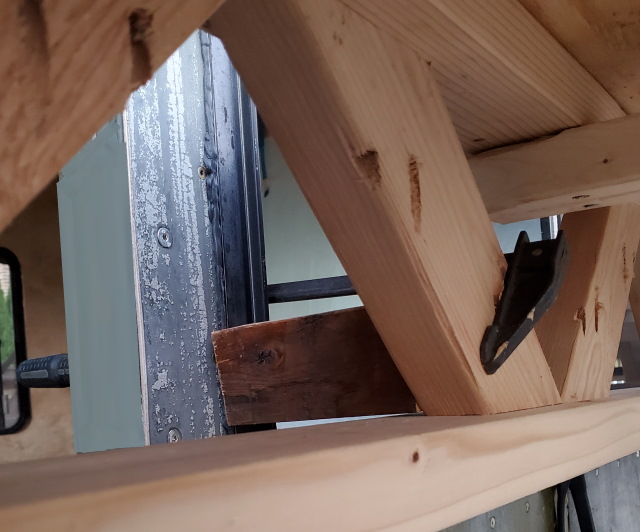
As you can see, with these clamps in place the side to side movement doesn't exist.
Forward and backward movement are taken care of by the current braces, as well as these 4 clamping areas.
Overall, I am happy with how this turned out. - Ok. I have secured the front part of the scaffolding to the moho so it cannot fall away from the coach.
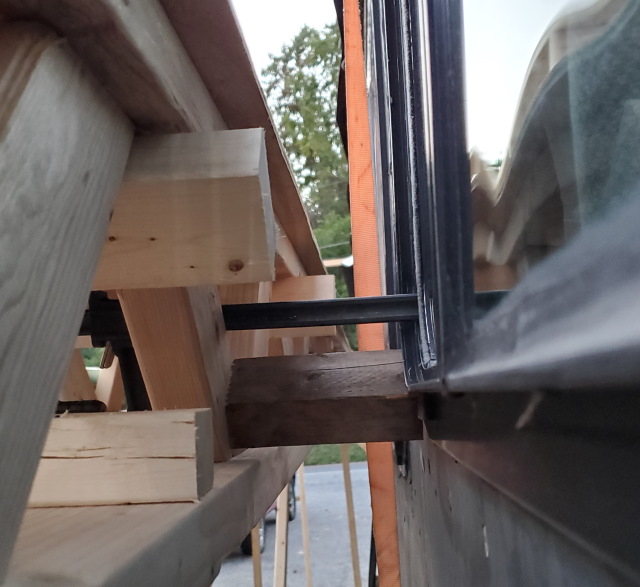
This first pic is at the window next to the pilot's seat. I screwed a 2 x 3 to the scaffold, and then clamped the scaffold to the side of the moho.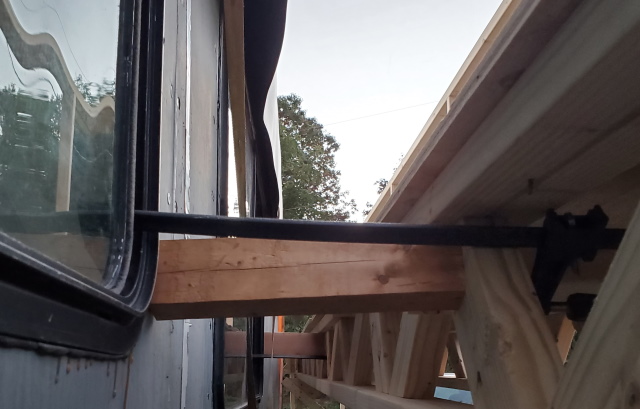
This next pic is also on the pilot's side, but is about 8 feet behind the first brace. This one is also screwed to the scaffold, and secured with a clamp going through the Living Room window.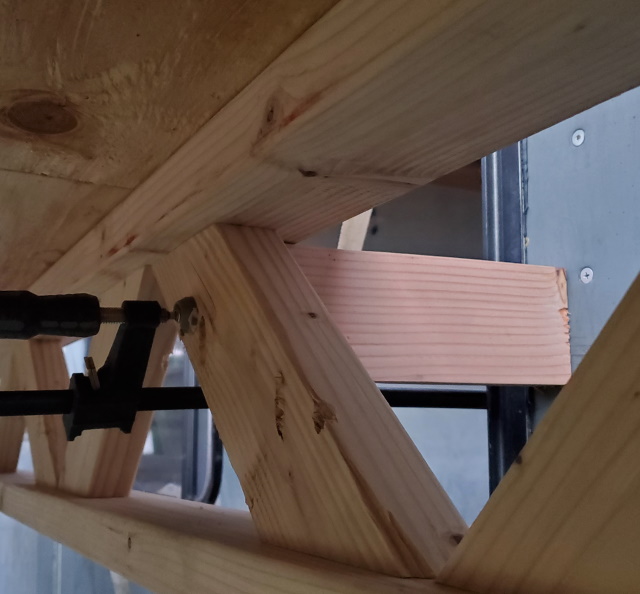
Between the 2 clamps holding the scaffolding to the side of the coach, there is absolutely NO movement to or away from the side of the coach. navegator wrote:
I would put two diagonal braces on that structure, both going from the ground at the outer leg to the upper part of the leg nearest the vehicle, on the one next to the ladder and the one aft of the door, this will help the structure from colapsing away from the vehicle.
navegator
Ordinarily I would agree with you. However, look at the next post to see why I did not. It is secure and will not go anywhere.
Thanks for the post. navegatorExplorerI would put two diagonal braces on that structure, both going from the ground at the outer leg to the upper part of the leg nearest the vehicle, on the one next to the ladder and the one aft of the door, this will help the structure from colapsing away from the vehicle.
navegator- Unfortunately, no update tonight. Had some other things that needed to be done, and never made it out there.
Should be much easier working on the roof, when I do get there though. - So with all that excitement, (lol), today, I also want to update the spreadsheet tonight, so this doesn't get ahead of me.
First, I purchased 34, yes, 34 - 2 x 3's that are 8 feet long.
Second, I purchased 20 - 2 x 4's that are 16 feet long.
Third, I also bought 4 sheets of plywood which are 19/32" x 4 x 8.
Lastly, I bought 2000 Kreg screws, 2-1/2 inch long and blue coated.
Costs for these items are as follows.
2 x 3's = 94.95
2 x 4's = 241.47
4 sheets plywood = 153.04
Kreg screws = 84.59
Total for above amounts to = $574.05.
But WAIT! There is GOOD NEWS!
Since these will also be used to work on the roof of the 5th wheel for our son, he gave me some money towards them.
$300 in fact.
That reduced my cost to just $274.05
Adding that to our prior total of $10,255.74, and our new grand total amount to - $ 10,529.79.
I wasn't exactly sure how to handle this because these will be also used for around the house, to work on both the South and East sides for painting and such.
Eventually, I just decided to include the cost to the moho project. So, that brings us up to date.
About Motorhome Group
38,769 PostsLatest Activity: Dec 31, 2014