Forum Discussion
8,453 Replies
- After several hours worth of work, getting everything ready, and we have some results.
I just left the excess TPO hang there, like I did on the other side, as it's not going anywhere.
I was about wiped out after that today, and will likely be a little sore tomorrow. Call me a wuss.... Lol...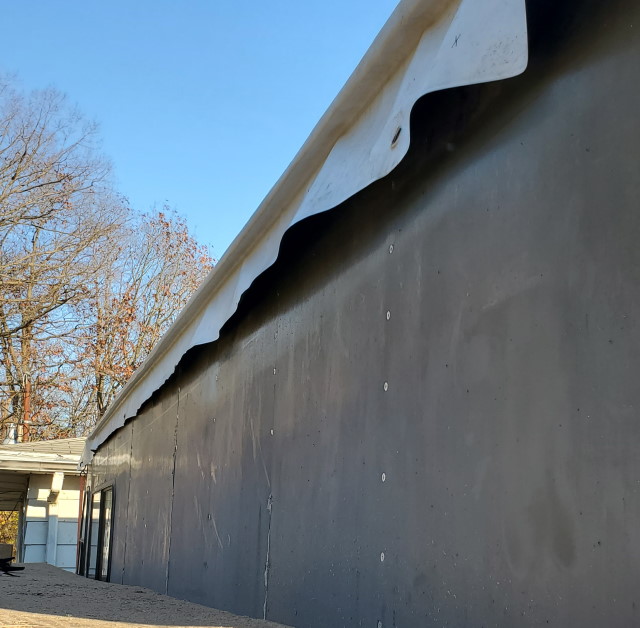
- The business end of the "helper". It's about 4 inches wide. That TPO is tough when trying to fold it into place, so I figured that a wider piece would just make it harder to get the TPO in place.
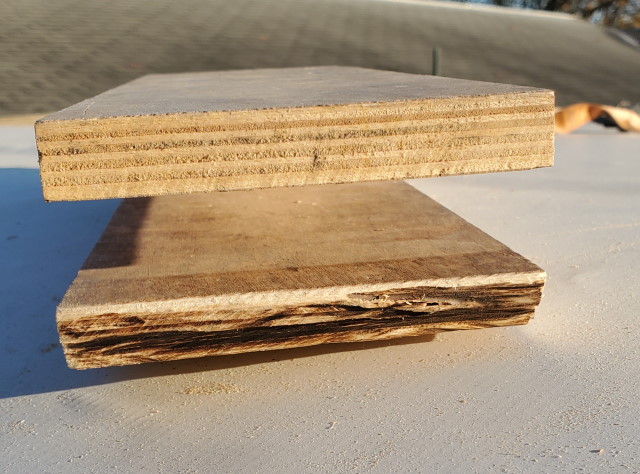
- Here you can see that I cut an angle on the piece that was going to be used on the bottom, so that I could get the TPO all the way in.
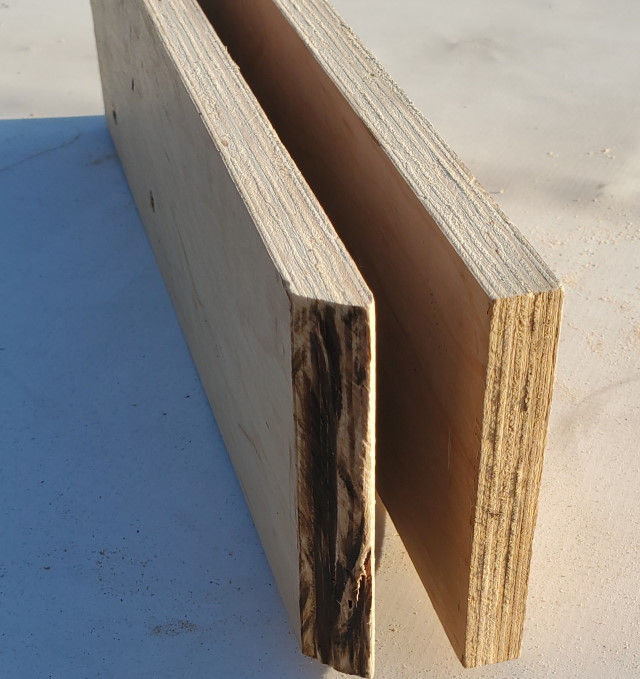
- I decided to use a little mechanical advantage today while working on the drivers side roofing.
Instead of jamming my fingers up there, I used a couple of pieces of plywood that would give me some leverage.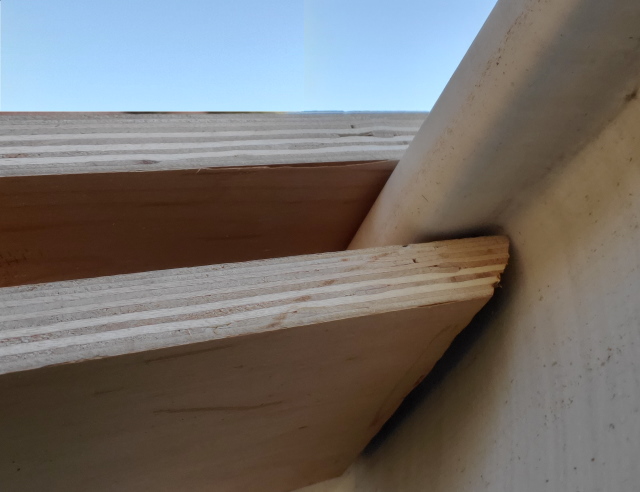
As you can see, the plywood gap is just a little wider than the thickness of the roof.
That allowed me to push the roofing in and up, and then squeeze the whole thing together to set the adhesive.
It actually worked fairly well, although it gave me a good workout.
I was still better than just using only my fingers. - Is this a good sign?

I was up on the scaffolding today to work on the drivers side roof, and shortly after getting up there, I dropped my utility knife.
When I went down to retrieve it, there it was, blade stuck in the ground at about a 45 degree angle. Lol. - The first drawing is showing the TPO stuck to the top of the roof, and to the vertical edge of the roof.
If I apply pressure at a lower part of the TPO handing down, (red arrow), what tends to happen is shown on the right.
There winds up being an air gap towards the bottom edge, which can't be removed. Fortunately, I don't have any of them.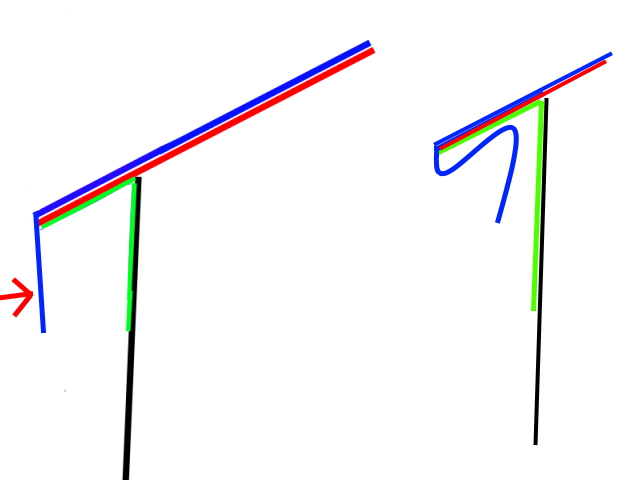
In this drawing, what is shown, is to apply pressure towards the top of the loose TPO, so that the very edge gets folded first, and the edge adheres before the rest of the TPO is mated underneath.
That is shown on the right side of this pic.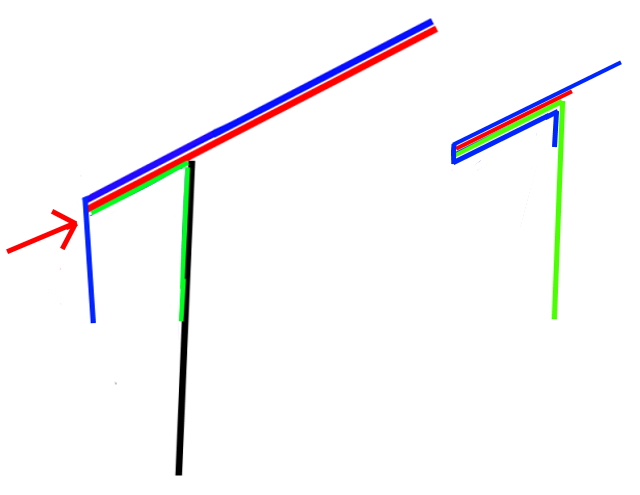
If this was a thin TPO, it would be much easier to bend around the corner, but since it is .060, and fiberglass reinforced, it doesn't bend very easily.
I did do this when the sun was out, and had warmed up the TPO, and that helped a lot. I don't think I could have done it if it was cold.
I suppose I should have some type of U shaped device, to force the TPO up against the bottom, from the outside in.
I am not sure yet, I guess I'll have to play around with a couple of test pieces before doing the other side.
I must say, I didn't see this one coming. zigzagrv wrote:
How bout ripping a 2x4 lengthwise to the angle of the overhang and supporting it to the scaffold with a couple 2x4s till the glue sets?
I thought about trying to apply pressure from the underside, but wasn't exactly sure how I wanted to do it.
I have 2 drawings to indicate what happens when pressure is applied and where it is applied.
The adhesive I used is specifically for the TPO When applied to both surfaces, it is supposed to sit for a few minutes to "flash off" a little before mating the 2 surfaces. When doing that, once mated, they are instantly stuck.
Apply a little pressure, and it is done.
Thanks for the post. zigzagrvExplorerHow bout ripping a 2x4 lengthwise to the angle of the overhang and supporting it to the scaffold with a couple 2x4s till the glue sets?
- The real bear was trying to apply pressure in 2 directions at once. The Black arrows show trying to apply pressure both upwards and inwards, all while keeping the TPO against the outer edge, and not wrinkling the underside.
Trying to bend the TPO around the outer edge, and the inner angle at the same time was a real trip.
The tips of my fingers are still a little tender from applying pressure to the TPO.
I'll have to see if I can come up with a better system for the other side. This worked, but, there has to be a better way to stick this up there.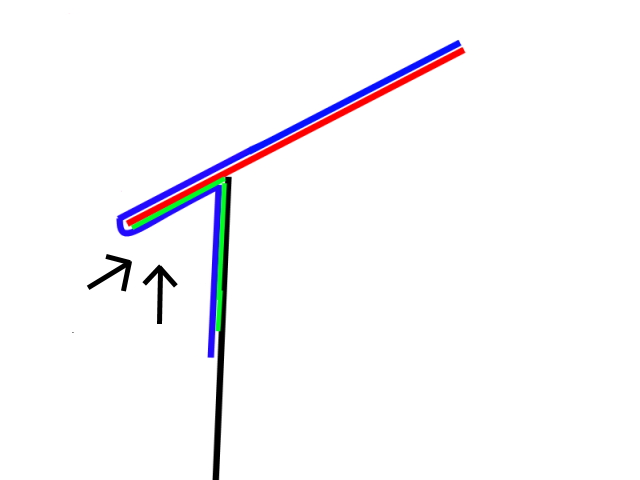
- Here's the drawing of where I glued the TPO down, and where I did not glue it yet.
The Magenta color arrows point to where the glue is.
The Black arrow shows that the vertical surface is not yet glued.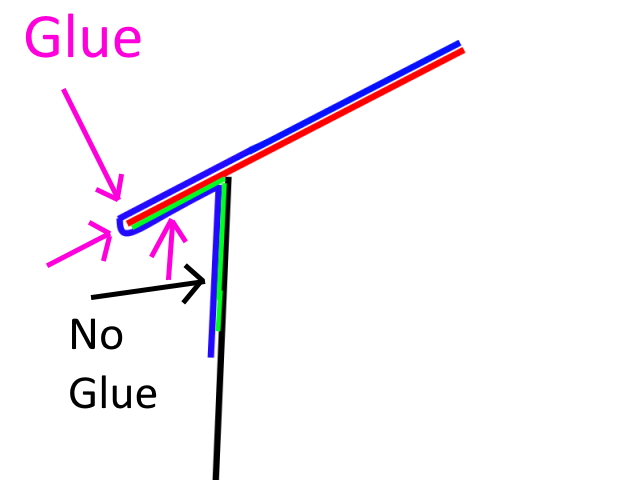
About Motorhome Group
38,769 PostsLatest Activity: Apr 04, 2026