Forum Discussion
8,453 Replies
- Adding a little piece of painters tape, with just a little pressure, and we are at 90 degrees. So basically, I will call this one a win.
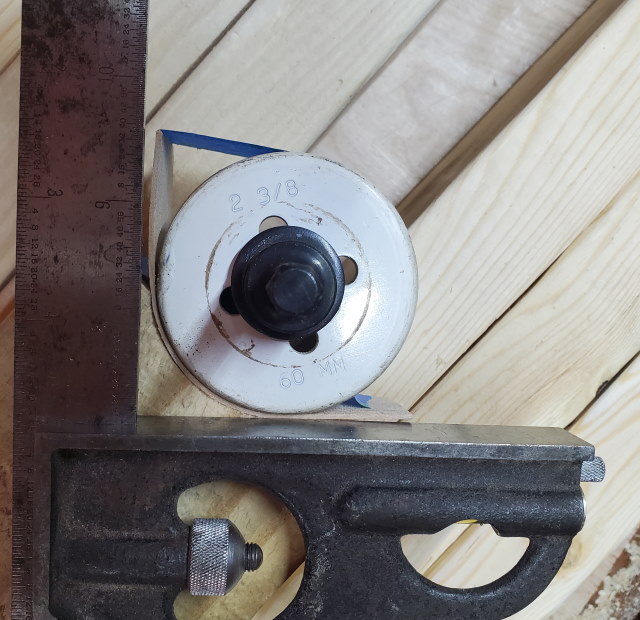
I now know, I can bend wood around a 2 - 3/8" or 2.5" diameter object, so that should make things a little easier to bend the wood for the bottom of the sink edges. - As it turns out, I should have kept just a touch more of the hole to bend the wood. It is very close, but as the old saying goes - no cigar. Lol.
Here you can see, it is close to a 90 degree angle, but not quite.
- I noticed on the hole saw, there were 4 slots around the outside of the saw.
Sooooo, I figured, since they are equal distance apart, after drilling the hole, I cut off the end of the 2 x 4 until I had 1/4 of the outside diameter in the wood.
I figured that would give me a right angle transition and should work just fine.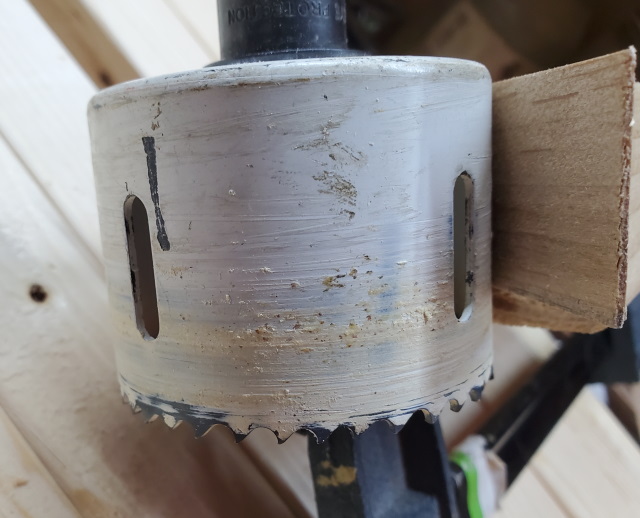
- This is the bottom side, and you can see the wood being bent around the outside of the hole saw, while forced into the 2 x 4 partial hole.
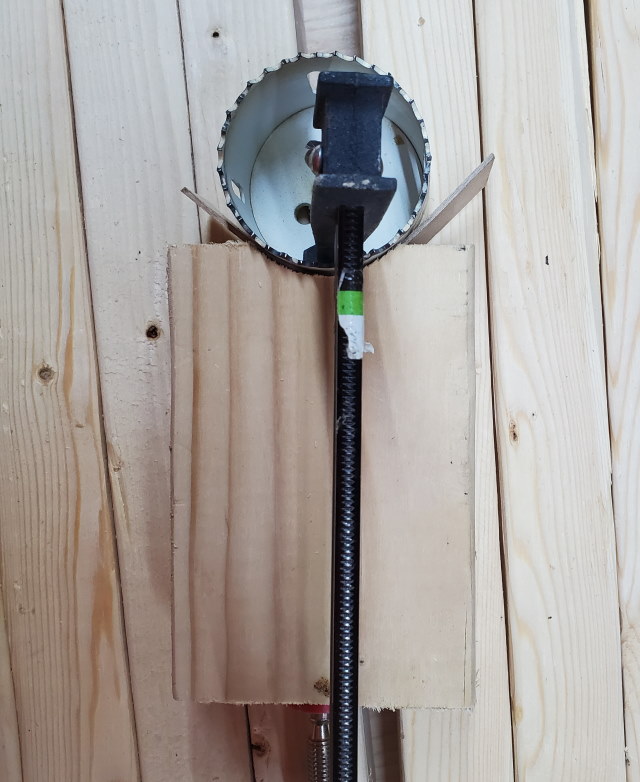
- I've been looking for a way to bend wood at the bottom of the sink, to make the transition from the sides to the bottom. I need a fairly tight corner.
I pulled out a hole saw that is 2 - 3/8" diameter. I drilled a hole in a piece of a 2 x 4 to see how some of the pieces of wood I have would bend.
I did moisten the wood a little and then forced the wood into the curve, like this.
- Got my 2x3's cut today, in preparation for assembly of my saw horses. That will simplify things for working on large items.


- Evening, everyone. I started measuring and marking the 2x3's to make my new set of saw horses. I haven't cut any of them yet, just getting ready.
I also added some extra pieces to to the sink. I had a small section that needed the 3rd layer, so I glued them into place tonight.
It seems easier to glue them from the inside, rather than the outside.
As you can see, the section between the arrows is what I glued into place.
I plan to glue another layer inside, to make it look much better before I add the Epoxy to cover the rest of the wood.
It will look better when I am done, compared to what it does now. Hang in there. BigRabbitMan wrote:
Just for everyone’s information, a day or so ago a 1976 FMC like mine that had the drive train and many other parts/systems upgraded or cleaned up just sold on the Bring a Trailer auction site for $151,000. I am glad Len and Robert, the two people that did the work, didn’t “stick a fork” in it!
I did the same drive train upgrade that was done to that coach. I didn’t do it looking at resale value. I did it for my own use and enjoyment of the coach.
Wow. Color me impressed. Lol. When a reno is done, whether it is back to factory specs or not, somewhere, there is usually a person who thinks the final product is worthy of spending their money on.
Thanks for the info.
I expect to have an update tomorrow. BigRabbitManExplorerJust for everyone’s information, a day or so ago a 1976 FMC like mine that had the drive train and many other parts/systems upgraded or cleaned up just sold on the Bring a Trailer auction site for $151,000. I am glad Len and Robert, the two people that did the work, didn’t “stick a fork” in it!
I did the same drive train upgrade that was done to that coach. I didn’t do it looking at resale value. I did it for my own use and enjoyment of the coach.
Yep, 8' long fit inside and I can still close the rear hatch.
Did I mention I like my Pt Cruiser? As my mom used to tell my dad when he used to tell a story, 'We've heard that story 50 million times, move on'! Lol.....
I picked up some 2x3's today, and I'll be making a new set of saw horses. I am 6' tall, and I like my work surface between 36 and 40 inches high, for a comfortable work height.
Then I can paint some plywood and get more done while working on the sink.
About Motorhome Group
38,768 PostsLatest Activity: Nov 21, 2015