Forum Discussion
8,453 Replies
 cruising_spudExplorer IIfulltimin,
As someone who checks out your posts several times a week, I have a question (now, I'm sure the answer is tucked somewhere is all of your posts, but I don't have the stamina to look through them). Once your inside build is done, do you still have the engine/under the hood stuff to do, or is that all done? Also, I just have to ask-are you just taking this one day at a time, or have you considered a possible end date to all of your work? I admire all the work that you have done.- Time to test fit the box again, and at least it fits. It's a touch loose, but, it will be fine. Not that big of a deal, other than hurting my feelings.

Got no one to blame but myself. - When I am assembling pieces like this, and need them to be flush on the ends, I typically like things up like this.
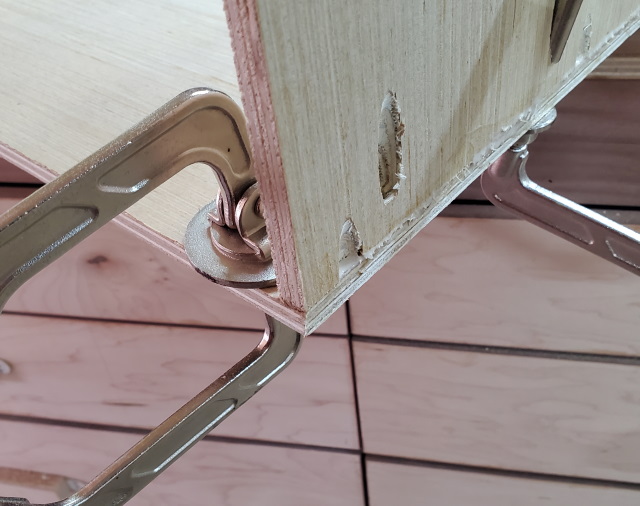
Then on the inside, I put a clamp up against the piece which has the screw in it, so as to not allow the screw to pull the side in, and cause an alignment problem.
- I then, drilled additional holes in the side pieces for the Kreg screws.
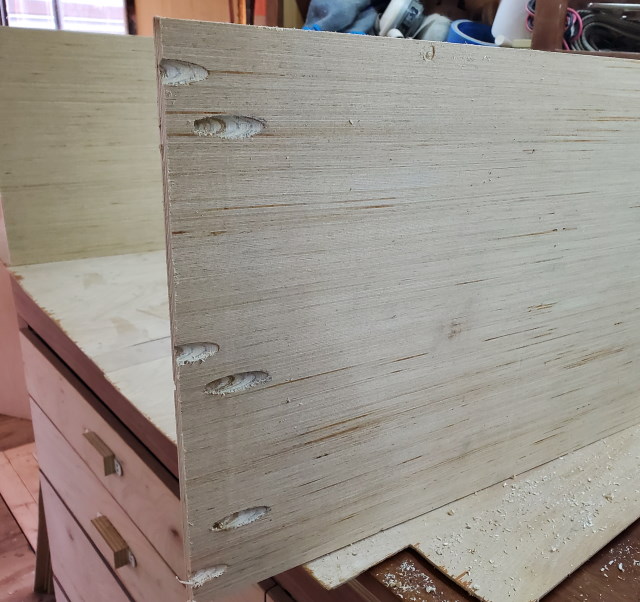
- Soooo, I proceeded to cut the one end off of the box, and used my router to trim the side pieces a little bit.

While we're at it, lets just trim off the corner of the table under the jig, as well.......
- Well, well, well..... Nothing like measuring twice, cut once and assembling. Yeehaw!
Then you check your work and find this.....


Measure twice, cut once... but you never hear anyone talk about assembly. There is a right way, and a wrong way. Obviously, I chose the wrong way here.
When I measured, I had planned on putting the ends of said box, at the end of the long piece, and somehow during installation, I put the end pieces on the side of the long piece. (see pic 2).
This way, it made the box, 1" shorter from side to side, and 1" longer from front to back. Yea, it didn't fit. - Cut the 4 sides to correct length and width. Pull out the Kreg jig and drill a bunch of holes.
Apply glue, set the screws, check the square of the box, and then..... wait for the glue to dry.
sundancer268 wrote:
I would think if the floor covering is a solid sheet of vinyl with no seams the plywood be well protected. You could also coat all sides and edges with Epoxy and it would probably last longer than the rest of the coach.
Correct. As long as it is covered with something waterproof, it will be fine.
Thanks for the post.Lt46 wrote:
As a casual observer, I can appreciate using scrap wood where possible. But, has your frugalness caused you to lose sight of the application? My thought is marine grade plywood would have been a much better choice considering where it's going to live. The bath is a very wet and humid environment.
Haven't lost site of the application. Agreed that the shower area will be a very humid application.
All that wood that is being used in the shower area will be covered by something or the other which will make it waterproof. Could be Por15, Fiberglass, Epoxy, FRP glued to the plywood, but something will be there to protect it.
Thanks for the post. sundancer268ExplorerI would think if the floor covering is a solid sheet of vinyl with no seams the plywood be well protected. You could also coat all sides and edges with Epoxy and it would probably last longer than the rest of the coach.
About Motorhome Group
38,768 PostsLatest Activity: Nov 21, 2015