Forum Discussion
8,453 Replies
 LouLawrenceExplorer IIHope your wife is tall enough to step up that high to flush.
- Even the toilet and box is fitting like it should. Yay!

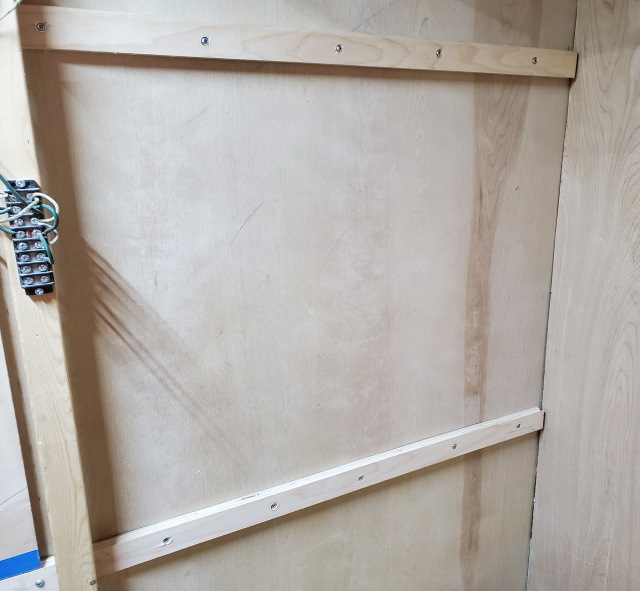
- Then I cut a piece of plywood for the inside of this wall portion. This isn't completely fastened yet, but it's enough to check out fitment. So far so good.

- I also cut a 2 x 3 so I could begin installing a wall next to the toilet area. After drilling for Kreg screws, I used 2 clamps to keep the 2 x 3 flush with the piece I am screwing it too.
That prevents the screws from pulling it sideways.
- Today I removed the screws that hold the frame for the sliding window cover in the rear, one by one, and countersunk all of them. I'll need to cover that area up before being able to use that area as a shower.
navegator wrote:
Now all you need is the eau d toiltte!
navegator
Might help if there was a hole in the plywood under the toilet. Lol. navegatorExplorerNow all you need is the eau d toiltte!
navegator- Next, I cut a piece of 3/4" thick plywood for the top. I made that just a little larger than the box itself.
The red arrow shows the overhang in the front, and you can see the slight overhang on the side, as well.
I also left a small amount of space along the side for adding a wall covering there.
- I finally spent some more time on the box under the toilet.
I cut a piece of plywood a little larger than the size of the box, and screwed it on from the bottom. That will stiffen up bottom of the box, since it's glued and screwed together.
After getting that in place, I took a router trim bit and trimmed the bottom plywood flush with the sides.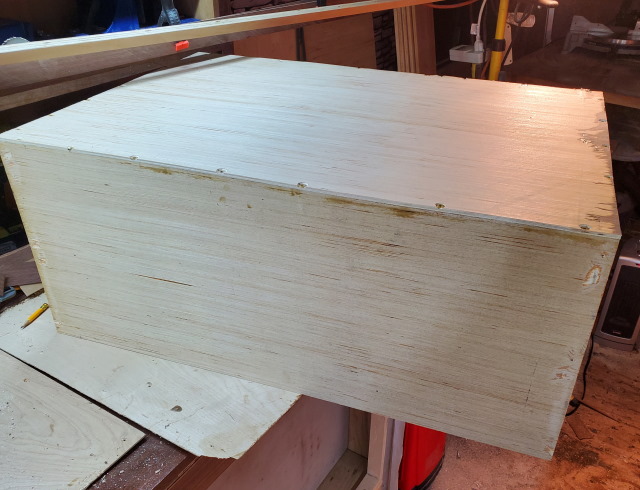
- I'll be back tomorrow night. Finally finished up the rest of the non emergency computer work today, after finishing the emergency stuff on Friday.
Good news is, this was a nice paying job.
About Motorhome Group
38,768 PostsLatest Activity: Nov 21, 2015