Forum Discussion
8,453 Replies
Brob wrote:
I have just completed reading this post. Took me a little while to get caught up to date; I can tell it's been quite the adventure!
I too am doing a pretty extensive rebuild of a 1987 Class A motorhome. Mine's a 37' Georgie Boy Encounter. I went down to the frame inside, but I haven't gone quite as far as you with this project, close, but not quite.
I admire your tenacity and appreciate all the details you provide. I've gotten some good information during the read. Like yourself, I am adding additional insulation as I put the coach back together. I used it last year for a place to sleep during a month-long job. I had the back bedroom area insulated,and the A/C going for comfort.
A question I have for you is in regards to adhesives you are using to laminate the insulation and plywood together. I noticed that you had primarily been using the Chemlink M1 adhesive, but it seems that you have been using a different adhesive here recently. Did you switch adhesives, and of so, what prompted the decision?
I have used a few different things with varying degrees of success. Lately I have used the water-based Weldwood contact cement. It's okay, but it is not a product that I am super on fire about. I was considering the Chemlink as something that might be better suited as I move forward.
What do you think?
I really appreciate the thread and sharing all your experience as you go along. I'm really looking forward to seeing you progress on the TPO roofing material. I had considered that myself, but ended up stripping the existing sheet aluminum and coating it with a 2-part liquid EPDM. I had filon siding that had delaminated badly in the back of the coach. I ended up removing the filon to a point just past the delamination, replacing the Luan below, and then using West System epoxy to re-laminate the filon.
I'm really looking forward to seeing you on the road with your new old motor home!
If you are new to the forum, Welcome! If you read the post from beginning to end, in a short period of time, all I can say is ... WOW! Congratulations!
You are correct. It has been an adventure! Lol.
Congrats on your own rebuild. Feel free to post some pics if you like.
I am glad you have gotten some help here. I try to detail a good amount of what's going on, and how I am dealing with it, just in case someone else can use the info. Sometimes, I wonder if it's too much detail. But hey, might as well have a good time while we're going along.
I did switch to another adhesive for some of the inside. I tried some spray adhesive on the inside wall plywood to insulation. Overall, I'm also not thrilled with it, long term. On the ceiling inside, I used a combination of spray adhesive, along with the "new adhesive".
What I used was, Loctite PL 3x Premium construction adhesive. It's about $5.00 a tube, instead of the $7.50 I was paying for the ChemLink. That is one reason, but not the main one. The Loctite is also on the List of adhesives that are compatible with the insulation I was using from Lowes.
The biggest difference, is that the construction adhesive gets very hard, and I wanted some of that for the "gluing" of the interior walls. I figured, between some nails, screws, and hard adhesive, things won't move around or loosen up on me. Don't get me wrong, the ChemLink won't move either, but it stays somewhat flexible, where the Loctite doesn't. Either should work fine, depending on what you are trying to accomplish.
Thanks for the kind words, and glad you are enjoying the thread. Glad you were able to get your roof and walls sealed up. The one thing I've found is, when you see water damage inside, it is likely to be far worse than expected, once some of the inner shell is removed.
We are looking forward to getting this on the road, in a floor plan that will work well for our style of rving.
Thank you for posting! :) BrobExplorerI have just completed reading this post. Took me a little while to get caught up to date; I can tell it's been quite the adventure!
I too am doing a pretty extensive rebuild of a 1987 Class A motorhome. Mine's a 37' Georgie Boy Encounter. I went down to the frame inside, but I haven't gone quite as far as you with this project, close, but not quite.
I admire your tenacity and appreciate all the details you provide. I've gotten some good information during the read. Like yourself, I am adding additional insulation as I put the coach back together. I used it last year for a place to sleep during a month-long job. I had the back bedroom area insulated,and the A/C going for comfort.
A question I have for you is in regards to adhesives you are using to laminate the insulation and plywood together. I noticed that you had primarily been using the Chemlink M1 adhesive, but it seems that you have been using a different adhesive here recently. Did you switch adhesives, and of so, what prompted the decision?
I have used a few different things with varying degrees of success. Lately I have used the water-based Weldwood contact cement. It's okay, but it is not a product that I am super on fire about. I was considering the Chemlink as something that might be better suited as I move forward.
What do you think?
I really appreciate the thread and sharing all your experience as you go along. I'm really looking forward to seeing you progress on the TPO roofing material. I had considered that myself, but ended up stripping the existing sheet aluminum and coating it with a 2-part liquid EPDM. I had filon siding that had delaminated badly in the back of the coach. I ended up removing the filon to a point just past the delamination, replacing the Luan below, and then using West System epoxy to re-laminate the filon.
I'm really looking forward to seeing you on the road with your new old motor home!- After considering the storage situation, it is likely that I may add some extra cabinets over the shelves area in the kitchen. They will still be out of the way there, and provide much needed extra storage.
Assuming I do, here is where they will go, with the black lines being the front and bottom of the cabinet.
There is also a piece of plywood in the ceiling, at roughly the 12" mark, from the side wall. That will allow me to attach the front of the cabinet to the ceiling, securely, and the back of the cabinet to the wall, without having to worry about it falling off.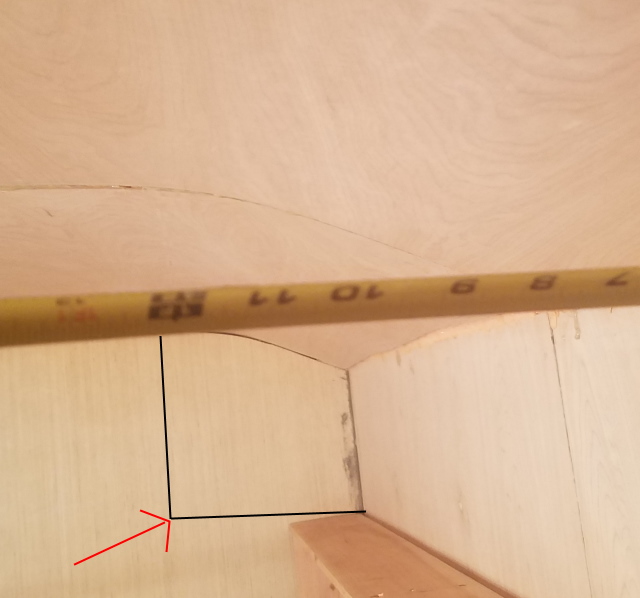
- Here you can barely see, the marks I put on the wall, at the end of the top shelf. This is where the piece of plywood is in that wall.
Here's a close up of those marks. Wahoo!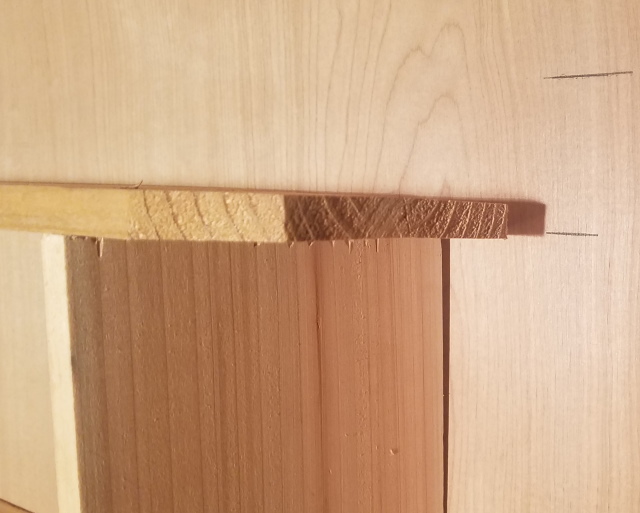
- You may remember a while back, before I applied the inside wall plywood, that I took pictures of the wall, so I could keep a copy of the measurements of where the plywood strips were, so I would know where I can attach things securely to the wall.
Here is a picture of one of those I took. This is on the drivers side, and I will need this for securing those shelves to the wall.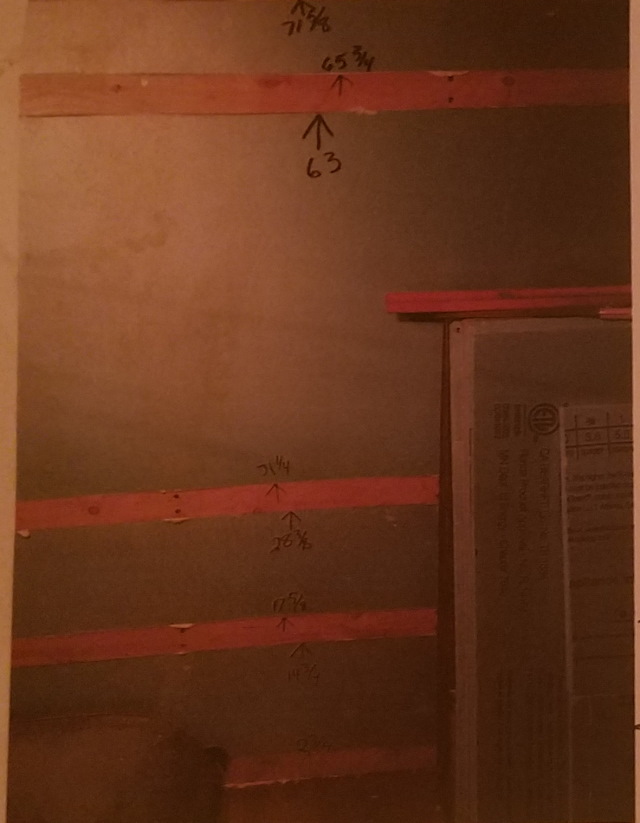
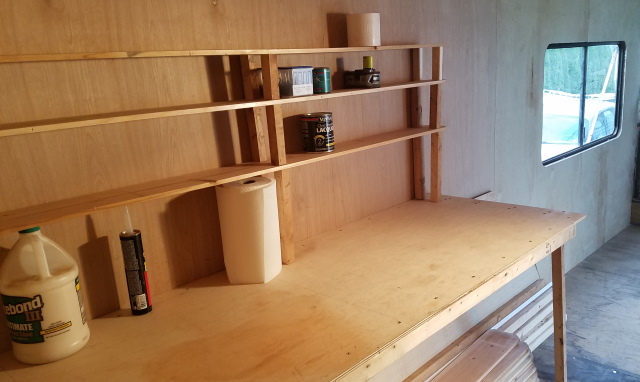
- I had the wife take a look at the shelves on the drivers side. She said the upper shelf should be the same height as the second one.
So, I pulled the top one off, and added a couple of inches to the height, so we now have the bottom one at 12", the second and third are at 7" high.
That will work a little better, than the 5" one. Finally settled on shelf distance. Yay!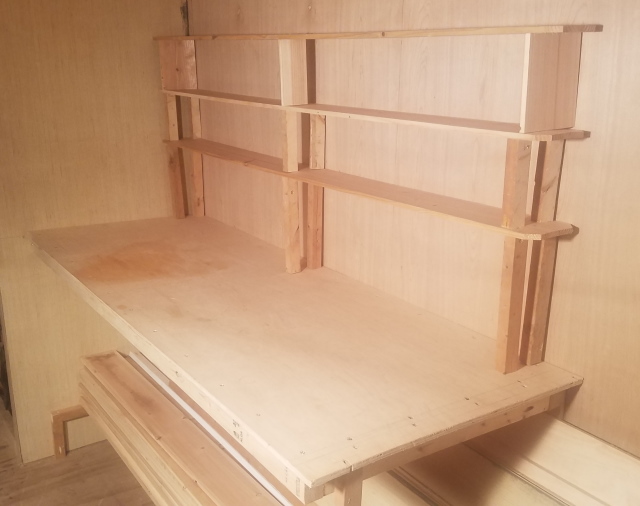
- Not much of an update tonight. I did want to update the spreadsheet again.
You may remember a few weeks ago, I bought some Cedar dog eared fence boards. I bought 30 of those, but never entered them into the spreadsheet.
There is a reason. I know I was going to use some of those for another project, but I did not know how many. I figured, I would just wait until I used those other ones, (which I have), and then add the cost of those that are left into the motor home cost.
So, that is tonight's spreadsheet update. I have 25 of those Cedar boards available for the motor home. They cost me $2.57 each for a total of $68.11 including the tax.
Prior total was $9258.42, so our new total amounts to $$9326.53
The top 5 categories for expense are.....
Adhesives - 2351.94
Plywood/lumber - 1432.04
Paints - 1083.59
Insulation - 1058.58
Steel - 1037.00
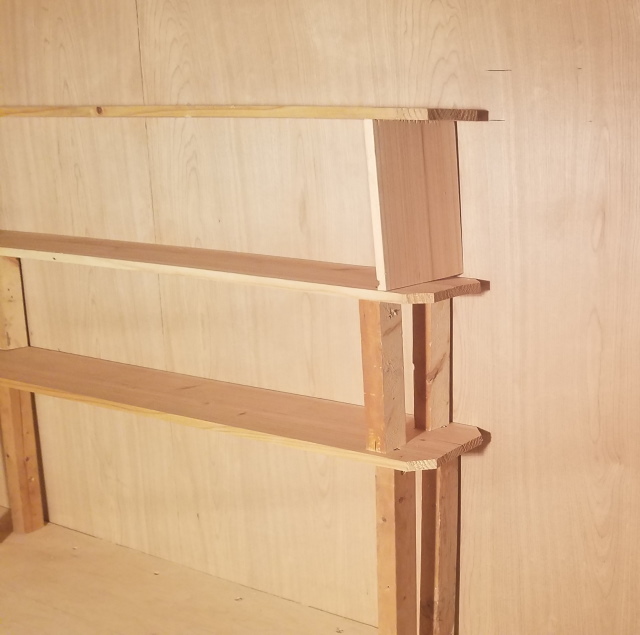
Maybe a better update tomorrow. :) - Here is how they look with both sides in place. I did have the wife check the passenger side, and she can reach the stuff at the very top.
The drivers side is only about 3/4" higher than the passenger side, so that should not be an issue.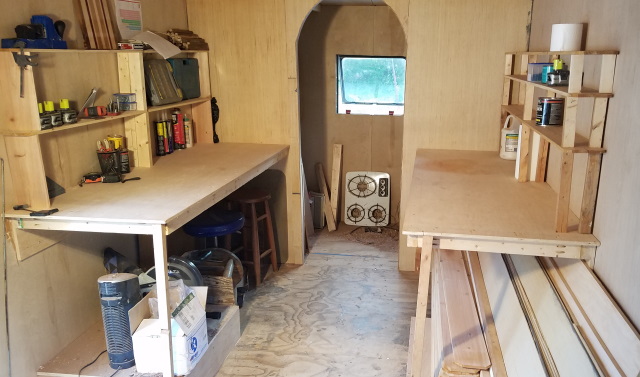
- Here we go with the cleaned up drivers side.
- Most of my day was spent doing other things, but I did manage more clean up, and I made another set of preliminary shelves, this time for the drivers side.
This time, I left the bottom shelf at 12", the second shelf at 7", and the top shelf at 5".
I think the middle and top shelves will probably work better this way, as I wouldn't expect to put a lot of 10 to 12" high stuff up there like on the passenger side. Obviously, this will need to be run by the wife.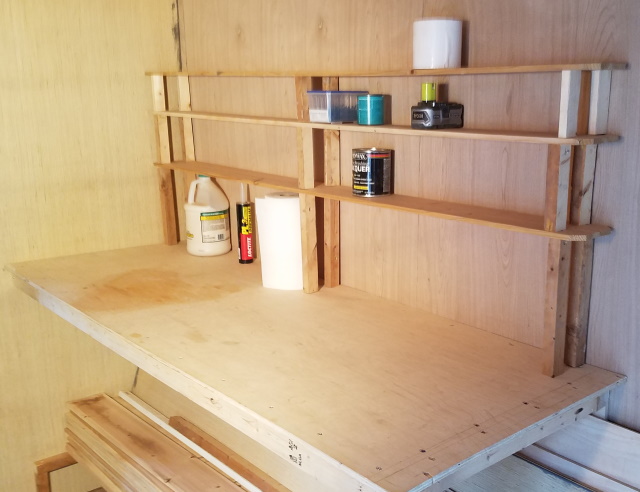
About Motorhome Group
38,771 PostsLatest Activity: Apr 13, 2026