Forum Discussion
8,453 Replies
- Update coming tonight! Yeehaw.... No, it's not a miracle....
- Need to update the spreadsheet tonight. The 4 quarts of Lacquer cost $63.52, and the rollers and handle were another $15.86 for a total of $79.38.
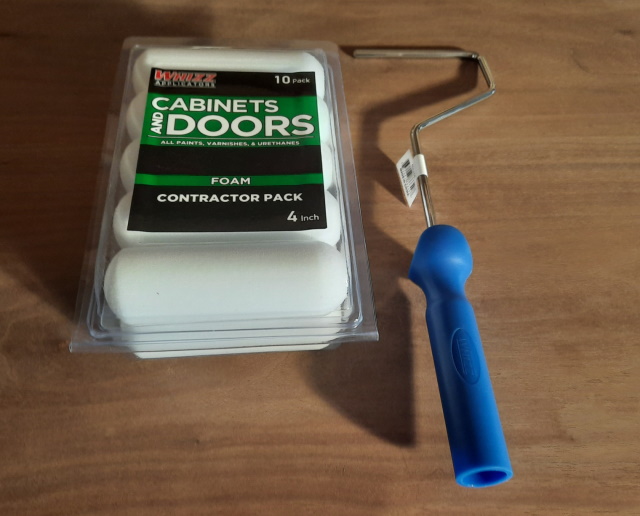
Our prior total was $9793.12 and we add another $79.38 for a new grand total of $9872.50. - I also picked up some 4 inch rollers, with a handle today. These are the really smooth type foam rollers with no nap. As you can see, they are recommended for cabinets and doors.
- I picked up 4 quarts of clear gloss brushing lacquer. In case you are wondering, this can also be sprayed on. Why didn't I just buy a gallon of this, at a cheaper price?
Not available in Pa. Quarts only.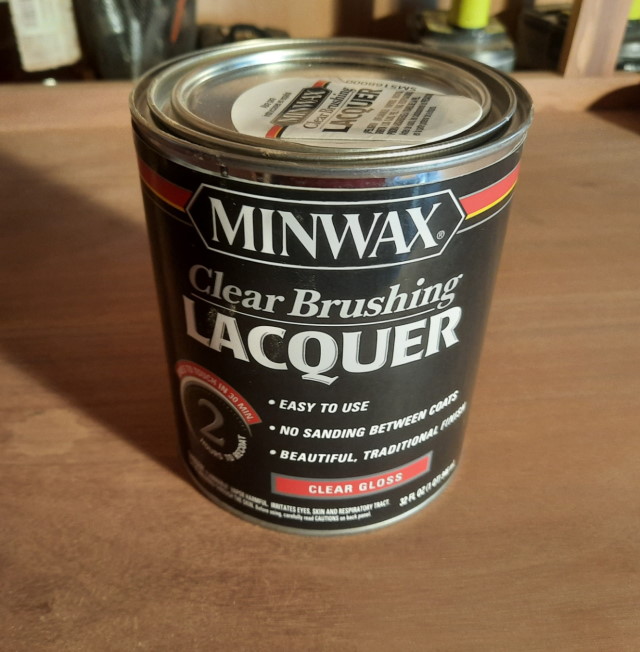
- Added a second coat to all of the shelves, and the face frames. Turns out, as expected, using a smooth roller, works a whole lot faster than using a brush.
Finally starting to have that "deep" walnut look, on the face frames.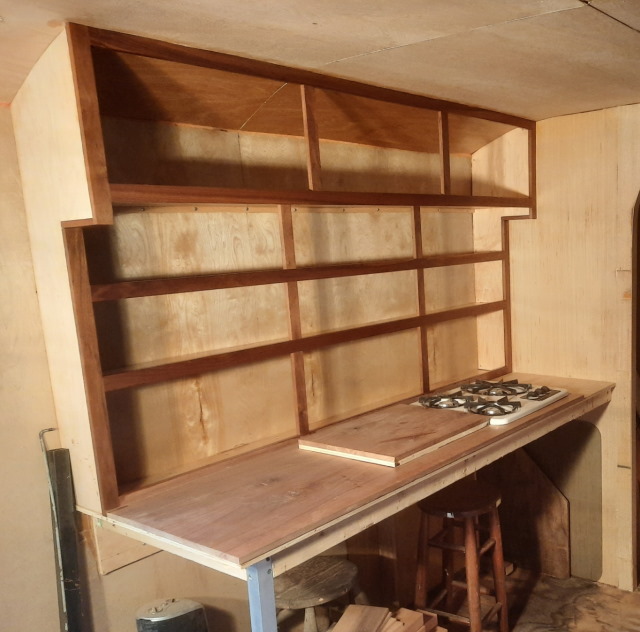
- Watching more Lacquer dry. They say the third time's a charm. 3 coats on this baby, finally.
- Here we go. All the shelving on this side now has a coat of Lacquer on it, except the very bottom front face. It's starting to look a little better.
I need to pick up some small foam rollers to roll the Lacquer on, instead of using a brush. That will take a lot less time.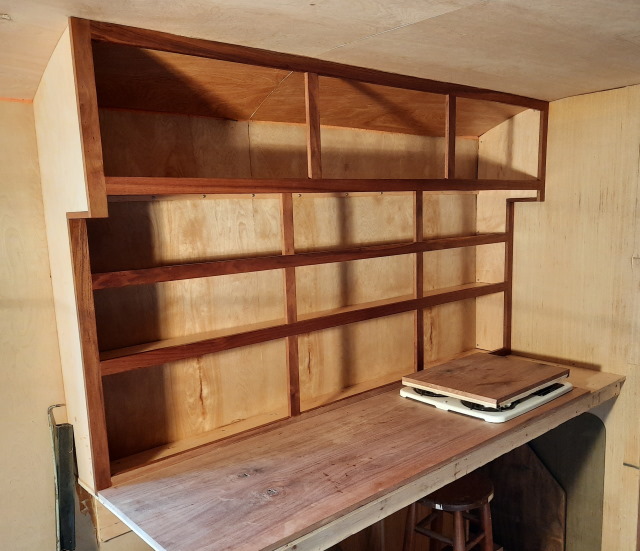
- Nothing like watching the grass grow.../ Ah, I mean, paint dry. / No, I mean ... Nothing like watching the Lacquer dry. Yea, that's it. Lacquer.
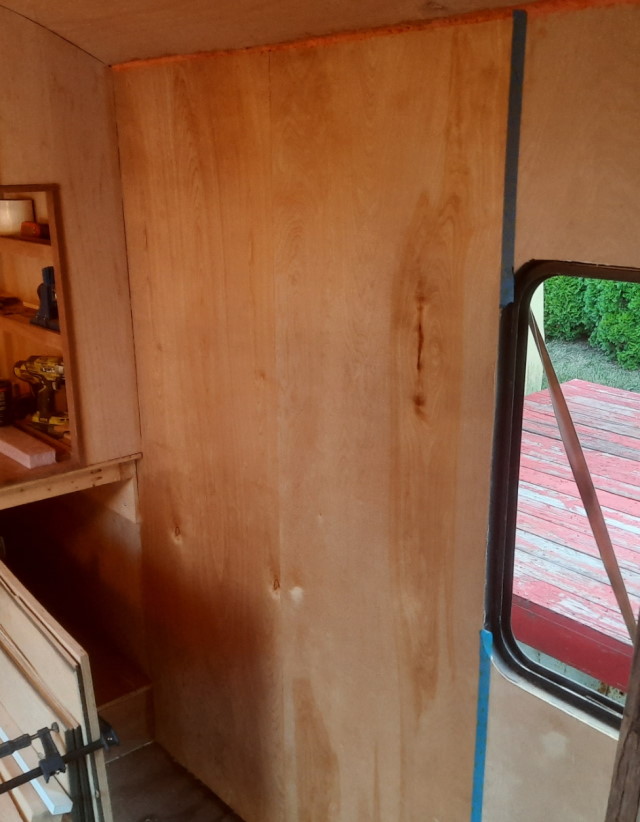
Here's another pic of the wall, with another coat of Lacquer on it. I am getting it ready for some special treatment!
This is a better pic without the artificial light on it.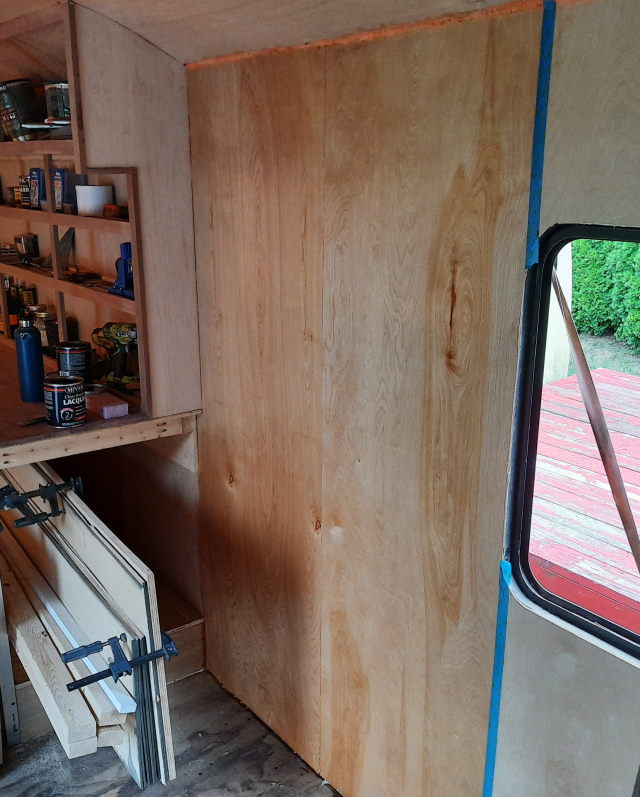
- I then, started to apply lacquer to the shelves on the passenger side. I lacquered the shelves from the yellow arrow, upward.
The red arrow points to the black walnut frame, and upward, that has lacquer on it.
I'll deal with the bottom half tomorrow. After stepping back and looking at it, I thought to myself, "Grand dad would be proud". And hey, I'm just getting started making it look "better". Wahoo!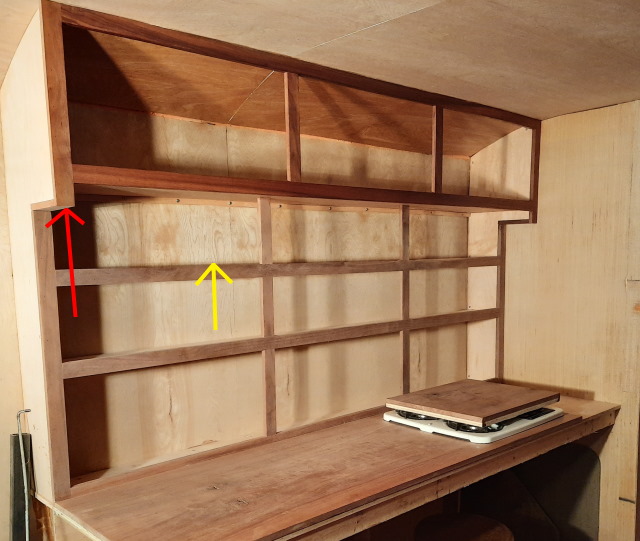
- After getting that out of the way, I proceeded to "paint" some lacquer onto the wall, on the drivers side, next to the shelves.
You can see the difference in color a little better towards the bottom, on the right side. The blue painters tape is where I stopped.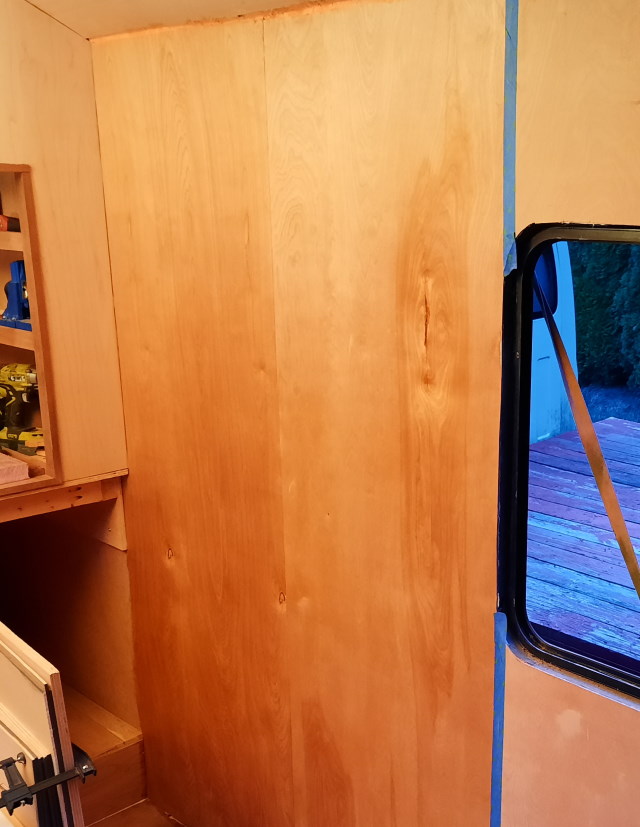
About Motorhome Group
38,769 PostsLatest Activity: Jun 25, 2013