Here is the install of the Norcold Cold Weather Kit and some operational information.
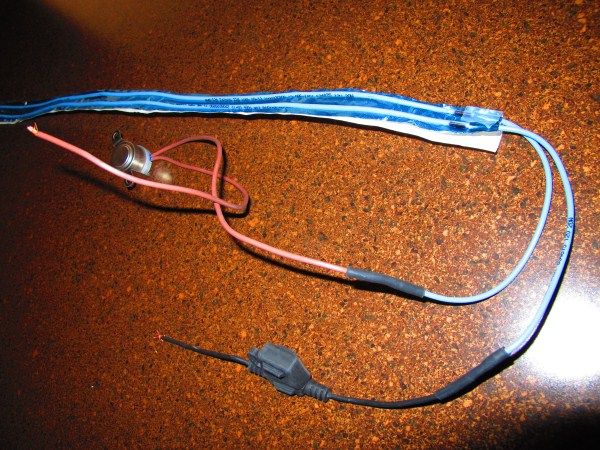
Another picture of the unit on a table prior to installation:
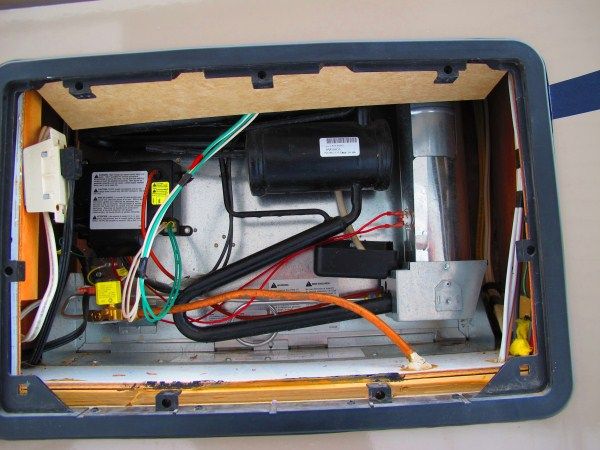
Back of refrigerator with access panel off (Note the cover near the top, partially blocking the flue. I had to remove this cover to gain access to install the kit):
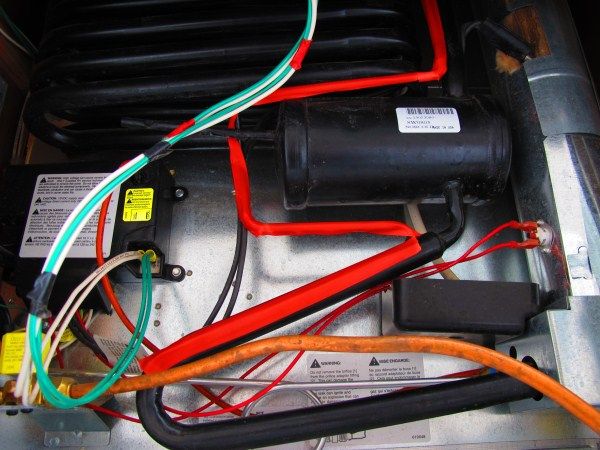
Lower part of refrigerator with red tape showing where heat tape needs to be installed:
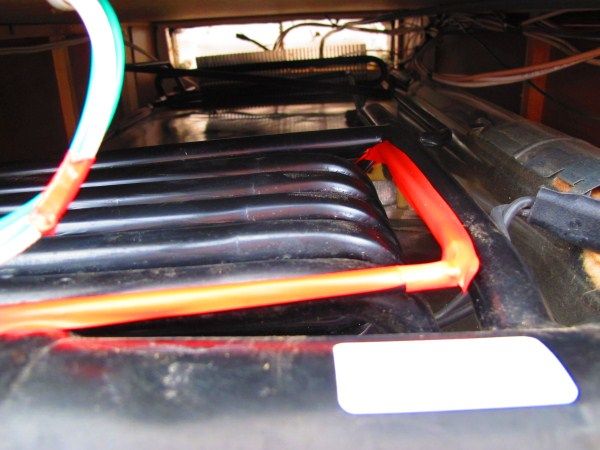
Upper part of refrigerator with red tape showing where heat tape needs to be installed (Note that the heat tape needs to follow this tube - marked in red - until its junction with a larger tube tucked up behind the coil...which you can't see in this photo):
Lower part of refrigerator with kit installed. You can see the defrost switch in the center of the picture (with the red wire going around it):
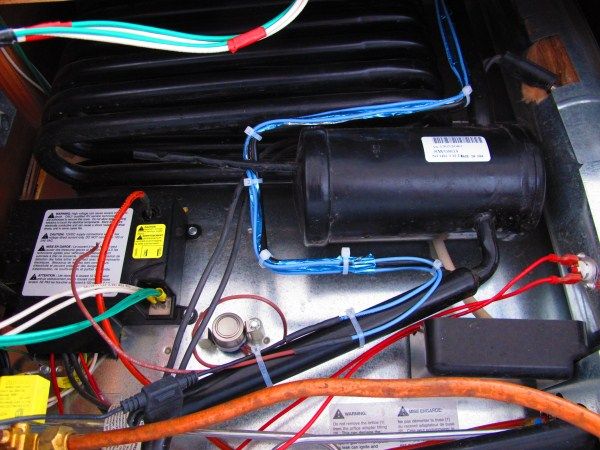
I am not posting any pictures of the installation in the upper portion of the refrigerator because they don't show much. It was a bit difficult to get the tape in there though as I had to do it completely by feel as I couldn't see in there with my arm in the way. Additionally, trying to get the heat tape to stick, neatly, in the cold weather made it even more challenging. O-well, it's in.
Finished up installation by adding a On/Off switch (see lower left corner):
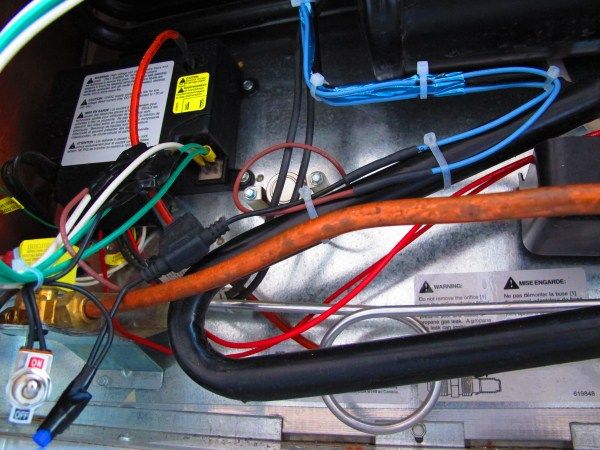
Turned the refrigerator on and ran the heater. Can't say it made any difference because the refrigerator has always worked fine at the temperatures I tested it at. I did note though that the tubing where the heater is, now runs warmer (~55 degrees F with air temp in the 20's)
The current draw of the heater is 1.7 amps at 13 volts. This should continue until the air temperature inside the refrigerator compartment reaches the cutoff limit of the defrost switch (48 degrees F)
I hope this posting was helpful,
Steve


