Forum Discussion
JoeChiOhki
Jul 21, 2016Explorer II
Friday, July 1, 2016
Rebuilding “Ms. Merry”, the Amerigo– Enclosing our first wall!
In our last adventure, the gang and I had set about solving the mystery of Ms. Merry’s trampoline floor, now that that is taken care of, it’s time to start closing up some walls so we can get Ms. Merry’s new fresh water tank installed and then I can get back up to finish her cabover floor.
First thing that needed doing was to finish up the frame in Ms. Merry’s front wall, it was missing a lot of wood both from be taking stuff out to fix her floor, and because Merry’s original builders cut a lot of corners.
To get started, we had to take poor Ms. Merry’s other front jack off and remove all the new plugs we’d installed last fall, they were coming through a part of the wall where some new framing needed to go.
Once all the new wood was cut, and glued and screwed in place, we made short work of cutting all the new insulation panels for Ms. Merry’s new front wall.
Before w/new right corner


After w/all of the insulation installed

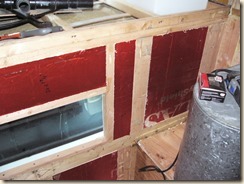


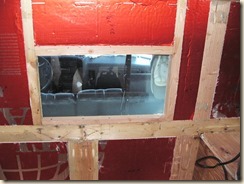
“My, that’s much better!”, exclaimed Ms. Merry after I tapped in the last piece of foam board.
I don’t know if you noticed, by Ms. Merry’s window opening in her front wall has changed a little as well, its been reshaped to take a spare window off Old Mr. Kit, who hasn’t needed it since he got his wall air conditioner several years ago.
How nice it is that Mr. KIT has yet another of his old pieces that Ms. Merry can use .
.
You’re probably also wondering, “Matt, why does Ms. Merry have an extra 2x4 in her left corner?”
Well, that’s for when I go to reinstall those connectors for Ms. Merry’s batteries and her lights, I wanted something solid I could cut holes through to anchor those outlets into good and solid so the seal would stay good and tight, before, those plugs were only held on by some caulk and a couple screws through the fiberglass.
With a fresh sheet of 3/8” Plywood, it didn’t take long to cut Ms. Merry’s new front wall plywood to shape, and then glue and screw it into place .
.
I also got to try out our newest member of the gang, the younger Milwaukee Brother, Router. Mr. Router Milwaukee made short work of cutting out the opening in the new plywood for Ms. Merry’s pass-through window.
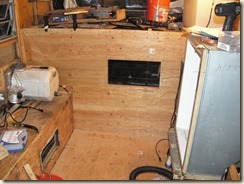

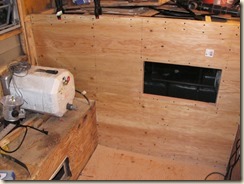
And there’s old Mr. Kit’s spare window, stuck in the opening for a moment on the wrong side to make sure it fights right .
.
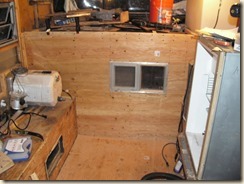

And now, Ms. Merry’s front wall is done till its time to install the finish paneling to make it look pretty .
.
Rebuilding “Ms. Merry”, the Amerigo– Enclosing our first wall!
In our last adventure, the gang and I had set about solving the mystery of Ms. Merry’s trampoline floor, now that that is taken care of, it’s time to start closing up some walls so we can get Ms. Merry’s new fresh water tank installed
First thing that needed doing was to finish up the frame in Ms. Merry’s front wall, it was missing a lot of wood both from be taking stuff out to fix her floor, and because Merry’s original builders cut a lot of corners.
To get started, we had to take poor Ms. Merry’s other front jack off and remove all the new plugs we’d installed last fall, they were coming through a part of the wall where some new framing needed to go.
Once all the new wood was cut, and glued and screwed in place, we made short work of cutting all the new insulation panels for Ms. Merry’s new front wall.
Before w/new right corner


After w/all of the insulation installed


“My, that’s much better!”, exclaimed Ms. Merry after I tapped in the last piece of foam board.
I don’t know if you noticed, by Ms. Merry’s window opening in her front wall has changed a little as well, its been reshaped to take a spare window off Old Mr. Kit, who hasn’t needed it since he got his wall air conditioner several years ago.
How nice it is that Mr. KIT has yet another of his old pieces that Ms. Merry can use
You’re probably also wondering, “Matt, why does Ms. Merry have an extra 2x4 in her left corner?”
Well, that’s for when I go to reinstall those connectors for Ms. Merry’s batteries and her lights, I wanted something solid I could cut holes through to anchor those outlets into good and solid so the seal would stay good and tight, before, those plugs were only held on by some caulk and a couple screws through the fiberglass.
With a fresh sheet of 3/8” Plywood, it didn’t take long to cut Ms. Merry’s new front wall plywood to shape, and then glue and screw it into place
I also got to try out our newest member of the gang, the younger Milwaukee Brother, Router. Mr. Router Milwaukee made short work of cutting out the opening in the new plywood for Ms. Merry’s pass-through window.


And there’s old Mr. Kit’s spare window, stuck in the opening for a moment on the wrong side to make sure it fights right


And now, Ms. Merry’s front wall is done till its time to install the finish paneling to make it look pretty
About Travel Trailer Group
44,056 PostsLatest Activity: May 04, 2014