hedge
Oct 15, 2016Explorer
Solar install, Adventurer 89RB
Thought I'd do a thread that shows my solar install. I have 300w of solar wired in parallel with a 1000W pure sine inverter. I went with Renogy 100w mono panels, no better reason than they fit well on my roof. I am somewhat overpaneled for my modest needs but since I usually have some shade on at least one panel I decided to add an extra.
As you all are aware, finding space for things can be an issue with a truck camper. I was also able to find some unused space behind the kitchen drawers to put the wiring, fuses, shunt for my battery monitor etc. My inverter fits below the lower drawer.
I currently have the epSolar charge controller but I plan to replace it with a MorningStar Ts-mppt. Mppt is probably overkill for me but I wanted to buy something that I could move to another rig if the time comes.

The 3 panels installed on the roof. My first screw up... I got too close to the vent so I could not install a vent cover. Instead I installed the expensive but nice Maxxair fan with integrated cover.
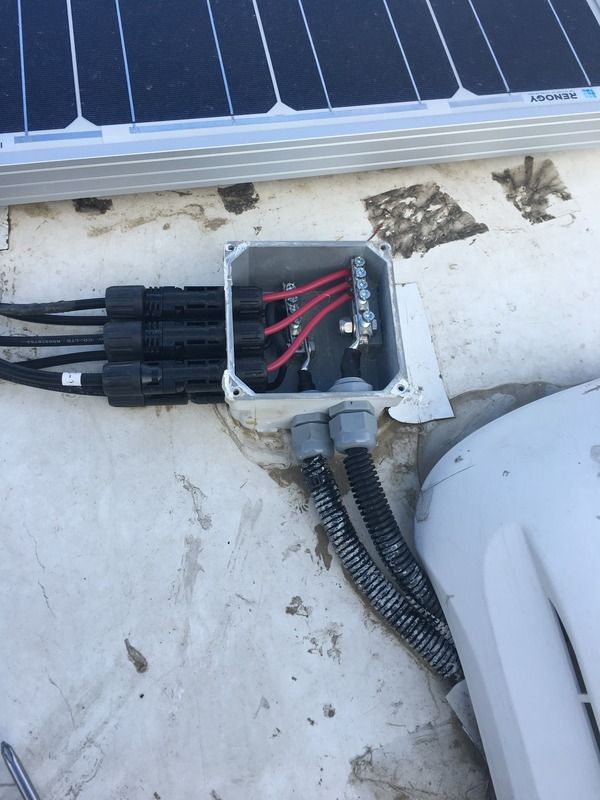
The panels all connect to the combiner box. I decided I didn't want to cut off the OEM MC4 connectors from the panels so I made my combiner box to accept MC4 connections. Coming out of the combiner box is 4awg wire that goes into the camper via the fridge vent.
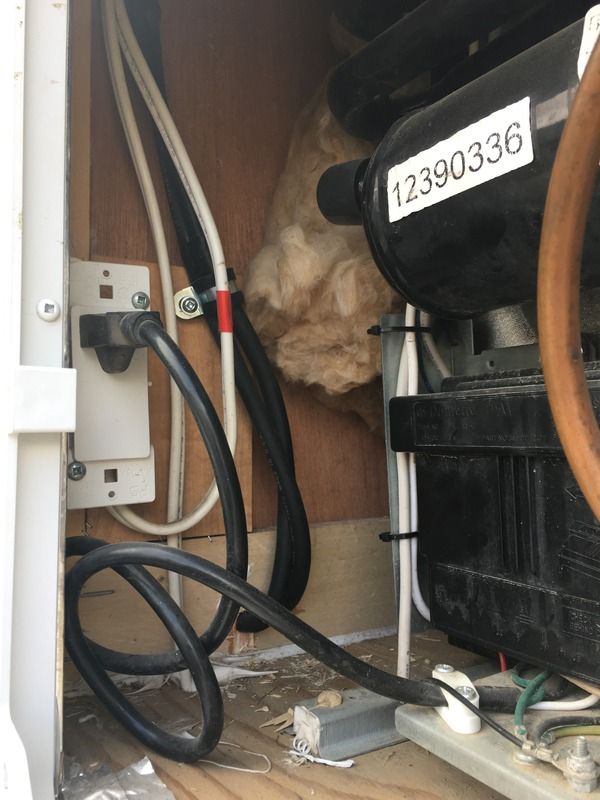
I couldn't see an easy way to run the wire beside or under the fridge so I ran it through the wall and into the compartment under the dinette seat where the water heater lives.
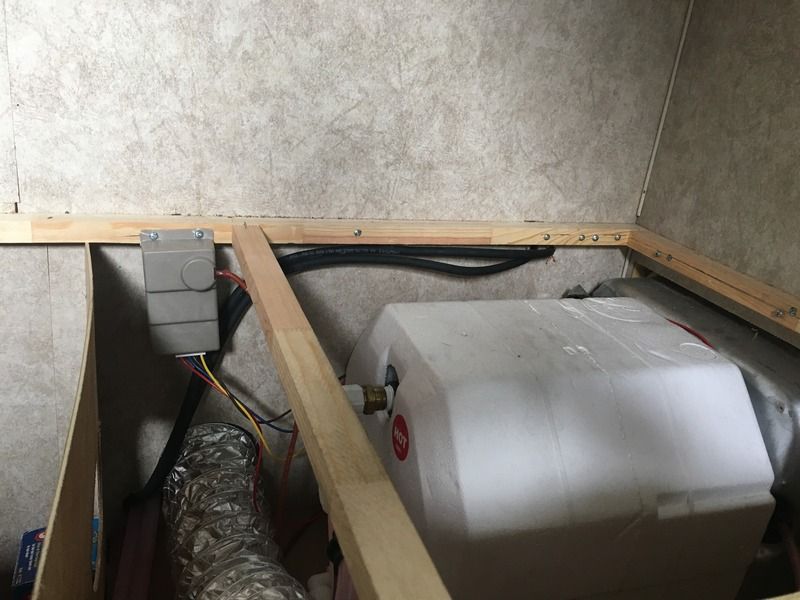
The wiring was then ran across and following the same holes as the water lines into the space below the cabover step. Then the wire was ran under the step over to the cavity under the sink.
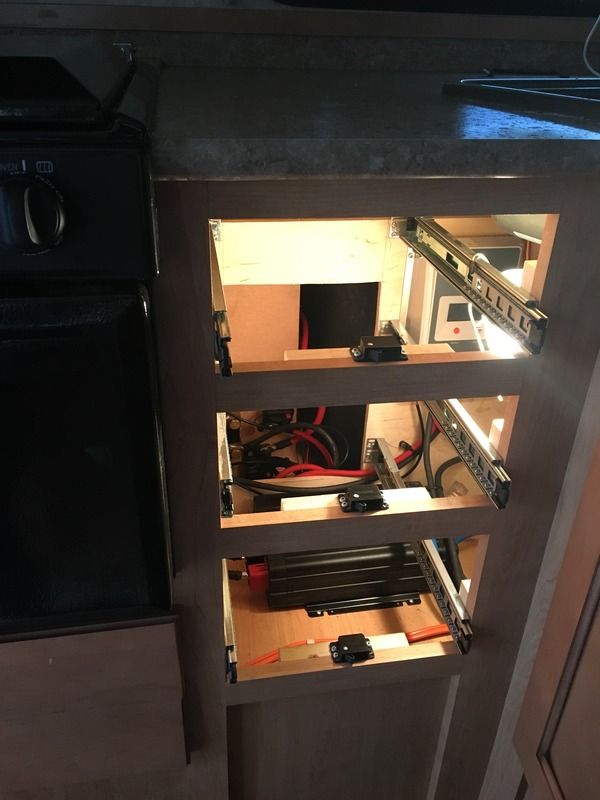
This is a pic with the drawers removed, the sink is to the upper right and cabover step to far right.
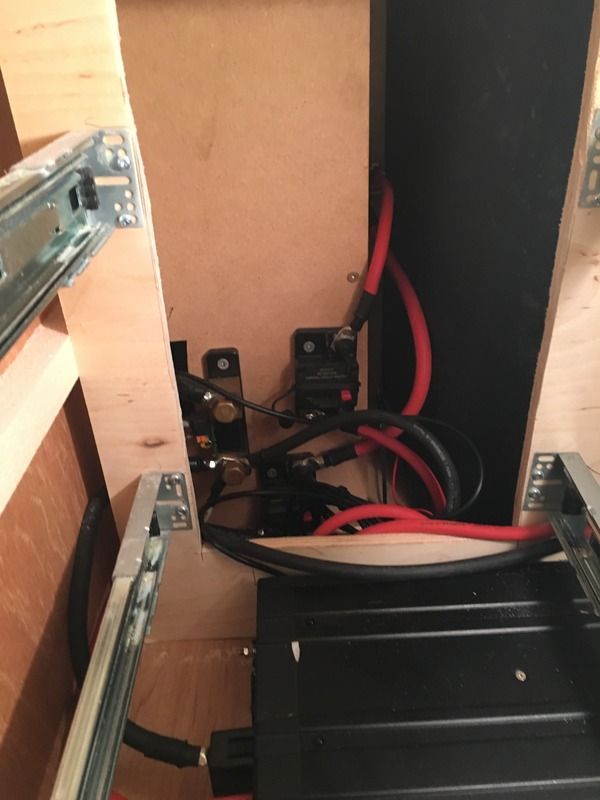
This is where I found some space to mount shunt, circuit breakers etc. that hole was not there from factory so i cut that out to get access to the empty space. It doesn't seem to have weakened the drawer mounts at all. That piece of wood in the back is built as an L and is attached to the battery box. To the right the wires are coming from a battery disconnect switch.
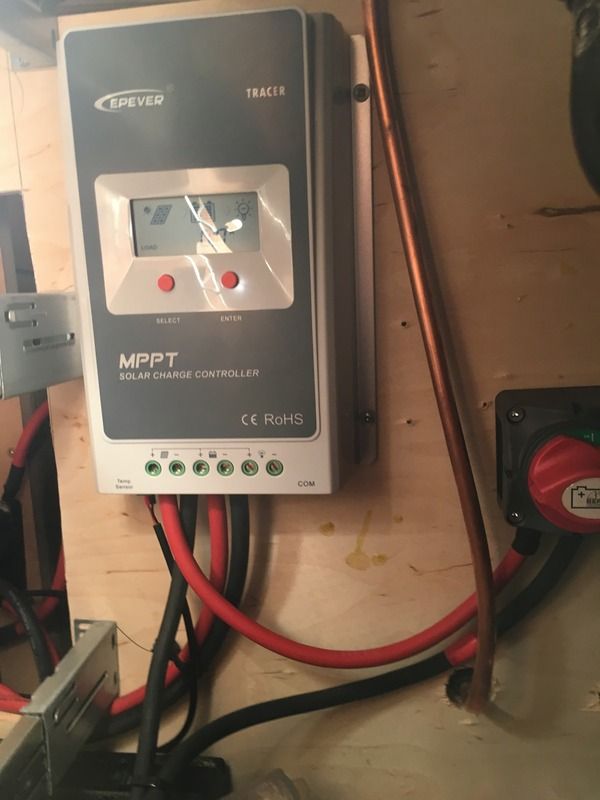
Wiring from panels comes to the disconnect switch and then on to the charge controller.
I've been quite happy with the system. I still carry my generator with me but with driving and solar charging I never had to start it this season. We aren't big power users our biggest draw is the furnace and running our Keurig to make coffee in the morning and sometimes the toaster.
I know the wiring is messy, It will be cleaned up when I change controllers.
If anyone spots any concerns with my install please let me know.
I'd also like to thank many of the members of the forum especially in the tech section for answering my questions. I was a complete newbie at this when I started so I had a lot to learn... and still do.
As you all are aware, finding space for things can be an issue with a truck camper. I was also able to find some unused space behind the kitchen drawers to put the wiring, fuses, shunt for my battery monitor etc. My inverter fits below the lower drawer.
I currently have the epSolar charge controller but I plan to replace it with a MorningStar Ts-mppt. Mppt is probably overkill for me but I wanted to buy something that I could move to another rig if the time comes.

The 3 panels installed on the roof. My first screw up... I got too close to the vent so I could not install a vent cover. Instead I installed the expensive but nice Maxxair fan with integrated cover.

The panels all connect to the combiner box. I decided I didn't want to cut off the OEM MC4 connectors from the panels so I made my combiner box to accept MC4 connections. Coming out of the combiner box is 4awg wire that goes into the camper via the fridge vent.

I couldn't see an easy way to run the wire beside or under the fridge so I ran it through the wall and into the compartment under the dinette seat where the water heater lives.

The wiring was then ran across and following the same holes as the water lines into the space below the cabover step. Then the wire was ran under the step over to the cavity under the sink.

This is a pic with the drawers removed, the sink is to the upper right and cabover step to far right.

This is where I found some space to mount shunt, circuit breakers etc. that hole was not there from factory so i cut that out to get access to the empty space. It doesn't seem to have weakened the drawer mounts at all. That piece of wood in the back is built as an L and is attached to the battery box. To the right the wires are coming from a battery disconnect switch.

Wiring from panels comes to the disconnect switch and then on to the charge controller.
I've been quite happy with the system. I still carry my generator with me but with driving and solar charging I never had to start it this season. We aren't big power users our biggest draw is the furnace and running our Keurig to make coffee in the morning and sometimes the toaster.
I know the wiring is messy, It will be cleaned up when I change controllers.
If anyone spots any concerns with my install please let me know.
I'd also like to thank many of the members of the forum especially in the tech section for answering my questions. I was a complete newbie at this when I started so I had a lot to learn... and still do.