- Good Sam Community
- Everything RV
- DIY Maintenance
- Re: The Ultimate DIY thread - Ubuilding (Pics)
- Subscribe to RSS Feed
- Mark Topic as New
- Mark Topic as Read
- Float this Topic for Current User
- Bookmark
- Subscribe
- Mute
- Printer Friendly Page
The Ultimate DIY thread - Ubuilding (Pics)
- Mark as New
- Bookmark
- Subscribe
- Mute
- Subscribe to RSS Feed
- Permalink
- Report Inappropriate Content
Mar-04-2012 10:52 AM
There is another, albeit smaller, side to this whole RV thing - those crazy folks who build their own for whatever reason. Whether you've scratch-built it from the ground up, assembled a kit, or (like me) scrounge up appropriate frames and go from there: let's hear about it.
I'm on number three.
The first was simply a utility trailer that got an enclosed box for a fraction of the cost of the used toy haulers I was looking at. It was carrying mountain bikes and race gear, so the GVW didn't matter and all the commercially built units were overkill for what I needed. A guy my dad worked with had a dump trailer he didn't need anymore...and so it began.
Number two was a more adventurous project. I started with a tent trailer deck and built a steel stud frame and sheathed it, first in OSB then in 1/4" ply when that failed dismally. I camped the trailer as a bare shell a few times, but the noise when the wind blew wasn't conducive to a good night's sleep. It's still on my 'ideas' pile, but it wold have to be FAR more rigid than that 'technology demonstrator' was.
Those two were pre-internet and pre-digital (for me at least) so there are pics but they are in a box in the basement and haven't seen the light of day in a long time...lost at sea.
Then I got a great deal on a 24' 1977 Dodge C..."had I known then what I know now..." nuff said.
That was how I found this forum.
A couple other projects and work since then and now I'm at a stage in my life where I want to go back to school and get the education I should have gotten years ago. Part of that 5 year strategy is staying in a trailer to keep my accommodation costs down....the rub is that I drive a compact pickup and don't have said trailer.
For this boatbuilder, the solution was a cinch...
My principal build requirements have been low build cost, low towing weight, four season (no canvas) and a permanent bed.
So far, I am building to all of those except for a minor concession in the bed - it will convert to form one side of the dinette.
I started with a tent trailer - $50 on craigslist. Once the body was off, the build could begin:
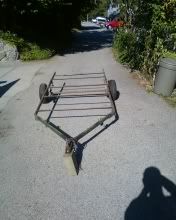
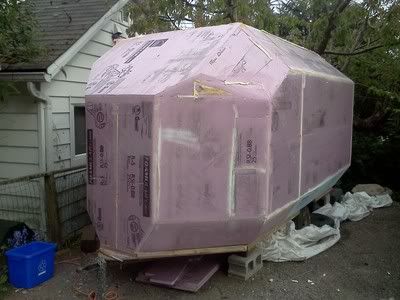
The deck is a sandwich of 3/8 ply, 1" foam, and 1/8 doorskin on top to provide some puncture resistance. At the moment, I'm sheathing the top of the deck in epoxy and 6oz cloth (pics to follow). The body will be foam and epoxy and will be shaped like a horse trailer - the head will be u in the nose and the bed will be in the back with a slide out in the back wall for a footwell. I will have to fab the (manual) slideout mechanism. My plan is to use heavy duty drawer slides, but any insight there is appreciated.
This is the completed but not yet glassed deck:
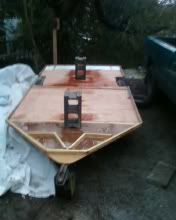 .
.For the appliances, I scrounged up a free camper on craigslist. For the cost of a case of beer and the dump fees ($60), I got a stove/oven, two way fridge, lantern, windows, and a bunch of other bits. I still have to replace the heating element in the fridge (works great on gas) and the furnace valve body was beyond my desire to fix it, but otherwise everything works great and just needs to be cleaned up a bit.
Today, I'll be glassing the rest of the deck and next weekend I'll start assembling the cabinet carcasses and bulkheads. I was going to get the shell done first (the way you build a house) but the overhang off the back will be easier to build if I have the bed framing in place first. All will be built with 1" foam and then glassed. I haven't decided to make a weight concession with the galley countertop and dinette table and go with 3/4" ply or to use foam with an upper skin of 1/4" ply. Either way, they will be small enough that I can make both from the leftovers.
That's my build to date...let's hear about yours !
- Mark as New
- Bookmark
- Subscribe
- Mute
- Subscribe to RSS Feed
- Permalink
- Report Inappropriate Content
Mar-25-2013 04:07 AM
2003 Chevy silverado
- Mark as New
- Bookmark
- Subscribe
- Mute
- Subscribe to RSS Feed
- Permalink
- Report Inappropriate Content
Mar-24-2013 07:26 PM
Funny thing: this originally started in my head as a bare-bones teardrop get-outta-Dodge camping rig but morphed into a bit of a behemoth. The next one will be back to a stripped down sleeping/cooking area with a beer cooler, secure space for hunting/fishing gear and that's about it...
Still, as the ol' body makes its creaks and groans at the end of a long but fun day, it's nice to have a real bed to crash on....
Today I started on the tail light 'pods'. I have the lights I'm going to use in the short term until I mold in some funky wrap-around automotive tail lights but I wanted to mount them in an external molding so that the only structural wall penetration would be for the wiring.
I have read elsewhere that styrofoam painted with a couple coats of TB3 will make the foam impervious to the deleterious effects of styrene-based resins... meaning it won't eat the foam ?
I certainly have enough TBIII on hand to test the theory !
These units will be screwed on (since they'll be replaced eventually...probably), so it makes sense to see if that particular piece of "internet wisdom" holds true. It should work but this will prove or disprove it for sure...with pics to follow, of course !
Anyway, on with the pics. Assume that the lights will be centered and the teardrop lens will probably be a bullet a la classic Caddy tail lights...but this is what I'm thinking:
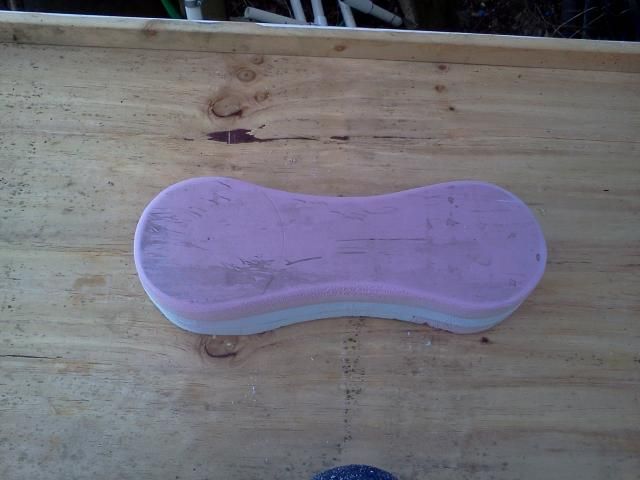
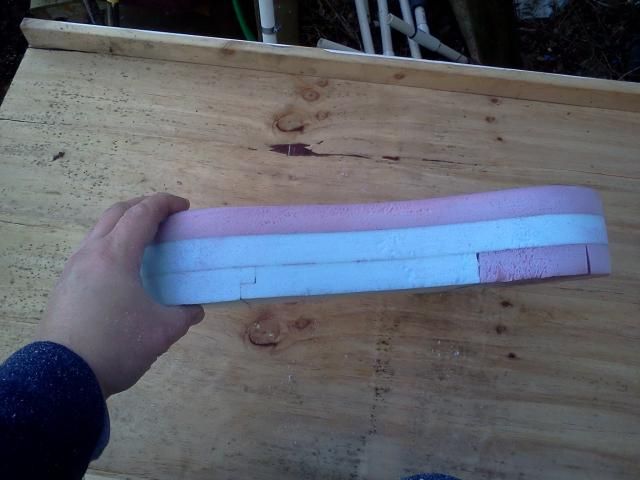
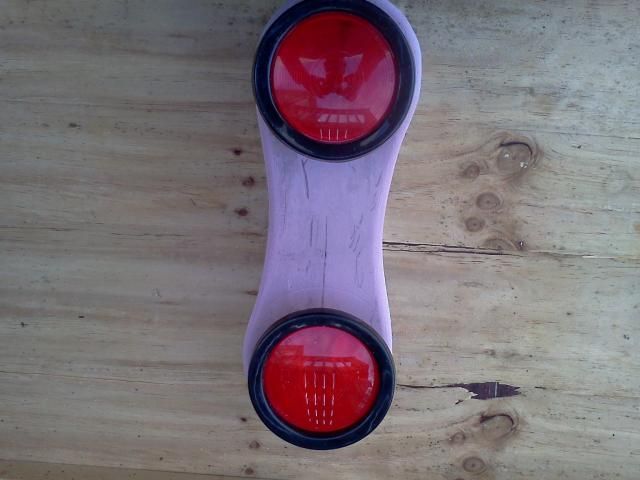

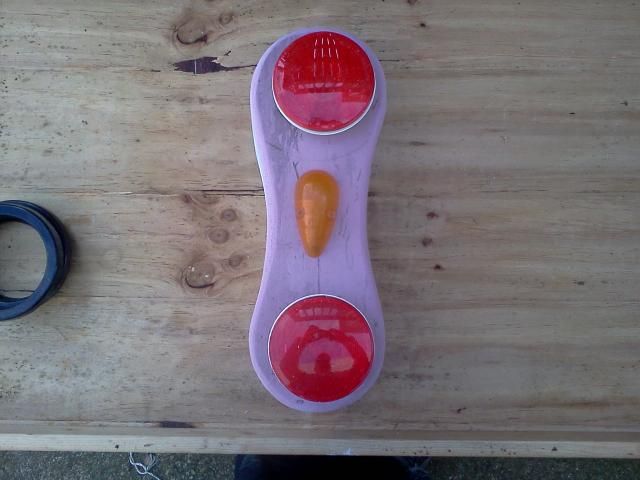
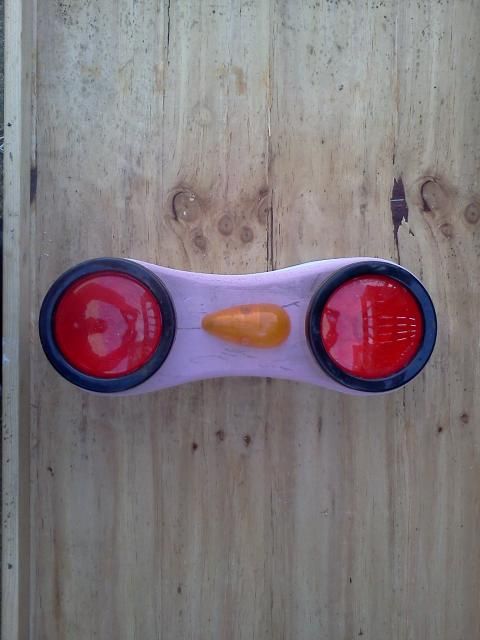
The idea here is to lay up the pods with conventional (styrene) resin and glass since they will be bolted on rather than bonded. That will make sure that both sides are symmetrical (if not it would bug me every time I saw it...)
- Mark as New
- Bookmark
- Subscribe
- Mute
- Subscribe to RSS Feed
- Permalink
- Report Inappropriate Content
Mar-24-2013 05:32 PM
- Mark as New
- Bookmark
- Subscribe
- Mute
- Subscribe to RSS Feed
- Permalink
- Report Inappropriate Content
Mar-24-2013 12:34 PM
I am nine screws and two wire connections away from being my own utility.
To a lot of people that would mean nothing, lol.
These switches are rated at 325 & 175A and were free so it just makes sense to use them. When I get the dinette laid out, I'll know the size of the panel and can start with that. I'm going to take a page from your build and use paper cutouts of all the fixed stuff to lay out the panel. The switch knobs will protrude through holes in the bottom of the door rather than being attached to the door, but other than that I haven't thought much yet about mapping the switches, breakers and guages. I also have a bunch of CH push button breakers from the ambulances and what I don't have will probably be Blue Sea stuff through my wholesale account. Going cheap on electrical tends to be a false economy I've found.
- Mark as New
- Bookmark
- Subscribe
- Mute
- Subscribe to RSS Feed
- Permalink
- Report Inappropriate Content
Mar-24-2013 11:07 AM
Those Cole-Hersee switches are a quality item. I used three of them for my 12v distro panel, they are not cheap but the highest rated for the purpose. I'll have some pictures up in the Hilton thread after I get that @*^$ solar panel mounted. The weather is not being that cooperative. I am nine screws and two wire connections away from being my own utility.
'71 Starcraft Wanderstar -- The Cowboy/Hilton
- Mark as New
- Bookmark
- Subscribe
- Mute
- Subscribe to RSS Feed
- Permalink
- Report Inappropriate Content
Mar-24-2013 10:55 AM
I mentioned a few pages back that I've been using the solar panels to make my morning toast...sort of.
I set the panels up in a rack on the roof and fed them down through the dining room window into the charge controller. On the sideboard, I have a group 31 deep cycle (~100A*h) and a 1250/1000 W MSW inverter. I ran an extension cord to my (900W) toaster and, while the buzzer does sound indicating the inverter is running at capacity, the fault light doesn't come on and shut the inverter off the way it does for an overload.
I started off right at 12.6V. The battery had all night to equalize but in the following pics they didn't. The voltages are instantaneous so take them with a big grain of salt.
Surge voltage drop right after turning the toaster on - I expect this momentary overload is what's triggering the buzzer.
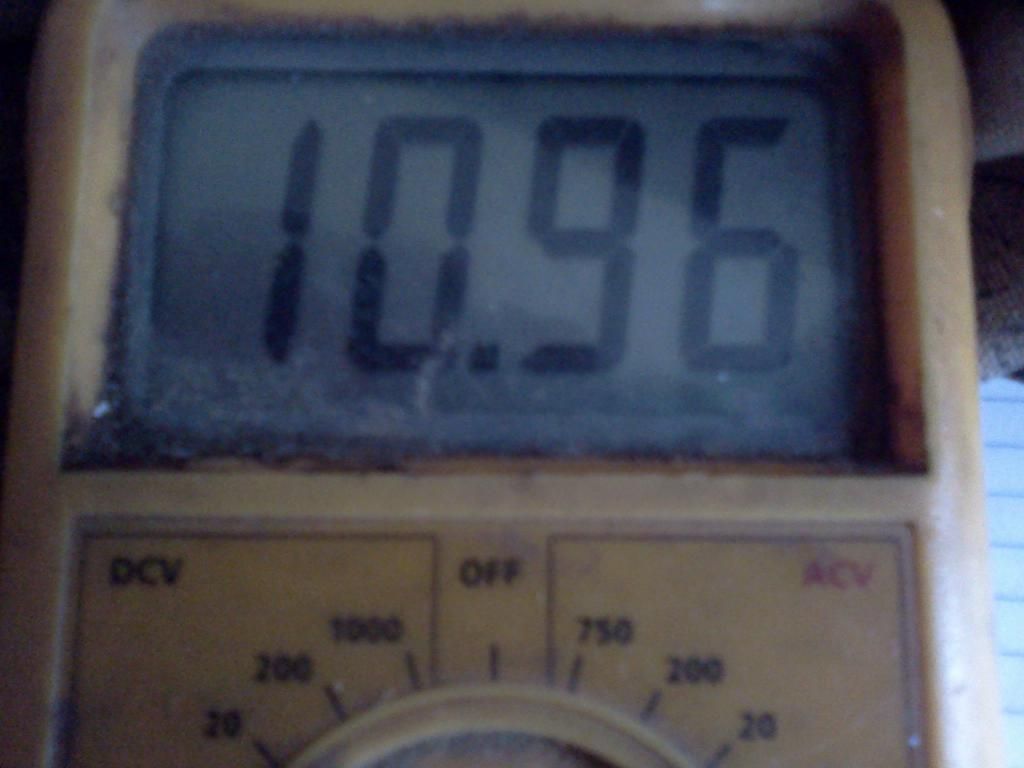
This is the 'stabilized' running voltage
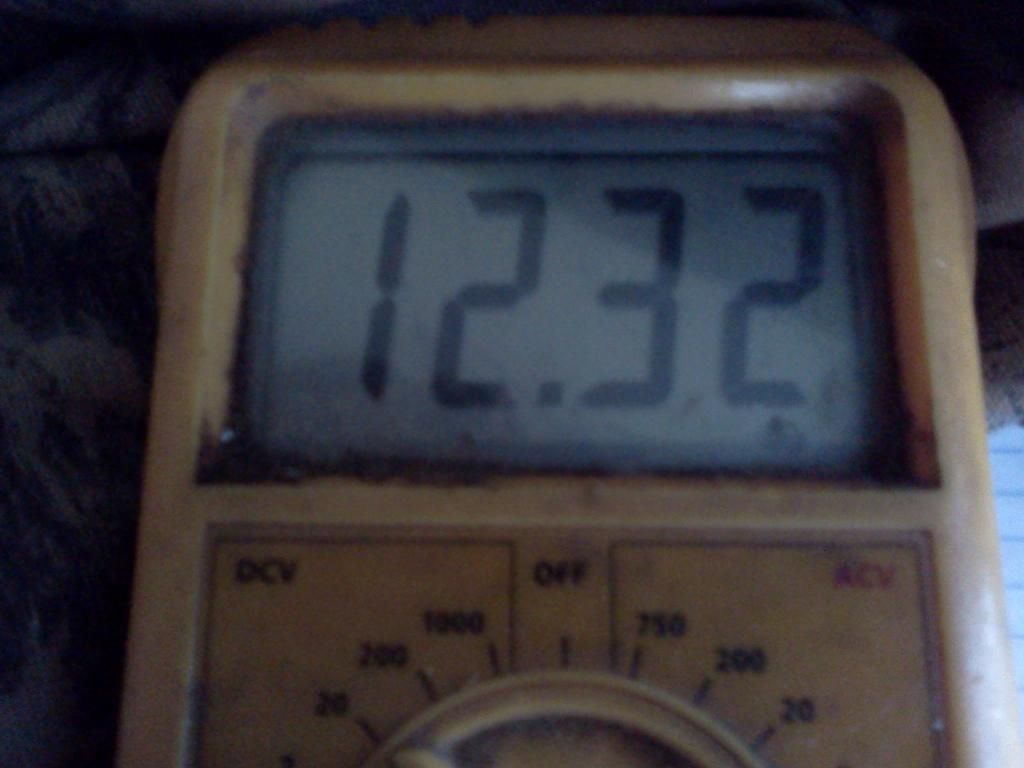
And this is right after shutting the load off
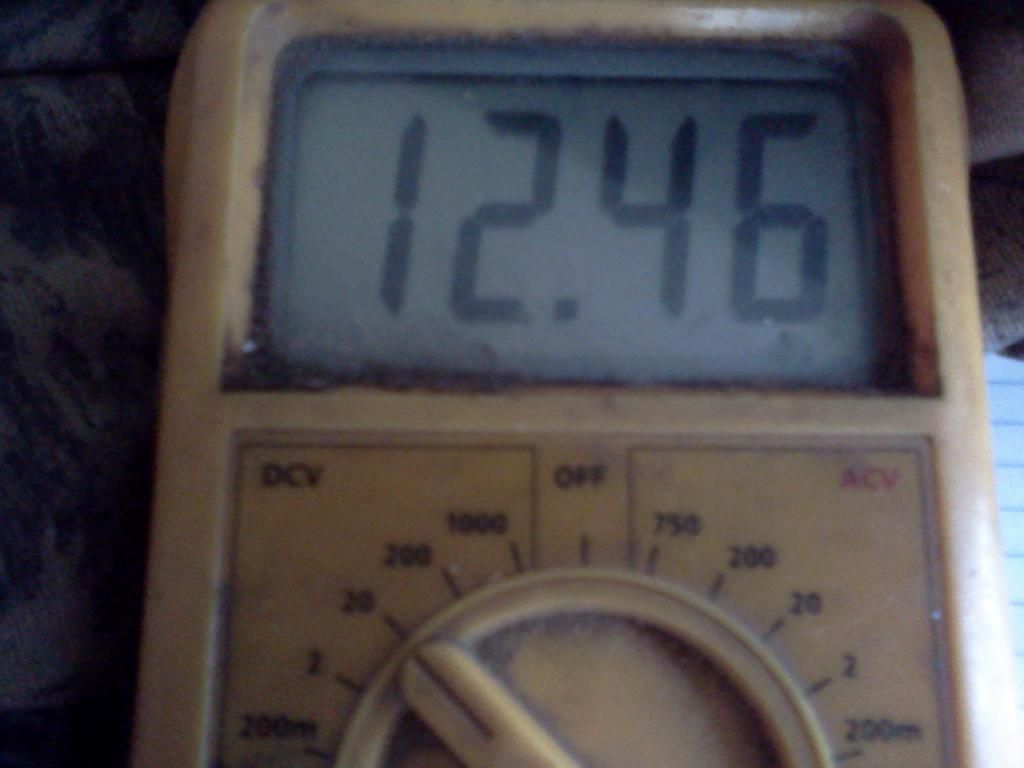
Of course, that voltage continues to climb, both from equalization and from the solar input.
Right now (3 hrs later) the voltage is at 14.74 so the panels are doing their thing.
This isn't that 'scientific' of a measurement, but I'm doing it to convince her that camping doesn't have to mean living like cave people. I've also got a couple of those LED courtesy lights in the dining room running off the battery all the time for those late night trips to the john or the fridge.
- Mark as New
- Bookmark
- Subscribe
- Mute
- Subscribe to RSS Feed
- Permalink
- Report Inappropriate Content
Mar-24-2013 10:40 AM
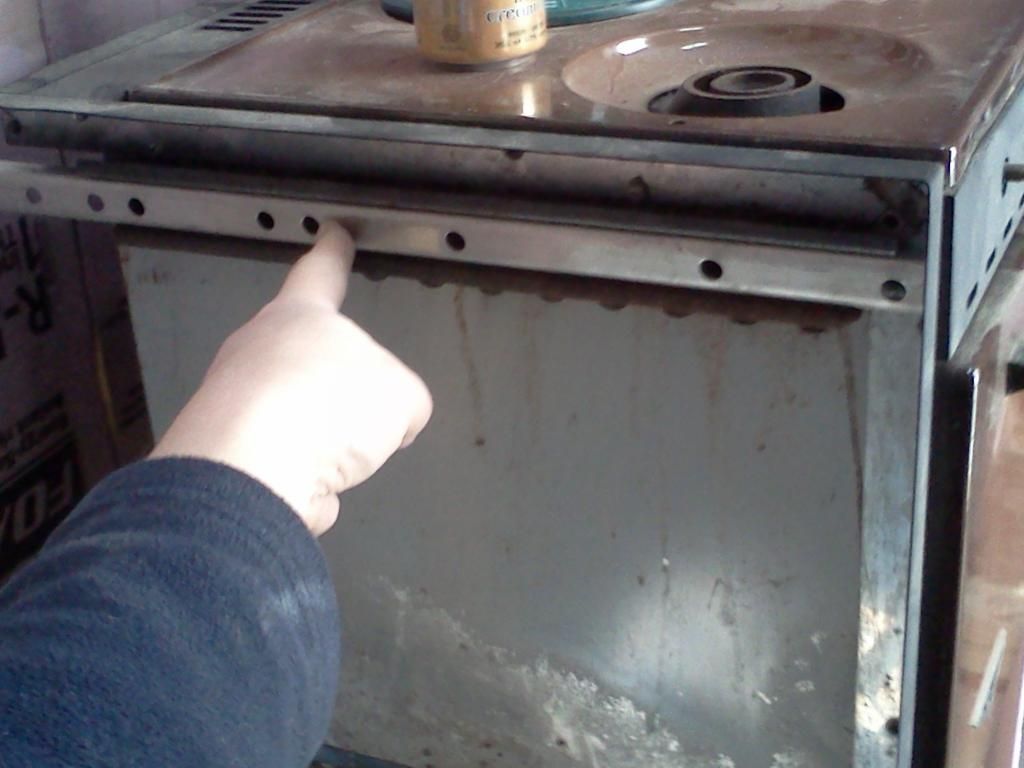
The forward one will fasten to cedar blocking that I'm sure I won't forget to include when I lay up the bulkhead 🙂
For the aft one, I've left a fir rail on the countertop
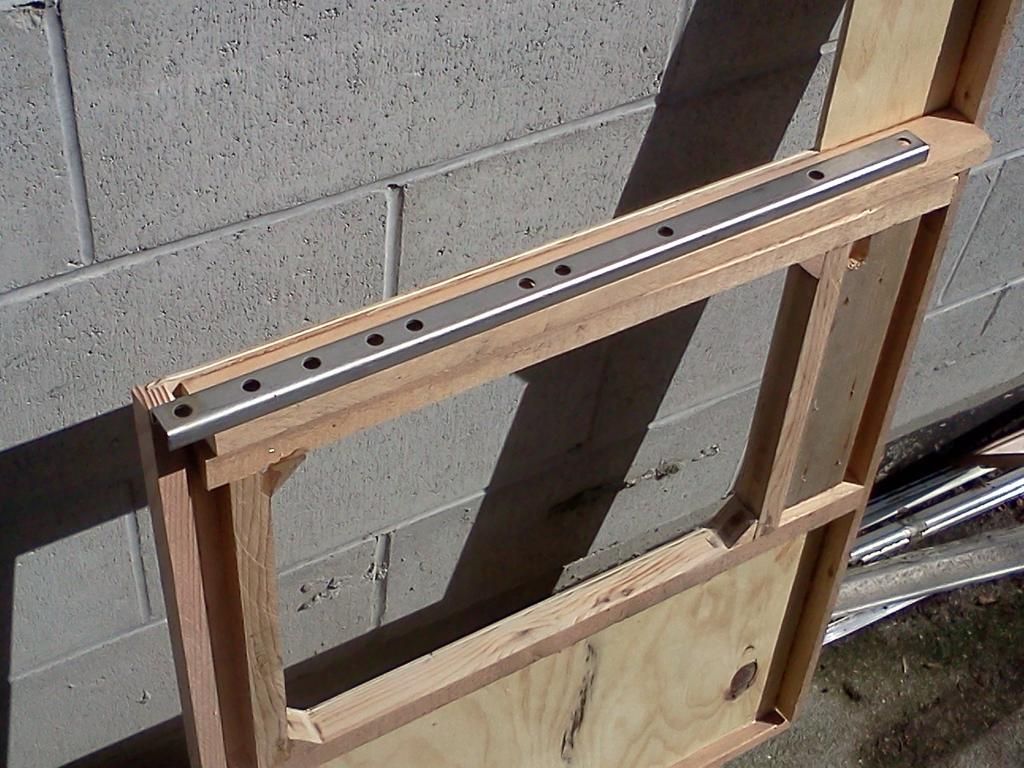
The plan is to hang the stove off them and run it. Depending on how warm that space gets, I'll pack rockwool between the stove and the foam, otherwise I'll leave it as an airspace. That should also make it easier to switch to a slide out cooktop later if we find that we don't use the oven.
While I was thinking about the stove, I made a couple changes. First off, I was concerned about dealing with the heat both from the cooktop and from the oven vent at the back. It's not enough heat to start a fire, but it could potentially be enough to degrade the epoxy over time (temperature is a weakness of standard laminating resins). I also wanted a drop-in counter section so I came up with a dead simple way to do both. I'll use a drop down 'lid', lined with aluminum to direct the heat into the range hood when it's flipped up. That's in addition to the 4" space between the back of the stove and the wall. It's a much better option weight-wise than gluing on a piece of enameled steel salvaged from a scrap appliance. When it's closed, the countertop will be continuous with a drop board in the sink.
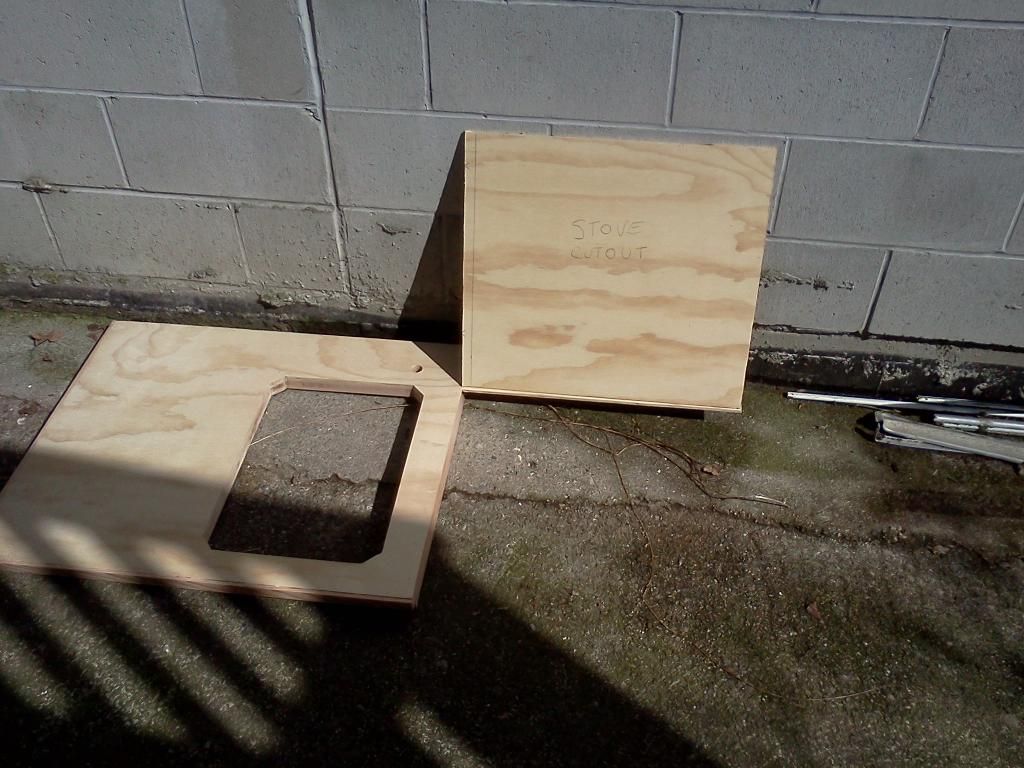
Part and parcel of that solution is getting rid of that heat as it rises. As nice as the brown range hood is (lol), I don't think I'll be using it after all.
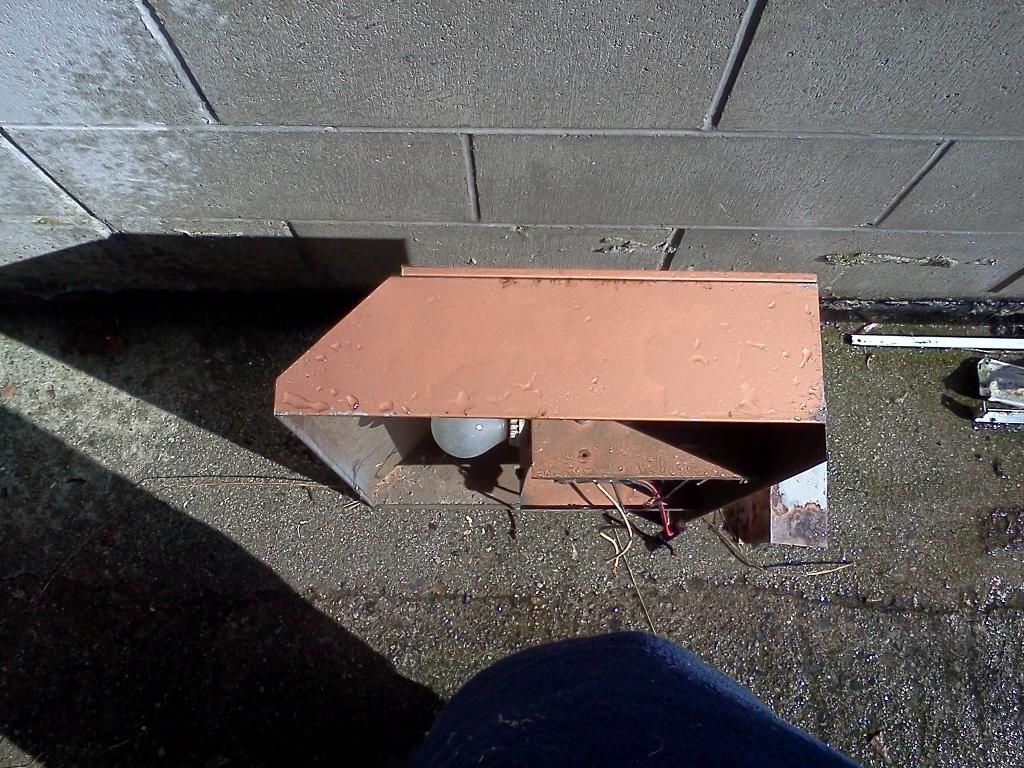
The issue is that I have neither a vertical wall nor a horizontal ceiling to mount it to. I've been trying to think of a way to keep the set together despite the angle on the upper side walls.
If I mount it in a drop from the ceiling, I still have to close the triangular space between the vertical outlet of the hood and the angled wall section. The ducting is no problem but it will always look like it was bodged into place because I won't have any other upper cabinetry to hide it. Doing that would also push the front out past the stove by a foot - the alternative is to cut the back of the range hood to match the angle and reinstall the back plate. If I'm going to do that, I may as well fab up an aluminum hood that matches what I need exactly. I was going to replace the incandescent bulb anyway, and I have a better squirrel cage fan that I can use to vent it.
I gotta stop thinking about this stuff :B
Anyway, more salvage stuff: my battery switches (again, from ambulances)
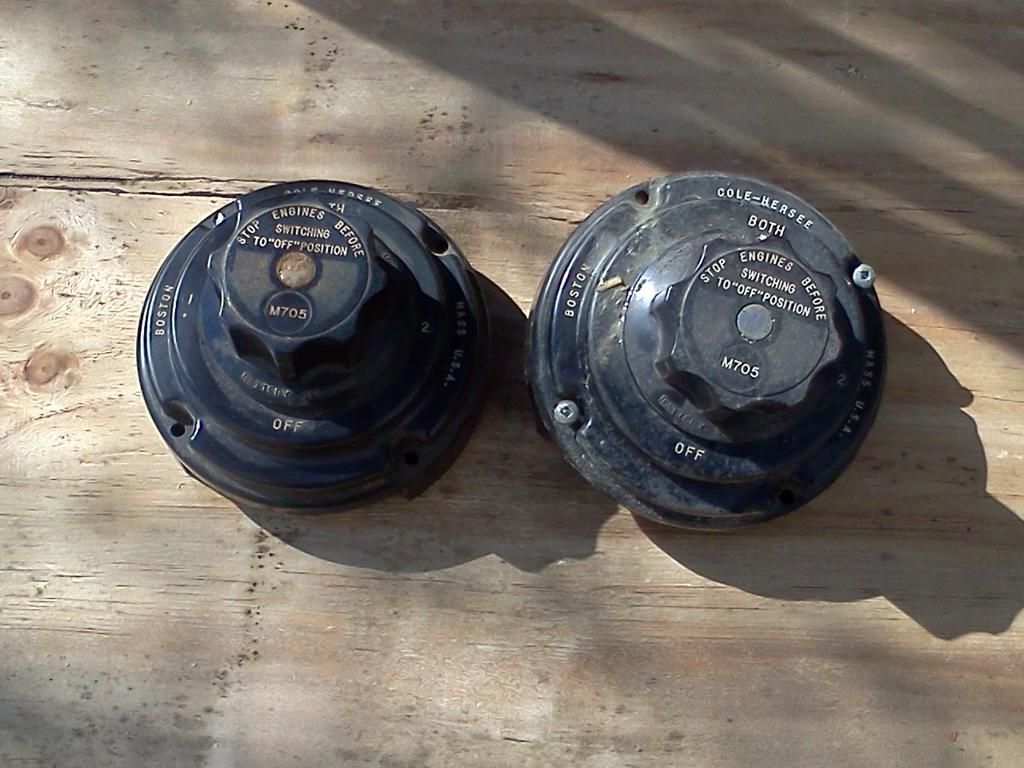
Because I'll be using up to 4 used batteries, at least to begin with, this will allow me to scale the system as I add them depending on how many amp hours I actually need. I am pretty good at minimizing my power consumption when living on 12V but she-who-camps-with-me hasn't had the practice. I'm guessing 100A*h to start, which realistically means 4 group 31's to be sure I don't draw them below about 75%. The two, 2 bank switches will allow me isolate all four to prevent them from backfeeding. I will make up a four-bank diode pack to split the charge controller's output as well. I don't expect 60W of solar to do any more than maintain four 100A*h batteries.
Speaking of which...
- Mark as New
- Bookmark
- Subscribe
- Mute
- Subscribe to RSS Feed
- Permalink
- Report Inappropriate Content
Mar-24-2013 10:00 AM
I was cleaning up the shop and sorting through all of the 'trailer' stuff I've been collecting over the years.
Here is a shot of most of the lighting I've scrounged.
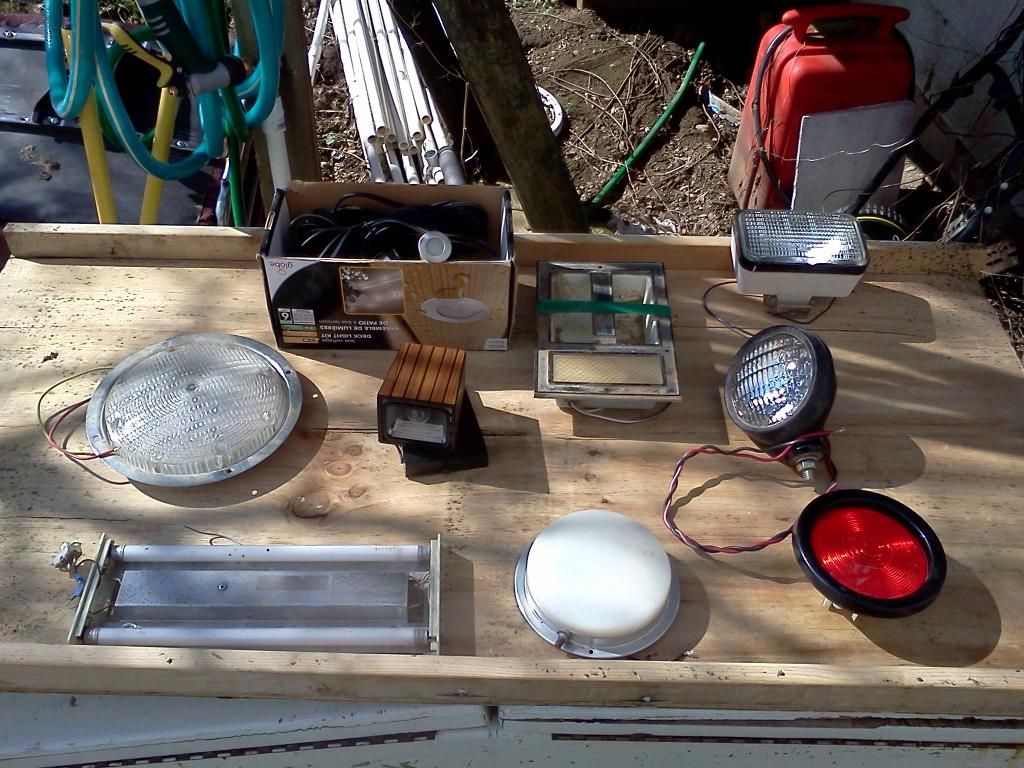
Clockwise from top left are are a box of 10 or 12 LED deck lights I'll be using as courtesy lighting. They'll provide enough light to use the move around at night without using the 'big' lights. Being waterproof deck lights, I will probably install a few in the lower sidewalls on the passenger side to illuminate the area around the door and steps. They are less than 2W each and here is what they look like lit up


Next is the grab handle/porch light from my old Dodge C class. I don't know that I'll use it because it's pretty heavy and would require some extensive blocking since it's deeper than the 1" walls, but I went to the trouble to clean it up and repaint it, so it's in the collection.
The white spot light is a spreader light I bought for a boat job that the owner kiboshed. I could have shipped it back, but those are the sorts of things that one can always sell. It's got a standard 55W H3 bulb and the diffuser does a really good job. I figure it will probably go on the front slope below the bathroom's roof hatch to light up the coupler and LPG tank(s) as needed. The trick will be to keep it low enough that it doesn't dirty the airflow coming off the truck but high enough to throw enough light.
Next is one of two 12V tractor lights that I cleaned up and rewired with 12AWG tinned wire. I will put one right behind the top of the front door on the upper angled section of the sidewall to provide more light around the door than the courtesy lights can. It will be out of the airflow altogether. I probably won't use the second one.
Next is one of two signal lights. I want to make up a foam fairing that holds two of them vertically in a pod that will screw onto the back wall. That way, the only penetration in the back wall is for the wires (never mind that I am cutting huge opening for a window...). I'm doing this because eventually I would like to french some automotive tail lights right into the corner posts...but that's a modification to be made down the road (pardon the pun).
The white dome will be the bathroom light and the flourescent fixture (dead switch) will replace the 12V incandescent in the range hood.
The other dome light there is one of a pair I salvaged from an ambulance I scrapped out a while ago ('94ish, lol). The 1194 bulbs will be replaced with LEDs and I'll use one to light up the locker under the bed and one for an externally accessed locker. The brown reading light will get painted and serve as a vanity light in the bathroom as well (also an 1194 LED).
Not pictured are the LED puck lights that will be surface mounted on the ceiling to provide the bulk of the illumination. I haven't bought them yet but they're pretty generic...though I do like westend's use of LED elements in picture frames for dome lights in the Cowboy/Hilton...
Next up - my plan on how to mount the stove...
- Mark as New
- Bookmark
- Subscribe
- Mute
- Subscribe to RSS Feed
- Permalink
- Report Inappropriate Content
Mar-23-2013 06:24 PM
- Mark as New
- Bookmark
- Subscribe
- Mute
- Subscribe to RSS Feed
- Permalink
- Report Inappropriate Content
Mar-22-2013 12:11 AM
Are you asking for recommendations?
ALWAYS !!
One vote for the walnut counted and appreciated.
The tabletop isn't overly heavily, maybe 25lbs tops. It's 5/8 or 3/4 for the top with some doublers for reinforcements underneath where hardware is attached. I don't know if I'll use the same hardware to mount it (probably not) so I can remove the doublers if need be.
Of course, I could get some lacquer thinner in there to dissolve the contact cement and just remove the laminate altogether and re-glue it to a light composite top of foam and 1/8" ply instead....
weighed over 50 lbs., (oops, 22.72 kg,)
The funniest thing about the whole metric thing is that we don't really use it in everyday life.
When I buy a loaf of bread, it's 454 grams. (1 lb)
Then I go and get a 2.27kg bag of potatoes or flour (5 lb)
Both building codes and motor vehicle laws do the same thing by converting the well-known imperial units to their metric equivalents rather than assessing the values on their own.
You stop 3m from a stop sign because it's 10', not 3m.
Were we truly metric, a loaf of bread would be labeled as 500g and a bag of flour as 2kg, 2.5 kg, etc.
I checked out your build thread a while ago (that's how I knew you had a high-mounted fridge, lol). It's amazing that your table was that heavy. Then again, look at how many RVs run within a hair's breadth of the GVW even when empty. My Dodge C was about 9800lb on a 10,200 lb GVW. It's little things like this that add up to the 'weight creep' I mentioned back in the first few pages. I've been keeping weight in mind with every decision I make: it will be interesting to see how that plays out on the weigh scales...
- Mark as New
- Bookmark
- Subscribe
- Mute
- Subscribe to RSS Feed
- Permalink
- Report Inappropriate Content
Mar-21-2013 10:49 PM
About how heavy is that salvaged table top? The original in my '71 weighed over 50 lbs., (oops, 22.72 kg,). I made a different one and all the edge trimmed counter tops out of edge-glued panels from the lumber yard (or salvaged :D). The details are in my build thread, in my signature.
'71 Starcraft Wanderstar -- The Cowboy/Hilton
- Mark as New
- Bookmark
- Subscribe
- Mute
- Subscribe to RSS Feed
- Permalink
- Report Inappropriate Content
Mar-21-2013 10:06 PM
My spare arbor is at the shop and it was too late to grab another, so just pretend it's there in the pics. It should be pretty obvious where it's going anyway.
I mocked up the galley with the sink in place. On the left, the plan was for a tall drawer front covering the cooler but I think I'll forego that for the time being and use the handle on the cooler as a drawer pull. The cooler itself will be secured with cleats around the base and a strap or two for transit. The space under the sink will be a typical cabinet and there will be a solid cabinet face under the stove, which is the cutout to the right.

I figured I'd share one of the decisions I'm mulling over, so we'll be going off track a little bit. Not to worry, it's for a good reason and I'll bring it back...
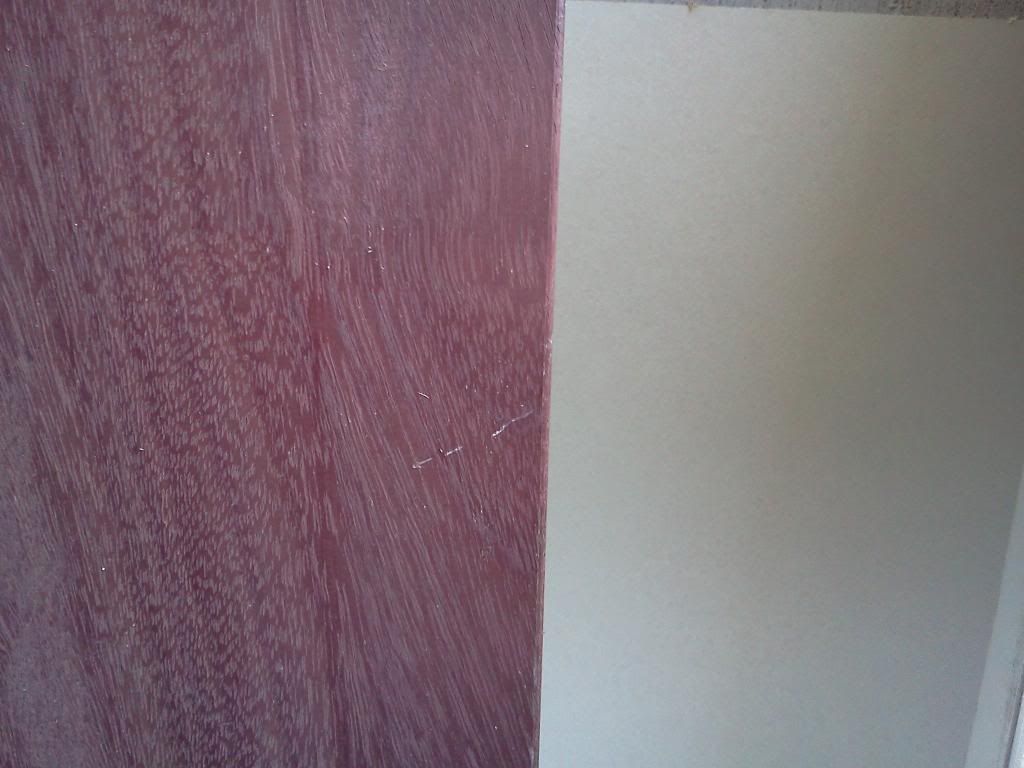
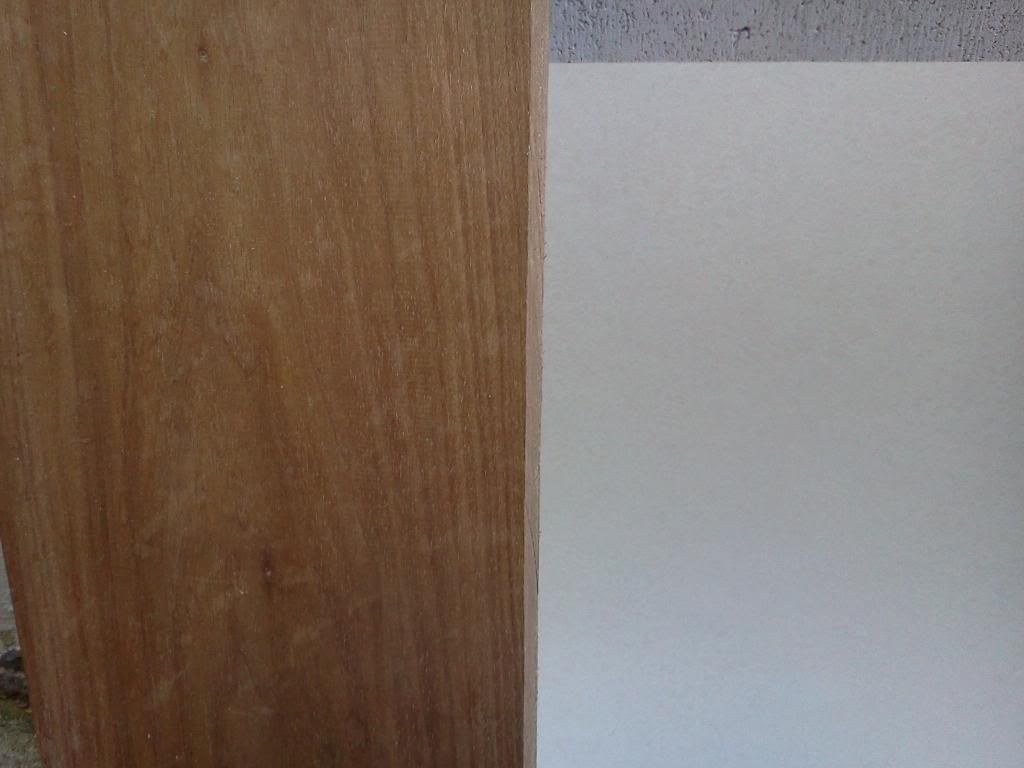
I have a hunk of purpleheart and a piece of walnut that I want to use for trim. I also have the 70's table from the camper that the appliances came from. The flat lighting is unavoidable - it's almost dark when I get home. The laminate is white with sort of amoeba-shaped blotches almost the same pinky color as the highlights on the tabletop.
This is the galley in a nutshell:
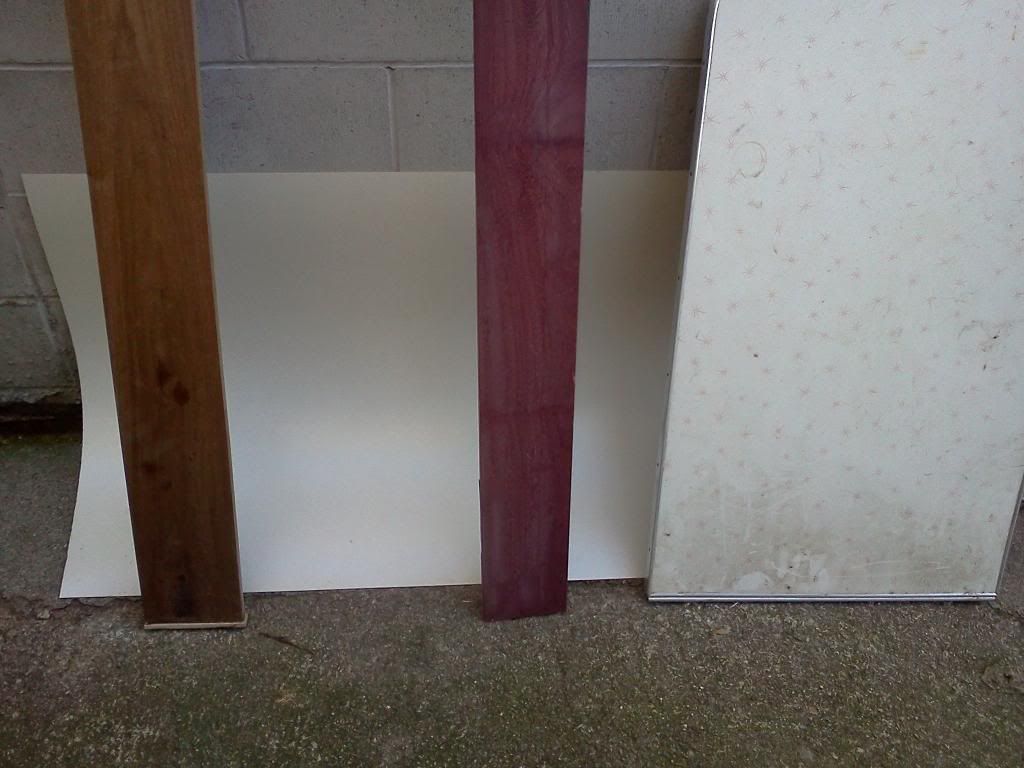
Salvaged 70's tabletop against countertop laminate

Purpleheart against countertop laminate
Walnut against countertop laminate
That will all go against a light grey base paint. The floor will be vinyl tiles or roll ends, so I'll put in whatever matches. Depending on how the weigh-ins go, I'd like to do the bottom 3' or so of the walls in 1/8" ply, finished bright.
But this decision is a ways off yet...
Moderator edit to re-size pictures to forum limit of 640px maximum size.
- Mark as New
- Bookmark
- Subscribe
- Mute
- Subscribe to RSS Feed
- Permalink
- Report Inappropriate Content
Mar-20-2013 06:30 PM
and yet NASA is using metric system,go figure.
Yup...NASA, the military, medicine, engineering....
I started grade one in '77 and that was the year of the official change here. It was great because I grew up learning metric in school but everyone around me was still using Imperial. Most folks around my age that I meet are 'bilingual' that way.
As far as the finishing (called fairing) goes, you normally mix up your fillers and adhesives using your laminating resin as the base. If you mix one additive, you wind up with a glue. Another gives you a lightweight, easily sanded filler with a texture and hardness similar to drywall mud. There are other additives (low friction, high heat, non skid, pigment, etc) but those two are the most used. That ensures that there are no compatibility issues between products.
It is a lot of work at first but once you learn the process you begin to develop tricks and techniques that cut down on your fairing time. My panels are all flat, so as long as I maintain their flatness and their alignment to each other (hence the temporary formers inside), fairing should be minimal.
One thing is to squeegee out as much resin as possible - after it hardens, dragging a dry squeegee across it should sound like a zipper.
Then one needs only a very thin skim of filler to fill the weave in the cloth and a light followup with a sanding board. The filler is normally made by mixing thickeners to the same resin used for the layup. That way, there are no compatibility issues. The filler has a texture like drywall mud and sands really easily, especially when you use only enough to fill the weave. Just like anything else, one could get it glass-smooth...it just takes time.
I'm likely going to use an industrial (epoxy) floor paint inside and out. The one I've used before (Interlux) goes on pretty thick but not so much that it'll be a problem on the sides. I'll probably do a few thin coats on the sides if the self-leveling nature of the stuff will hide the roller tracks - it does on the floor and gives you a nice smooth finish since it takes a few hours to gel.
I think thin coats will be the key...but I won't know for sure till I try it !
If not, there are a lot of paints that are compatible with epoxy - latex house paints being the cheapest and simplest to use. Let the epoxy cure, wash down with a ScotchBrite pad and lots of water to remove the blush (waxy byproduct of curing in humidity), prime and paint.
One great site to poke around is the West System website. They are the best known resin formulator, have been at it for years, and have devised all sorts of ways to test their products. Most interestingly, they publish the results: even the failures !
Here's a page on priming over epoxy. Their user manual is a good start for anyone wanting to play with the stuff - there are some things I do differently, but it all works...especially for a beginner.
- Mark as New
- Bookmark
- Subscribe
- Mute
- Subscribe to RSS Feed
- Permalink
- Report Inappropriate Content
Mar-20-2013 05:32 PM
DeadeyeLefty wrote:
Gijoecam, welcome!
As far as the weight goes, I'm shooting for as light as I possible. My strength requirement assumes that the trailer is loaded to gross all the time (which is in itself a fluid number at this stage...to a point), but if the gross stays under 700kg (1400#...for those in the one country not using metric, hehe...) registration is much simpler.
If I go much over that, I'll obviously upgrade as required. I'm currently building to the shockingly scarce standards for trailers and to ABYC ('code' for boats) when in doubt.
Hard numbers: I'm looking for 1000# + stores, batteries and water. I doubt I'll make that, but it's the target. That said, each wall panel is about 10 lbs and they're about 3'X7'. The 6 1/2 X 11' SIP floor was about 60 lbs IIRC.
Currently I can lift the tongue with one hand on the cinder blocks under the back corners and temporary 1X4 ring frames inside. I've been wanting to drop it off the blocks and see how it's doing weight-wise but I have it perfectly level right now 🙂 I've already talked to the guys at the landfill about using their scale to weigh it so I'll get weights in a few configurations. Can't tow it till the shell is done though !
Free Radical, my Japanese is worse than my Russian...and I don't even speak Russian... I too would like to hear what they're saying. I was amazed at how it seemed to eat the smoke as well: like it's actually absorbing the heat.
I wonder if, like Halon, it's almost as bad for you as the fire is ?recycler wrote:
i like the idea of turning it to a smoker if it does not work.. salmon would be good..
Salmon is always be good...
For camping I'm thinking about putting folding (or tabletop) legs onto mine.
That's a cheap Broil King (~$150 IIRC) albeit repainted and the slats stained mahog and sealed. It works as either a charcoal grill or a side draft smoker. Being so small it takes a while to figure out how to keep the heat even but it does a great job once you figure that out.
and yet NASA is using metric system,go figure. :h
----
I was checking out this moldless sandwich construction,on YT and elsewhere,
and if its strong and light enough ,may have to build something someday..
Only drawback I see its a helluva lots of work,especialy exterior finnishing,
I guess only way to make it smooth would be plenty of bondo or some kind of surface filler,then sand and paint,right?
- Mark as New
- Bookmark
- Subscribe
- Mute
- Subscribe to RSS Feed
- Permalink
- Report Inappropriate Content
Mar-19-2013 06:58 PM
As far as the weight goes, I'm shooting for as light as I possible. My strength requirement assumes that the trailer is loaded to gross all the time (which is in itself a fluid number at this stage...to a point), but if the gross stays under 700kg (1400#...for those in the one country not using metric, hehe...) registration is much simpler.
If I go much over that, I'll obviously upgrade as required. I'm currently building to the shockingly scarce standards for trailers and to ABYC ('code' for boats) when in doubt.
Hard numbers: I'm looking for 1000# + stores, batteries and water. I doubt I'll make that, but it's the target. That said, each wall panel is about 10 lbs and they're about 3'X7'. The 6 1/2 X 11' SIP floor was about 60 lbs IIRC.
Currently I can lift the tongue with one hand on the cinder blocks under the back corners and temporary 1X4 ring frames inside. I've been wanting to drop it off the blocks and see how it's doing weight-wise but I have it perfectly level right now 🙂 I've already talked to the guys at the landfill about using their scale to weigh it so I'll get weights in a few configurations. Can't tow it till the shell is done though !
Free Radical, my Japanese is worse than my Russian...and I don't even speak Russian... I too would like to hear what they're saying. I was amazed at how it seemed to eat the smoke as well: like it's actually absorbing the heat.
I wonder if, like Halon, it's almost as bad for you as the fire is ?
recycler wrote:
i like the idea of turning it to a smoker if it does not work.. salmon would be good..
Salmon is always be good...
For camping I'm thinking about putting folding (or tabletop) legs onto mine.
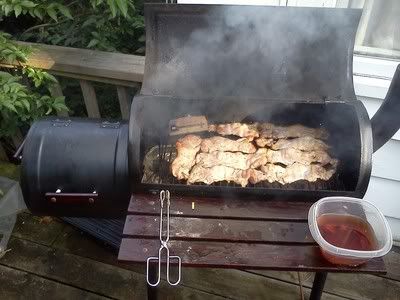
That's a cheap Broil King (~$150 IIRC) albeit repainted and the slats stained mahog and sealed. It works as either a charcoal grill or a side draft smoker. Being so small it takes a while to figure out how to keep the heat even but it does a great job once you figure that out.


