cancel
Showing results forย 
Search instead forย 
Did you mean:ย 

My insulation theory, take a look.

evy
Explorer
Explorer
Hi everyone,

Please read this post completely before giving me your opinions, thanks!

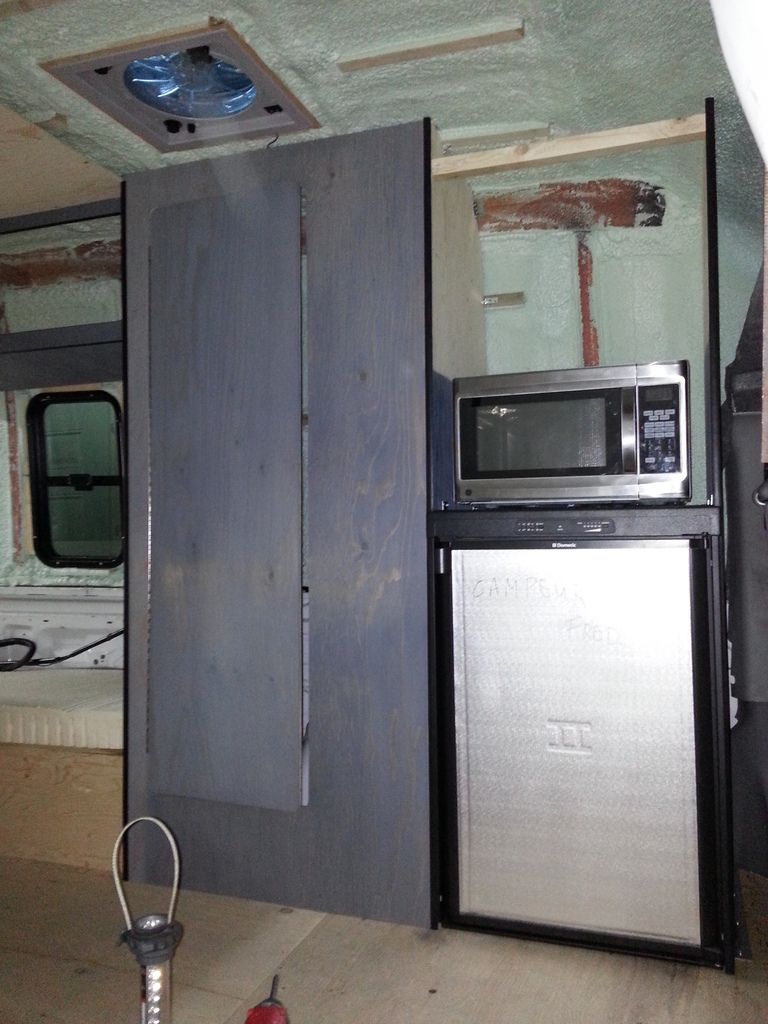
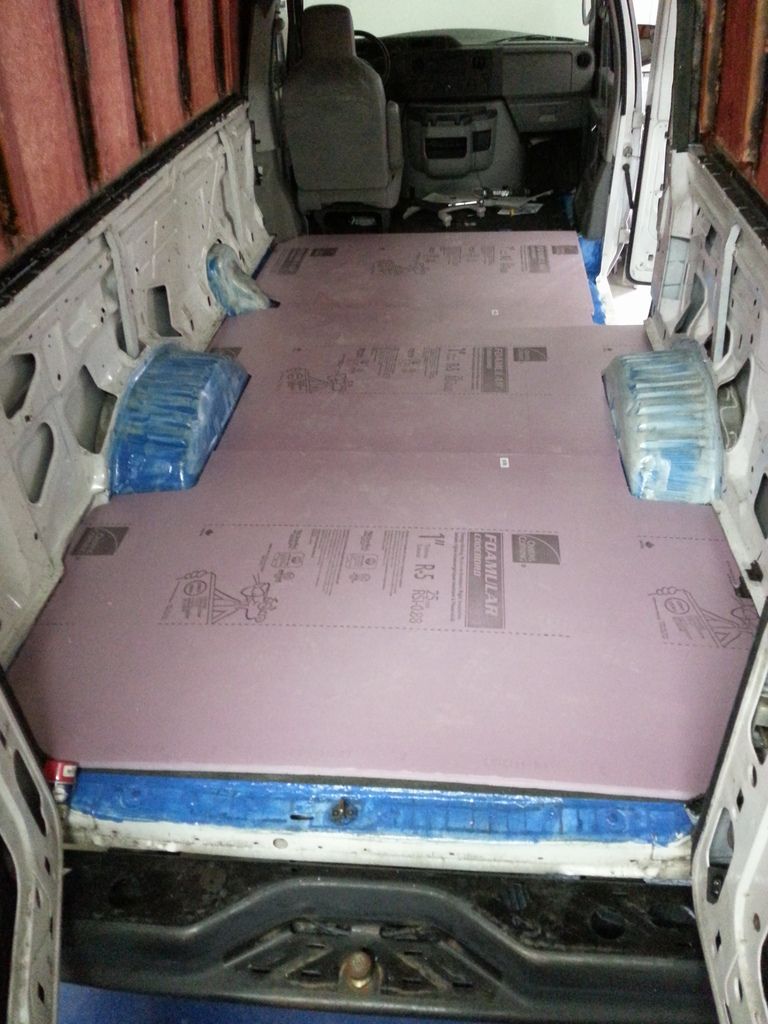
I'm working on my very first DIY camper conversion, using a 2010 extended Ford E250.

At this moment the floor, upper wall and ceiling is insulated.
The lower walls, doors and wheel wells aren't insulated yet.
But before insulating the lower walls I wanted just wanted your opinion on this subject, I know it's been debated over the "correct" method to insulate a campervan.


I'm an Architectural technician so I know a little bit about insulation but this is not a house, I don't believe in Reflectix (sorry I know a lot of you do) I don't even consider it to be insulation, it's basically a thermal bridge breaker, I'm not saying it doesn't work, I just don't want to use it.

Also I know there's a lot of people afraid of polyurethane foam, there's some talk of panel warping, I'm aware of that, from what I have learned there's 2 main reasons for that, the insulation company that did the upper walls and ceiling of my van told me that the temperature of the polyurethane coming out of the nozzle is something like well over 200 degrees and that's why the panels warp (from the heat).
The other reason is expansion, when the foam is trapped it won't stop expanding and will warp the panels.

I have red many many articles here and there on the net and I think that's what it comes down to.

So here's my theory, take a look at my drawing, it's a section of the outer wall and floor.

I plan on using a different and relatively new product : Sika post fix


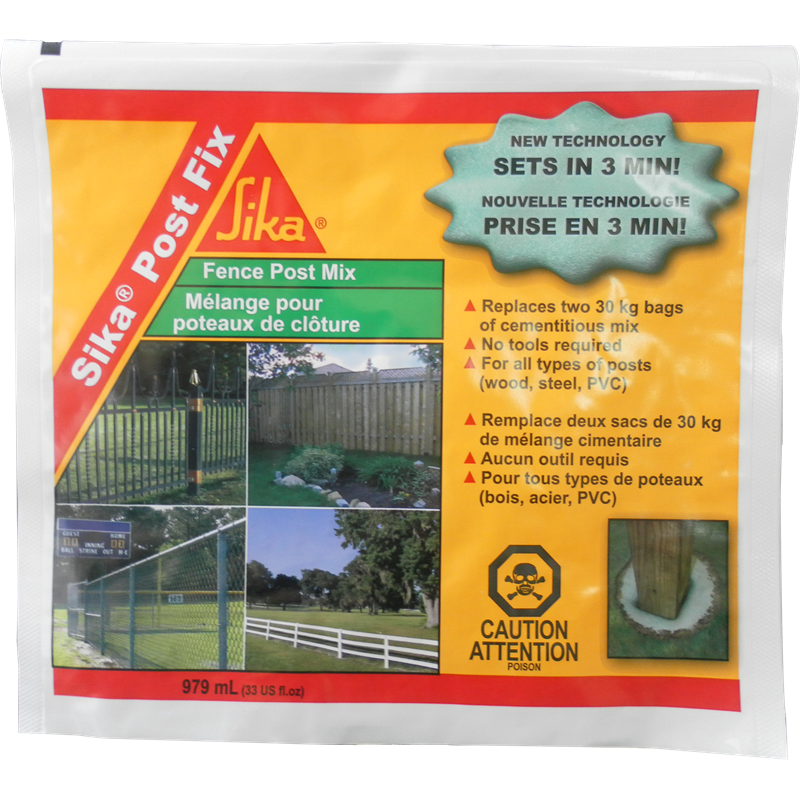
You can see it in action here :
https://www.youtube.com/watch?v=r9J2Rec2MjE


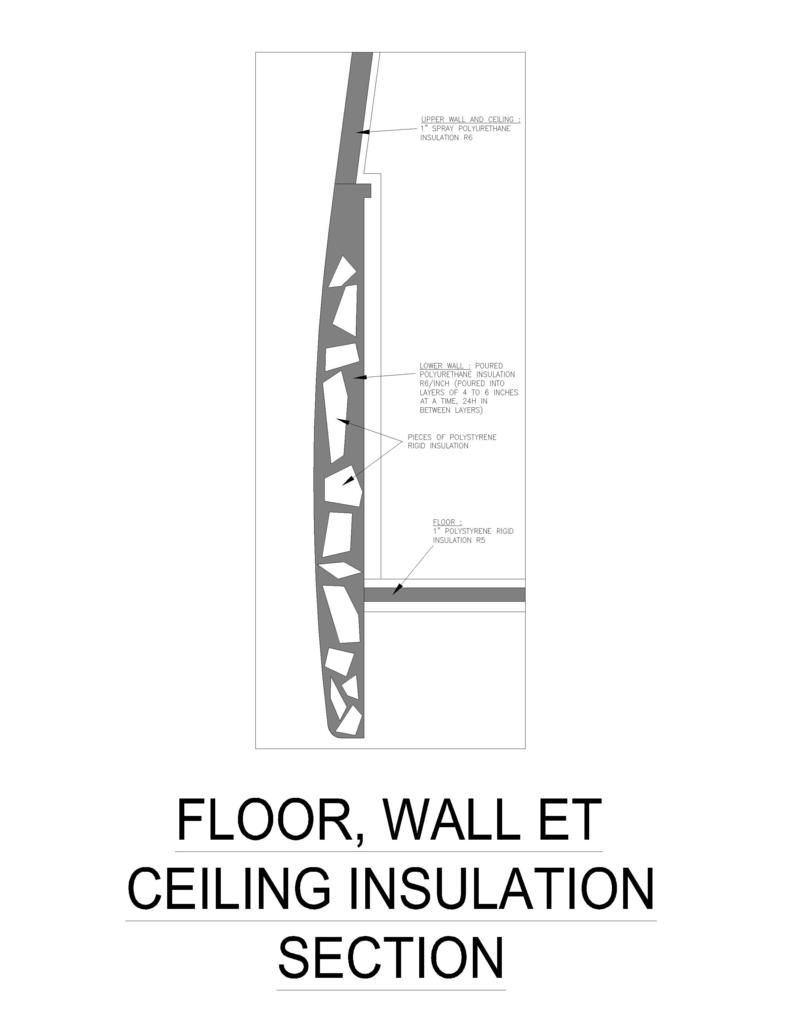
But the idea is to pour it in small layers of 4 to 6 inches (expanded) maximum at a time (that's my opinion) so the expansion would only be towards the top, So I would start pouring at one end making my way towards the other end, pouring it through the holes on the inside of the walls waiting 24h in between layers. Also I have a lot of scrap foam boards/pieces laying around, I would brake them up in small pieces and put them inside the panels, the expanding foam would fill the void in between the pieces, also I would need much less of that liquid post fix polyurethane.

So there's my theory... what do you think about it?

I'm actually waiting to do this because it's still pretty cold up here.
_______________________________________________
DIY conversion build, extended 2010 Ford 5.4L E250 + high top, from Montreal Canada, new to all this so please be patient and clear with me (never built or camped in a van yet)
55 REPLIES 55

evy
Explorer
Explorer
24 hours later and I'm not sure if the panel is still warped, maybe the heat generated from the chemical reaction heated the outside panel and it expanded with the heat? Now that it's cooler it shrunk back into place?
Anyways I'll use cups next time so I don't over-pour the polyurethane in one spot.
_______________________________________________
DIY conversion build, extended 2010 Ford 5.4L E250 + high top, from Montreal Canada, new to all this so please be patient and clear with me (never built or camped in a van yet)

evy
Explorer
Explorer
Working with those bags is really complicated, first you have to break the seal between the two liquids and then hurry up and mix them by rubbing the bag on the corner of a table for 20 seconds (doesn't mix them properly) and then you have to pour the liquid not more than a 1/4 bag at a time in every spots which is very hard to figure out since the bag is made of thick plastic and you dont see the liquid coming out.
I poured the third bag almost completely in one spot (not on purpose) I just tilted the bag and it just came out too quickly and before I knew it it was almost empty. It happened probably at the worst spot, almost no space between the inner and outer panels.
I could feel the heat and see the foam pushing it's way into place really quickly. I dumped the little that was left on the wheel well and I went outside of the van to see if it was warping...
I couldn't see it but I felt the heat with my hand so I knew where the polyurethane was on the inside, then I started feeling the panel swelling on the outside ๐Ÿ˜ž
Not much but I can feel it and it's my fault.
Next time I will remove both liquids without mixing them and store them into two separate bottles just like when you buy polyurethane. Those **** plastic bags are impossible to work with.
I had in mind to put less since the space between the panels was really narrow, it would never have happened if I was pouring it with a plastic cup or something I can see the liquid.
I still think this is the best way to insulate those walls (pouring polyurethane) but you have to use logic, more where you have space and less (thin layers) where it's tight.
_______________________________________________
DIY conversion build, extended 2010 Ford 5.4L E250 + high top, from Montreal Canada, new to all this so please be patient and clear with me (never built or camped in a van yet)

evy
Explorer
Explorer
westend wrote:
Very cool! I've already thought of a couple different uses for this foam. Thanks for posting your progress!


be sure that the foam has some space to expand to and it's never trapped, I'm not sure how I will finish the top part? maybe low expansion foam from a can.
_______________________________________________
DIY conversion build, extended 2010 Ford 5.4L E250 + high top, from Montreal Canada, new to all this so please be patient and clear with me (never built or camped in a van yet)

evy
Explorer
Explorer
Hey we needed someone to try it out and I guess it had to be me, it was a question of time before someone came up with the idea.

I'm not even half way there and if I had to do it over again I would definitely buy polyurethane by the gallon, closed cell / 2 or 3lb
from a big name company like this one
http://www.uscomposites.com/foam.html

These pouches I'm using are polyurethane but it's hard to figure out what type/density etc...

When I'm done I'll see how many pouches I used so I can put a price on it. I'm pretty sure buying polyurethane by the gallon is a better deal, but we'll see.
_______________________________________________
DIY conversion build, extended 2010 Ford 5.4L E250 + high top, from Montreal Canada, new to all this so please be patient and clear with me (never built or camped in a van yet)

westend
Explorer
Explorer
Very cool! I've already thought of a couple different uses for this foam. Thanks for posting your progress!
'03 F-250 4x4 CC
'71 Starcraft Wanderstar -- The Cowboy/Hilton

Chris_Bryant
Explorer
Explorer
evy wrote:
Chris Bryant wrote:
Do you have a scrap you can cut open to see the cell structure?


If I don't forget I will try to take a picture next bag I pour, I just cut a piece and zoom in?


Yeah, I'm just interested in how big the cells are.
-- Chris Bryant

evy
Explorer
Explorer
Chris Bryant wrote:
Do you have a scrap you can cut open to see the cell structure?


If I don't forget I will try to take a picture next bag I pour, I just cut a piece and zoom in?
_______________________________________________
DIY conversion build, extended 2010 Ford 5.4L E250 + high top, from Montreal Canada, new to all this so please be patient and clear with me (never built or camped in a van yet)

Chris_Bryant
Explorer
Explorer
Do you have a scrap you can cut open to see the cell structure?
-- Chris Bryant

evy
Explorer
Explorer
it oozed out from all the cracks, sealing the whole thing.
After emptying the bag I roll it tightly and squeeze out what's left on the wheel well.
I had to cut holes to fill some part of the inner walls and add an improvised cardboard spout.


_______________________________________________
DIY conversion build, extended 2010 Ford 5.4L E250 + high top, from Montreal Canada, new to all this so please be patient and clear with me (never built or camped in a van yet)

evy
Explorer
Explorer
Here's the video of the second pouring.
This time I did it only in three spots (on the passenger side only)

https://youtu.be/tsky4z-b7ns

The outside panel of the van has not warped at all, that's a relief.

I will pour some more tonight.
_______________________________________________
DIY conversion build, extended 2010 Ford 5.4L E250 + high top, from Montreal Canada, new to all this so please be patient and clear with me (never built or camped in a van yet)

evy
Explorer
Explorer
smkettner wrote:
I was more thinking you could have done one spot per bag.
Less stress to get the pour done before the expansion starts.


Really? You think I could pour it in one spot? I'm a bit worried it would stop expanding towards the top after a while and expand towards the sides maybe?
And from the heat generated by that polyurethane expanding the outside panel gets really hot and probably loses it stiffness? I don't think I'm game lol.
Maybe two spots?
_______________________________________________
DIY conversion build, extended 2010 Ford 5.4L E250 + high top, from Montreal Canada, new to all this so please be patient and clear with me (never built or camped in a van yet)

time2roll
Nomad
Nomad
evy wrote:
smkettner wrote:

After seeing the videos looks like you could have done one or two spots with the bag. Easy to cut away excess after it cools and hardens a bit.
Actually I did those three spots with only one bag in that second video.
I was more thinking you could have done one spot per bag.
Less stress to get the pour done before the expansion starts.

evy
Explorer
Explorer
Gjac wrote:
You have a good approach to your project. The heat you feel is an exothermic reaction, all two part resins do this as they cross link or polymerize the way to reduce the heat is to spread the mix thin or make multiple mixes with less volume. I used to use 4 and 8 lb poly foam in work and mix it and pour a few oz in a paper cup and you can see what kind if expansion you will get. If you contain it and put too much into a closed mold you will increase the density and sometimes warp the mold. With all the large openings I would not worry about excessive expansion because you can tape the openings to contain the foam and cut the excess off with a sharp knife or razor if you use the lighter density foams 2-4 lbs, the heavier densities 8-16lbs or higher would require a saw because the get hard. You can also mix macro balloons into the foam to increase its insulating properties and reduce the volume of foam which would reduce the heat. Hope this helps and good luck with your project.


Since the polyurethane I'm mixing is meant for something other than insulating I don't have the specs for the density ๐Ÿ˜•

If you read my first posts in this thread I was thinking of inserting small pieces of rigid insulation and putting them in the inner walls before pouring the polyurethane but then I was worried that it could block the flow of the polyurethane when pouring so I decided that if I added some pieces I would add them immediately after pouring it.
The last thing I want is air pockets.
_______________________________________________
DIY conversion build, extended 2010 Ford 5.4L E250 + high top, from Montreal Canada, new to all this so please be patient and clear with me (never built or camped in a van yet)

evy
Explorer
Explorer
smkettner wrote:

After seeing the videos looks like you could have done one or two spots with the bag. Easy to cut away excess after it cools and hardens a bit.


Actually I did those three spots with only one bag in that second video.
_______________________________________________
DIY conversion build, extended 2010 Ford 5.4L E250 + high top, from Montreal Canada, new to all this so please be patient and clear with me (never built or camped in a van yet)