cancel
Showing results forย 
Search instead forย 
Did you mean:ย 

How do you look for leaks?

rbpru
Explorer II
Explorer II
Okay here is where the rubber meets the road.

I have been reading the comments on the merits of fiberglass or stick and tin with supporter and detractor on both sides; all agree water is bad.

Now as a new TT owner, how do I detect these water leaks before they spot the ceiling or drip down the walls? ๐Ÿ˜ž

If this snow ever goes away and I get a chance to examine the trailer what do I look for and where?

The dealer said I should crawl up on the roof and check out the various seals etc. this sounds good but is it really a good idea to put my 200 lb. frame on the trailer roof?

So again my question is what should I be looking for and where?
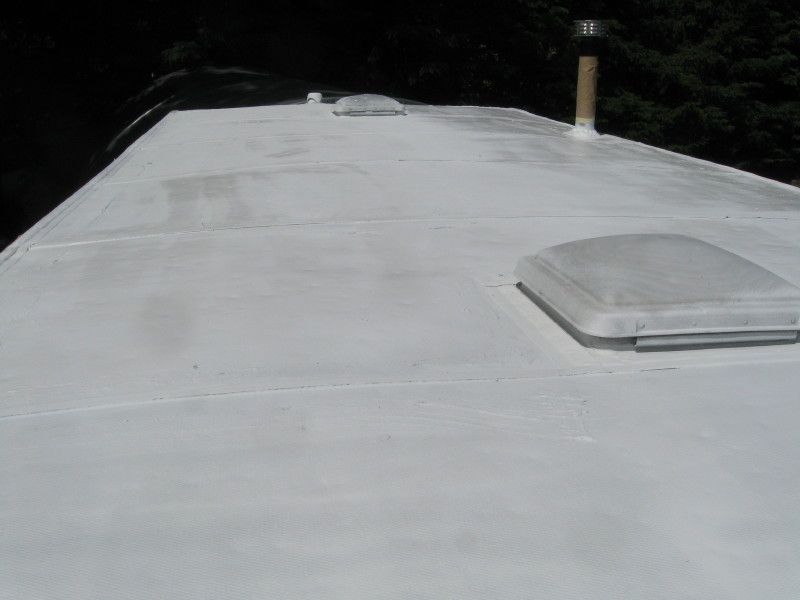
Twenty six foot 2010 Dutchmen Lite pulled with a 2011 EcoBoost F-150 4x4.

Just right for Grandpa, Grandma and the dog.
30 REPLIES 30

RTrider
Explorer
Explorer
For my last two trailers I 'Eternabond' the seam between the roof and the front cap. If this starts leaking, it will cause delamination in an awful hurray (so I have read on this forum).

In one of the pics above it shows the marker lights have an 'air' leak. I just make sure that the top and sides are well caulked and leave the bottom open for any drainage if needed. I may be off the mark here and willing to listen to alternate views of this proceedure. On my first trailer (an old one) I had to drill the bottom of the lense plastic for drainage as the fixture itself filled with water. Later learned that this was standard proceedure with these particualr fixtures.

Great thread. Can't wait to learn more.
2011 Jayco Eagle Super Lite 298RLS (Sold)
2010 Chevy Silverado 3500HD Duramax Diesel LB/SRW (sold)
Equalizer Hitch, 1200 lb bars (Sold)
2010 Honda NT700A.
Rampage winch loader for bike in back of TV (Sold)
Some Pictures

westend
Explorer
Explorer
myredracer wrote:
That does makes sense, thanks!
It certainly does!
FWIW, here was my situation: I restored the bad framing in the rig. To do that I removed all of the trim edge, the staples and screws, and peeled back the aluminum siding in order to replace rotten studs, top plate, bottom plate, and rafters. When I put it back together I didn't want it to leak so I put sealant in every spot I thought might leak. I sealed between the siding and frame, between the trim edge and the siding, and around the trim to the siding. Imagine my surprise when I found 2 dozen leaks in all of those places. That day made me a believer in the pressure test.
'03 F-250 4x4 CC
'71 Starcraft Wanderstar -- The Cowboy/Hilton

westend
Explorer
Explorer
abaerga wrote:
I have a skylight in my shower that leaks. Should I remove the old caulk first?
It's always good idea to remove a failing material rather than covering it up with new material. In the case of your skylight, you will get a better and more consistent bond by removing as much of the original caulk as possible.
'03 F-250 4x4 CC
'71 Starcraft Wanderstar -- The Cowboy/Hilton

abaerga
Explorer
Explorer
I have a skylight in my shower that leaks. Should I remove the old caulk first?
1996 Itasca Suncruiser RQ34

myredracer
Explorer II
Explorer II
That does makes sense, thanks!

AirForceAngler wrote:
myredracer wrote:
How much is a pressure test really going to help to find water leaks? There are lots of places where air can leak that aren't a problem (requiring repair) like the weep holes at the bottom of windows; around holes through the floor around pipes, ducts and wiring; around the fridge opening; ceiling vents; slideouts; etc. Just curious, maybe I'm missing something...

Water can ingress even in through hairline cracks in a wall or roof membrane that you can't even see sometimes. That's been one known cause of water ingress in buildings and mold and became more commonly known as a result of the "leaky condo crisis" of the 80s.

I would think a close visual inspection would be better along with regular maintenance. I think an RV cover would help somewhat as a preventative measure.


The fact that water CAN ingress through hairline cracks and other place you can't see IS the reason for a pressure test. You pressurized the camper then spray on the mixture of water and dish soap and look for the bubbles. Of course you're not going to worry about the weep holes and other natural leaks, but you want to take care of the leaks that aren't supposed to be there.

You can inspect all you want visually, but even what looks like a good seal can leak. My first camper was a good example of that. Bought it new and within 3 years, there were at least 4 rotten places in the floor with no visible leakage signs on the ceiling or walls. My guess is it was leaking through the door/camper seal and window seals that all looked fine to the eye.

AirForceAngler
Explorer
Explorer
myredracer wrote:
How much is a pressure test really going to help to find water leaks? There are lots of places where air can leak that aren't a problem (requiring repair) like the weep holes at the bottom of windows; around holes through the floor around pipes, ducts and wiring; around the fridge opening; ceiling vents; slideouts; etc. Just curious, maybe I'm missing something...

Water can ingress even in through hairline cracks in a wall or roof membrane that you can't even see sometimes. That's been one known cause of water ingress in buildings and mold and became more commonly known as a result of the "leaky condo crisis" of the 80s.

I would think a close visual inspection would be better along with regular maintenance. I think an RV cover would help somewhat as a preventative measure.


The fact that water CAN ingress through hairline cracks and other place you can't see IS the reason for a pressure test. You pressurized the camper then spray on the mixture of water and dish soap and look for the bubbles. Of course you're not going to worry about the weep holes and other natural leaks, but you want to take care of the leaks that aren't supposed to be there.

You can inspect all you want visually, but even what looks like a good seal can leak. My first camper was a good example of that. Bought it new and within 3 years, there were at least 4 rotten places in the floor with no visible leakage signs on the ceiling or walls. My guess is it was leaking through the door/camper seal and window seals that all looked fine to the eye.
2013 Toyota Tundra DoubleCab 4x4 iForce 5.7
2014 Grey Wolf by Forest River 26BH TT

myredracer
Explorer II
Explorer II
How much is a pressure test really going to help to find water leaks? There are lots of places where air can leak that aren't a problem (requiring repair) like the weep holes at the bottom of windows; around holes through the floor around pipes, ducts and wiring; around the fridge opening; ceiling vents; slideouts; etc. Just curious, maybe I'm missing something...

Water can ingress even in through hairline cracks in a wall or roof membrane that you can't even see sometimes. That's been one known cause of water ingress in buildings and mold and became more commonly known as a result of the "leaky condo crisis" of the 80s.

I would think a close visual inspection would be better along with regular maintenance. I think an RV cover would help somewhat as a preventative measure.

westend
Explorer
Explorer
mlts22 wrote:
The only downside of Eternabond is that a potential buyer might consider it a "hackjob". This is ironic because Eternabond is a lot better than caulk, but appearances sell.

Were I keeping my TT for the long haul, I'd be paying a few people a couple hundred each, and having a day where all the fixtures (skylights, vents) get replaced/upgraded, the roof primed, the tape laid down and pressed flat with a roller, then the tape's edges caulked. However, since I plan to sell my TT either this year or next, I just make sure all the joints are sealed tightly every 90 days.
I dunno, I think my Eternabond job looks lot better than some of the caulk applications from the factory. They really need to calibrate those air-assisted caulking guns, lol.

Finished roof:


Factory:
'03 F-250 4x4 CC
'71 Starcraft Wanderstar -- The Cowboy/Hilton

wrenchbender
Explorer
Explorer
Pressure test is the only way to go.

AirForceAngler
Explorer
Explorer
Thanks for the info on Eternabond! My blower is about that big in diameter and about half again as wide as that one. The motor on it is in the back with a belt driving the squirrel cage. I like how you mounted that in there, looks a little sturdier than cardboard and dryer-vent hoses!
2013 Toyota Tundra DoubleCab 4x4 iForce 5.7
2014 Grey Wolf by Forest River 26BH TT

mlts22
Explorer
Explorer
The only downside of Eternabond is that a potential buyer might consider it a "hackjob". This is ironic because Eternabond is a lot better than caulk, but appearances sell.

Were I keeping my TT for the long haul, I'd be paying a few people a couple hundred each, and having a day where all the fixtures (skylights, vents) get replaced/upgraded, the roof primed, the tape laid down and pressed flat with a roller, then the tape's edges caulked. However, since I plan to sell my TT either this year or next, I just make sure all the joints are sealed tightly every 90 days.

westend
Explorer
Explorer
AirForceAngler wrote:
Jerry9n wrote:
Westend X2 on the Eternabond. I went back a year later and retested and found a few more leaks where the caulk had cracked, but nothing on the Eternabond.

If you are worried about pressure (my furnace blower was two speed), crack the roof hatch a bit. The furnace blower is not made for a high static pressure. You probably have to be a little more careful, though, with a leaf blower.


Are you referring to the Eternabond tape or what product?

I have a serious furnace blower! It came from an industrial unit so I'll be careful! It's a good bit larger than the one pictured here earlier.
I was referring to Eternabond tape as passing the 100% success test. I used two different types on my roof, Eternabond Roof Seal (vinyl backing) on all cross seams, around vent through holes, and around vents. I used Eternabond Webseal over the roof's aluminum edge trim. Webseal needs to be coated to prevent UV degradation but I painted the roof with one of those roof products so it was coated in the process.

Eternabond tapes are one of those products that trip the "Why haven't I always used this?" trigger.

Blower used:


Eternabond sealing in process:
'03 F-250 4x4 CC
'71 Starcraft Wanderstar -- The Cowboy/Hilton

AirForceAngler
Explorer
Explorer
Jerry9n wrote:
Westend X2 on the Eternabond. I went back a year later and retested and found a few more leaks where the caulk had cracked, but nothing on the Eternabond.

If you are worried about pressure (my furnace blower was two speed), crack the roof hatch a bit. The furnace blower is not made for a high static pressure. You probably have to be a little more careful, though, with a leaf blower.


Are you referring to the Eternabond tape or what product?

I have a serious furnace blower! It came from an industrial unit so I'll be careful! It's a good bit larger than the one pictured here earlier.
2013 Toyota Tundra DoubleCab 4x4 iForce 5.7
2014 Grey Wolf by Forest River 26BH TT

rbpru
Explorer II
Explorer II
Racine,

Good advice I was surprised to see the same warning repeatedly in the ownerโ€™s manual. Showering, cooking etc.

It is not something that comes to mind when you think about RV camping.
Twenty six foot 2010 Dutchmen Lite pulled with a 2011 EcoBoost F-150 4x4.

Just right for Grandpa, Grandma and the dog.