cancel
Showing results forย 
Search instead forย 
Did you mean:ย 

Jack repair wood frame water damage 98 caribou

starcraft69
Explorer
Explorer
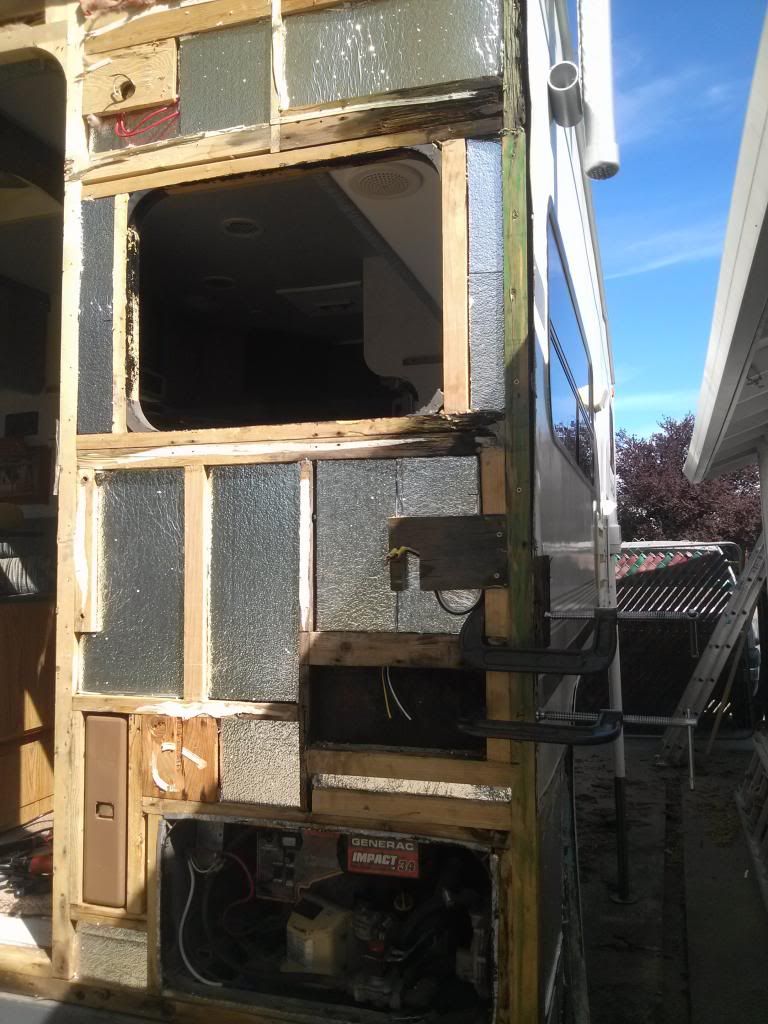
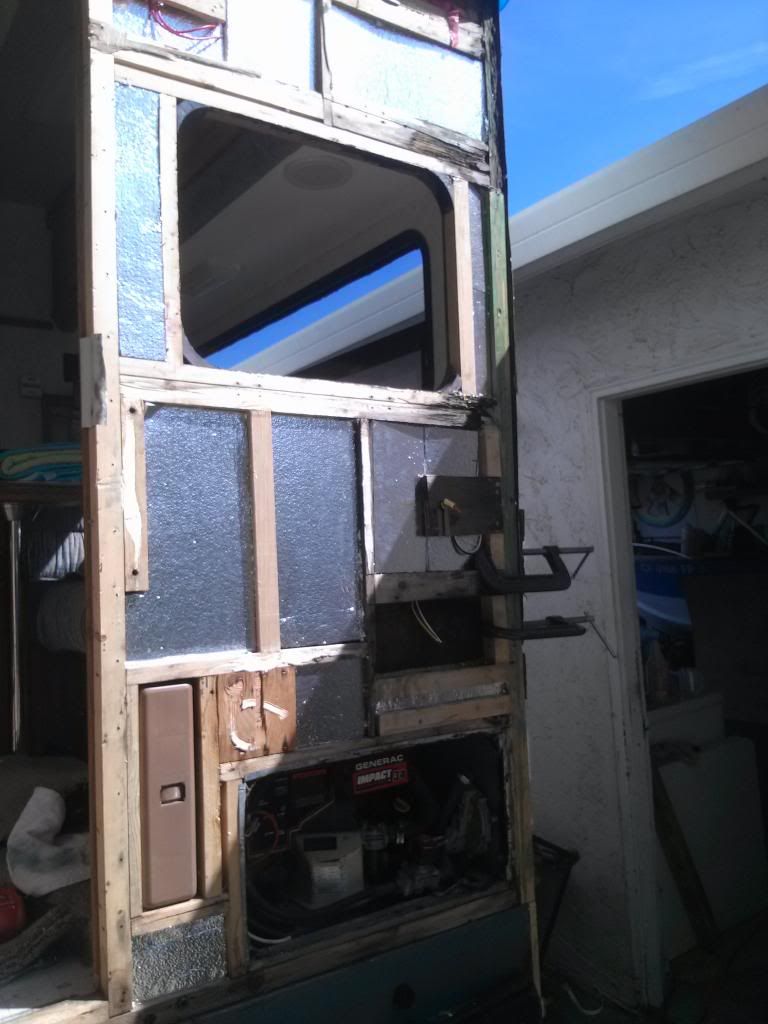
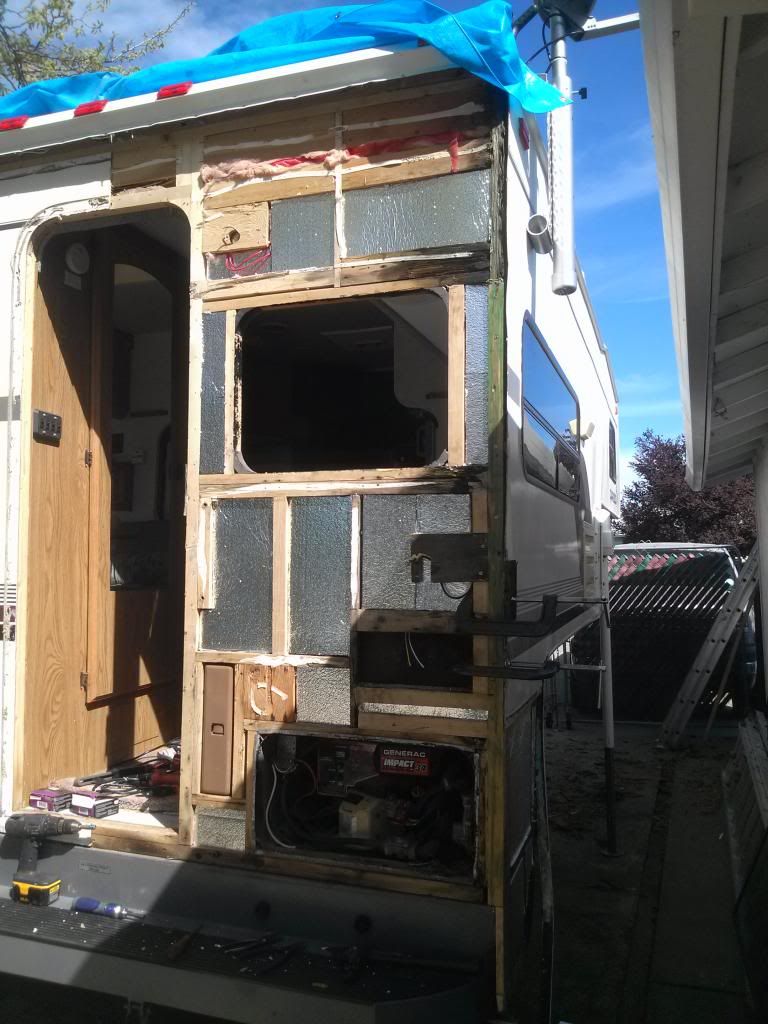
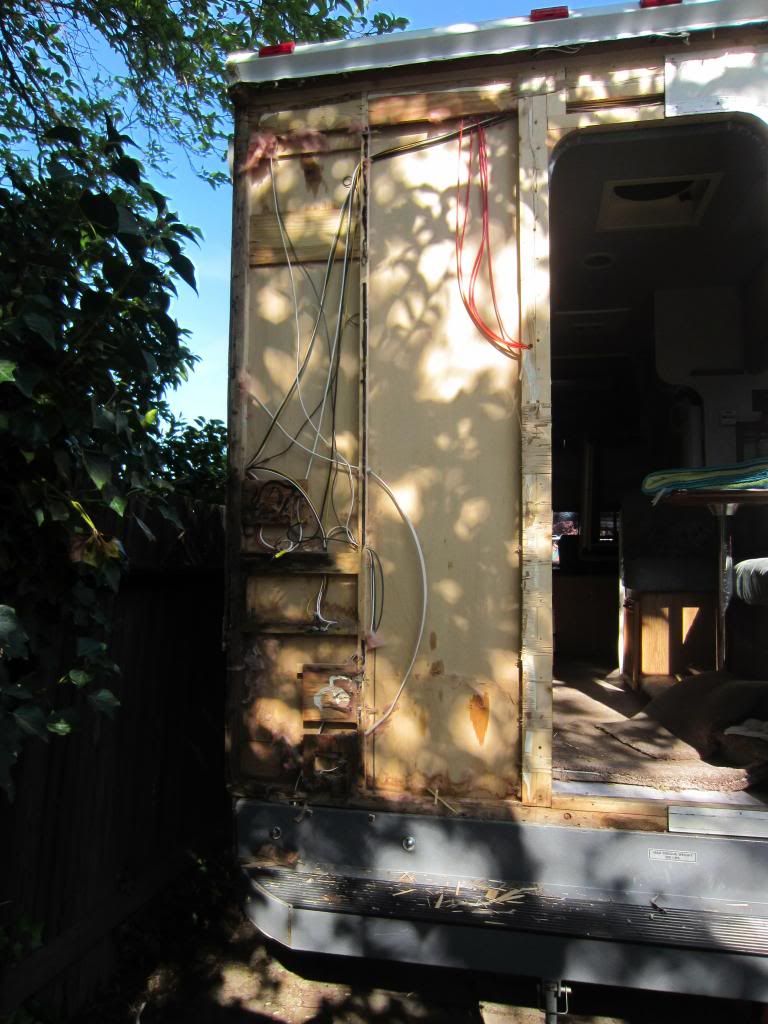
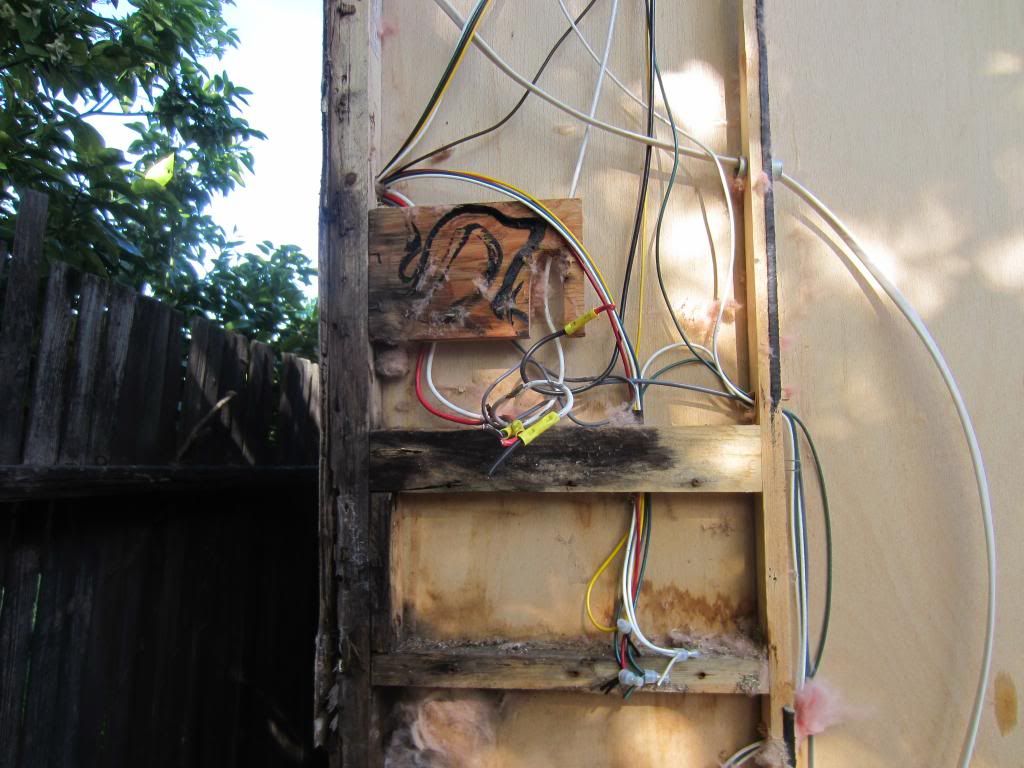
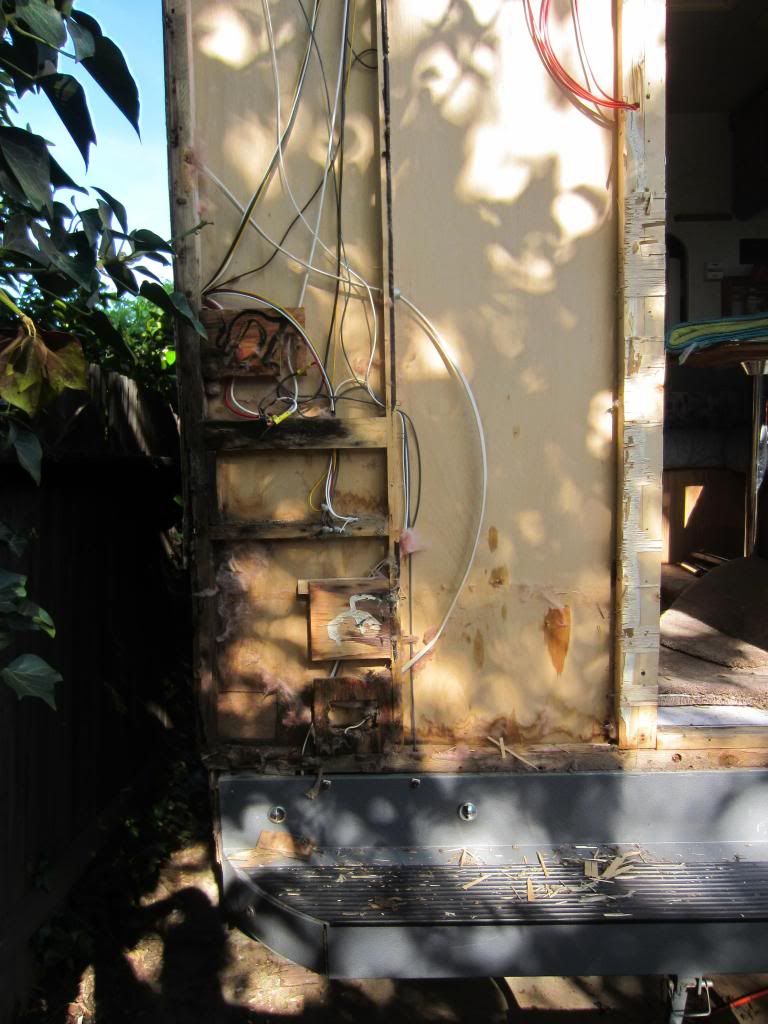
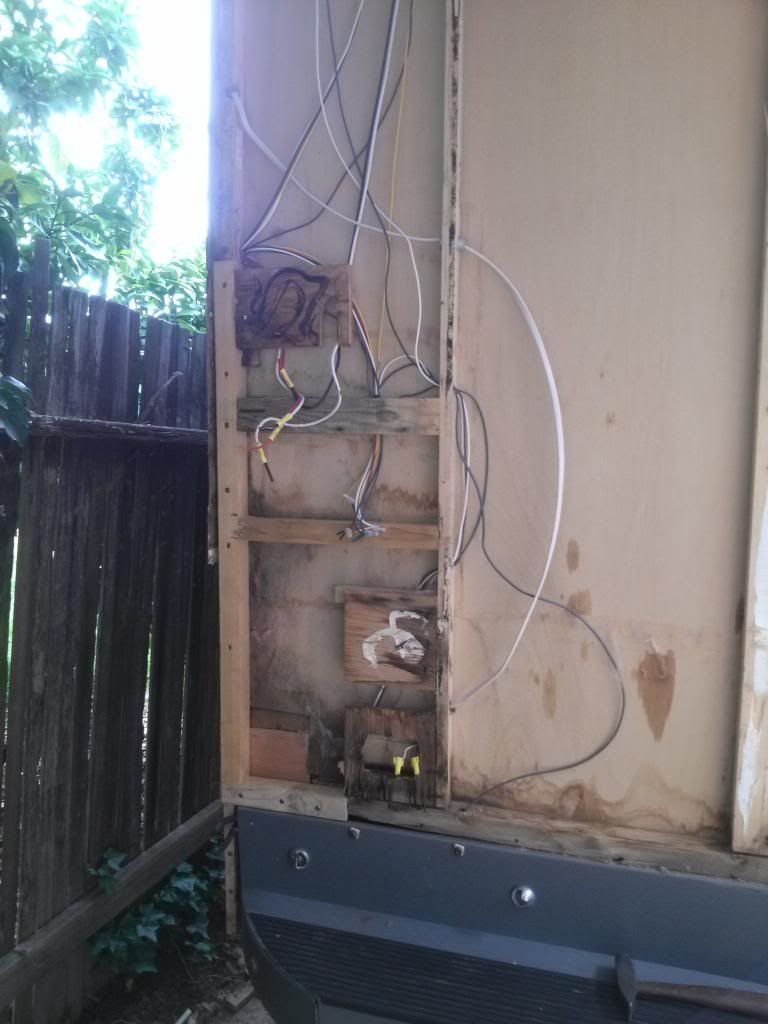
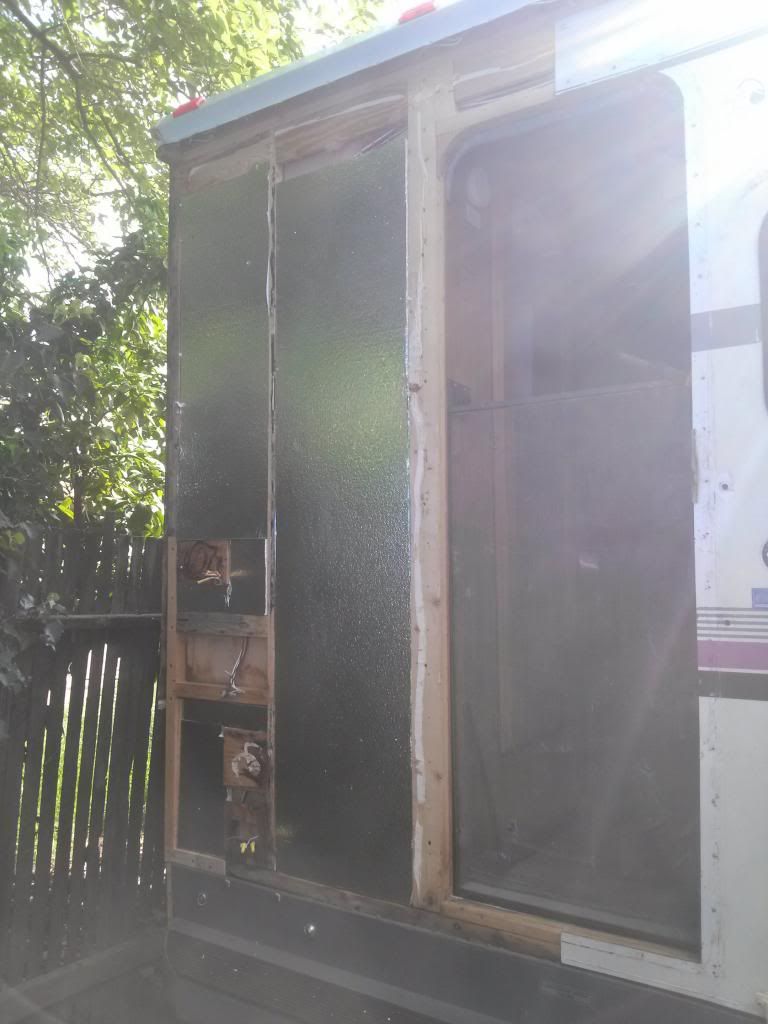
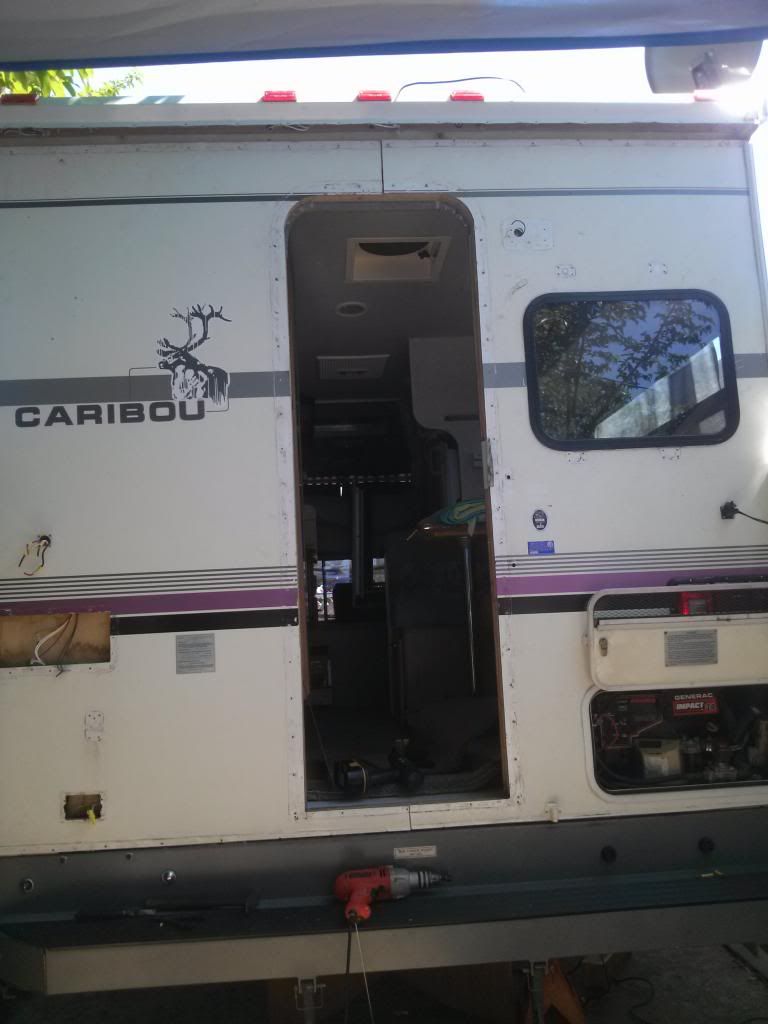
Well it was time to dig into this repair I have been putting off. Both rear jacks seem to have wood rot under the laminate the right one worse than the left. I started with the right side and you will see that I split the back wall in two sides at the door. also rebuild the wings. Here are some pics of the tear down and some repairs I have done.
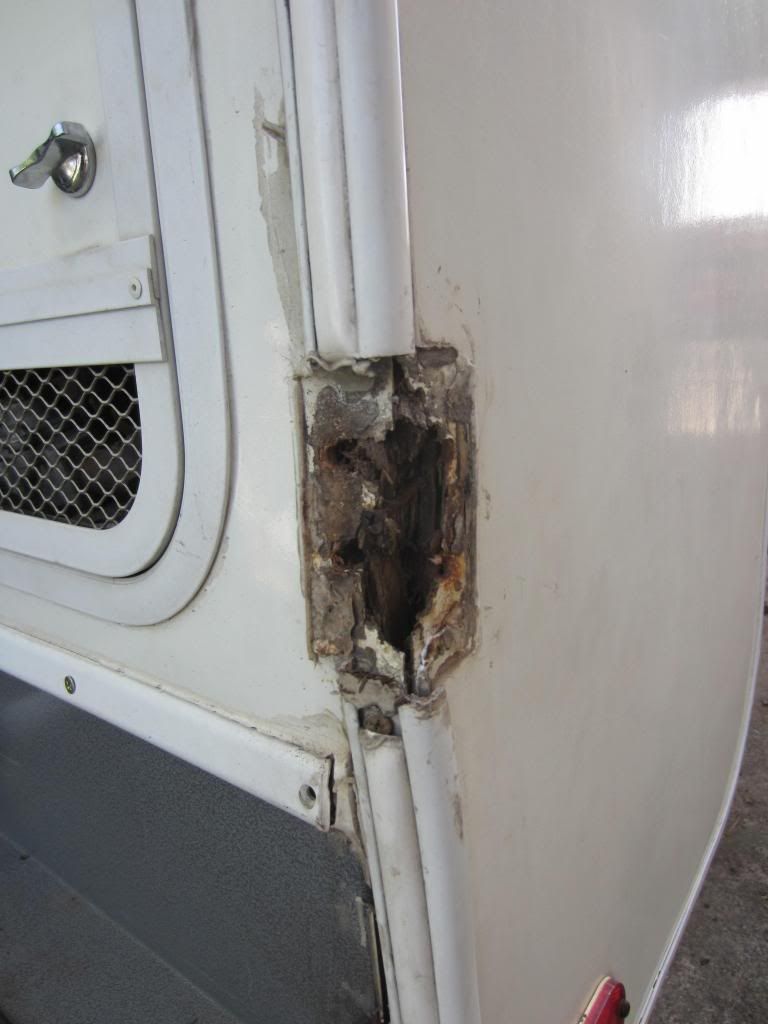
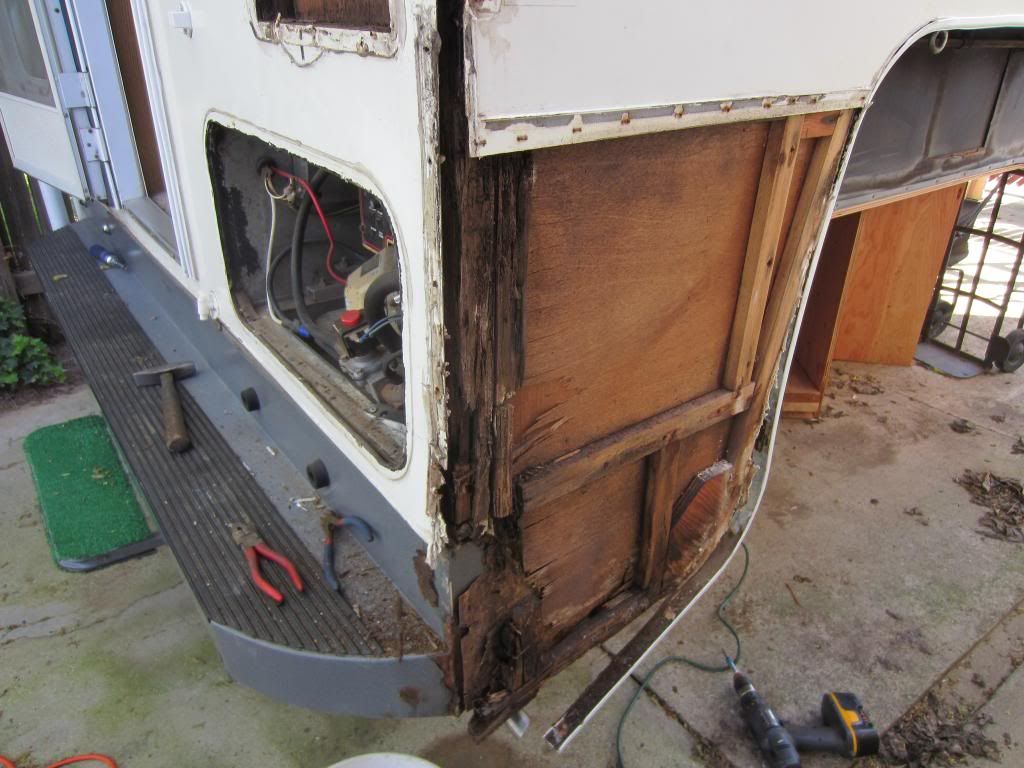
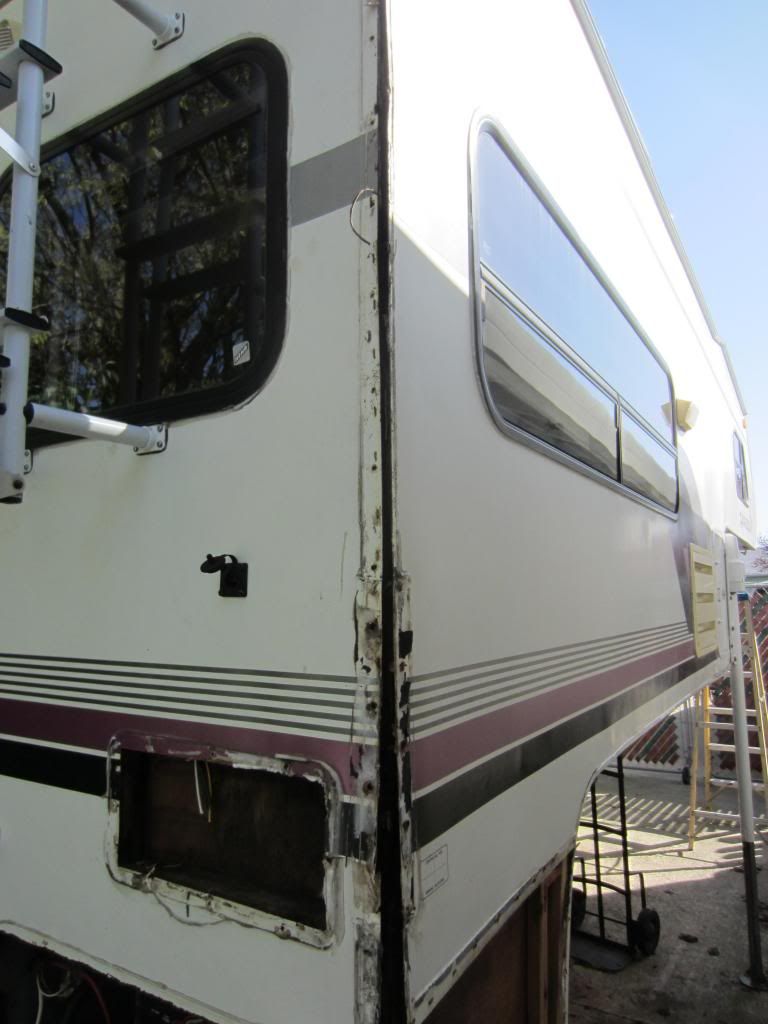
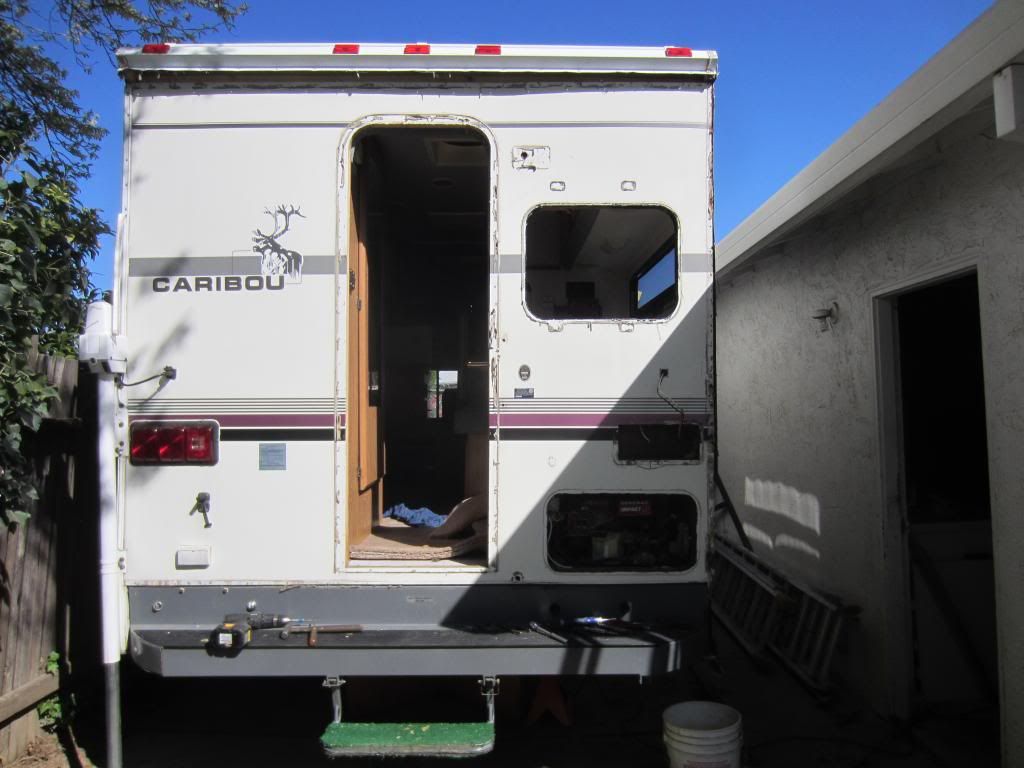
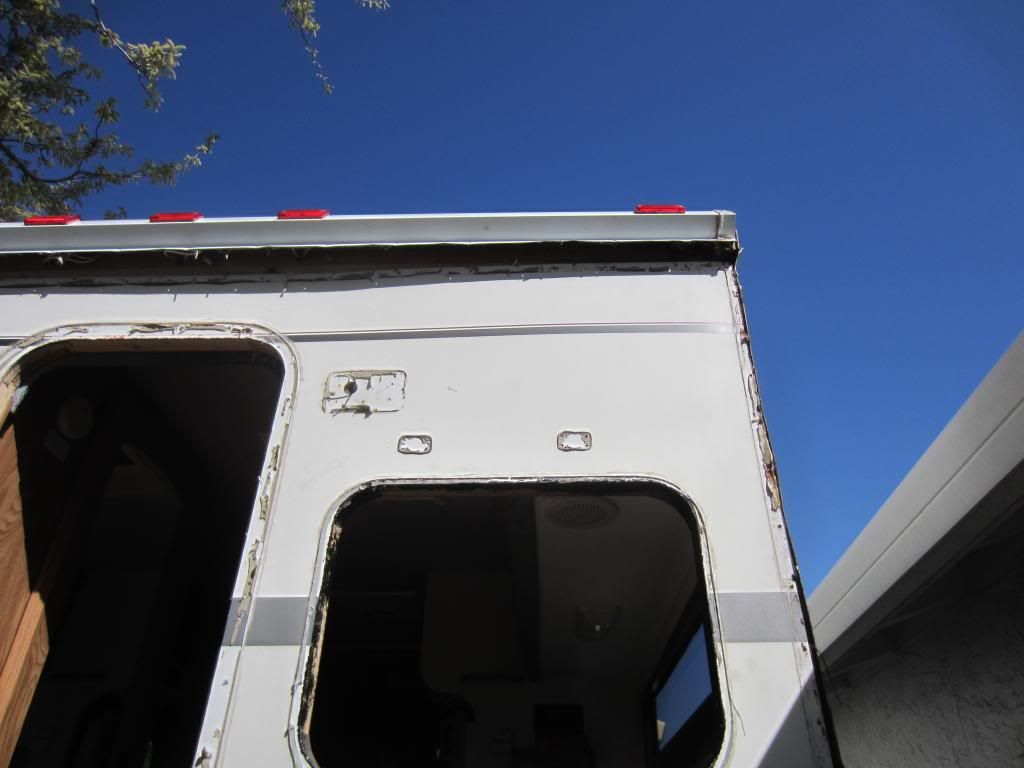
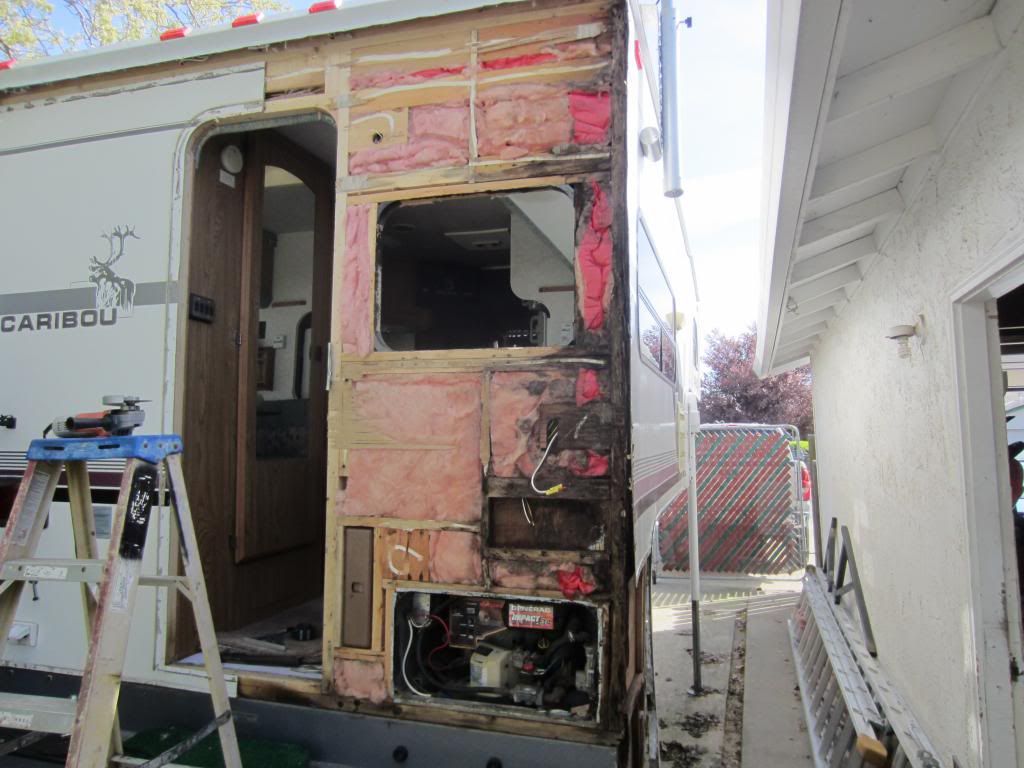
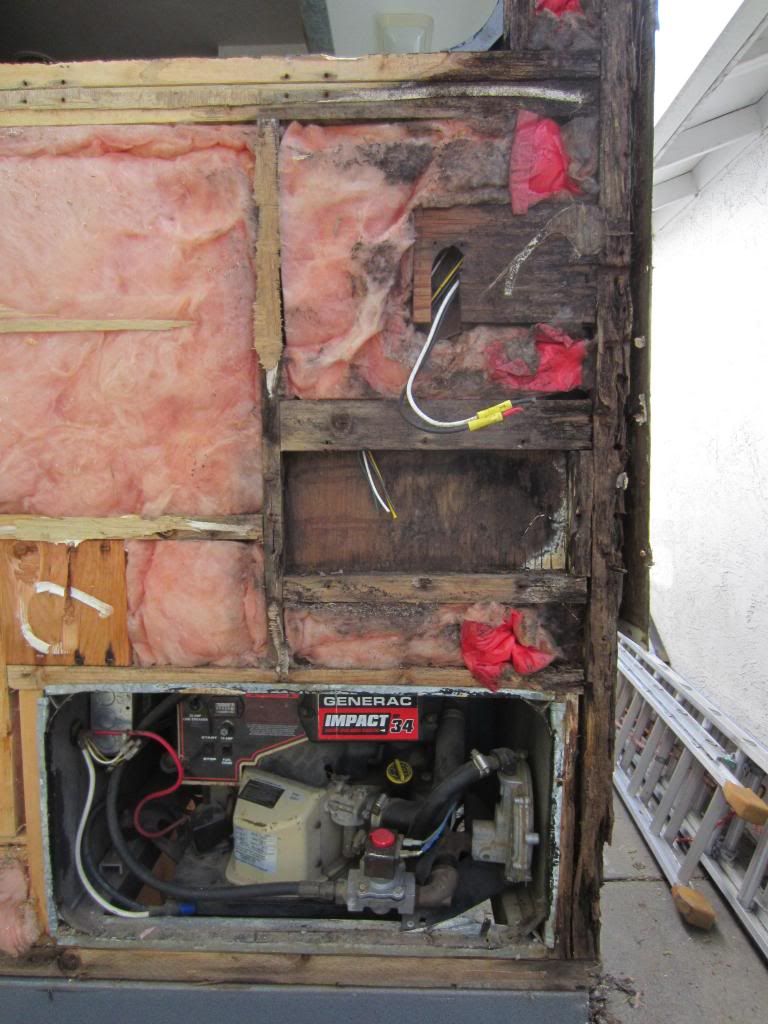
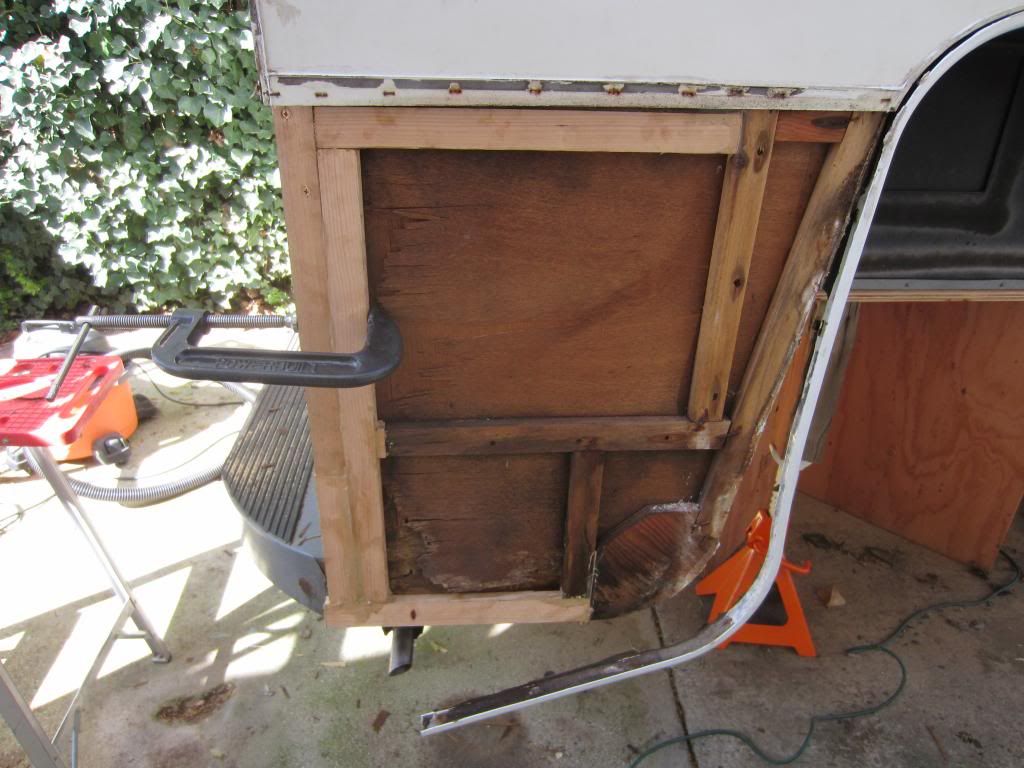
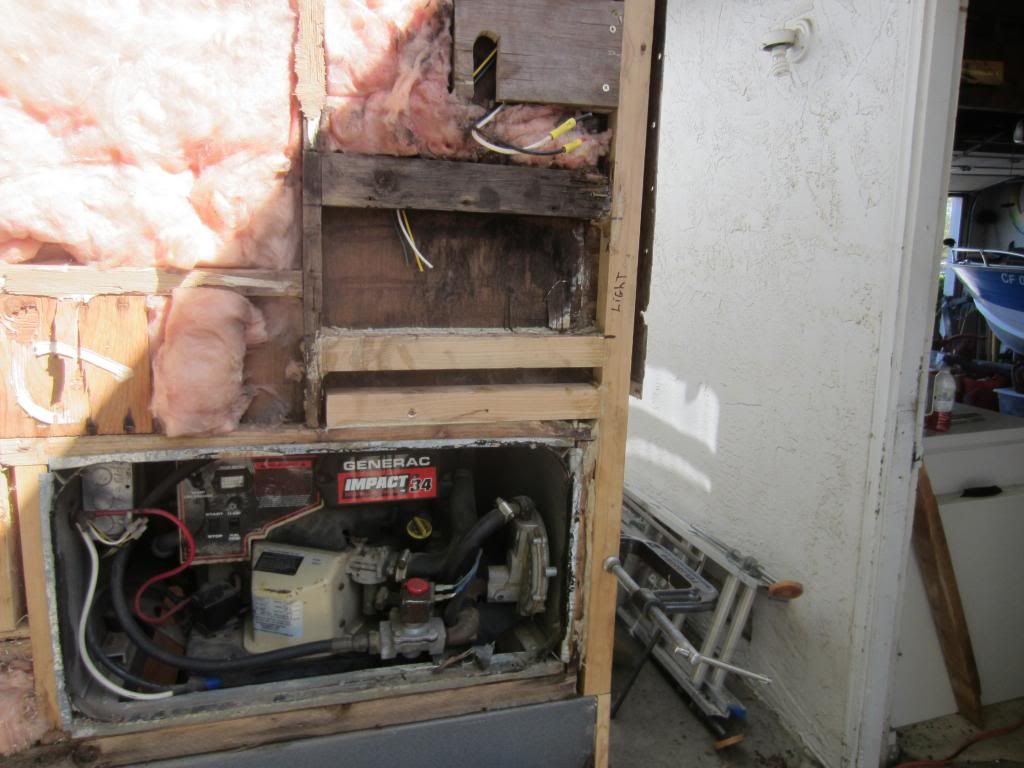
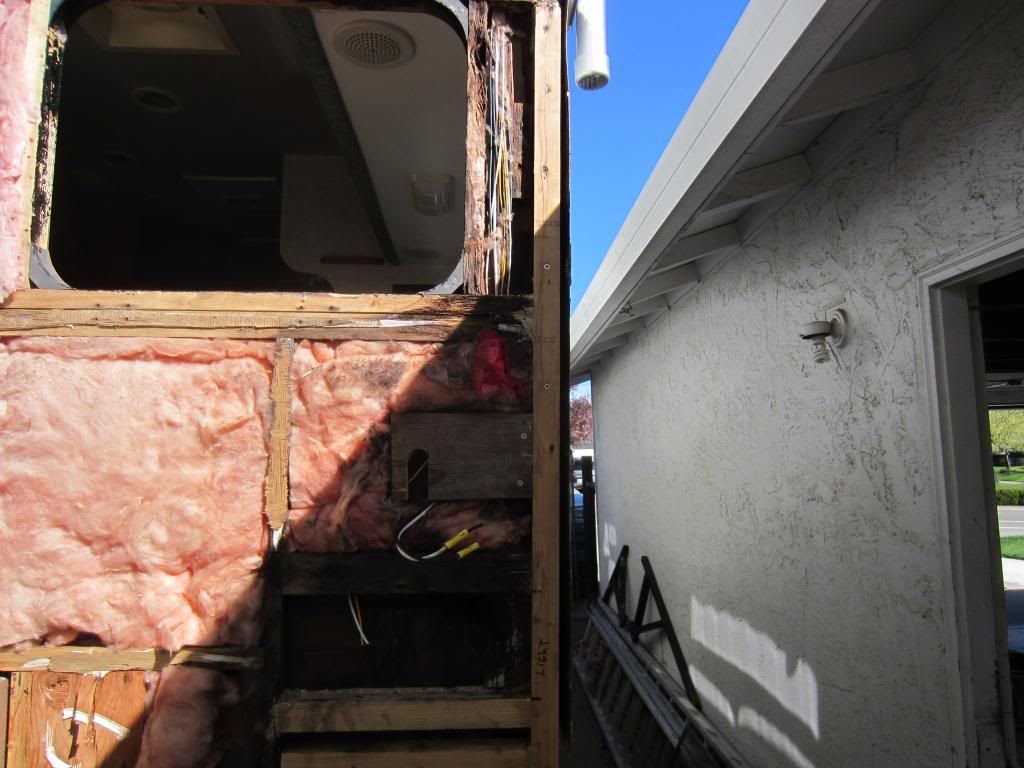


I will post more as I go. I do have a question if anyone knows a good way to pull all the thin plywood off the back of the laminate so I can redo it. I will take pics of it tomorrow.
2007 chevy 2500 HD 6.0 longbed
2015 Eagle HT 28.5 5th wheel
tucker the fishing dog
12 REPLIES 12

starcraft69
Explorer
Explorer
I am at about a month due to weather and work and turkey season. I should have been done by now but almost. I have about a day to day and a half left. Maybe next week Im getting A honey do list done for Easter.
2007 chevy 2500 HD 6.0 longbed
2015 Eagle HT 28.5 5th wheel
tucker the fishing dog

Joe417
Explorer
Explorer
What is your length of time from start to where you are. It's starting to look good again.

Your posts are over the past month.

I've done a few and I end up taking 3 months worth of weekend to complete something ""this simple"". Am I too slow or are you just fast.

The wife would prefer I pay someone but I like knowing what I have when I'm finished.
Joe and Evelyn

starcraft69
Explorer
Explorer
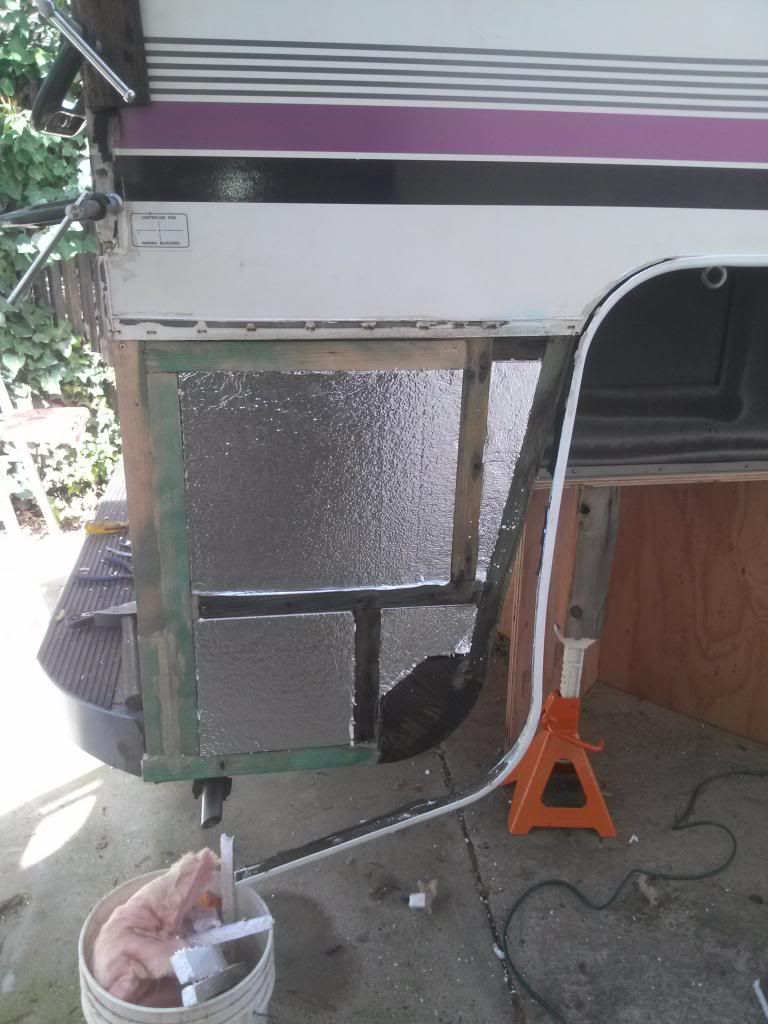
Now for the left side repair as you can see much less dry rot but still in need of repair.


I am still working on a few more things but almost done
2007 chevy 2500 HD 6.0 longbed
2015 Eagle HT 28.5 5th wheel
tucker the fishing dog

Joe417
Explorer
Explorer
I'm not sure of the facts, but I've been told not to allow Aluminum to come into contact with the copper based preservatives,as it will cause severe corrosion.

Since it looks like you are all fiberglass and wood you should be good.
Joe and Evelyn

billyray50
Explorer
Explorer
Great job. Thanks for update and Pics.

starcraft69
Explorer
Explorer
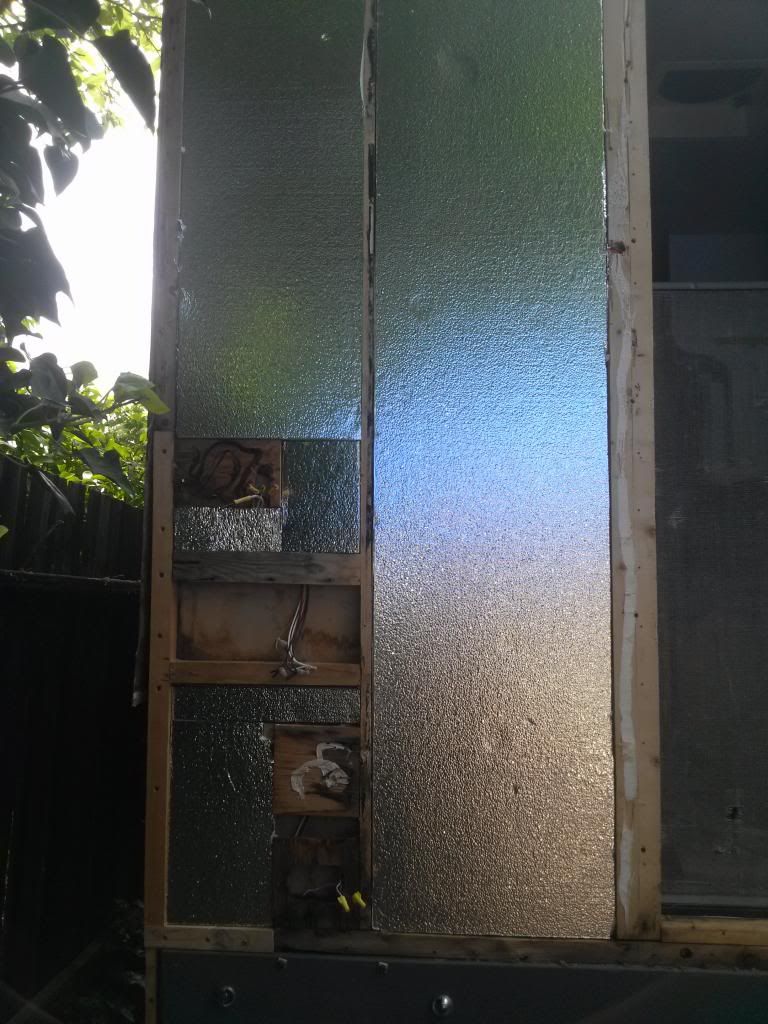
Well I got a little more done today. I finished framing new wood in and added second coat of copper green. I also cut and installed new insulation. Tomorrow I will be getting the wood hardener applied and start working on the laminate prep for install.


2007 chevy 2500 HD 6.0 longbed
2015 Eagle HT 28.5 5th wheel
tucker the fishing dog

starcraft69
Explorer
Explorer
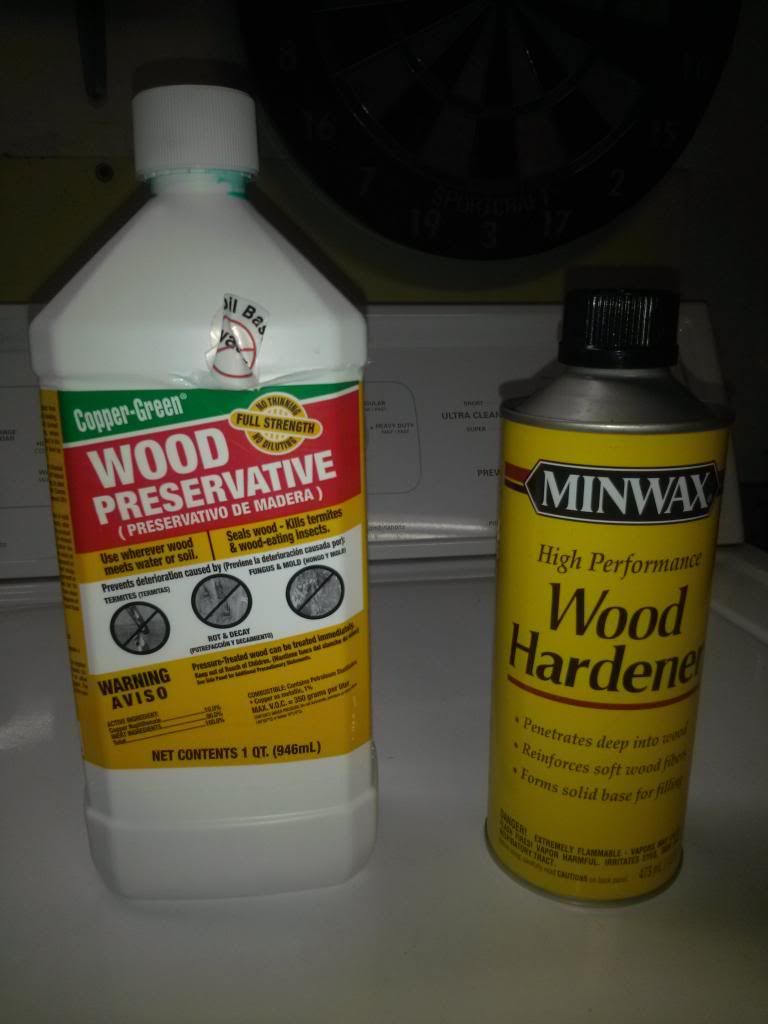
Just a quick update I used copper green and minwax wood hardener instead of Git-Rot. Its about half the price and a local RV repair told me its how they do the same repairs. I applied copper green today and worked on stripping the lauan of the wing. I will apply second coat of copper green tomorrow and put in the insulation board. Not really much to take pics today but I will tomorrow when much more progress.

2007 chevy 2500 HD 6.0 longbed
2015 Eagle HT 28.5 5th wheel
tucker the fishing dog

starcraft69
Explorer
Explorer
Thanks guys on info to remove the lauan backing. I will be using Git-Rot on much of the wood, It is hard to decide wear to stop on the tear down. It looks like I will not have to tear the sides off just the back. I will be working on it a little more today and will update with more pics.
2007 chevy 2500 HD 6.0 longbed
2015 Eagle HT 28.5 5th wheel
tucker the fishing dog

NRALIFR
Explorer
Explorer
Goodness! That's what I was afraid I'd find when I started the skirt replacement on mine. Fortunately, the rot didn't extend up into the walls. Rebuilding a camper like this without totally destroying it is almost an art. You have to constantly evaluate how far you're going to take your repairs, and the implications of removing that "next piece".

Before closing the walls back up, I'd recommend replacing all of the fiberglass insulation with pink or blue foam board. It doesn't absorb water like the fiberglass, and probably has a better R value. It's easy to cut with a box cutter, or you can cut it on a table-saw like I did and get them perfectly sized to the voids they fit in.

If you have a swimming pool you might try putting the skin panel in it to help remove the lauan backing. Otherwise, keeping it wet somehow is going to be your best bet.

On my repair, I've found that the two most useful tools have been my Rockwell Sonicrafter and my Porter-Cable heatgun. A heatgun may also help getting the plywood backing off the filon.

Good luck with the rest of the repair.

:):)
2001 Lance 1121 on a 2016 F450 โ€˜Scuse me while I whinge.
And for all you Scooby-Doo and Yosemite Sam typesโ€ฆโ€ฆโ€ฆ..Letโ€™s Go Brandon!!!

Artum_Snowbird
Explorer
Explorer
You could get some Git-Rot and put it onto the old wood you left plus the new wood you used to really help stop any further decay. Do the research and look at some of the videos, that stuff is really amazing.
Mike
2012 Winnebago Impulse Silver 26QP
2005 16.6 Double Eagle
2018 Jeep Wrangler JK
previously Snowbird Campers,
Triple E Motorhome and Fifth Wheel

Joe417
Explorer
Explorer
I remove the backing from the front cap and side skirts by laying them out on some heavy plywood and carefully scraping with standard paint scrapers. Soaking the wood over night using wet rags with a sheet of plastic over it to prevent it from drying helped to soften the wood that was left.

After getting most of the wood and cardboard off, I used Acetone to help dissolve some of the adhesive. (Not knowing the composition of your siding, you probably need to try the Acetone where it doesn't show to verify it doesn't affect your siding.) Then used a sander to remove more. I didn't remove every bit of the glue, just enough to allow the fiberglass to adhere smoothly to new plywood. Not positive but I think the original adhesive was polyurethane. I did use polyurethane to put it back together with.

On the right front side wall I had about 24" of de-lamination back to the cab over window. I removed all the loose plys back to good wood. The fiberglass still had a single ply adhered to it which I dried and then re-laminated with new 1/8" plywood.

It worked well and turned out to look great. It was a big job which took a lot of scraping and sanding but was well worth the effort.

Together, the wife and I spent probably 2 full days prepping the glass before glueing it back on.

Good luck on the project.
Joe and Evelyn

billyray50
Explorer
Explorer
Great pics and keep us updated. I have a little dry rot on the rear wings of my Lance. Not to bad though. Members like you with these posts and pics give me more confidence in attempting myself. Thanks and all the best with repair.