- Good Sam Community
- Groups
- Travel Trailer Group
- Forum
- Re: Photos of 100+ Mods & accessories to our Trail...
- Subscribe to RSS Feed
- Mark Topic as New
- Mark Topic as Read
- Float this Topic for Current User
- Bookmark
- Subscribe
- Mute
- Printer Friendly Page
Photos of 100+ Mods & accessories to our Trailer
- Mark as New
- Bookmark
- Subscribe
- Mute
- Subscribe to RSS Feed
- Permalink
- Report Inappropriate Content
Jan-05-2019 03:41 PM
However, making it our own, to fit our particular wants and needs, morphed into quite a list. We are right at about 110 items, but we are mostly done, there are less than 10 items on our "to do" list now.
Much of what we’ve done was learned here on the forum, much was a matter of looking at what was, and what we wanted it to be.
Sharing what we’ve done, along with photos, may be of some help to other newbies, just like we got help reading of other’s mods here.
It will take a bit of time to list them all, along with photos, but I will post as I have time.
In no particular order-
1. Put some advertising of our business on the outside. Good for taxes, to help offset some of the expenses. lol
Here we are our first weekend at the lake, with the factory graphics.
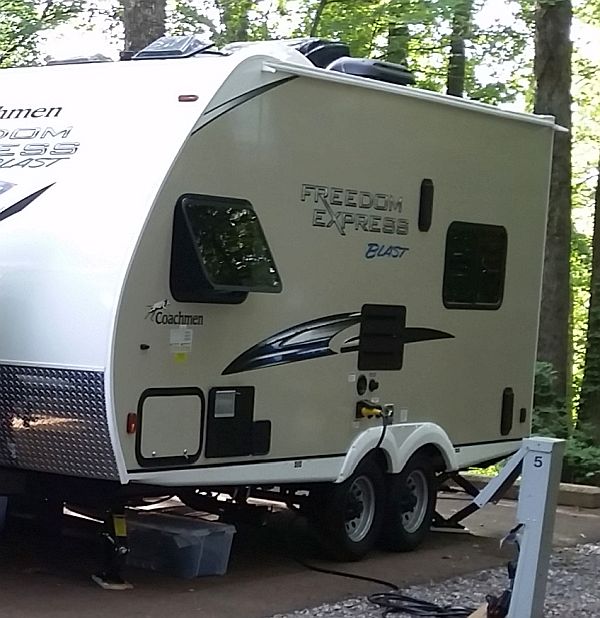
A week later a local shop had some nice graphics they applied to all four sides.

2. We did not like how the water pump pulsed. Both the sound and the variation in water pressure. I thought about doing a larger accumulator, but decided to give the little Shurflo a go.

It was a fairly easy installation. Accumulator, 4 fittings and hose all from Amazon Prime. Installed a cross-member and affixed it to that. Followed the directions on setting the bladder pressure.
The improvement is well worth it to us. No more variation in water pressure, and sound of the pump is no longer irritating.
3. One of the first things we realized we did not like...the bathroom door opened right into whoever was standing at the kitchen sink or stove. We got to where we had to call out a warning "Opening the door", before opening the door so we did not bang it into each other.
We removed the door and installed an accordion door. It was a bit of a PITA, but, WOW, it is really nice now!

4. Another area that was a bit tight was the shower. The OEM curtain has a slight arc in it, in a nod to giving more space...but it was still quite tight.
We got the Stromberg Carlson EXT-3542 Extend-A-Shower, again, from Amazon Prime and it gives quite a bit of extra space now. Do not feel crowded at all.

While we were at it Mary got a different shower curtain...don't remember what the old one looked like, but she says this one looks much better. lol
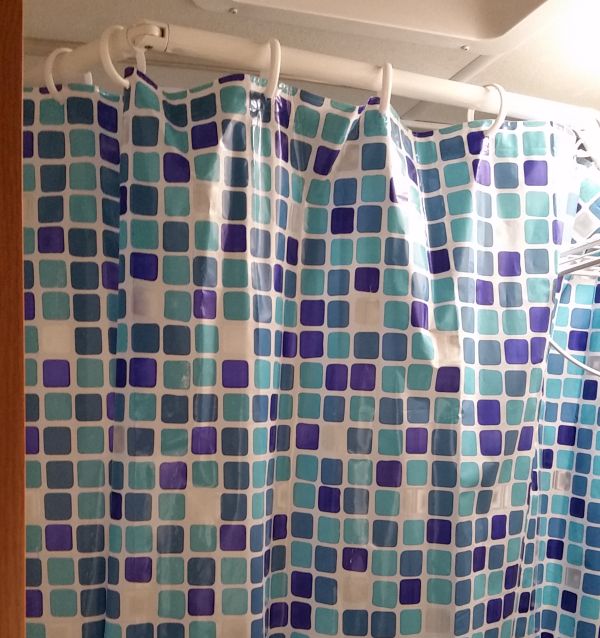
5. While the OEM showerhead did the job, we figured we'd give the Camco a shot. It was a good improvement, and less than $10....yep, Amazon Prime.

Oh, and in the above pic you can see a little hook that we placed on the shower wall. Quite handy.
6. We installed a shelf next to the shower, along with two hooks. Works well and used daily.

Will post more as time allows.
2018 Ford F150 3.5 EB HDPP 8' Bed - For Sale
2020 Ford F350 6.7 PSD 4X4 DRW CC LB
2019 Coachmen 271BL Toy Hauler
- Mark as New
- Bookmark
- Subscribe
- Mute
- Subscribe to RSS Feed
- Permalink
- Report Inappropriate Content
Feb-17-2019 02:55 PM
GrandpaKip wrote:
I have the same TPMS. Couple things I noticed. Looks like you have rubber valve stems. I had metal stems put in on my new rims and tires. You might want to keep an eye on the stems for cracking around the base from centrifugal force.
Also, as far as I know, you should start out the day with 50# in the tires.
Nice documentation of what you’ve done.
Yes, they are rubber and I am regularly checking them. When I change tires I will be going with metal stems.
Yes, each morning should start out at 50 #'s cold. But I knew that the pressure was only that low because it was so cold and that they would warm up very quickly and the PSI would be good.
If they had not I would have pulled over, broke out the compressor and added some air.
2018 Ford F150 3.5 EB HDPP 8' Bed - For Sale
2020 Ford F350 6.7 PSD 4X4 DRW CC LB
2019 Coachmen 271BL Toy Hauler
- Mark as New
- Bookmark
- Subscribe
- Mute
- Subscribe to RSS Feed
- Permalink
- Report Inappropriate Content
Feb-17-2019 02:50 PM
KM Rolling wrote:rangerjean wrote:
I love your shelf in the bathroom but don't get where it is and how did you fasten it on those thin walls. I am a great lover of command hooks so love your use of those kinds of fasteners
We're out camping right now. Later this week I'll get some pics of the wall anchors we used for the screws. The shelf is right above the toilet.
The shelf it above the toilet, as pictured below. It is high enough and back enough that there is no bumping into it.

The wall anchors are "togglers". Really pretty trick, never saw them before looking for something to work on these thin walls.
Here's a LINK to them.
Photo of them-

2018 Ford F150 3.5 EB HDPP 8' Bed - For Sale
2020 Ford F350 6.7 PSD 4X4 DRW CC LB
2019 Coachmen 271BL Toy Hauler
- Mark as New
- Bookmark
- Subscribe
- Mute
- Subscribe to RSS Feed
- Permalink
- Report Inappropriate Content
Feb-11-2019 05:55 AM
Also, as far as I know, you should start out the day with 50# in the tires.
Nice documentation of what you’ve done.
2015 Skyline Dart 214RB
2018 Silverado Double Cab 4x4
Andersen Hitch
- Mark as New
- Bookmark
- Subscribe
- Mute
- Subscribe to RSS Feed
- Permalink
- Report Inappropriate Content
Feb-10-2019 02:21 PM
65. An adapter to plug my 30 am cord into a home style (15 amp) outlet.
This is VERY handy, and is what I use for shore power in my driveway, or wherever else I may be that has a regular home style outlet.

66. A 50 amp to 30 amp adapter. Useful if I am at a spot that only has a working 50 amp outlet. I can plug into it, then plug my 30 amp cord in.

67. This allows me to plug a regular (home style) extension cord into a 30 amp outlet.
I've had to use this a couple of times where the 30 amp outlet was simply to far away to plug into. I ran a 15 amp extension cord, giving me the extra length, to my 30 amp trailer cord. Of course, I did not have the full 30 amps worth of power available, but 15 amps is better than none.

68. Awning stabilizer kit. We've carried this all around the country, into Mexico too. Never used it once. One day we may be happy we have it....we'll see.

69. Two 25 foot lengths of fresh water hose. We generally use just one of them, however, a couple of times having the second one has come in handy.

70, 71 & 72. Up top is our filter. We never put water into the trailer without running thru the filter.
Bottom left is a pressure regulator. 95% of the time we run off our fresh tank, but if we're hooked up to city water it goes through this regulator. Have no desire to let some random high pressure supply blow out our plumbing.
Bottom right is a simple elbow that we use so that the weight of the hose sticking out from the side of the trailer is not putting constant, leveraged, pressure on our city connection.
Little things that can keep a small problem from turning into a big problem.

73. Handy dandy gloves that keep a barrier between me and the nastiness of emptying the tanks and messing with the hoses.

74, 75, 76, 77 & 78. Containers that easily slide in and out of the cargo area. On one side is one with our fresh water hoses and water filter and connectors. Also in there are the various electric adapters.

The container on the other side has tools and spare parts. Also pictured is-
Silicone spray for stabilizers and all hinges
Electric drill for stabilizers
Leveling blocks
That's it until I take some more photos. Will get that done, and add on here as time allows.
2018 Ford F150 3.5 EB HDPP 8' Bed - For Sale
2020 Ford F350 6.7 PSD 4X4 DRW CC LB
2019 Coachmen 271BL Toy Hauler
- Mark as New
- Bookmark
- Subscribe
- Mute
- Subscribe to RSS Feed
- Permalink
- Report Inappropriate Content
Feb-10-2019 12:01 PM
Here are some more of our mods/accessories-
57. TPMS. After reading so much about blow-outs that folks have, and damage done, I decided it was a must to have a Tire Pressure Monitoring System. Also, wanted it to have a temperature read out.
What's weird is that I've been pulling trailers of different types for over 40 years and never thought about having one. I've only ever had one blow-out in those 40+ years.
It was in July about 15 years ago, in Arizona, pulling an overloaded tandem axle flatbead with a Dodge Cummins powered 2500. The trailer had an F150 on it, along with about 10k lbs of other stuff. It was a non-event. Tire blew, pulled to the side of the road, swapped it out with the spare and was on my way.
BUT, with all the horror stories I read, plus the TT's having a higher profile, I wanted one.
It was a relatively painless install. First up was putting the caps on each of the tires-

They are numbered, so you know which is which on the monitor in the cab-

There is a repeater, to boost the signal between the caps and the monitor in the cab. The repeater/booster is zip tied to the frame, near the batteries, and hooked up to the battery for power. There is a green LED on the booster to let you know that it is receiving power from the battery. (you can see the lit LED at the very left side of the photo below)

Part of the kit is a solar powered (it also has batteries) monitor. I ran it loose on the dash for awhile. After I was comfortable that I liked the system, and I knew where I could put it on the windshield, I installed it in the upper left.
It does not block my view, but it is always there for me to see what the temperature and PSI is of each tire.

It will also beep and flash if any one of the tires have a sudden loss of PSI or gets too hot.
I can attest to this working. In the initial setup you enter the Max PSI of the tire into the monitor. For my tires that is 50 psi. We left on a trip, where I had put all the tires (cold) to 50 psi when the ambient temp was 70 degrees.
One night on the trip we stayed in a rest stop and the temps had dropped to 18 degrees. When we were leaving out in the morning it had warmed up to a whopping 21 degrees. The difference in ambient temps had dropped the psi in the tires to 40 and the monitor was beeping and flashing.
I drove slowly for a few miles, letting the tires warm up. As soon as they all hit 42 psi the beeping and flashing stopped.
Within 30-40 minutes all the tires had warmed up enough that they were at 48-49 psi.
I'm very pleased with the system.
58. Another thing I did for the tires is put Ride-On tire sealant in each tire. Not only does it prevent leaking from small punctures, it also balances the tire.
It was an easy, no mess deal. Unlike slime or other sealants.
59. For a whopping $60 I got a HF motorcycle stand/wheel chock.
It sits on a throw rug on the rubber mat floor and I can drive the bike right on to it.
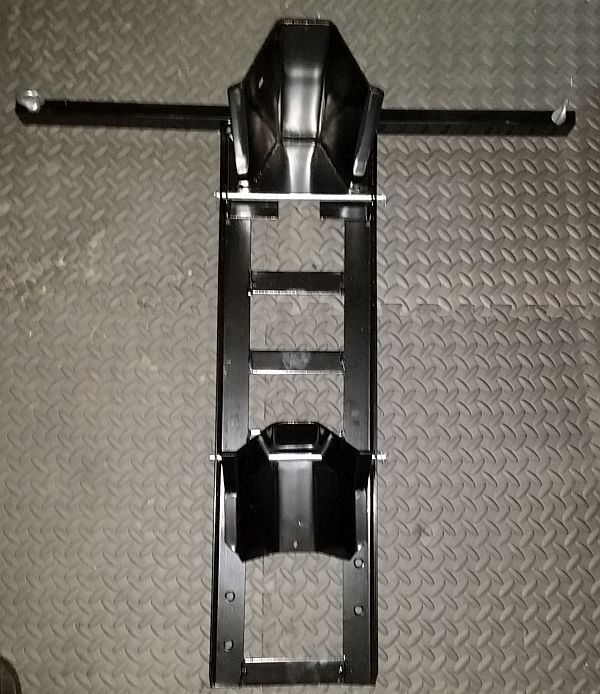

Since the bike is strapped to the tie-downs in the trailer floor, I have found no need to secure the chock at all.
60. Put some MaxxAir vent covers over our to OEM vents. This allows us to have the vents open while it is raining without it raining INTO the trailer.
We can leave the vents open while gone from the trailer, or while sleeping, and not be concerned about if it will start raining or snowing. Makes life simpler! 🙂

61. This little "Save-a-Step" adjustable brace makes a very nice improvement. Keeps the step solid and also reduces trailer movement when stepping into the trailer.

62 & 63. To make washing the trailer easier, we got a telescoping brush. It can be used just to dip into a bucket, you can also hook a hose to the end of it.
Makes for quick work of giving the trailer a wash.
Also pictured are wheel chocks that we have for each side of the trailer.
Collapsed-

Extended-

64. Also about washing the trailer. We use the McKee's 37 Sio2 wash. It is very foamy, and also has a small amount of ceramic in it to give some protection and a brighter look.
This has worked very well for us, enhancing the look AND making less stick to the surface, resulting in easier cleaning.

More mods coming soon.
2018 Ford F150 3.5 EB HDPP 8' Bed - For Sale
2020 Ford F350 6.7 PSD 4X4 DRW CC LB
2019 Coachmen 271BL Toy Hauler
- Mark as New
- Bookmark
- Subscribe
- Mute
- Subscribe to RSS Feed
- Permalink
- Report Inappropriate Content
Jan-26-2019 04:12 PM
49. We ran wire from our fuse box, under the padded floor, and then up the wall over to our USB/Power Station.
To make it neat, protected, and a bit less obtrusive looking we used a cable concealer kit.
A photo with the trash can moved to see it better...

...and how it looks normally. We are happy with it, and it was far easier/better than drilling and pulling wires thru the ceiling.

50. A Fabreeze Plugin air freshener. Works off 120v

51. This citronella candle works pretty good at keeping the mosquito's away...if we're close enough to it. lol

52. This is a small and relatively low wattage hair dryer...

...On high it pulls 1000 watts, but on low it only pulls 500 watts, which is low enough to run off our small inverter.

53. After a fair amount of looking around, Mary got this HoLife wet/dry "dustbuster". It is quite helpful at keeping things clean. Charges off 120v and runs about 30 minutes (far more than needed in a typical week) off that charge.

54. This 12" "Lazy Susan" is very handy. We put our vitamins/supplements on there, and store it on the shelf we made...

...then can pull it out and access everything easily. Amazingly, going down the road, everything stays put on its' non-slip surface.

55. After very little use we noticed that some of the support rails on the underside of the fold up couch were starting to wear holes in the covering.
We took some marine grade vinyl and zip tied it around the offending rails, patched a couple of spots that had started to wear through...

...and now over 8000 miles of travel later, zero wear. :thumb:

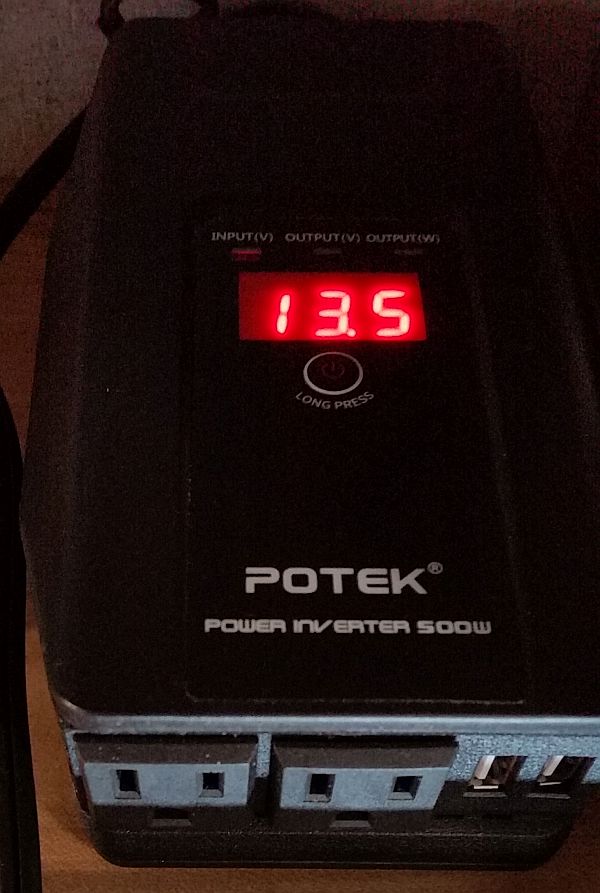
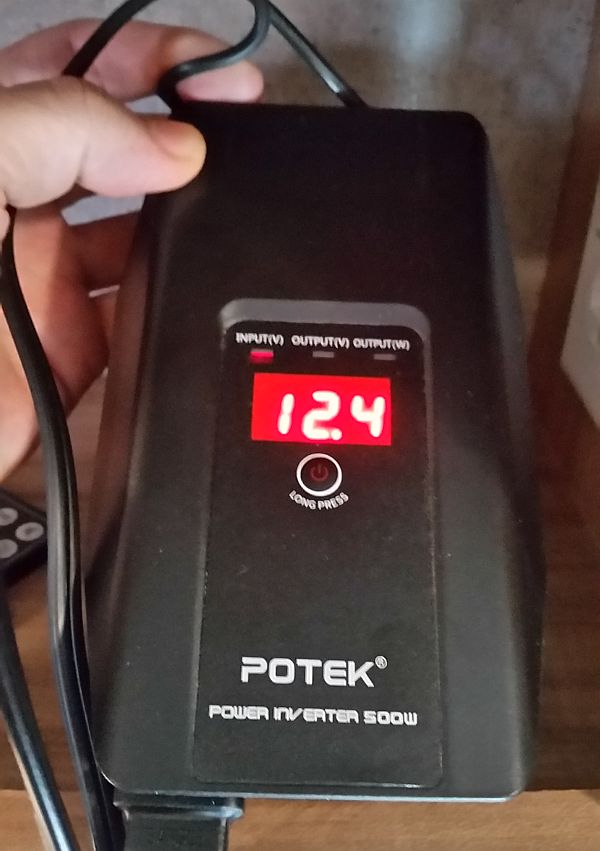
56. Last one for today- Our quiet (no fan) small inverter. It sits on the shelf above the power station, and below the TV. I like that it has a digital readout-
1- AC Voltage out

2- How many watts are being pulled by whatever is plugged in. (this is our TV at normal volume, only pulling 18 watts)

3- DC voltage being supplied TO the inverter. It is at 13.5v because shore power is connected, giving the batteries a maintenance charge.
4- DC voltage being supplied to the inverter from the batteries with no shore power, and a normal load on them.
Besides this inverter having two 120v outlets, it also has two USB charging ports.
It also came with two ways to power it...a 12v power point plug (which is what we normally use) and also battery clamps, so it can be hooked directly to a 12 volt battery.
Got plenty more, have to take some more pics. Will do so and post up as time allows.
2018 Ford F150 3.5 EB HDPP 8' Bed - For Sale
2020 Ford F350 6.7 PSD 4X4 DRW CC LB
2019 Coachmen 271BL Toy Hauler
- Mark as New
- Bookmark
- Subscribe
- Mute
- Subscribe to RSS Feed
- Permalink
- Report Inappropriate Content
Jan-26-2019 03:34 PM
rangerjean wrote:
I love your shelf in the bathroom but don't get where it is and how did you fasten it on those thin walls. I am a great lover of command hooks so love your use of those kinds of fasteners
We're out camping right now. Later this week I'll get some pics of the wall anchors we used for the screws. The shelf is right above the toilet.
2018 Ford F150 3.5 EB HDPP 8' Bed - For Sale
2020 Ford F350 6.7 PSD 4X4 DRW CC LB
2019 Coachmen 271BL Toy Hauler
- Mark as New
- Bookmark
- Subscribe
- Mute
- Subscribe to RSS Feed
- Permalink
- Report Inappropriate Content
Jan-26-2019 12:14 PM
- Mark as New
- Bookmark
- Subscribe
- Mute
- Subscribe to RSS Feed
- Permalink
- Report Inappropriate Content
Jan-25-2019 01:28 PM
2015 Freedom Express 246RKS
- Mark as New
- Bookmark
- Subscribe
- Mute
- Subscribe to RSS Feed
- Permalink
- Report Inappropriate Content
Jan-20-2019 03:01 PM

41. Digital Temp & Humidity Gauge. This is part of a wireless kit that we have at our home. The main station reads 6 different units like this one.
Each unit displays the temp and humidity, and the same info is displayed on the main station that Mary keeps on the kitchen counter.
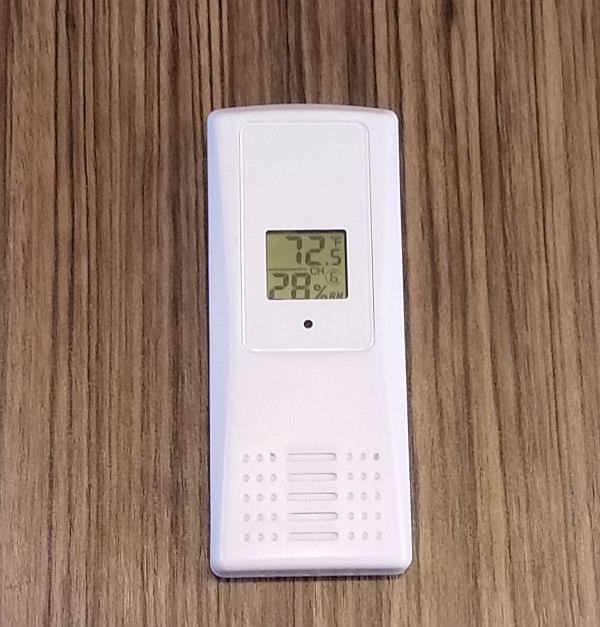
btw, it is a toasty 72* inside, and 29* outside. 🙂
42. When we have shore power/generator power, this is our main source of heat. An oil filled radiator with a small fan blowing across it.
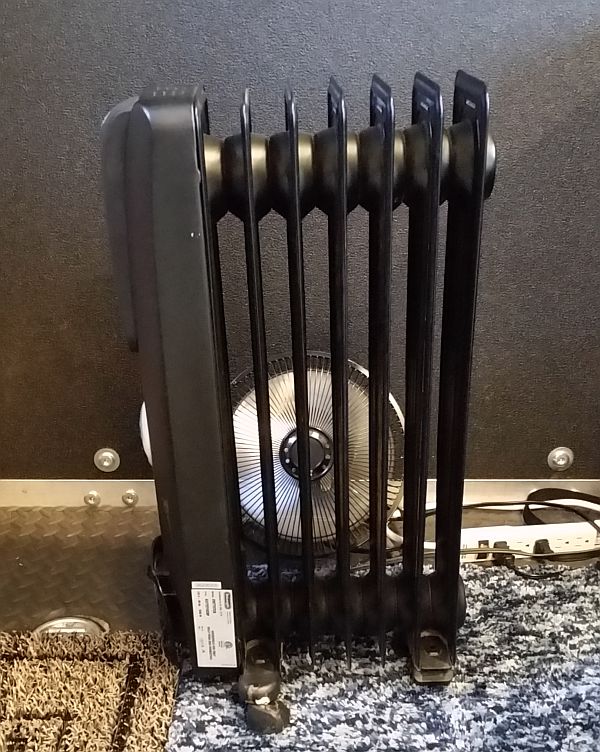
When the rig is in the driveway we are plugged into shore power. If we are stationary for more than a day with shore power or the genny running, we use this.
For overnight stops we don't break this out, we use the propane furnace.
Also, this takes a while to heat everything up if starting from cold, so we'll give it a head start by running the propane furnace to get it warm, then most of the time the oil filled radiator can maintain a nice temp...if it is so cold that the temp drops down, then the furnace will kick on.
43. This is a fan that we picked up that is multi-function:
Runs on regular 120 volt plug
Runs on 12 volt power point
Runs on built in lithium battery (which is recharged when plugged into 120v or 12v)
Runs on optional "D" batteries
It has a USB port to plug devices into to charge them
It has a Low and High Speed
While it has all the above options, and is lightweight, it does not push as much air as we thought it would. But it is definitely nice to get some air movement and we have used it quite a bit.

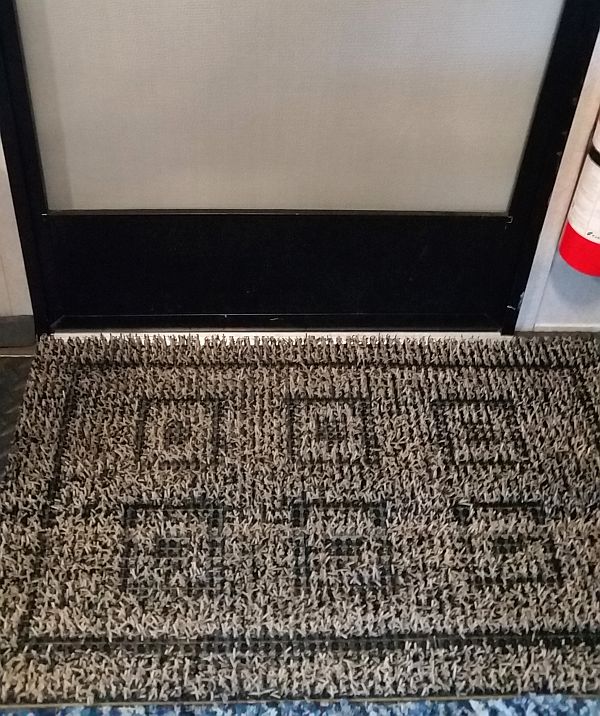
44. Door mat does a really good job at cutting down on how much dirt is tracked in.
45. Mary found these nice trays with handles. We each have one for our personal hygiene items. They store easily...

...are easy to pick up and move around (and find stuff in).

Sometimes we just put them in the shower (out of the way). Easy enough to move when shower is used.
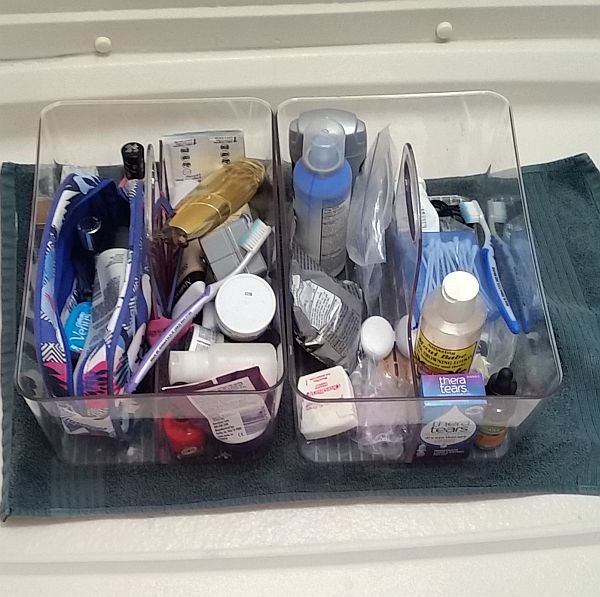
With the small bathroom we have, no cabinet and only the one shelf we put in, these trays have proved very convenient.
46. Another small item that is very convenient and has saved time looking around...a key hook right inside the door.

47. Couple of crates sitting on the wheel well that we use as a catch-all. Amazingly, these stay in place and have never slid off the wheel well in over 7k miles of travel.

48. Fridge circulation fan. We've used this a couple of times. I think it is only really useful when the fridge for is starting to cool down. It helps it cool down faster. But since we keep the fridge going, pretty much all the time...not so needed. BUT, it does do a good job at accelerating the cool down time.

Will post more as I have time.
2018 Ford F150 3.5 EB HDPP 8' Bed - For Sale
2020 Ford F350 6.7 PSD 4X4 DRW CC LB
2019 Coachmen 271BL Toy Hauler
- Mark as New
- Bookmark
- Subscribe
- Mute
- Subscribe to RSS Feed
- Permalink
- Report Inappropriate Content
Jan-17-2019 08:42 AM
afidel wrote:
**** you, now I'm going to have to do the cabinet door mod, DW has hit her head on the doors over the front bed more than once and I can't see myself not doing it now that I know it can be done rather trivially.
You're welcome. :B
2018 Ford F150 3.5 EB HDPP 8' Bed - For Sale
2020 Ford F350 6.7 PSD 4X4 DRW CC LB
2019 Coachmen 271BL Toy Hauler
- Mark as New
- Bookmark
- Subscribe
- Mute
- Subscribe to RSS Feed
- Permalink
- Report Inappropriate Content
Jan-16-2019 12:23 PM
2015 GMC 1500 Sierra 4x4 5.3 3.42 full bed
Equalizer 10k WDH
- Mark as New
- Bookmark
- Subscribe
- Mute
- Subscribe to RSS Feed
- Permalink
- Report Inappropriate Content
Jan-15-2019 02:19 PM
So we moved the hinges to the top, moved the handles to the bottom...

...and added spring loaded door struts to keep them open.

The difference is night and day. Before we had to back up to keep the doors from hitting our face as we opened them. Then while they were open they were sitting out in the walkway at face level.
Now they can sit open above head level, not blocking anything.
35. While working on the cupboards we also added shelves and non-slip inserts. These allow us to use all the space without having to stack and un-stack to get to something.

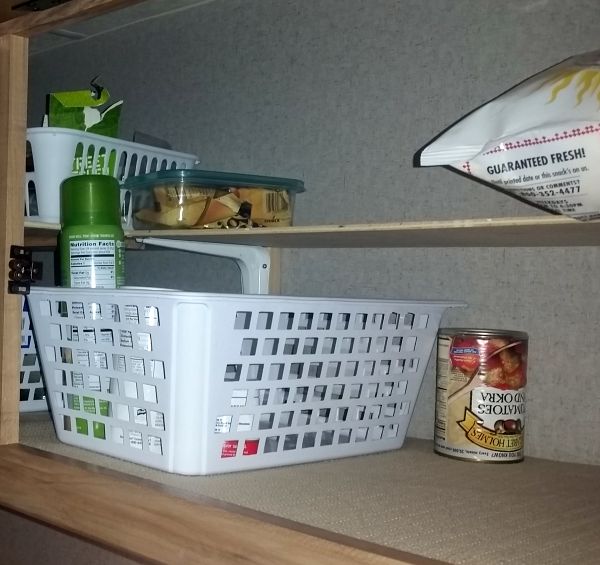
Much Better!
36. While in the shelf making mode...we put this one at the head of the bed. It is a nice little alcove, but it is 3 feet tall, by putting this shelf in the middle we have much more usable space.

37. While we were at it we put Two More shelves here...at the heights that worked for us on what we wanted to use them for...effectively doubling our usable space.

38. Below the microwave is a cupboard door. It had a false wall set in at an angle. This resulted in the available storage space angling from 4" deep to 10" deep. Not really very useful.
I know why they did it...it was an easy way to wall off the propane hose that is routed up to the stove. But they way they did it really wasted a bunch of space.
I moved the wall back a good distance. I also put a foam noodle around the hose to give it some protection.
We now have a space that is 16" deep. Much better!

39. Since we have been doing a lot of cold weather traveling, we picked up this little gem. A DampRid. It is doing a nice job at helping keep it dry inside.
You can see the liquid in the bottom that has collected.
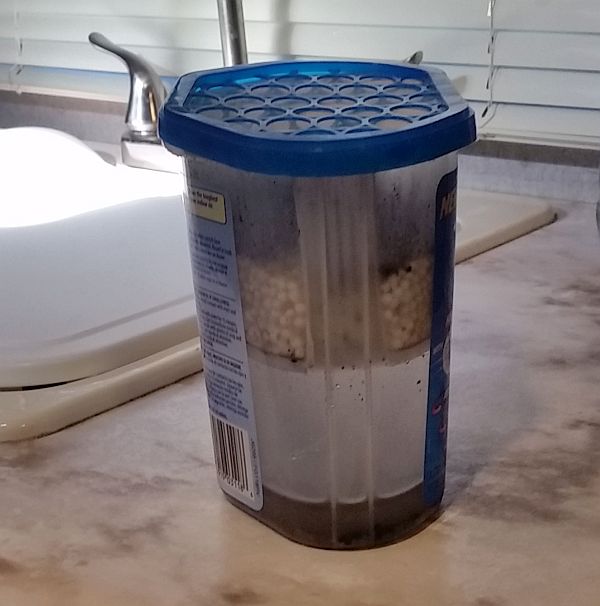
We thought we may need a dehumidifier, but between running our heat, keeping a ceiling vent cracked and this, we are not having any condensation inside.
40. The trailer came with a nice clock...I thought...but Mary could hear it ticking at night. Yep, she's got much better hearing than I.
So this clock is silent, and now in place of the OEM clock.

More mods coming as I have time to take pics and post them up.
2018 Ford F150 3.5 EB HDPP 8' Bed - For Sale
2020 Ford F350 6.7 PSD 4X4 DRW CC LB
2019 Coachmen 271BL Toy Hauler
- Mark as New
- Bookmark
- Subscribe
- Mute
- Subscribe to RSS Feed
- Permalink
- Report Inappropriate Content
Jan-13-2019 08:19 AM
Continuing with a few more mods on the outside-
28 & 29. The trailer came with one 12 volt/100 amp hour lead acid battery. It was centered in the battery tray behind the propane tanks.
I purchased a second 12 volt/100 amp hour battery and case, moved the existing one over and put in the second one.
Also, in the photo below, in the lower left corner there is a small white box zip tied to the battery tray. That is the TPMS signal repeater.

I thought about adding a third battery to the tray. But wanted to see how we would do with these two first. The two work well. We can easily go 3 days of normal use without firing up the generator or plugging into shore power, just with these two batts.
Power used by the batteries-
Interior & exterior LED lighting
Awning
Tank & pipe heaters
Vent fans
Water pump
Furnace fan
Fridge (even though it is propane, it still uses 12 volt power)
USB charging of multiple devices
Inverter to power TV and computer
We have used all of the above for multiple days, never dropping below 50%, so I think we're good for now.
30. The first 7-8 times out it was less than optimum with Mary being in the trailer with a level and me being outside getting everything level.
We purchased these two little gems. One is on the tongue for getting front to back level...

...and the other is on the front cap for getting side to side level.

31. We quickly discovered that easy access AND Not having the poop tube in a container in the cargo area were both preferable.
Purchase & installation of a Valterra Products Inc Black 34"-60" hose carrier was easier and faster than making one out of PVC.
I did need to spend 20 minutes fabbing a bracket for the far side mount. The unit is not long enough to go from one side to the other.

Note: Even though the hinged end caps have a keeper, keeping the ends closed...they are plastic, so we added a carabiner clip on each side.
32. For grins and giggles I had my business partner pull the rig down the road with me riding in it.
I discovered that when 55 mph or faster that the pop out window at the front chatters a bit. This is because the wind is catching the leading edge of the window frame and pulling it out a bit, unseating it. It is enough that you can feel a good amount of air moving...and if it was raining, then water into the window frame and inside.
Solution was a bit of trim applied to the trailer side, right in front of the window. Now the air hits that and goes around. No more window leakage at speed.
Trim was applied with automotive grade double sided tape...same stuff used to hold emblems on autos and motorcycles.

While we were at it we put some of the same trim above the hinges on both cargo doors. Not sure how much protection it affords the hinges...but it can't hurt.

33. One of the first things we did was get a PROGRESSIVE INDUSTRIES SSP-30XL Surge Protector. It works.

Will post more mods soon!
2018 Ford F150 3.5 EB HDPP 8' Bed - For Sale
2020 Ford F350 6.7 PSD 4X4 DRW CC LB
2019 Coachmen 271BL Toy Hauler


