Sir_Ken
Jul 12, 2016Explorer
Improving Air Flow in Roof A/C vents.
After returning home from a 28 day road trip with my family, I felt that the air conditioner in my 2016 Thor Chateau 31E Class C was… lacking. The air coming out of the roof top unit was cold but the amount of air moving through the vents was less than impressive. The a/c unit is a 15000 btu and the RV has 12 roof vents that are cut into the ceiling.
I found a post, somewhere, on the subject that mentioned checking the divider inside the a/c that separates the return air and the cold air coming from the squirrel cage fan. I was not surprised to find that the divider in my a/c was indeed improperly installed by Thor. The divider had a misalignment of approximately 3/4". I repaired this and taped the divider into place, using aluminum tape, and completely separated the air return from the cold air from the squirrel cage fan.
I failed to check the air flow prior to this initial repair. I did check the air flow after the repair by way of my rifle kit's Kestrel 2500 Wind Meter.

Starting on the driver's side of the RV, closest to the front of the cab left to right, and working my way back checking each vent. I checked the vents with all of the remaining vents in the closed position. I would check the air flow, close the vent, move to the next one. I also made sure the quick cool vents were closed on the a/c unit itself.
Vent 1
10.3 mph
Vent 2
11.5 mph
Vent 3
9.8 mph
Vent 4
12.7 mph
Vent 5
9.9 mph
Vent 6
13.5 mph
Vent 7
11.4 mph
Vent 8
9.2 mph
Vent 9
10.5 mph
Vent 10
11.0 mph
Vent 11
11.4 mph
Vent 12
11.4 mph
Just the front vent of the quick cool setting.
14.3 mph
Just the rear vent of the quick cool setting.
13.5 mph
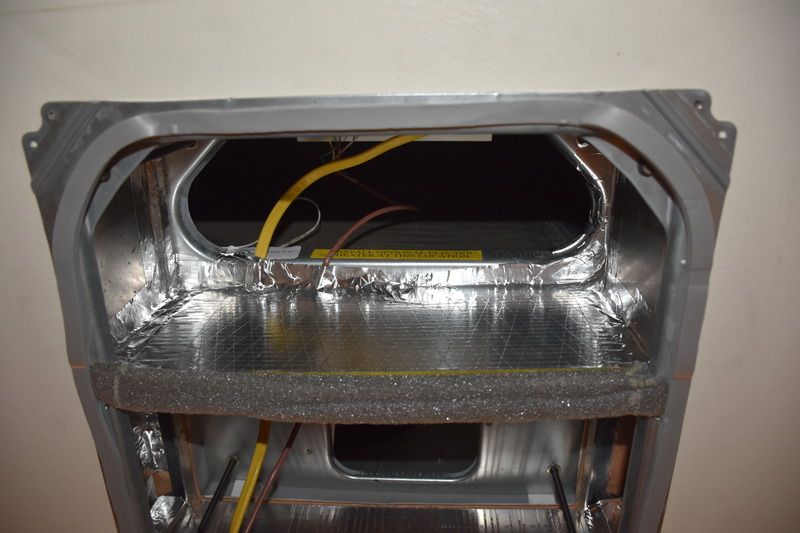
Next I wanted to work on smoothing the air flow into the duct work inside the ceiling. The transition inside the a/c unit was very abrupt and I felt that I could smooth the air flow as it entered the ducting on either side of the a/c unit.
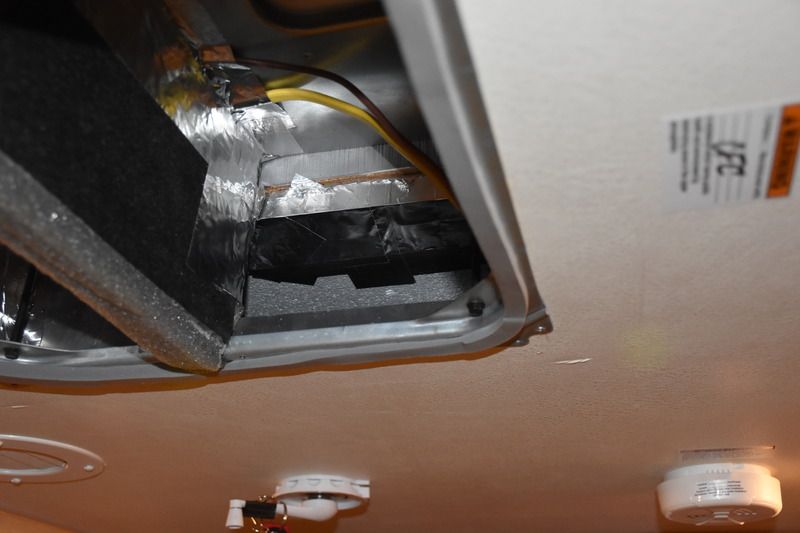
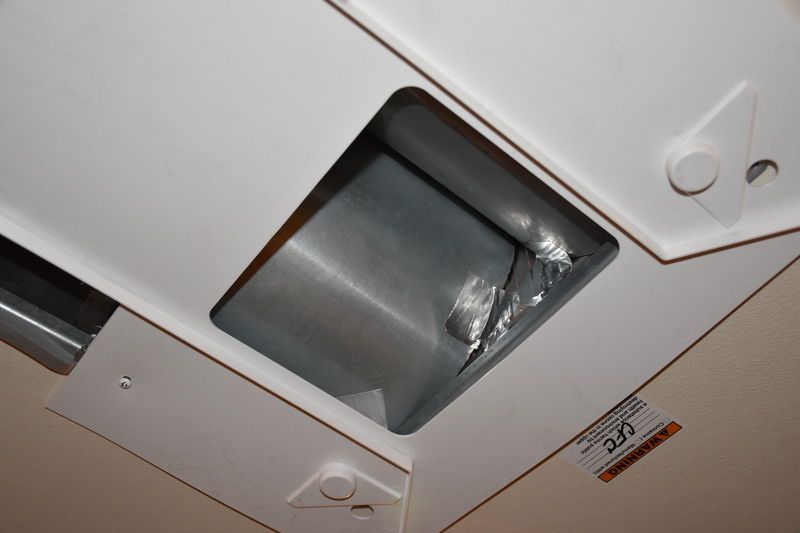
As you can see in the following photo, the company made plenty of room in the sides of the metal casing to streamline the air flow but that is as far as they went. The a/c was simply installed into the ceiling by Thor and no effort was made to alleviate the 90* turn the air was suppose to make prior to entering the ductwork.
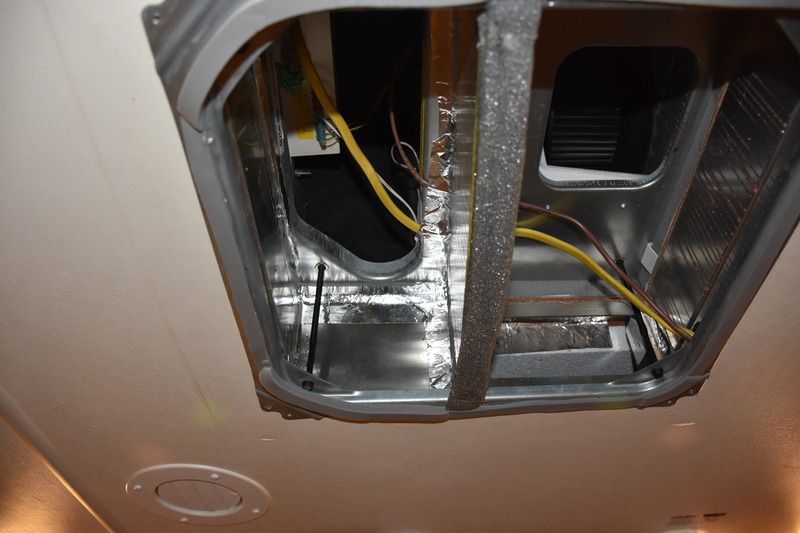
I proceeded to use the same aluminum tape I used to fix the initial issue to try and smooth the passageway that the air would travel as it entered the ducting.
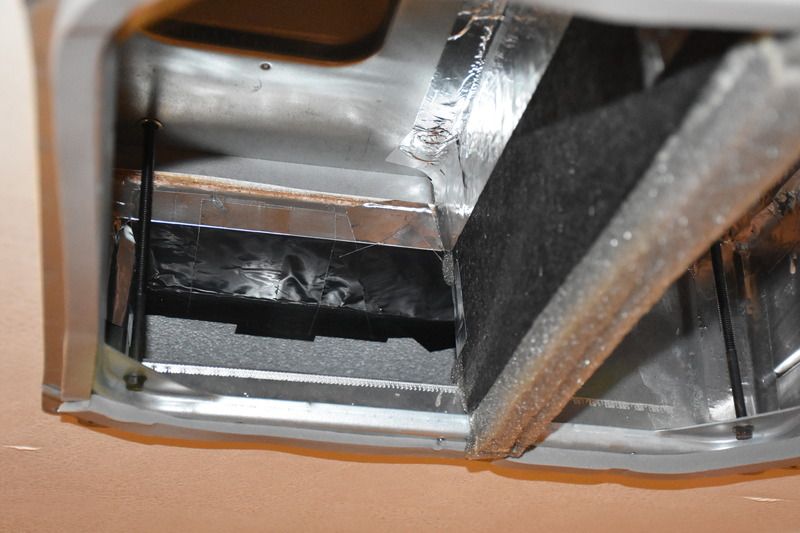
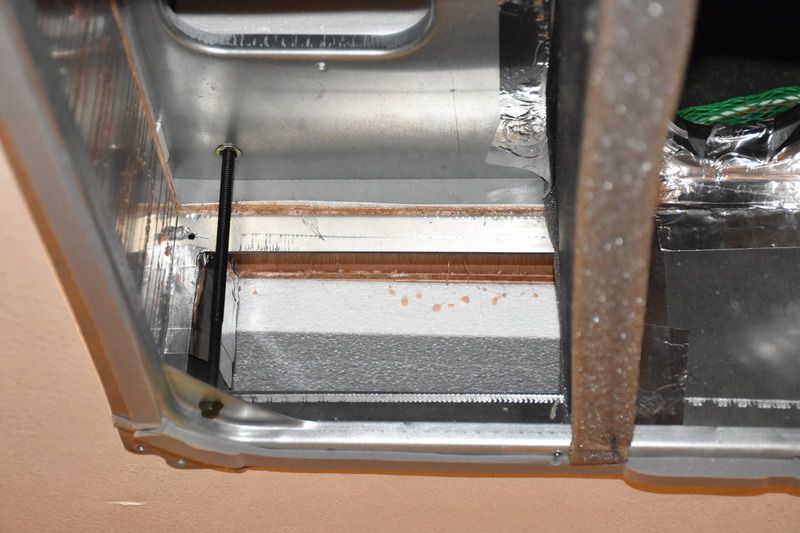
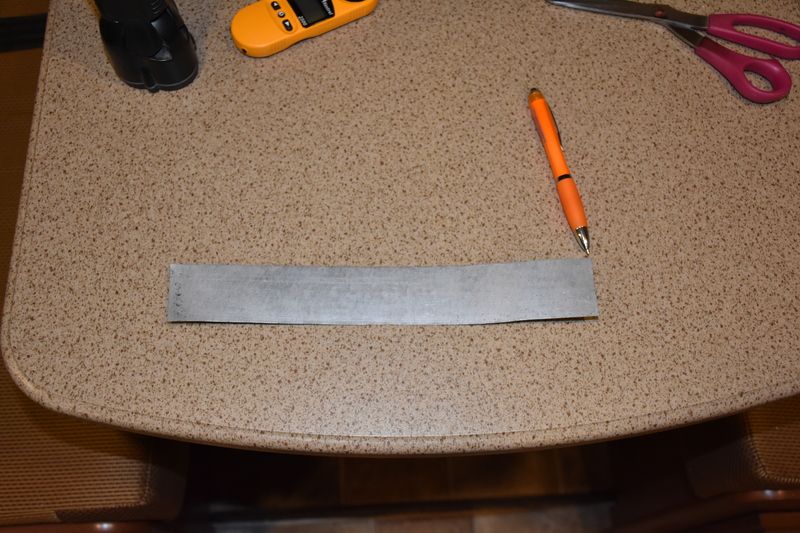
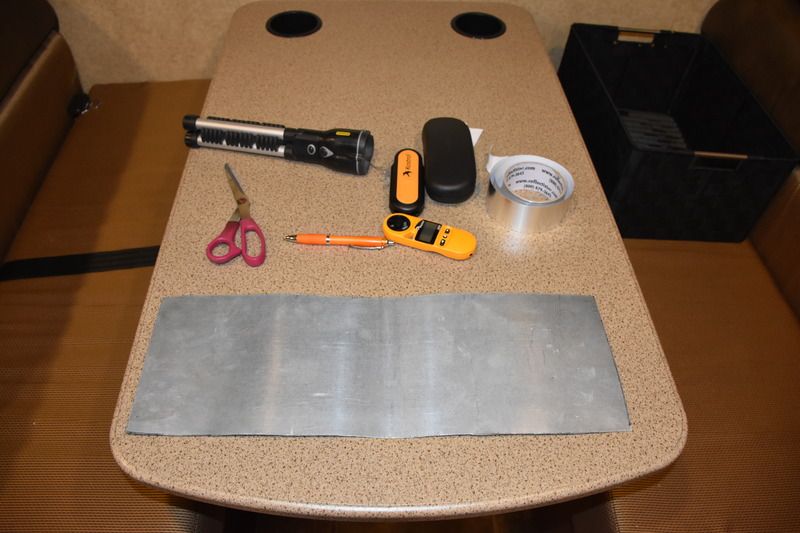
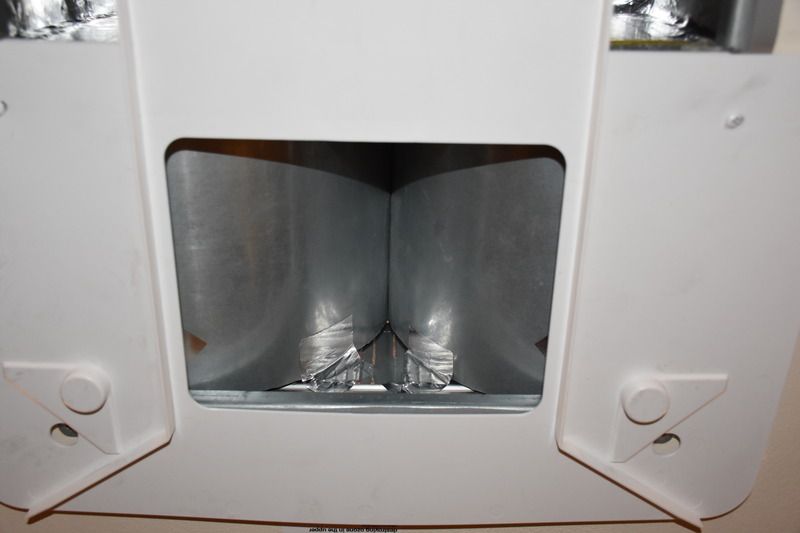
Next I cut flat metal ducting material in an effort to insert them into the ducting to help direct the air from the a/c unit. I measured the space between the upper and lower levels of the duct work and cut the metal to fit.
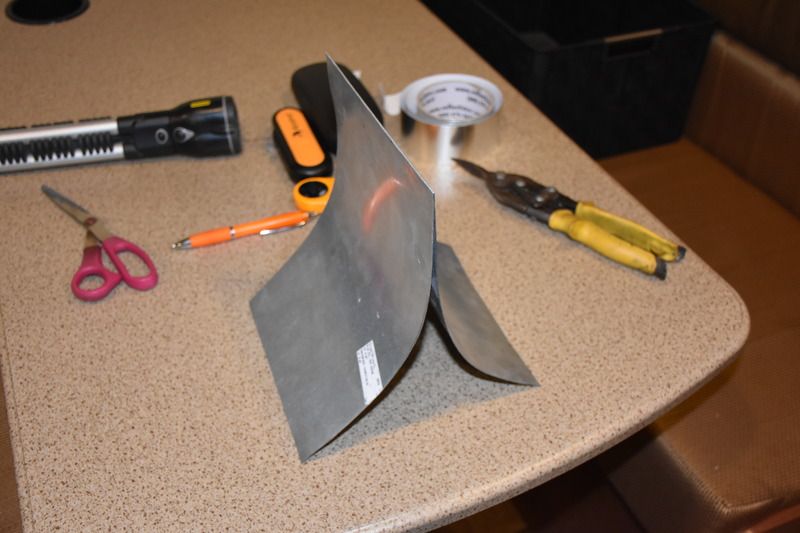
Next I shaped it into a splitter to help the air flow to the front and the rear of the RV. I made one of these for each side of the a/c ductwork.
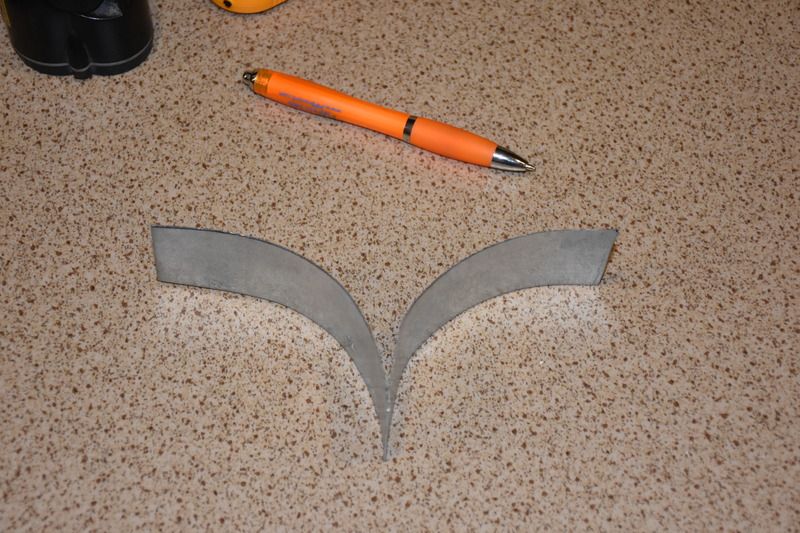
I taped these two diverters into place inside the ductwork on each side. Now, instead of the air exiting the a/c and entering the duct at a 90* angle, it would be directed forward and aft.
I reassembled the unit cover and rechecked my air flow at each vent as described earlier. The results are listed next.
Vent 1
11.0 mph INCREASE OF 6.79%
Vent 2 INCREASE OF 6.08%
12.2 mph
Vent 3 INCREASE OF 8.16%
10.6 mph
Vent 4 INCREASE OF 7.08%
13.6 mph
Vent 5 INCREASE OF 3.03%
10.2 mph
Vent 6 INCREASE OF 5.18%
14.2 mph
Vent 7 STAYED THE SAME
11.4 mph
Vent 8 INCREASE OF 19.56%
11.0 mph
Vent 9 DECREASE OF 2.85%
10.1 mph
Vent 10 INCREASE OF 0.90
11.1 mph
Vent 11 DECREASE OF 5.26%
10.8 mph
Vent 12 INCREASE OF 2.63%
11.7 mph
Nearly every vent picked up air speed, with an average improvement of 4.27% added air flow at each vent.
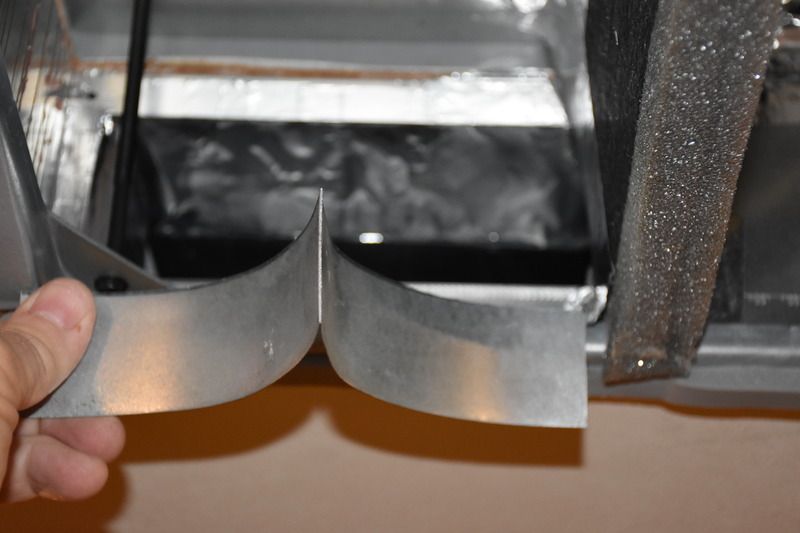
Next I wanted to try a splitter at the squirrel cage exit to smooth the transition from the a/c unit into the duct work. I measured the dimensions of the interior of the a/c unit and cut a piece of metal ducting to fit. Then folded it in an effort to help smooth out the air flow.
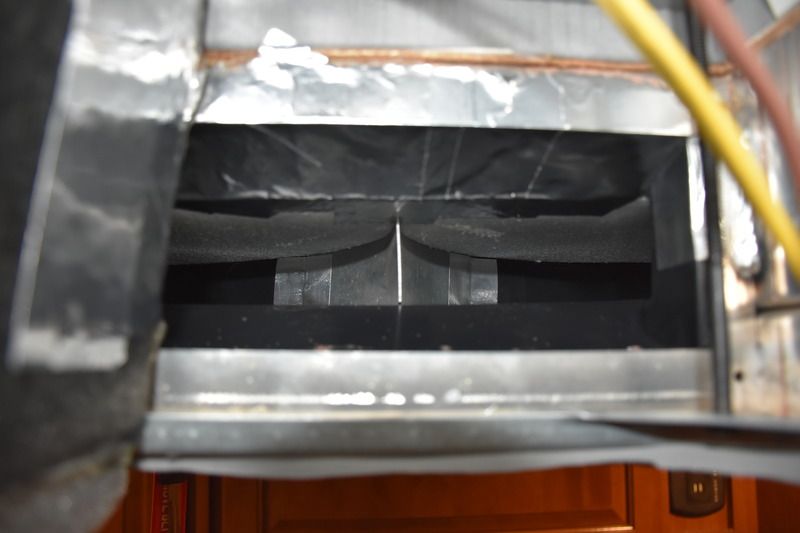
This was inserted at the squirrel cage fan exit and temporarily installed to split the cold air into the right and left ceiling ducts.
This addition provided an average of 1.10% increase in air flow at each vent.
It should be noted that this addition nearly deleted all the air flow at the front and rear vents of the quick cool feature of the a/c unit.
This last air diverter, inside the actual a/c unit, was removed as its benefits were negligible and actually made the a/c unit less efficient.
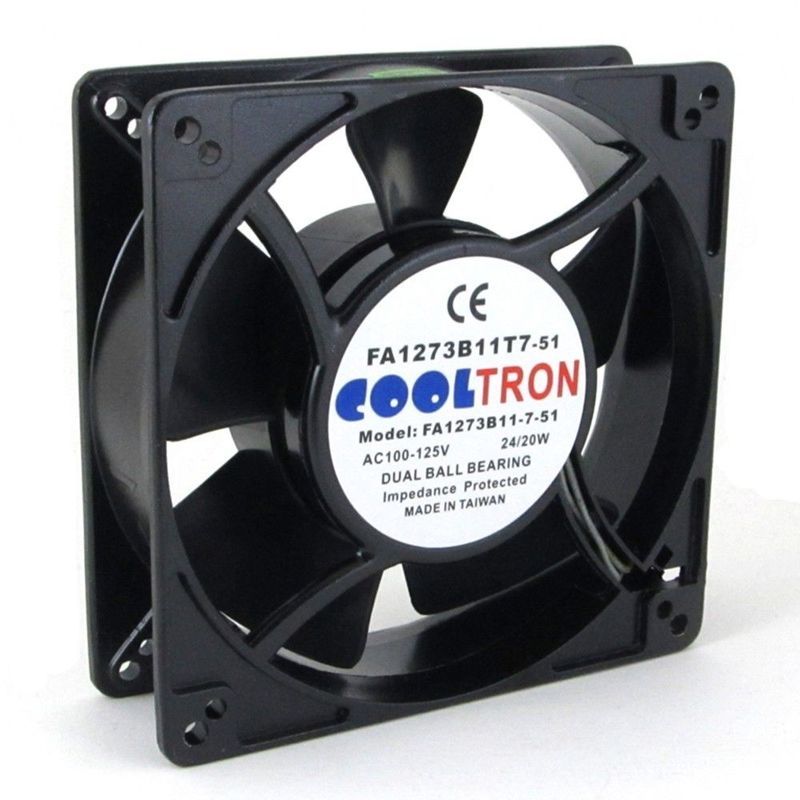
I have ordered and will be installing these 110V cooling fans inside the actual holes cut into the ceiling. The factory holes are 5" and these cooling fans are 127mm. I will remove the 'ears' from one side of the fan so that it will slide into the opening where the current vents are located. I may or may not remove all the ears so that the entire fan will fit into the ceiling openings and put the current vent cover in place to conceal the electric fan.
The ceiling duct will provide ample room to run the wiring back to the a/c unit to provide power. Each fan will have its own micro switch to turn on/off depending on the efficiency of this latest project.
I will update this thread or start a new one with the results of the install.
I found a post, somewhere, on the subject that mentioned checking the divider inside the a/c that separates the return air and the cold air coming from the squirrel cage fan. I was not surprised to find that the divider in my a/c was indeed improperly installed by Thor. The divider had a misalignment of approximately 3/4". I repaired this and taped the divider into place, using aluminum tape, and completely separated the air return from the cold air from the squirrel cage fan.
I failed to check the air flow prior to this initial repair. I did check the air flow after the repair by way of my rifle kit's Kestrel 2500 Wind Meter.
Starting on the driver's side of the RV, closest to the front of the cab left to right, and working my way back checking each vent. I checked the vents with all of the remaining vents in the closed position. I would check the air flow, close the vent, move to the next one. I also made sure the quick cool vents were closed on the a/c unit itself.
Vent 1
10.3 mph
Vent 2
11.5 mph
Vent 3
9.8 mph
Vent 4
12.7 mph
Vent 5
9.9 mph
Vent 6
13.5 mph
Vent 7
11.4 mph
Vent 8
9.2 mph
Vent 9
10.5 mph
Vent 10
11.0 mph
Vent 11
11.4 mph
Vent 12
11.4 mph
Just the front vent of the quick cool setting.
14.3 mph
Just the rear vent of the quick cool setting.
13.5 mph
Next I wanted to work on smoothing the air flow into the duct work inside the ceiling. The transition inside the a/c unit was very abrupt and I felt that I could smooth the air flow as it entered the ducting on either side of the a/c unit.
As you can see in the following photo, the company made plenty of room in the sides of the metal casing to streamline the air flow but that is as far as they went. The a/c was simply installed into the ceiling by Thor and no effort was made to alleviate the 90* turn the air was suppose to make prior to entering the ductwork.
I proceeded to use the same aluminum tape I used to fix the initial issue to try and smooth the passageway that the air would travel as it entered the ducting.
Next I cut flat metal ducting material in an effort to insert them into the ducting to help direct the air from the a/c unit. I measured the space between the upper and lower levels of the duct work and cut the metal to fit.
Next I shaped it into a splitter to help the air flow to the front and the rear of the RV. I made one of these for each side of the a/c ductwork.
I taped these two diverters into place inside the ductwork on each side. Now, instead of the air exiting the a/c and entering the duct at a 90* angle, it would be directed forward and aft.
I reassembled the unit cover and rechecked my air flow at each vent as described earlier. The results are listed next.
Vent 1
11.0 mph INCREASE OF 6.79%
Vent 2 INCREASE OF 6.08%
12.2 mph
Vent 3 INCREASE OF 8.16%
10.6 mph
Vent 4 INCREASE OF 7.08%
13.6 mph
Vent 5 INCREASE OF 3.03%
10.2 mph
Vent 6 INCREASE OF 5.18%
14.2 mph
Vent 7 STAYED THE SAME
11.4 mph
Vent 8 INCREASE OF 19.56%
11.0 mph
Vent 9 DECREASE OF 2.85%
10.1 mph
Vent 10 INCREASE OF 0.90
11.1 mph
Vent 11 DECREASE OF 5.26%
10.8 mph
Vent 12 INCREASE OF 2.63%
11.7 mph
Nearly every vent picked up air speed, with an average improvement of 4.27% added air flow at each vent.
Next I wanted to try a splitter at the squirrel cage exit to smooth the transition from the a/c unit into the duct work. I measured the dimensions of the interior of the a/c unit and cut a piece of metal ducting to fit. Then folded it in an effort to help smooth out the air flow.
This was inserted at the squirrel cage fan exit and temporarily installed to split the cold air into the right and left ceiling ducts.
This addition provided an average of 1.10% increase in air flow at each vent.
It should be noted that this addition nearly deleted all the air flow at the front and rear vents of the quick cool feature of the a/c unit.
This last air diverter, inside the actual a/c unit, was removed as its benefits were negligible and actually made the a/c unit less efficient.
I have ordered and will be installing these 110V cooling fans inside the actual holes cut into the ceiling. The factory holes are 5" and these cooling fans are 127mm. I will remove the 'ears' from one side of the fan so that it will slide into the opening where the current vents are located. I may or may not remove all the ears so that the entire fan will fit into the ceiling openings and put the current vent cover in place to conceal the electric fan.
The ceiling duct will provide ample room to run the wiring back to the a/c unit to provide power. Each fan will have its own micro switch to turn on/off depending on the efficiency of this latest project.
I will update this thread or start a new one with the results of the install.
Moderator edit to re-size pictures to forum recommended limit of 640px maximum width.