Forum Discussion

montanafos's avatar
montanafos
Explorer
Sep 07, 2015

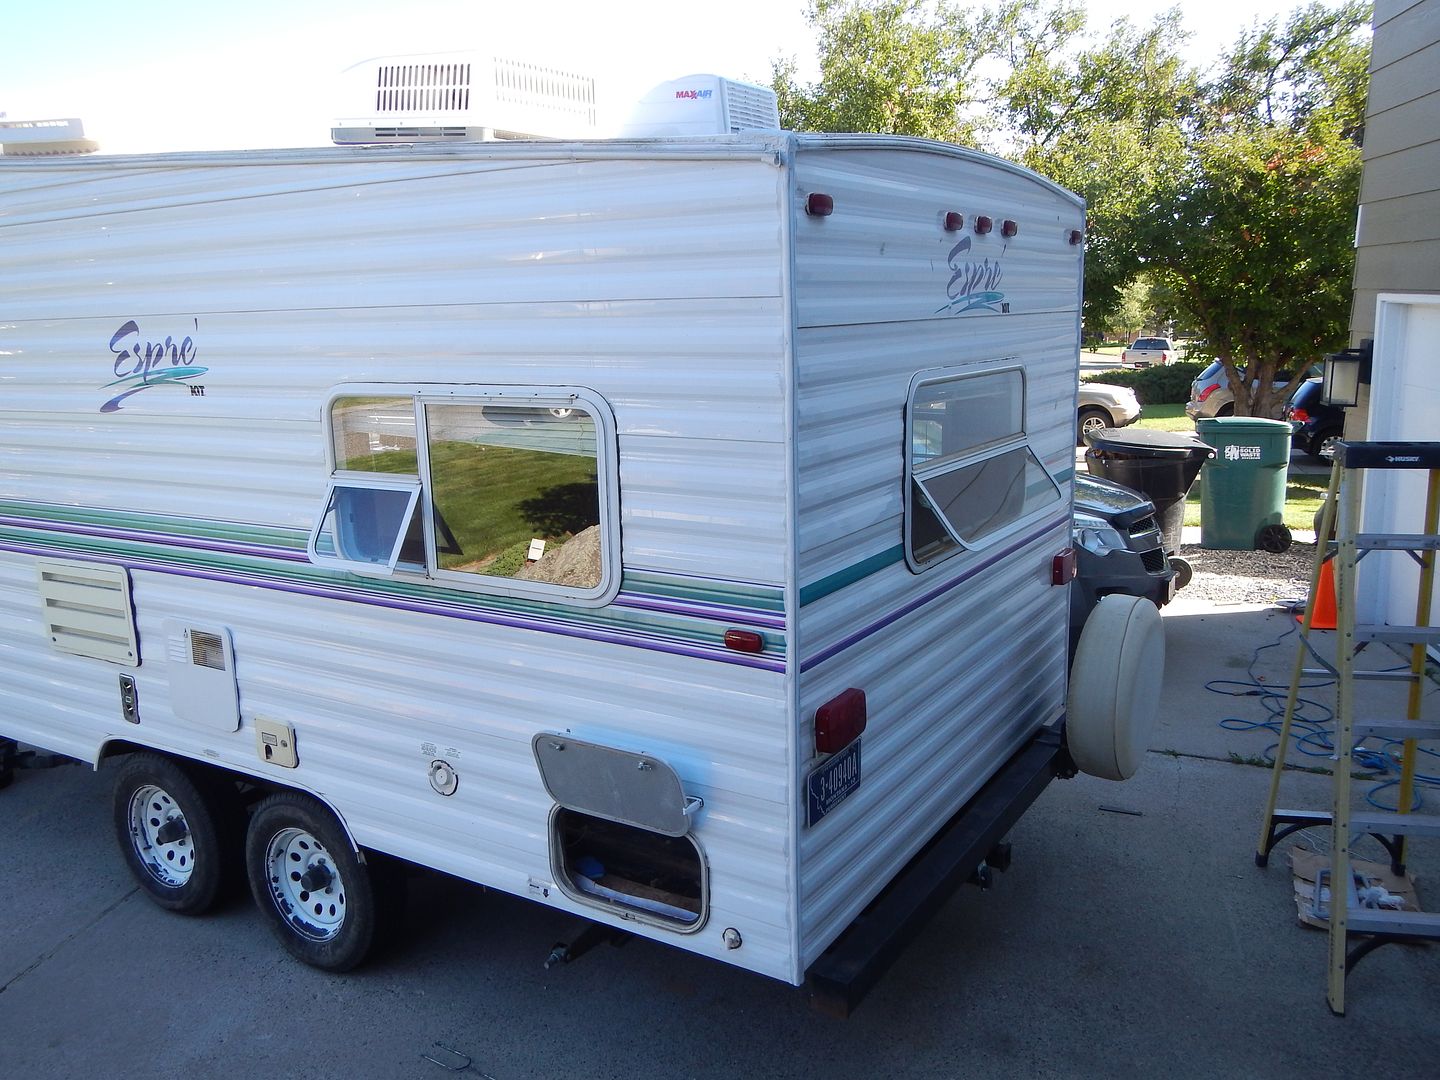
Introduction and New Project

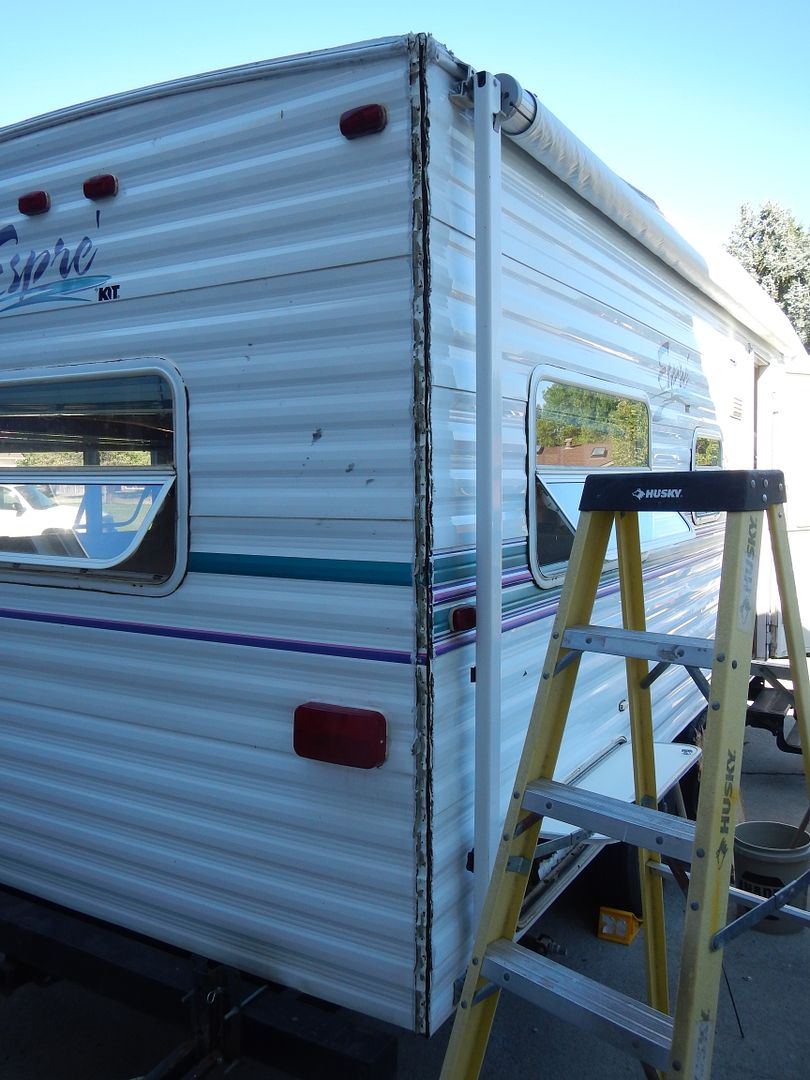
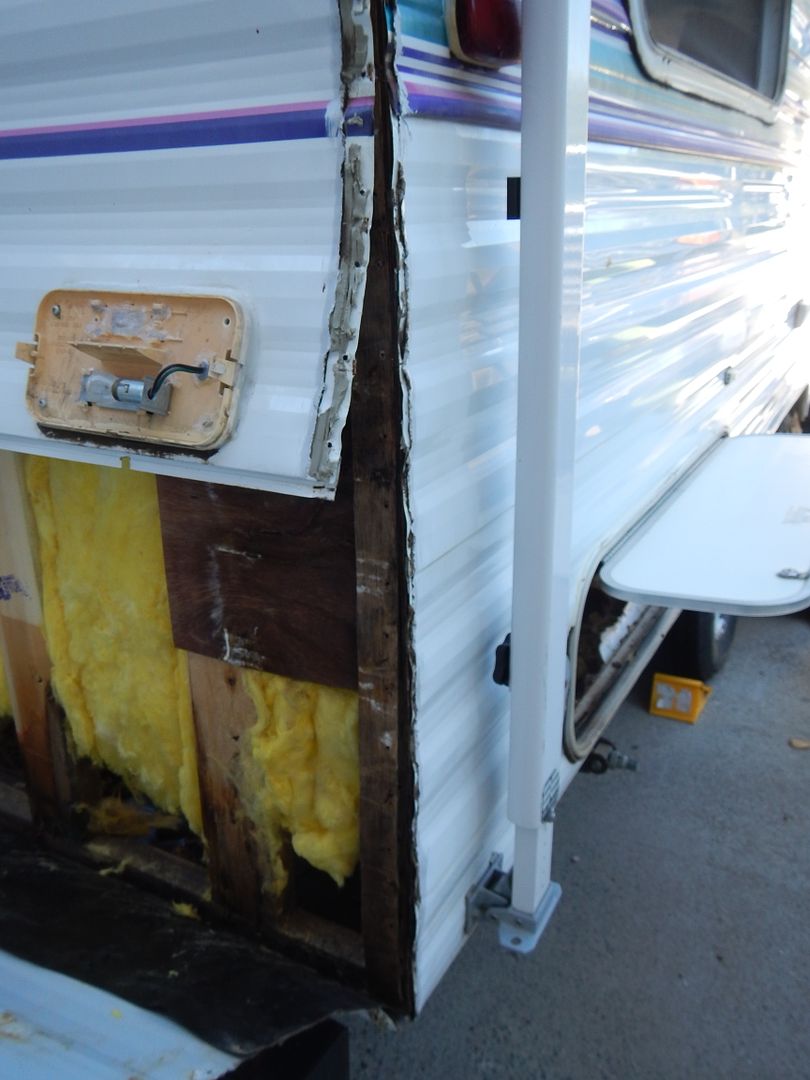
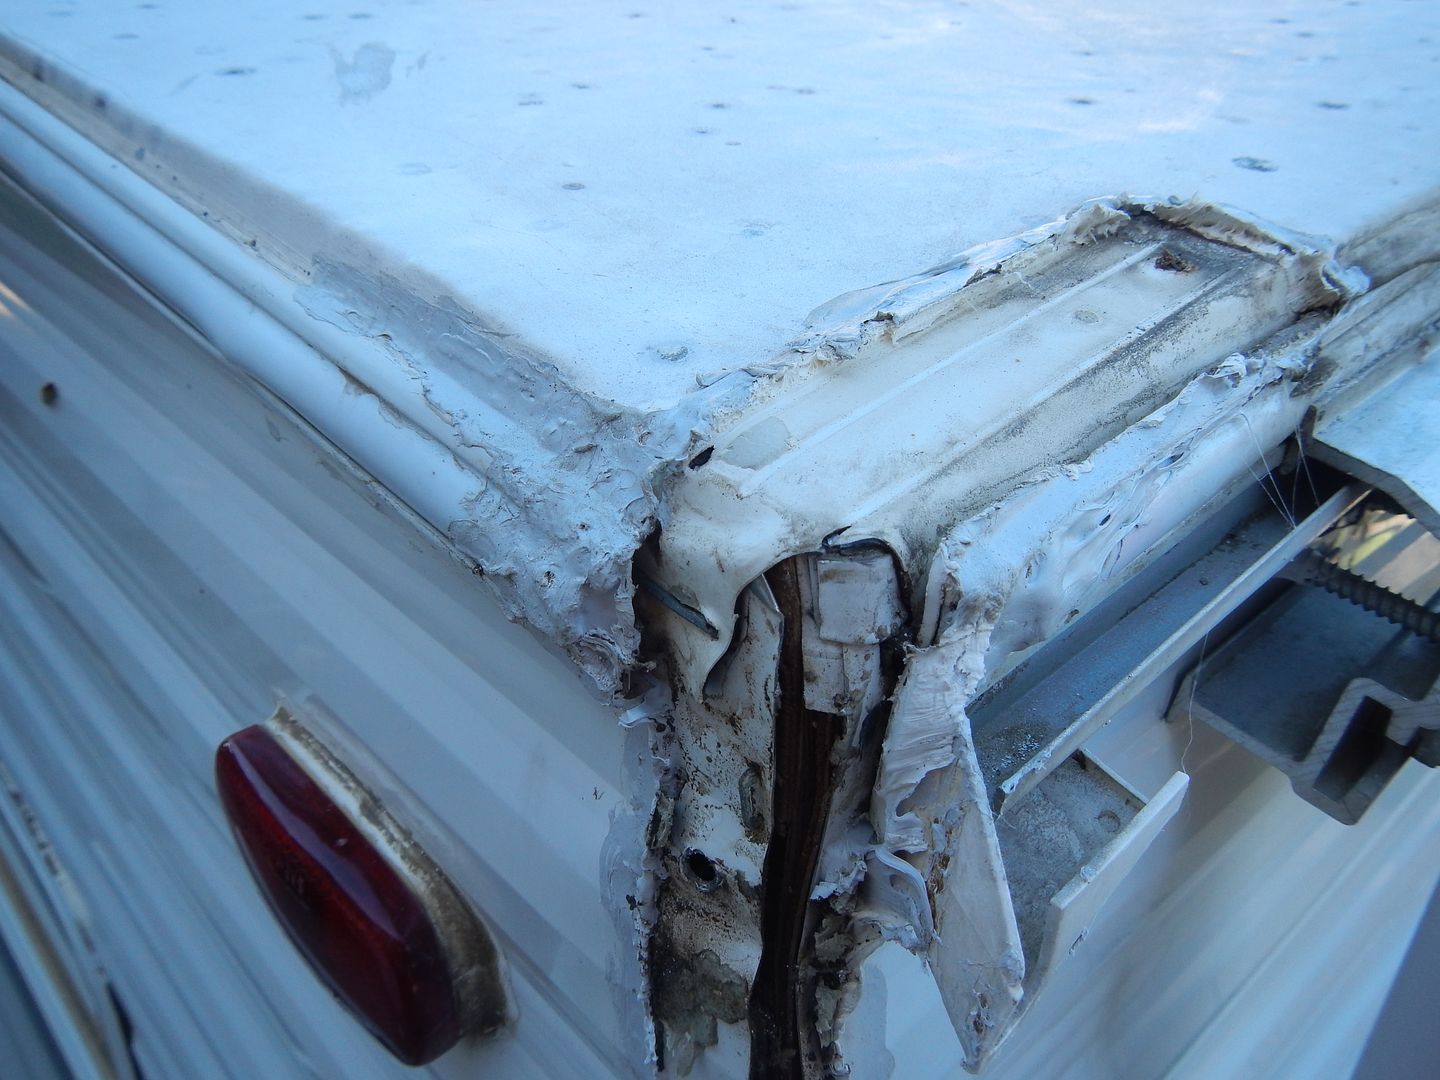
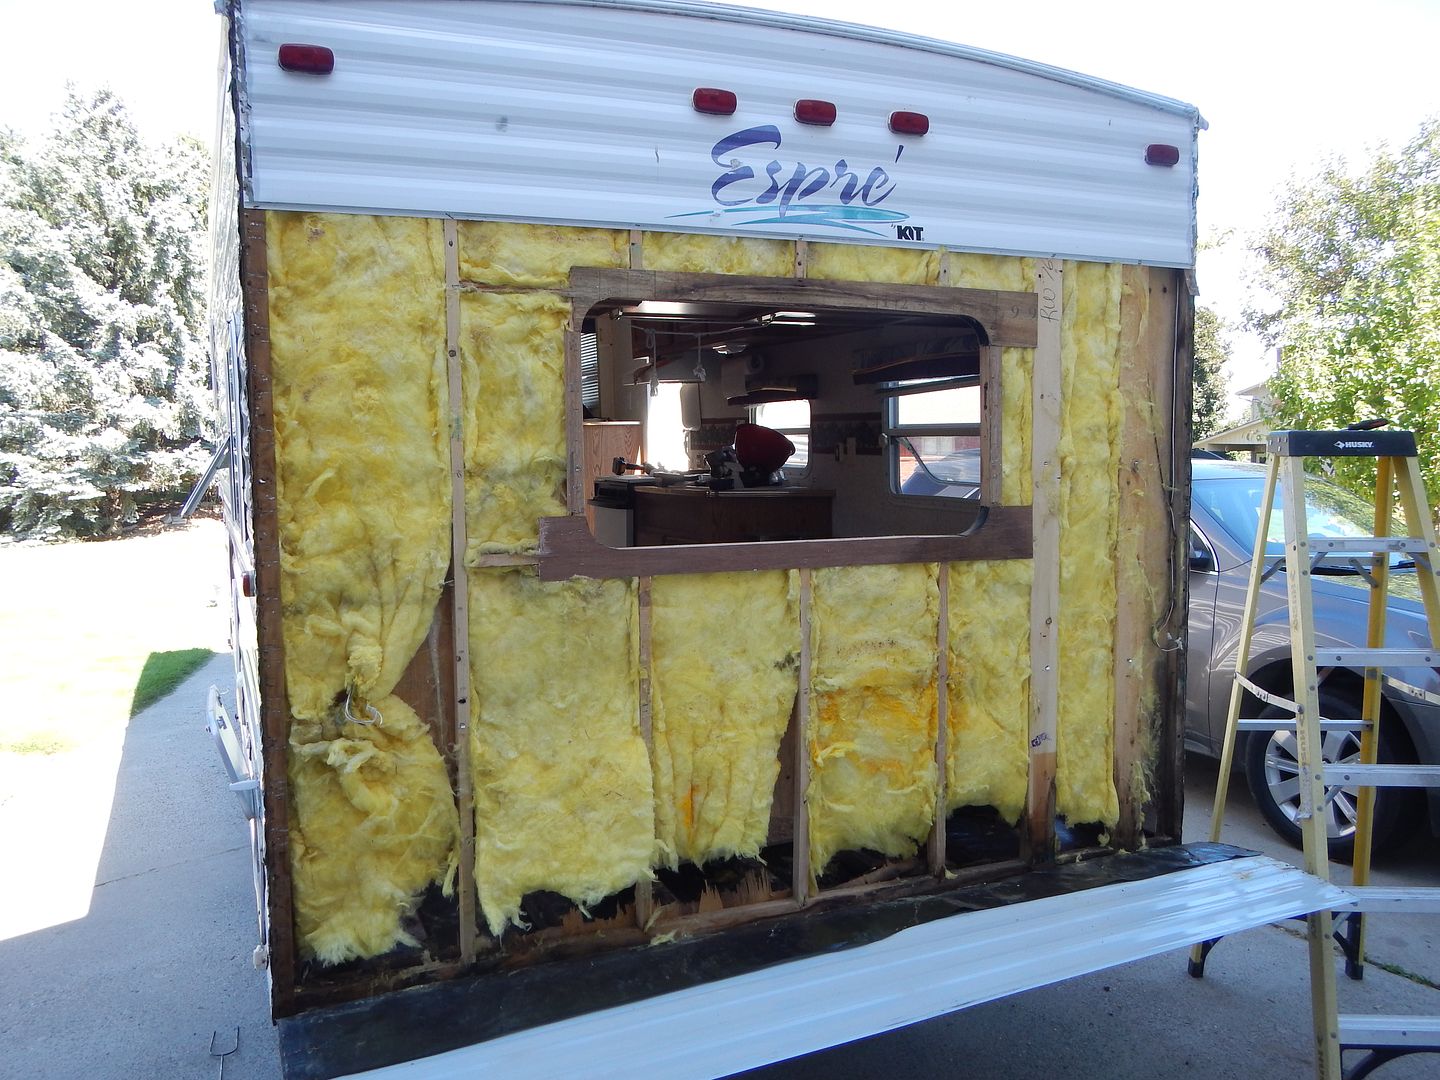
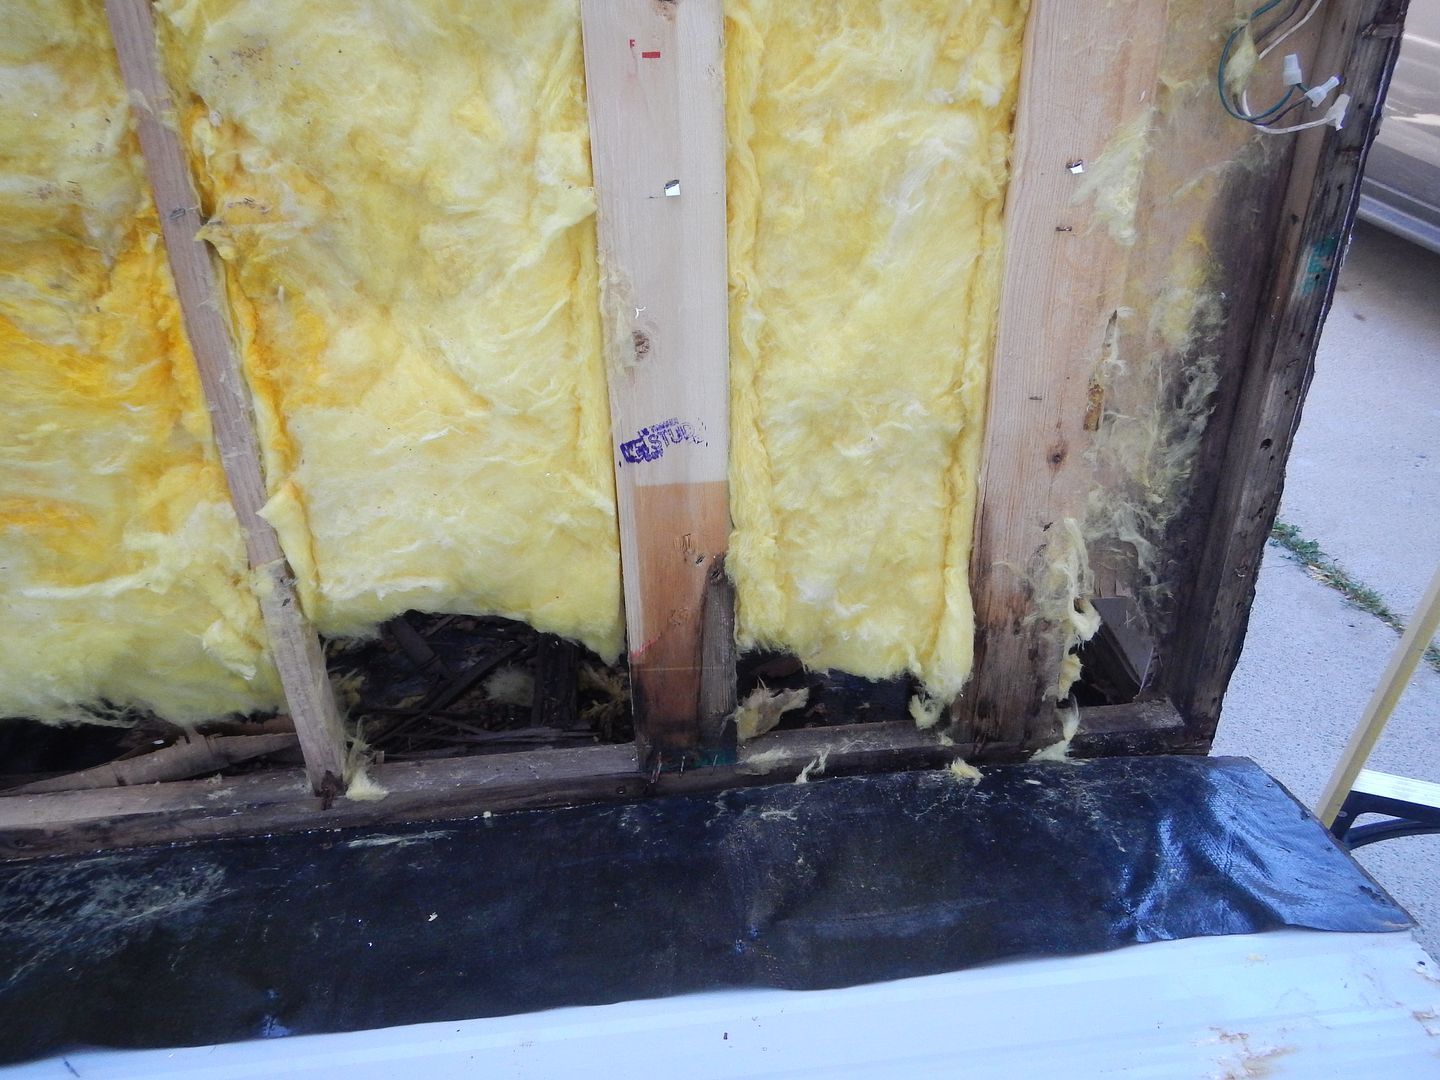
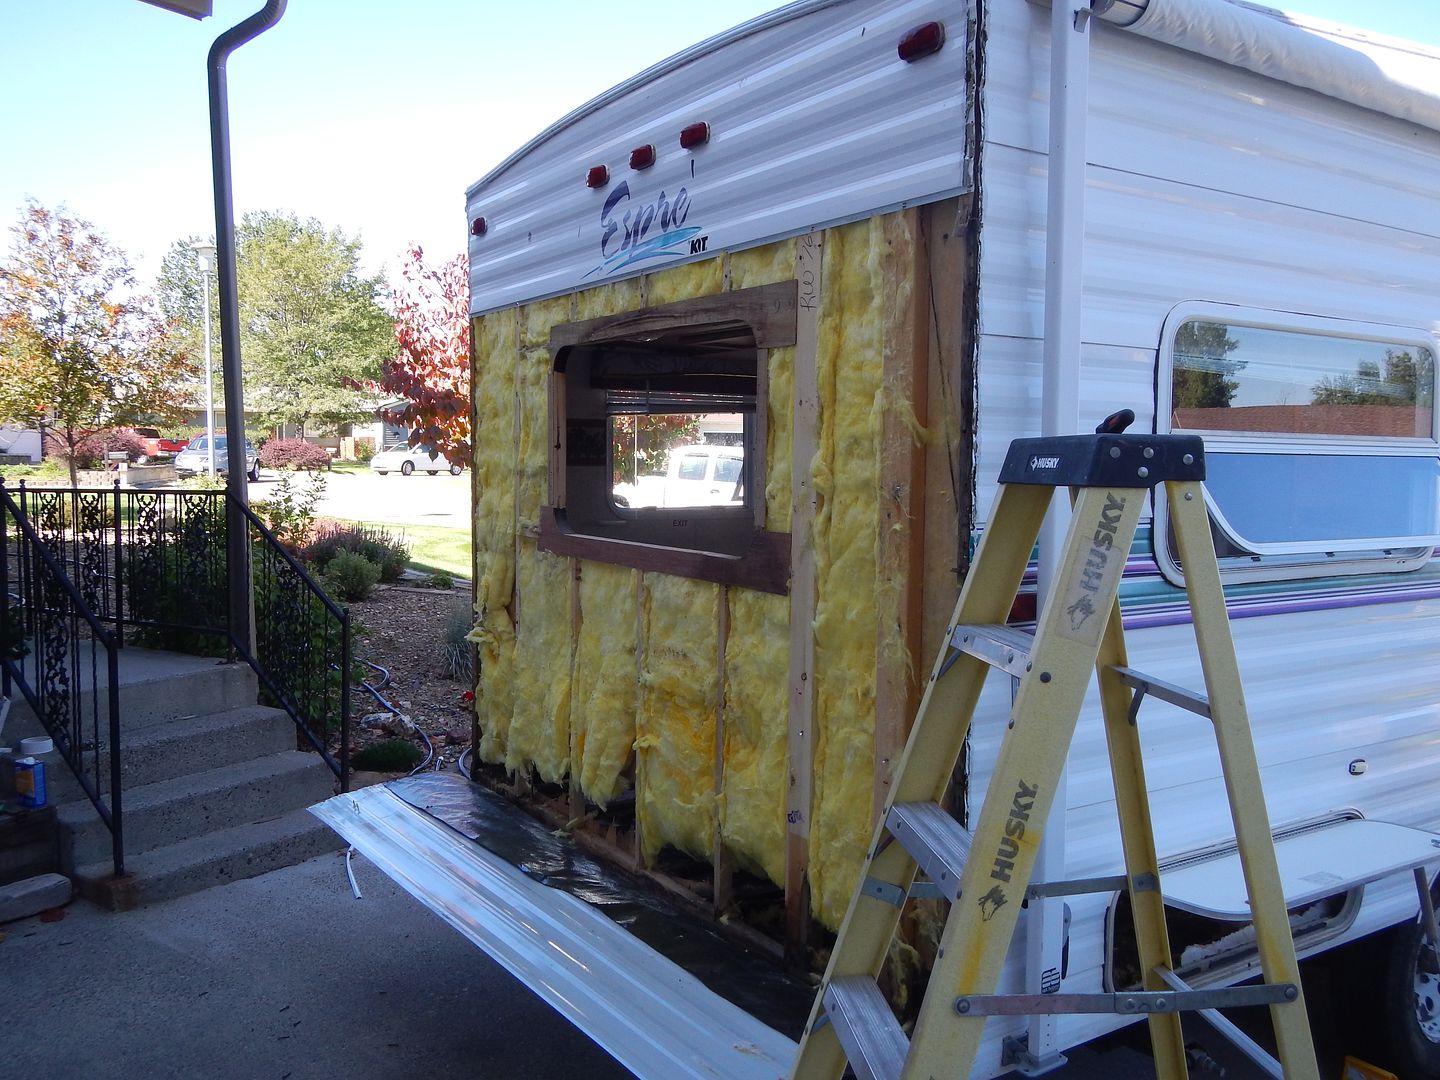
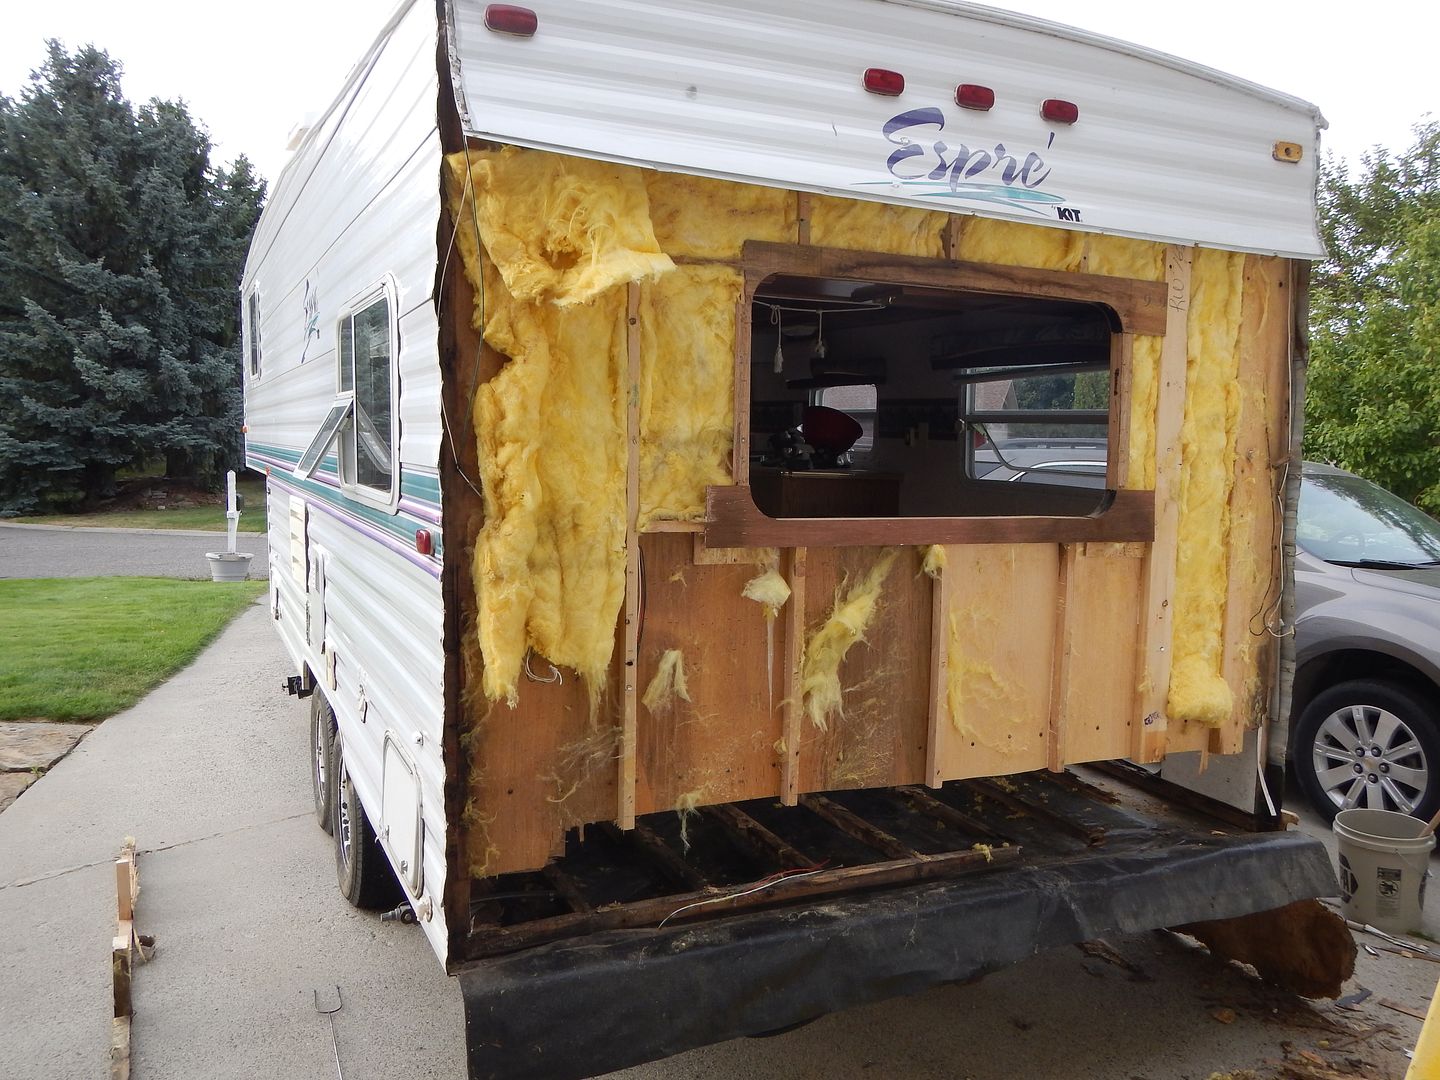
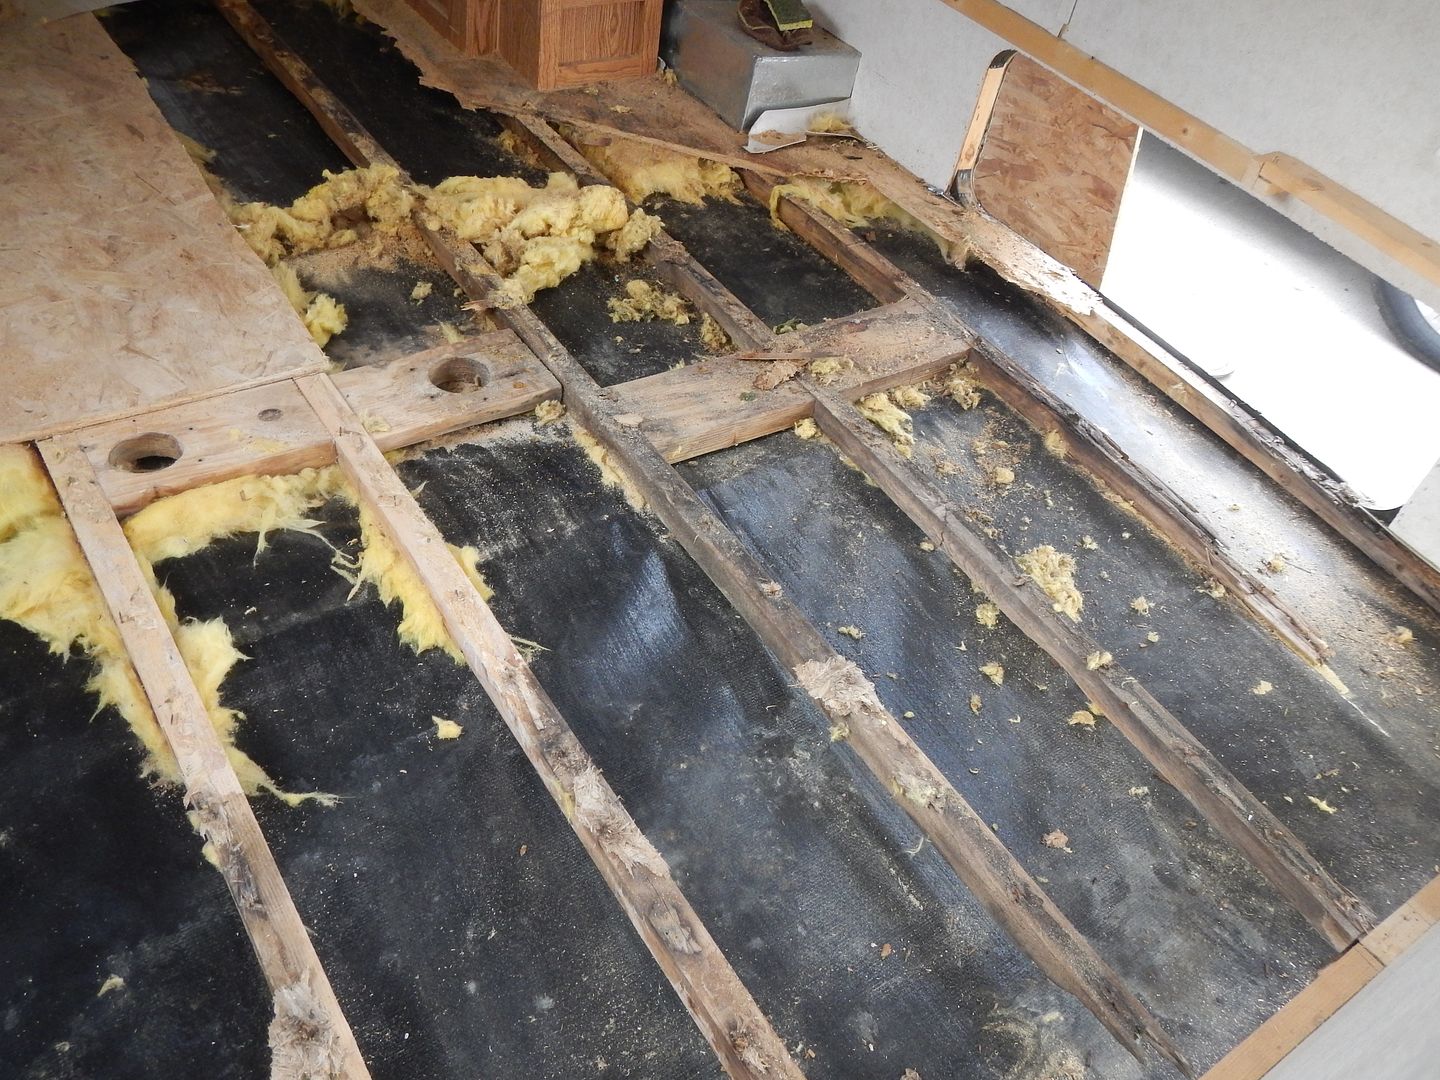
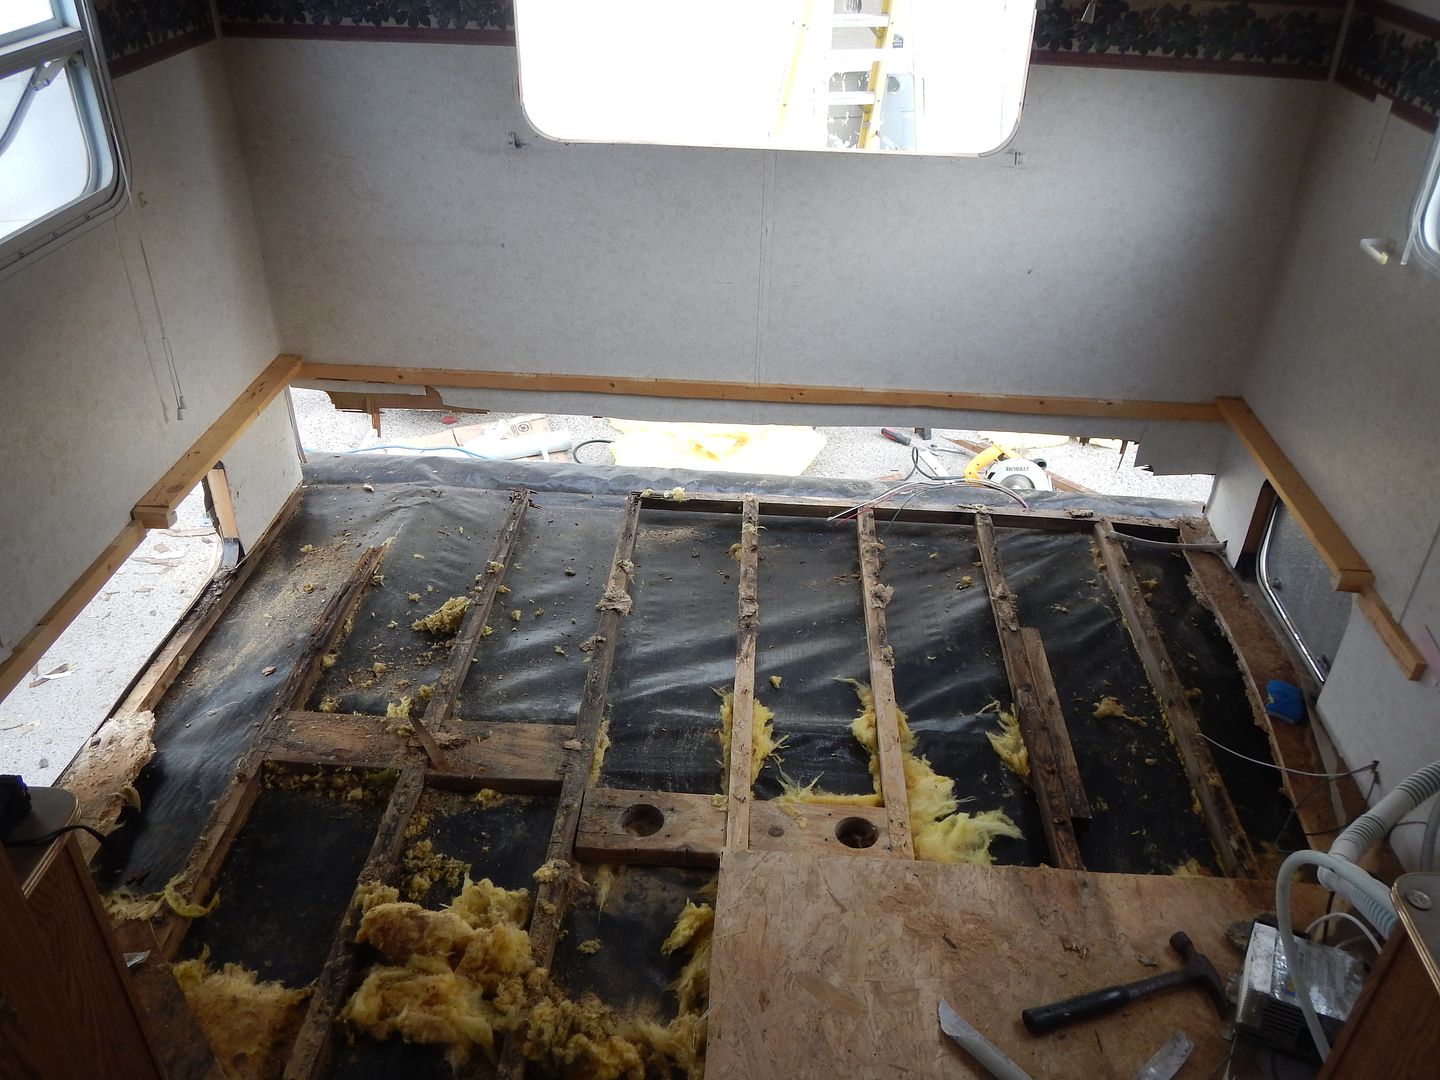
Have lurked on the forum and lots of great info here...appreciate the wealth of knowledge as it's helping me through this project. Our '01 Kit Espre surprised me with a rotten rear floor I discovered during spring cleanup for a trip...that never happened as a result of mush under the vinyl flooring. Finally got the nerve to start taking things apart and while very enlightening...a bit overwhelming as these campers are built a bit backwards from normal construction methods. So here for your viewing is the project. Have removed the rear siding and will be replacing the sill, partial studs and corner studs across the back and a couple feet of sill on each rear side going forward. The interior floor stringers will be replaced and I'll be doinf my level best to get everything sealed properly to make sure we don't go down this road again. I would like to ask if the EPDM corner in the rear appears to have been cut short from the factory? It will be covered by the trim and cover and I'll Dicor it well. Would an addition of Eternabond be of benefit in the corner or should I just seal it all well with the Dicor after reassembling everything? The interior flooring has been removed and squared up to allow me to begin laying out the new floor frame tomorrow and will just take my time and pray for no rain for a week or two so I can get the walls back on. Appreciate the input and the great forum.


16 Replies

  • (I already posted above and thought of another question.)

    Not being noisy, but what is your experience level fixing outside skins and getting roof tucked under on RV's?

    I ask because it is important to use right materials. And people might be able to post better replies if they know your level of "RV fixing ability" is.

    It's all very simple but very time consuming and fixing it right the first time will save you in long run.
  • Welcome and that is a Big project, Be very careful taking off the metal. Can be real pain to replace and not cheap.

    At the top corner, looks like to me that somebody discovered a leak and tried to fix it but they didn't do a very good job. Or didn't use right material to fix. Because you can see new material, (caulking or something) somewhat tooled in place.

    I guess you've done a good inspection of entire RV and problem only at rear?

    A project like this don't think about your man hours you're putting into it. Think about how you're saving $100.00 per hour over RV shop rates.

    Water damage always looks worse than it really is.

    Couple weeks ago at my local Home Depot I saw 2x3's versus 2x4's which would save you some time and $$$ if you have access to one near you.

    If you have any questions during your project ask away. Many people on here are helpful.
  • gbopp wrote:
    Welcome to the forum.
    It looks like you know what you're doing. Please, keep us updated on your project.


    I appreciate the vote of confidence...but I'm about a half mile from knowing what I'm doing on this one. Thank God for the internet...and a good weather forecast! Will post more pics as it progresses. Hoping it proves helpful for someone else to see the project as it's how I was able to gather much of the info I needed prior to digging in.
  • Welcome to the forum.
    It looks like you know what you're doing. Please, keep us updated on your project.
  • That is quite the project, seems you are attacking it logically. Good luck.

About DIY Maintenance

RV projects you can tackle on your own with a few friendly pointers.4,390 PostsLatest Activity: Sep 19, 2025