Carb_Cleaner
Mar 12, 2014Explorer
Ladder Mount Bike Rack Build
UPDATE 8-4-'14, below. I couldn't find what I wanted, so I cobbled together some 2" angle aluminum and 2" PVC, inspired by other designs from here and a Google.

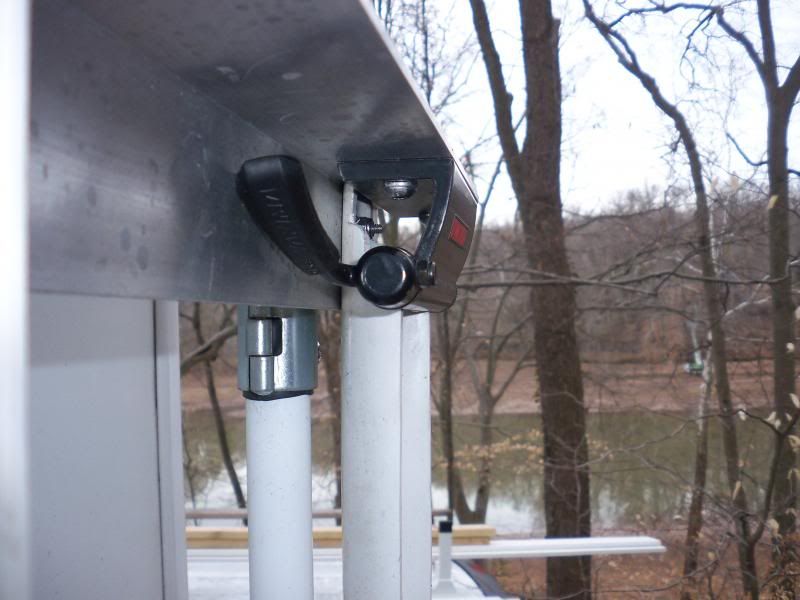
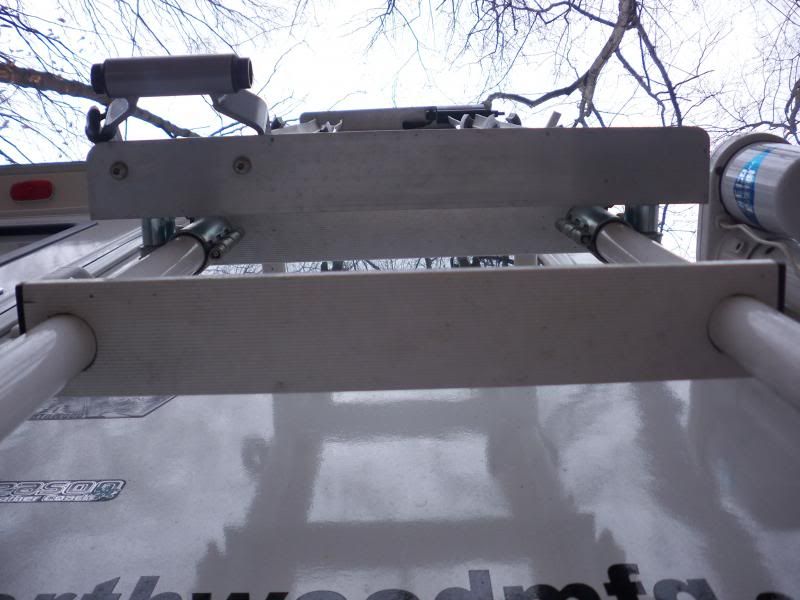
The PVC was heated and expanded for the rear tires' width using a heat gun and another piece of PVC as a shaper. The ends of the PVC were coped to allow the Yakima fork-mount attachment. A design flaw is the restriction of the fork-mount skewer's flip-clamp handle against the angle aluminum. Some shaping of the aluminum, like cutting the aluminum edge back, might help. Larger, say 3", angle aluminum would cure this, but then you'd have another inch of aluminum to climb over when getting on the roof. The skewers' clamp handles will work, and I zip tied them tight, but it takes a little finagling and patience when loading. I can load them by myself, with the aid of a 4 foot step ladder:
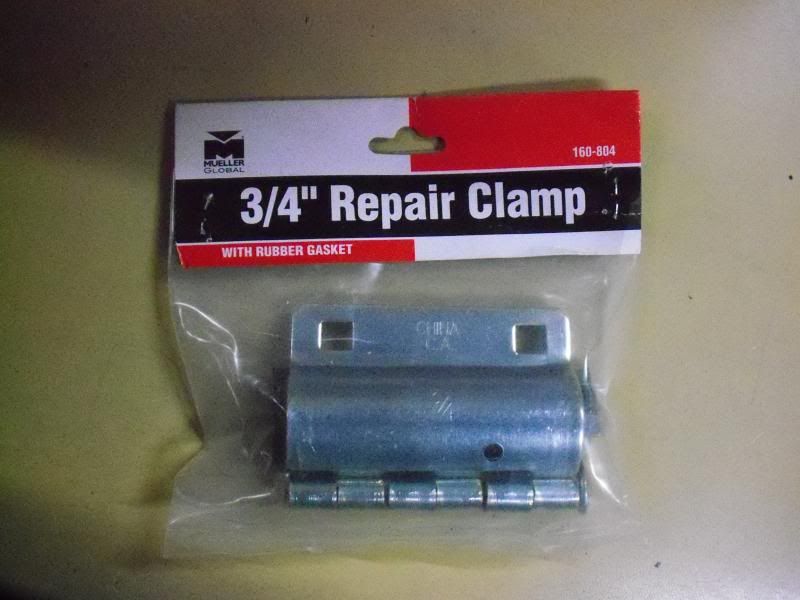
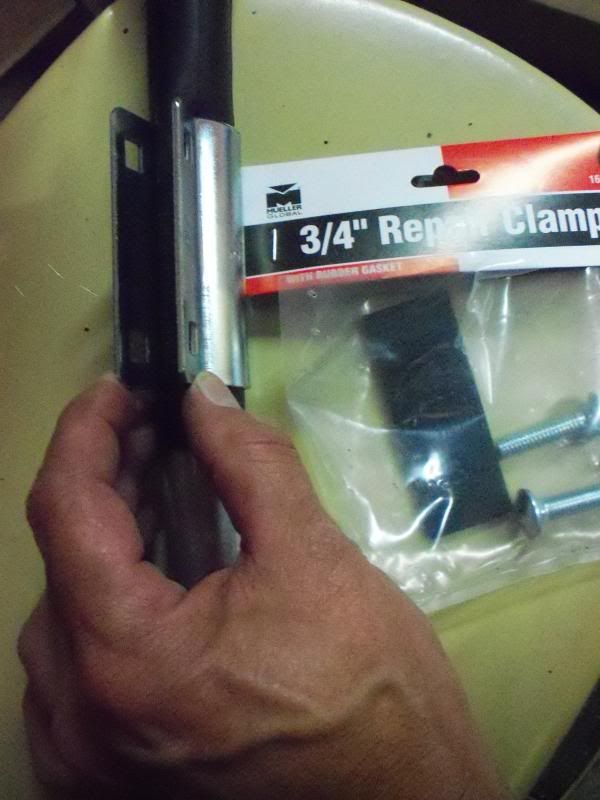
These are the clamps I used for the ladder interface. 3/4" Pipe Repair Clamp, from Home Depot. A piece of inner tube protects the ladder's powder coat and gives stiction. I did a chin-up on the top 2" angle aluminum. I'm about a-buck-two-oh-five. It doesn't move and the force is distributed by the long clamps so the ladder isn't crimped.
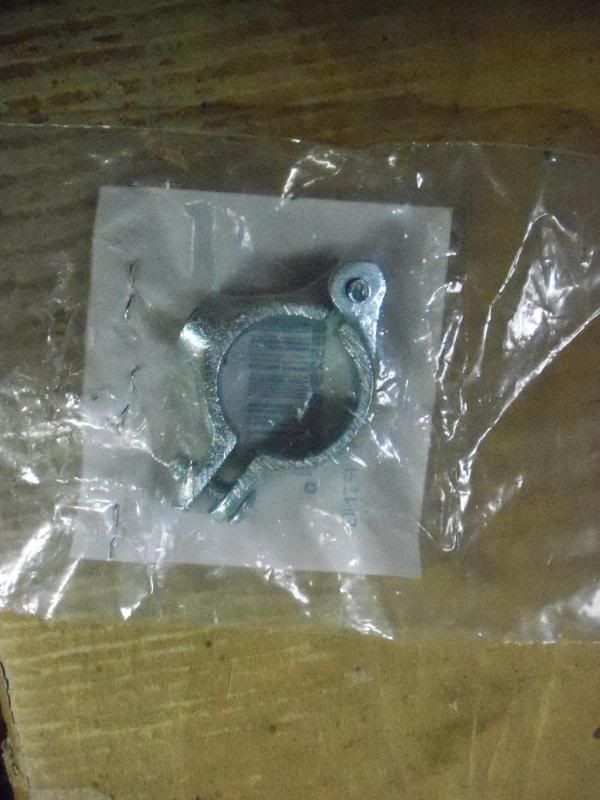
Here's a clamp I rejected because it's way too small, it's cast pot metal that's easy to crack and the bore for the attaching threads didn't allow for a large enough bolt. Other clamps, like conduit, two-hole straps and pipe clamps, didn't do what I wanted, either:
Box of 316 Marine Grade Stainless Steel hardware from McMaster-Carr (http://www.mcmaster.com/#). Very expensive. This box would have paid for just about any other bike rack, but I do have pieces left over. The bag of little, black bolt-end caps contains 100 pieces. I used four. You can buy this stuff in smaller packages at a hardware store. I don't like rusty bolts:

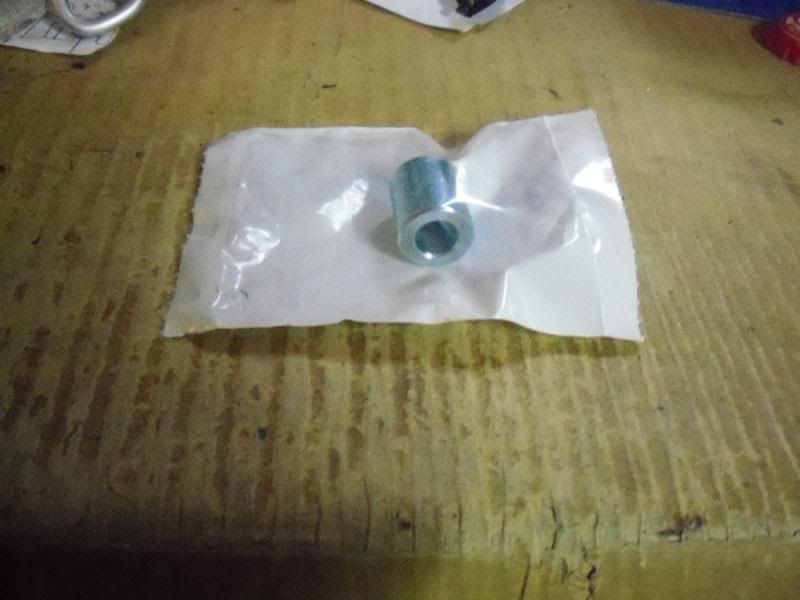
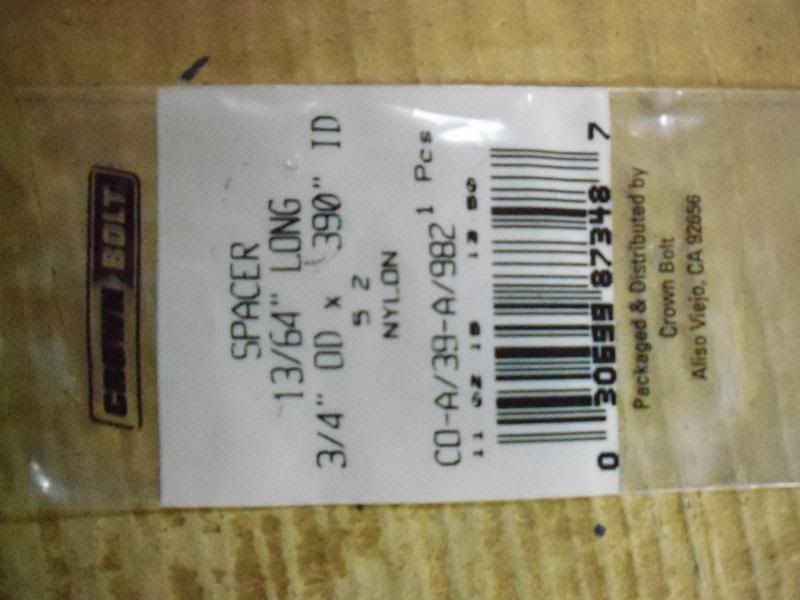
The steel spacers used as stand-offs between the aluminum and the ladder brackets. 3/4" long, but one inch would be better. I used pieces of pipe insulation between the PVC tire holders and my ladder because the stand-off wasn't enough. With the 3/4" spacers, my ladder rungs were within an 1/8" of the PVC. Ordered on-line and picked up in store (free shipping), from Home Depot:
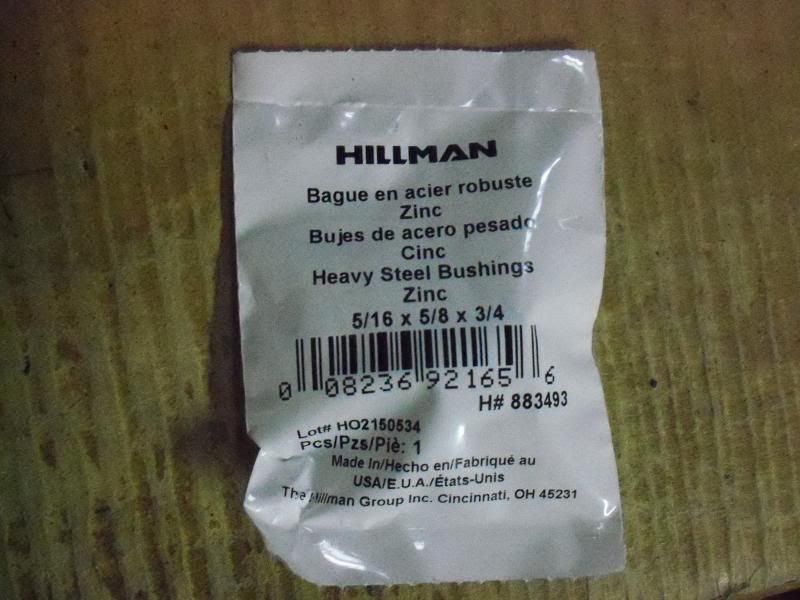
The spacers are the solid variety, not the hollow, rolled spacers with a seam. I wanted the bolt to be the same as the inside diameter of the spacer, so centering wouldn't be a headache. The thick-walled spacer gives it tremendous strength:
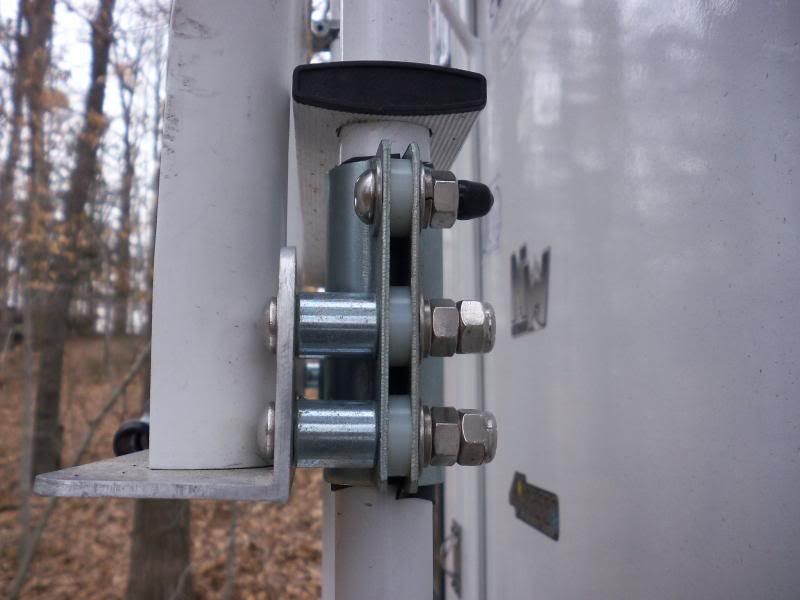
I had to use nylon spacers between the repair clamps' flanges so the ladder isn't squashed. I used nylon because that's what was available from Home Depot's stick and mortar after I determined the required size. Everything was a bit of an un-educated guess until I got to the mock-up stage of the project. Note, there's only two holes per flange/four per clamp from the factory, so I needed a third for attaching the 2" aluminum angle. That 3rd hole isn't centered between the existing two. Before drilling the extra holes in the repair clamps' flanges, I expanded the clamps by placing them over a scrap of one inch, thick walled aluminum tubing I had laying around and torqued down on the clamp with the included hardware until the flanges pulled together, tight. Effectivly, the hinge-pins get tweaked a little, but this procedure permitted the proper gap between the flanges after allowing for the thickness of the inner tube pad (see the nylon spacer). Pic below is a repair clamp as it would sit straight out of the bag. One inch repair clamps were too big, unless you wanted to use a double layer of innertube or had ladder bars larger than one inch. If the gap is too wide, the 5/16" stainless bolt won't fit through because the holes in the flanges are skewed (I was looking for 3/16" steel spacers, but 11/64 Nylon it is). After about 3,500 miles, the nylon spacers are doing fine. They may lend a bit of flex, taking some stress out. I don't know. I only pretend to be an engineer:
Stainless hardware. Lock washers, washers, nuts and double-nutted with Nylock Nuts:
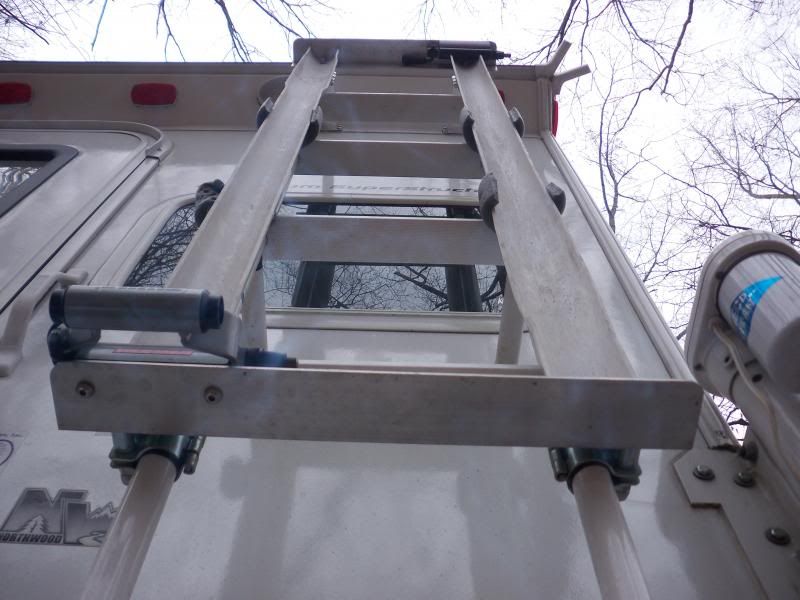
Worm's-eye view. On the left, you can see the Thule adapter I needed for a through axle on a 29er:
Another bottom view, showing the Thule adapter, the black Yakima fork mount at the top (right, black), the grey pipe insulation padding and the buldge introduced into the PVC where the rear tires rest. Eventually, I think I'll cut slits into the PVC to allow double-sided Velcro to pass around the wheel. Presently, bungee cords do a splendid job of holding the rear tires:
I made this with 26" mountain bikes in mind, 'cause that's what we rode before we left for Texas. I made the rear tire rests a little long in anticipation of future bikes' longer wheel base, but I didn't make them long enough to accomodate the 29" bikes we purchased in Austin. My 26" bike had a crank failure, but that's a story of dissappointment for another day. With the 29ers, the handlebars interfered with the adjacent bike's rear tire. Not enough height for the bars to pass over the tire. Going higher with the fork mounts or making the whole rig longer, or a combination of the two, would make it function for 29ers. I loosened the steering necks and turned the bars 45 degrees (handle bars 45 degrees to the bike frame and bike fork) to make them fit the rack for our trip home. Our old bikes were partially disassembled and strapped to the luggage rack. We had just the front wheels strapped up top at the begginnig of the trip, but after the old bikes needed to go up top, the wheels for the 29ers travelled inside on the bed and were placed in the truck while camping. Normally, getting the bikes' front wheels isn't an issue because you only need them when the bikes are off the truck, allowing access to the roof via the ladder. I've considered trying to fabricate a mount for the front wheels that places them along side the bikes on the ladder rack. It'd be nice to get my 4 foot step ladder I use for loading the bikes attached to the camper's ladder, too, but I don't want to be stingy or tear my ladder off the camper while it's going down the road.
It'll take some adjustments for the new bikes, and my shin hits the top aluminum angle when I transition from the ladder to the roof, but it's a pretty good prototype. The bikes don't interfere with camper entry or exit, even when the 26" bikes' handlebars were in the regular, perpindicular to the frame position. The brake lights aren't blocked and I can use the camper's ladder rungs when the bikes aren't loaded. It doesn't stick out the side any farther than my camper's rain-gutter spouts or my truck's mirrors, but you don't want to forget they're back there while backing up to a tree or awning. I tied a red flag to the handlebars, for rear visiblity as well as to keep me from knocking my noggin on the bikes too many (more) times. I discovered, fairly quickly, that placing the 4 foot step ladder under the bikes makes you walk around them.
If I ever get the pictures from the Better Half's phone-camera, I'll post some better shots of the whole deal loaded up. Maybe, tonight. No promises.
During mock-up with a 26" wheel bike:
 [IMG]http://i158.photobucket.com/albums/t112/WadeHarley/Camper%20stuff/Ladderbikerackunfinished3.jpg" width=600>
The 29ers loaded. If you squint, you can barely see one of the 26" bikes up top:

My new 29er, Specialized Epic Comp, in Dinosaur Valley State Park, TX. I find it's safest to wheelie past dinosaurs. It makes them think you're bigger:


The PVC was heated and expanded for the rear tires' width using a heat gun and another piece of PVC as a shaper. The ends of the PVC were coped to allow the Yakima fork-mount attachment. A design flaw is the restriction of the fork-mount skewer's flip-clamp handle against the angle aluminum. Some shaping of the aluminum, like cutting the aluminum edge back, might help. Larger, say 3", angle aluminum would cure this, but then you'd have another inch of aluminum to climb over when getting on the roof. The skewers' clamp handles will work, and I zip tied them tight, but it takes a little finagling and patience when loading. I can load them by myself, with the aid of a 4 foot step ladder:

These are the clamps I used for the ladder interface. 3/4" Pipe Repair Clamp, from Home Depot. A piece of inner tube protects the ladder's powder coat and gives stiction. I did a chin-up on the top 2" angle aluminum. I'm about a-buck-two-oh-five. It doesn't move and the force is distributed by the long clamps so the ladder isn't crimped.

Here's a clamp I rejected because it's way too small, it's cast pot metal that's easy to crack and the bore for the attaching threads didn't allow for a large enough bolt. Other clamps, like conduit, two-hole straps and pipe clamps, didn't do what I wanted, either:

Box of 316 Marine Grade Stainless Steel hardware from McMaster-Carr (http://www.mcmaster.com/#). Very expensive. This box would have paid for just about any other bike rack, but I do have pieces left over. The bag of little, black bolt-end caps contains 100 pieces. I used four. You can buy this stuff in smaller packages at a hardware store. I don't like rusty bolts:

The steel spacers used as stand-offs between the aluminum and the ladder brackets. 3/4" long, but one inch would be better. I used pieces of pipe insulation between the PVC tire holders and my ladder because the stand-off wasn't enough. With the 3/4" spacers, my ladder rungs were within an 1/8" of the PVC. Ordered on-line and picked up in store (free shipping), from Home Depot:
The spacers are the solid variety, not the hollow, rolled spacers with a seam. I wanted the bolt to be the same as the inside diameter of the spacer, so centering wouldn't be a headache. The thick-walled spacer gives it tremendous strength:
I had to use nylon spacers between the repair clamps' flanges so the ladder isn't squashed. I used nylon because that's what was available from Home Depot's stick and mortar after I determined the required size. Everything was a bit of an un-educated guess until I got to the mock-up stage of the project. Note, there's only two holes per flange/four per clamp from the factory, so I needed a third for attaching the 2" aluminum angle. That 3rd hole isn't centered between the existing two. Before drilling the extra holes in the repair clamps' flanges, I expanded the clamps by placing them over a scrap of one inch, thick walled aluminum tubing I had laying around and torqued down on the clamp with the included hardware until the flanges pulled together, tight. Effectivly, the hinge-pins get tweaked a little, but this procedure permitted the proper gap between the flanges after allowing for the thickness of the inner tube pad (see the nylon spacer). Pic below is a repair clamp as it would sit straight out of the bag. One inch repair clamps were too big, unless you wanted to use a double layer of innertube or had ladder bars larger than one inch. If the gap is too wide, the 5/16" stainless bolt won't fit through because the holes in the flanges are skewed (I was looking for 3/16" steel spacers, but 11/64 Nylon it is). After about 3,500 miles, the nylon spacers are doing fine. They may lend a bit of flex, taking some stress out. I don't know. I only pretend to be an engineer:

Stainless hardware. Lock washers, washers, nuts and double-nutted with Nylock Nuts:

Worm's-eye view. On the left, you can see the Thule adapter I needed for a through axle on a 29er:

Another bottom view, showing the Thule adapter, the black Yakima fork mount at the top (right, black), the grey pipe insulation padding and the buldge introduced into the PVC where the rear tires rest. Eventually, I think I'll cut slits into the PVC to allow double-sided Velcro to pass around the wheel. Presently, bungee cords do a splendid job of holding the rear tires:

I made this with 26" mountain bikes in mind, 'cause that's what we rode before we left for Texas. I made the rear tire rests a little long in anticipation of future bikes' longer wheel base, but I didn't make them long enough to accomodate the 29" bikes we purchased in Austin. My 26" bike had a crank failure, but that's a story of dissappointment for another day. With the 29ers, the handlebars interfered with the adjacent bike's rear tire. Not enough height for the bars to pass over the tire. Going higher with the fork mounts or making the whole rig longer, or a combination of the two, would make it function for 29ers. I loosened the steering necks and turned the bars 45 degrees (handle bars 45 degrees to the bike frame and bike fork) to make them fit the rack for our trip home. Our old bikes were partially disassembled and strapped to the luggage rack. We had just the front wheels strapped up top at the begginnig of the trip, but after the old bikes needed to go up top, the wheels for the 29ers travelled inside on the bed and were placed in the truck while camping. Normally, getting the bikes' front wheels isn't an issue because you only need them when the bikes are off the truck, allowing access to the roof via the ladder. I've considered trying to fabricate a mount for the front wheels that places them along side the bikes on the ladder rack. It'd be nice to get my 4 foot step ladder I use for loading the bikes attached to the camper's ladder, too, but I don't want to be stingy or tear my ladder off the camper while it's going down the road.
It'll take some adjustments for the new bikes, and my shin hits the top aluminum angle when I transition from the ladder to the roof, but it's a pretty good prototype. The bikes don't interfere with camper entry or exit, even when the 26" bikes' handlebars were in the regular, perpindicular to the frame position. The brake lights aren't blocked and I can use the camper's ladder rungs when the bikes aren't loaded. It doesn't stick out the side any farther than my camper's rain-gutter spouts or my truck's mirrors, but you don't want to forget they're back there while backing up to a tree or awning. I tied a red flag to the handlebars, for rear visiblity as well as to keep me from knocking my noggin on the bikes too many (more) times. I discovered, fairly quickly, that placing the 4 foot step ladder under the bikes makes you walk around them.
If I ever get the pictures from the Better Half's phone-camera, I'll post some better shots of the whole deal loaded up. Maybe, tonight. No promises.
During mock-up with a 26" wheel bike:
 [IMG]http://i158.photobucket.com/albums/t112/WadeHarley/Camper%20stuff/Ladderbikerackunfinished3.jpg" width=600>
The 29ers loaded. If you squint, you can barely see one of the 26" bikes up top:

My new 29er, Specialized Epic Comp, in Dinosaur Valley State Park, TX. I find it's safest to wheelie past dinosaurs. It makes them think you're bigger:

Moderator edit to re-size pictures to forum limit of 640px maximum width.