Forum Discussion
DeadeyeLefty
Mar 16, 2013Explorer
It's been a while since my last update so I figured I'd share where I'm at. There are plenty of pics, so this will be a long one.
I'm still waylaid on glassing the outer shell and realistically it'll probably be another month at least before I can continue thanks to other priorities. Fortunately, I have loads of wood laying around in the shop and this is the type of project that is perfect for using up scrap and offcuts from other jobs so I've been forging ahead with the galley even though the wall that it sits against still needs to be glassed.
If you look at the galley in most RVs, there is a cupboard under the stove/oven with the flip-down door becomes sort of a catch-all. My wife and I both have back issues so for us it's a space that would be used for junk that one rarely needs to get at. For us, a better use of that space would be to house a water tank, so I built one from 1/4" ply and epoxy.
There has been a lot of ballyhoo about BPA in drinking water. It is used in the formulation of epoxy hardener, so it stands to reason that it could theoretically leach into the water if the resin isn't fully polymerized. The tank will be plumbed to the sink for washing up so I'm not too worried about it.
Here is what West has to say about using epoxy for water tanks and is the guideline I go by.
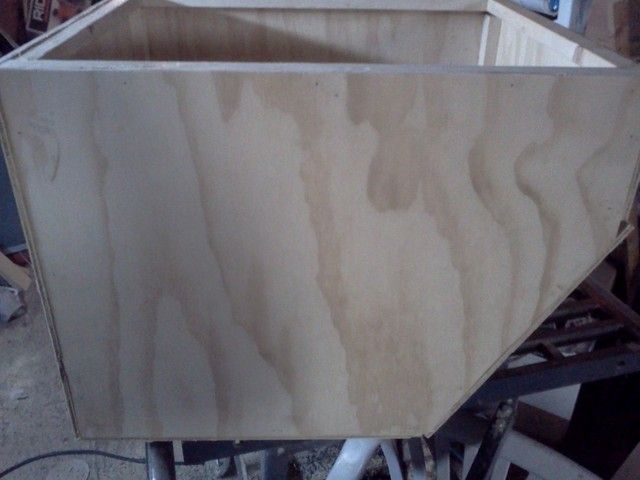
Because my build has the lower corners of the sidewalls 'clipped' to bring the excess width back into the trailer's frame, I have a shape that would create wasted space for a boxy poly water tank. I used that space to hold water and it will contribute to the shell's overall integrity once it's glassed into place, though that won't happen until the wall is glassed into place. The natural solution was a wedge-shaped tank.
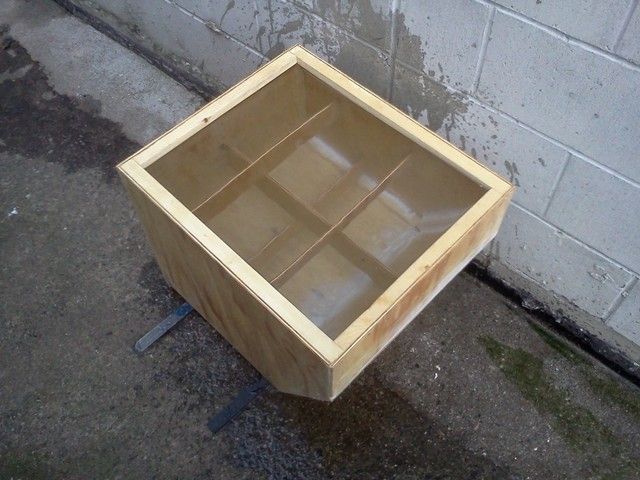
Leak testing
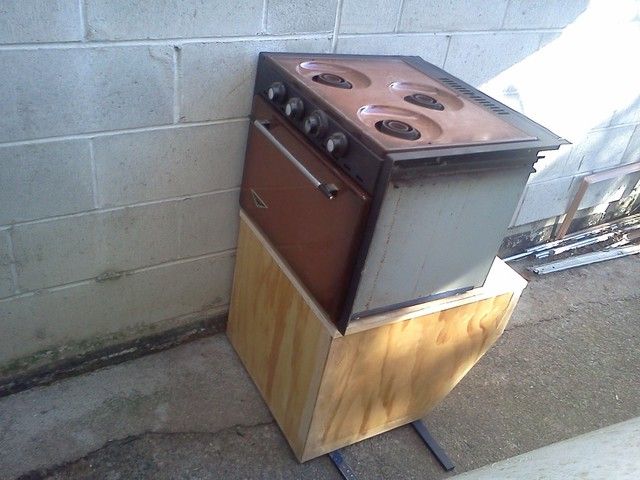
As it will be installed
Hmmm...I was sure I had a pic of the stove sitting on it in its spot inside the trailer - I'll edit one into here later if I can't find it.
The back of the stove has a duct where the oven's heat escapes into the range hood. Behind that I will have another 4" or so that makes up the difference between the depth of the stove and the depth of the countertop. In that space I'll run the plumbing to the tank. I'll plumb in a pickup with a standpipe, a non-pressure fill and a vent that will terminate at the top of the backsplash.
I'll be keeping the tank handy (with the top off) as I lay up the rest of the shell so that I have a place to use up any excess epoxy. It's leak free now, but I'll continue building up that layer with the resin that I have leftover after sgueegeeing (is that a word?) the wall section layups.
That's it for the tank. Next up: the countertop.
I'm still waylaid on glassing the outer shell and realistically it'll probably be another month at least before I can continue thanks to other priorities. Fortunately, I have loads of wood laying around in the shop and this is the type of project that is perfect for using up scrap and offcuts from other jobs so I've been forging ahead with the galley even though the wall that it sits against still needs to be glassed.
If you look at the galley in most RVs, there is a cupboard under the stove/oven with the flip-down door becomes sort of a catch-all. My wife and I both have back issues so for us it's a space that would be used for junk that one rarely needs to get at. For us, a better use of that space would be to house a water tank, so I built one from 1/4" ply and epoxy.
There has been a lot of ballyhoo about BPA in drinking water. It is used in the formulation of epoxy hardener, so it stands to reason that it could theoretically leach into the water if the resin isn't fully polymerized. The tank will be plumbed to the sink for washing up so I'm not too worried about it.
Here is what West has to say about using epoxy for water tanks and is the guideline I go by.
Because my build has the lower corners of the sidewalls 'clipped' to bring the excess width back into the trailer's frame, I have a shape that would create wasted space for a boxy poly water tank. I used that space to hold water and it will contribute to the shell's overall integrity once it's glassed into place, though that won't happen until the wall is glassed into place. The natural solution was a wedge-shaped tank.
Leak testing
As it will be installed
Hmmm...I was sure I had a pic of the stove sitting on it in its spot inside the trailer - I'll edit one into here later if I can't find it.
The back of the stove has a duct where the oven's heat escapes into the range hood. Behind that I will have another 4" or so that makes up the difference between the depth of the stove and the depth of the countertop. In that space I'll run the plumbing to the tank. I'll plumb in a pickup with a standpipe, a non-pressure fill and a vent that will terminate at the top of the backsplash.
I'll be keeping the tank handy (with the top off) as I lay up the rest of the shell so that I have a place to use up any excess epoxy. It's leak free now, but I'll continue building up that layer with the resin that I have leftover after sgueegeeing (is that a word?) the wall section layups.
That's it for the tank. Next up: the countertop.
About DIY Maintenance
RV projects you can tackle on your own with a few friendly pointers.4,410 PostsLatest Activity: Jan 18, 2025