Forum Discussion
8,453 Replies
 PastorCharlieExplorerWhen I build tanks I use 3" wide fiberglass rolls and do all the corners' walls and bottom. I run 1 1/2" up one side and 1 1/2" up the other side giving a good seal. The cloth can be cut and lay flat on the bottom and the sides over laying the 1 1/2 " of the 3" cloth and no need to work the large sheet around corners and joints.
 Bill1374ExplorerThat really looks good!
- I had to do a little bit more sanding on this today. I also found a couple of pieces on the right that needed a little extra glue, that only extended about an inch in from the end.
I glued them in and clamped them for the night.
Before I did that, I took 2 pictures. The first one is after sanding and the wood is dry.
The second one, I took some lacquer thinner and wet a paper towel, then wiped the surface. You can see the drastic difference between wet and dry.
That's why we add finishes. Make it look pretty, and protect it.

navegator wrote:
You might need to place a heavier piece of plywood under, water is heavy and filling the sink full might put too much strain on the bottom.
When you are ready to fiber glass, cut a length of cloth that covers the side complete with some left on top in order to wrap arround and tie the top edge once having the seam on the side that fases the edge of the counter, also cover the bottom with one piece and wrap arround, then glue the bottom to the edge and epoxy the whole sink so that it is protected from moisture.
To cut fiberglass clean and neat with the saber saw, use a carbide blade, they cut clean and last longer than the metal cutting blades, then finish with a file or sanding disk.
Going to be really nice.
navegator
I figured the best is to have it completely wrapped inside and out with cloth - not necessarily with one piece, but, as you said, in order to keep it water proof, it needs to be completely sealed.
Thanks. navegatorExplorerYou might need to place a heavier piece of plywood under, water is heavy and filling the sink full might put too much strain on the bottom.
When you are ready to fiber glass, cut a length of cloth that covers the side complete with some left on top in order to wrap arround and tie the top edge once having the seam on the side that fases the edge of the counter, also cover the bottom with one piece and wrap arround, then glue the bottom to the edge and epoxy the whole sink so that it is protected from moisture.
To cut fiberglass clean and neat with the saber saw, use a carbide blade, they cut clean and last longer than the metal cutting blades, then finish with a file or sanding disk.
Going to be really nice.
navegator- Finally finished the small corner in the lower right and glued everything to the piece of plywood underneath it.
I used 1/4" thick plywood, so combined, the bottom is about 5/16" thick, give or take a little.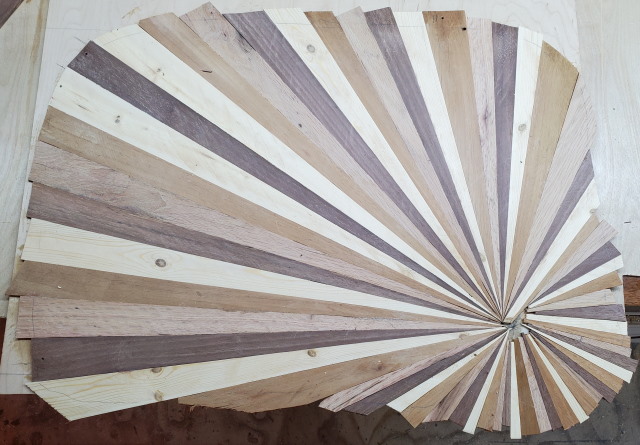
Now the water will be pointed in the right direction.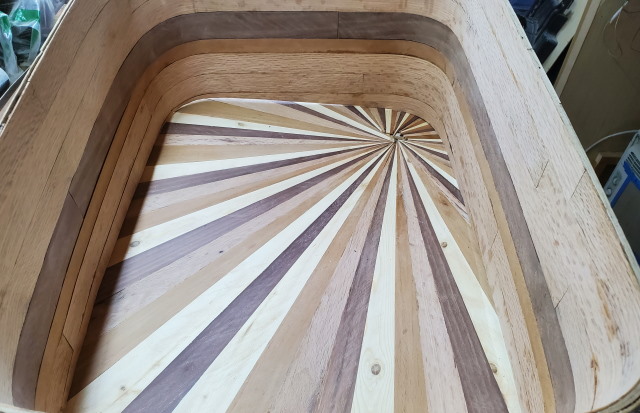
- Time for some gluing..
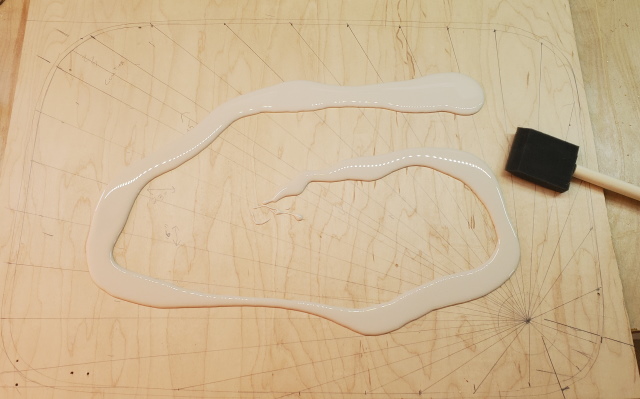
A 2" wide foam brush makes quick work of spreading glue over the area.
- Not sure how well this will show up, but, this is after the strips have been un through the saw. You may be able to see the saw cut right next to the board that acts as a fence.

As a result, I ended up with this. I got 2 "wedges" from each strip that I cut.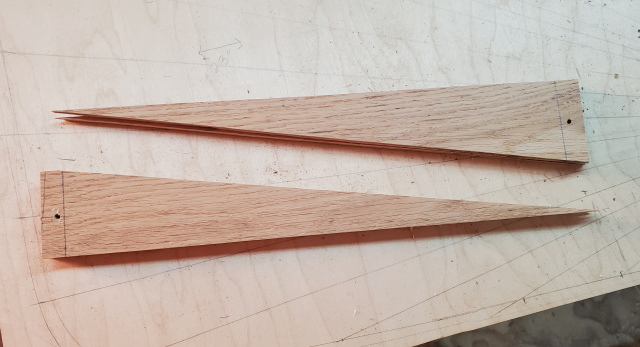
I used black walnut, pine, mahogany, and oak for the strips. - While screwing these together, the screw extended through the bottom of the strips.
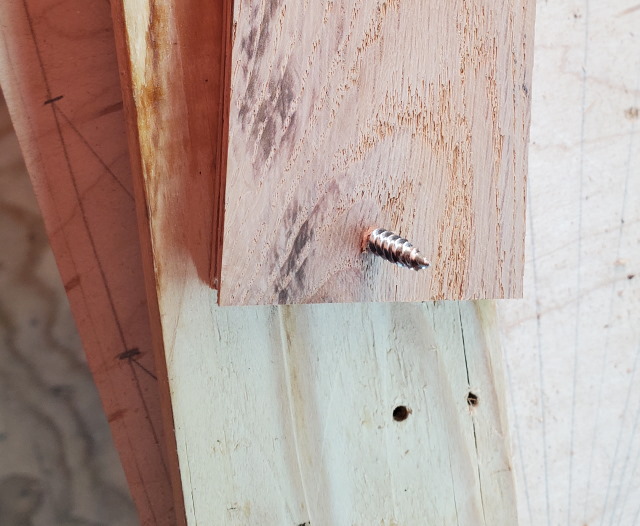
These were cut off, since this surface would be riding on the bed of the table saw.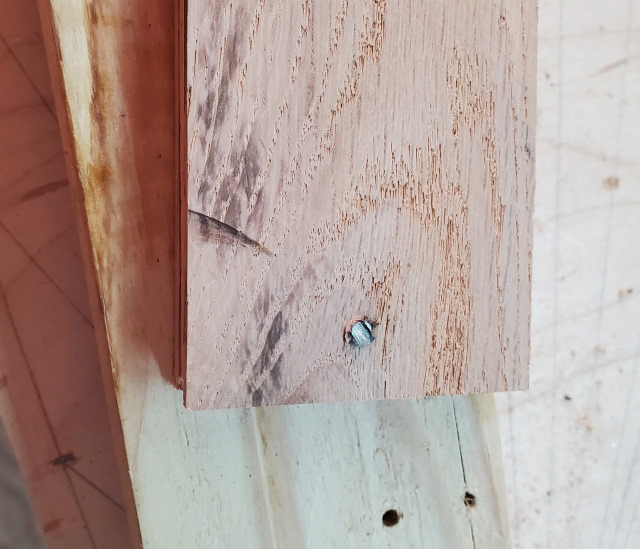
- The one end, I screwed an additional piece of plywood to the top to hold these together.
The end of this piece lines up with the line on the top strip. Picture angle isn't correct, so it looks like it doesn't line up, but it does.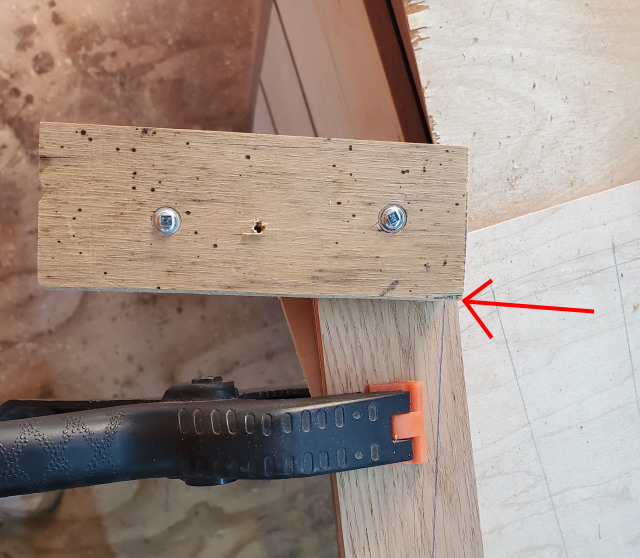
Next, on the left side, there is another piece of plywood screwed to the top of the first piece, and also to the strip of wood that I am using as a fence. (red arrow).
The other end with the red square, is the screw that holds the other end of the strips together.
The left side with the blue square, is where the screw is on the bottomn piece of plywood, that is screwed into the strips.
You will notice that the side of the long piece of wood, lines up with the diagonal line scribed on the strips.
The long piece of wood goes against the table saw fence and therefore the saw cuts right along the scribed line.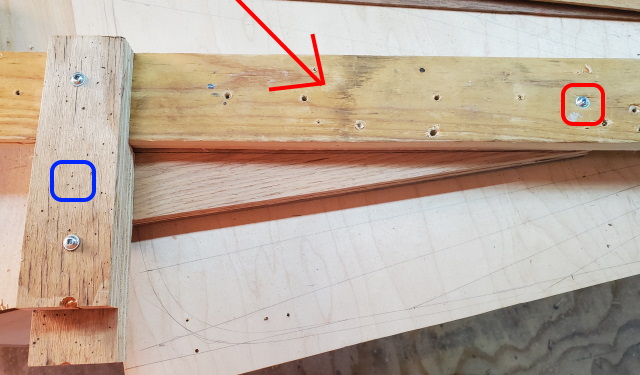
About Motorhome Group
38,768 PostsLatest Activity: Nov 21, 2015