Forum Discussion
5,655 Replies
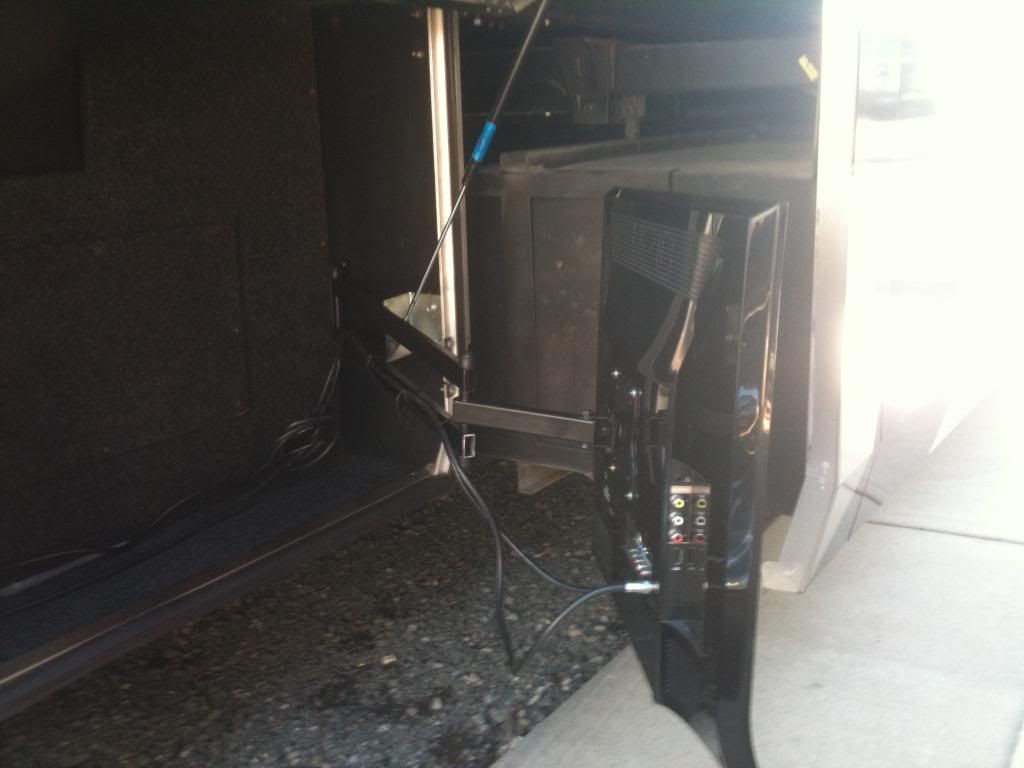
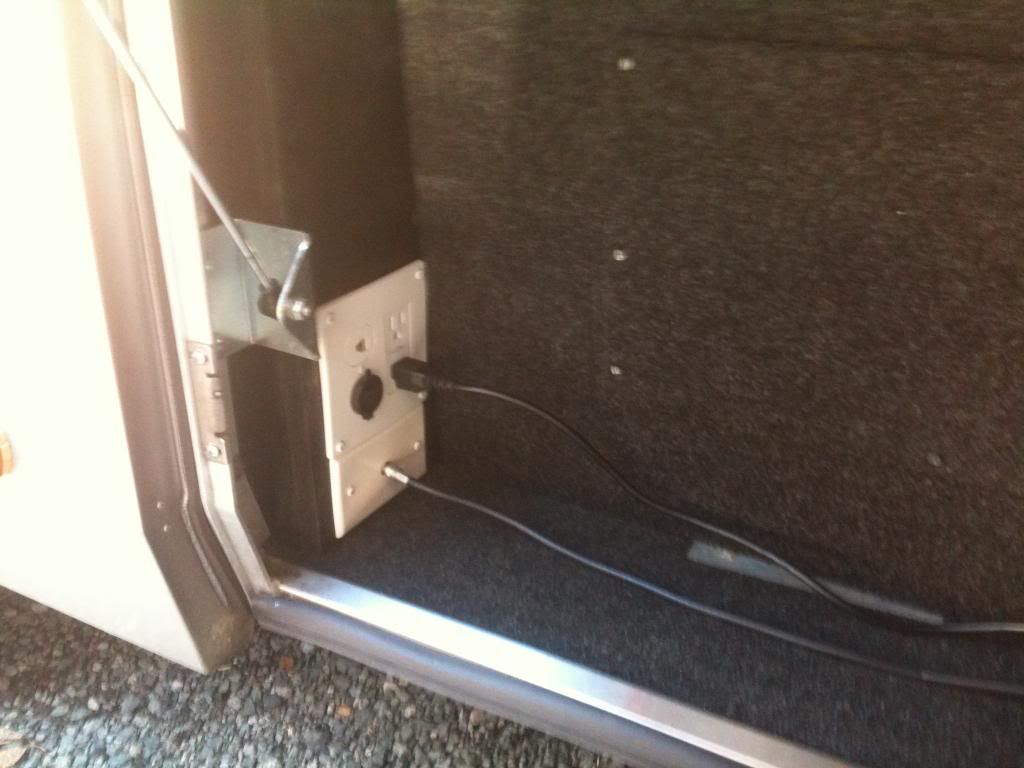
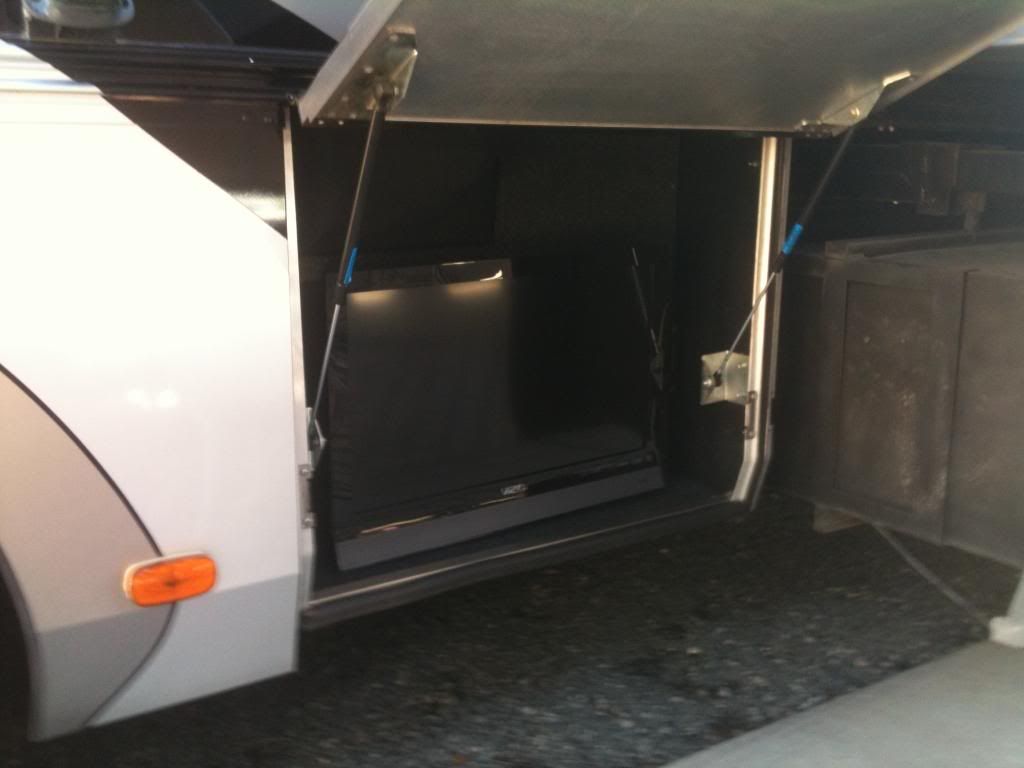
 road_glideExplorerGot another one for you. Early last fall, kept looking at the compartment behind our curbside slide. It had hook ups for 120v, phone, 12v and a input (not output)for coax for cable TV. After determining I could move the wall inside the compartment back about 6" inches against the grey and black tank. I moved the hook ups, ordered a $15 TV swing mount on eBay. I ordered 24" long square inch tubing to replace the inner ones so we could swing out the TV as far as possible. Found a one year old Visio 26" on Craigslist. Then I reversed the input and made it an output on the back of our switch box inside the coach (t-d off bedroom TV 2) I got the TV for $60 :B, bracket $15, extra long square tubes $12.
We found a black carpet mat with foam backing that covers both sides of the TV when in transit at Wally world for $8 and a secure strap for $2 there also..I'm such a mooch, but now we have outside TV if we want just like the Big Dog coaches.
PS...We only use it if the conditions are right (weather and checking with our neighbor RVer's if it bothers them)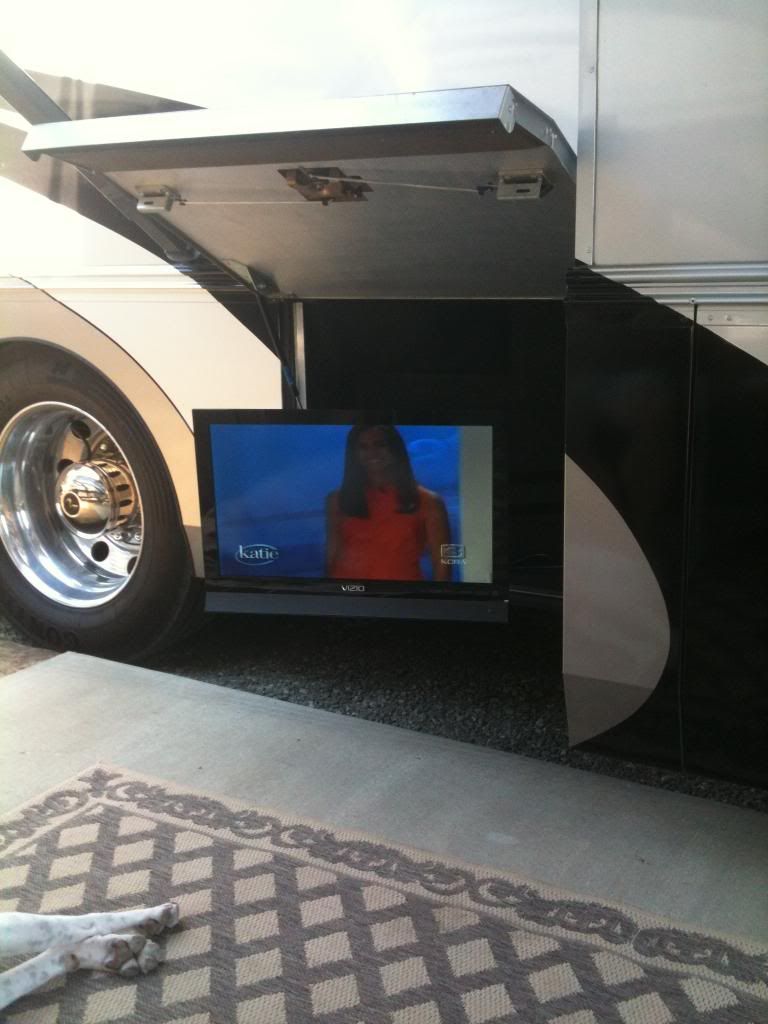

 wolfe10ExplorerRoadglide,
Looks great.
I hope the coach is NOT at ride height in those photos. If it is, small dips can cause the rockguard to scrape the road and throw up MORE rocks on your toad.- road_glideExplorerOur rock guard/mud flap was getting pretty worn on the bottom, the rubber wearing away and getting too close to the metal Safari band.
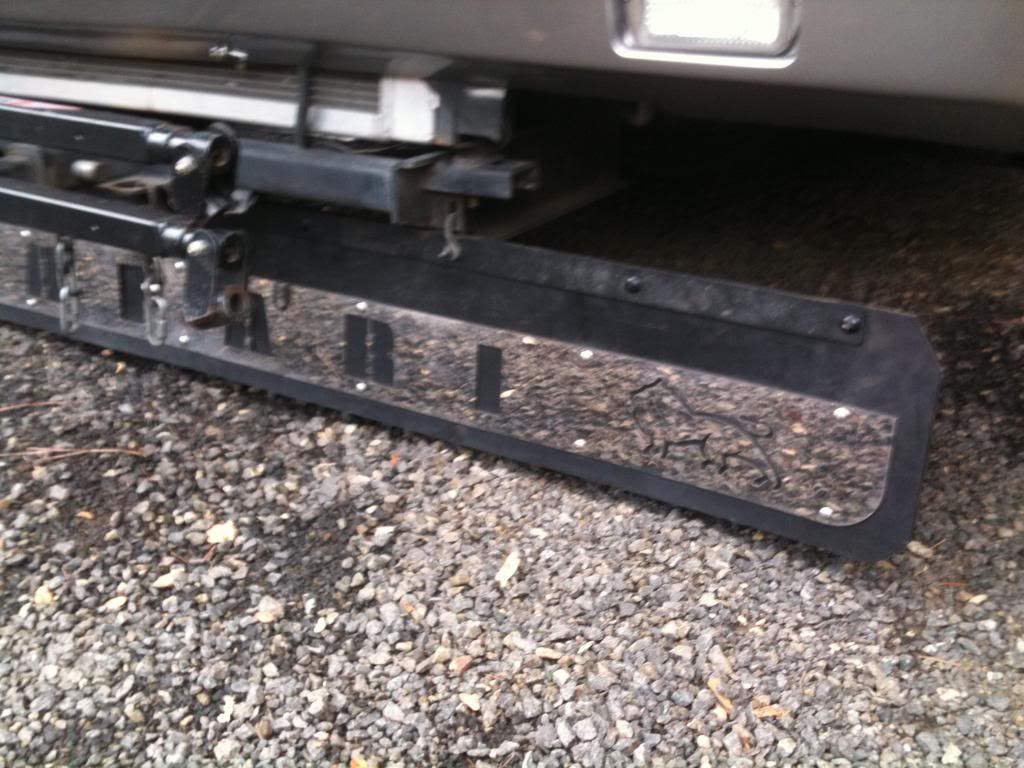
So DW and took measurements and went to the local rubber distributor and purchased a nice piece of 5/16" inch thick conveyor belt that was already sized at 12" inches wide. We had them cut it 95" inches long. When we got it home we took the metal pieces off and used the old flap for a template. Bolted up the top metal piece (hangs on the frame)and then put the "Safari" metal piece on just drilling the two end holes. Once we were satisfied with everything being level, we drilled the rest of the holes and reinstalled all the carriage bolts and nylon-lock nuts.
The fourteen bolts on the "Safari" bracket I replaced with all new carriage 1" by 1/4-20 and all new nylon-lock nuts. Total cost $69 for the rubber and $12 in bolts and nuts. So, now our rock guard is good and hopefully will last another 10 years..
PS..when using box cutter, spray soapy water or Simple Green on the area to cut and blade.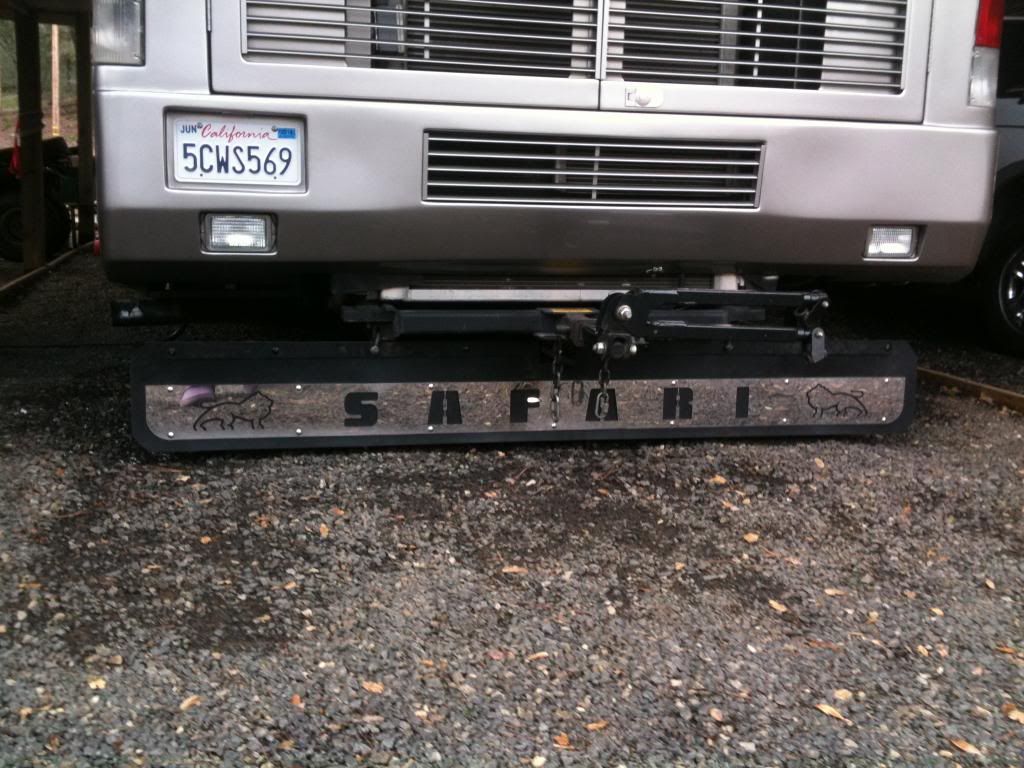
 Canadian_RainbiExplorer
Useroverdrive wrote:
Registered my account at rv.net. I'm also testing some winter modifications by running an electric heater all day. So far so good
Welcome to the forums! UseroverdriveExplorerRegistered my account at rv.net. I'm also testing some winter modifications by running an electric heater all day. So far so good
 xctravelerExplorerHere is a catch up post. When I brought the coach out of storage in September I noted a failed wiper seal on the passenger side front slideout. For a variety of reasons including travel with grandson and personal travel overseas this did not get dealt with until the end of January (the coach was back in storage October through December). We resumed living aboard on January 3 and within the week we went through very cold temps in Northern VA (as low as 4 overnight). I did not note any failures as a result of the cold, AT THAT TIME.
In Florida the Precision Temp tankless water heater began spewing water through the flow gauge face. Diagnosis from Gary at PT, the freeze preventer had turned on as called for, but failed to turn off, a known issue, overheating the flow gauge and causing it to distort. With his guidance I took the flow gauge apart and reassembled it which eliminated the immediate issue of no water in the coach (heater bypass valve is useless), however the spraying water had taken out the gas control board. Precision Temp shipped me both required parts no charge! Since I was having the seal (from the first paragraph)repaired at La Mesa in Sanford, I elected to have them install the new card and replace the suspect flow gauge.
While waiting for the parts,the water system started throwing black sand into every filter and screen on the coach. Diagnoses by me, the house filter had been damaged by the freeze back a month prior and was adding its carbon to the water flow. Simple project to replace the filter and clear the strainers on all the sinks. Unfortunately the kitchen sink did not clear as easily. The stuff had clogged the diverter valve for the spray hose. I crawled under the sink and tried to clean the diverter as recommended on the Pfister web site. It got better but not good enough. Talked to their tech and they sent out new diverter and new faucet core, no charge, lifetime warranty! I crawled back under the sink and replaced the diverter (2 minute job the second time). La Mesa installed the rest of the parts AND the seal and we were off to chilly Alabama, Summerdale that is, where I have washed the coach, finally, changed out the battery on one of my TPMS sensors and added a ROKU box to my entertainment options.
Sorry about the long list, hmmm... sorry it was so long :( but we're having fun. revumpExplorerA great experience at Camping World in San Bernardino, CA. I had them install a Voyager Tri-View Backup System = works great ... Service and clean our Splendide 2000 Washer/Dryer ... install drip rail over windshield
- mikeintnExplorer"After camping in a couple of situations where it was sort of "close quarters" over the last couple of years, it has been determined that I should have had "Genturi" long before now. It's not only common courtesy but, it's a lot healthier in terms of anyone that close to your rig, to not have to breath that exhaust if you happen to be camped that close to each other."
Good Job! It looks nice and should work well. I made one out of light weight PVC pipe that works well, we use it at NASCAR races where we are crammed together sometimes and never had an issue. You will get some detractors here because yours is not the store bought kind, but ignore them. Nice pictures too :D  FIRE_UPExplorerGents,
After camping in a couple of situations where it was sort of "close quarters" over the last couple of years, it has been determined that I should have had "Genturi" long before now. It's not only common courtesy but, it's a lot healthier in terms of anyone that close to your rig, to not have to breath that exhaust if you happen to be camped that close to each other.
Well, I saw them at Quartzsite for $119.00 total. I pondered it for a day and, when a friend came back to camp with one, I thought I'd go pick one up the next day. Well, the old fraise, "You snooze, you loose", yep, it applied to me and they were all sold out.
So, back at home and check Camping World and a couple of other sights and, they hovered around $130.00 and up, and some added shipping. So, I snooped around on the net and found out there's been quite a few of you that have made them yourselves.
So, I looked any pictures that were displayed and thought, heck, if I can pull the radiator out of this big beast, if I can disassemble 3/4 of a 7.5QD generator for a sensor/rotor/head gasket replacement, if I can install a Hydralift motorcycle carrier/lift on the back, I CAN BUILD A GENTURI!!!
So, off to Home Depot for an 1 1/2" EMT elbow, and some sort of light weight 3" tubing. The rest of the paraphernalia for constructing this little project I figured I had laying around someplace. Well, regular PVC 3" tubing and, ABS 3" black tubing was just too darn heavy. I went out to the garden department and found some light weight, plastic 3" drain pipe but, it was white and none of them were real straight.
So, while wandering around in the store, I happened upon the rain gutter section. And low and behold, there was some "down spout" tubing that was white and, some was brown. I picked up a 10' section of the brown and it was incredibly light. So, my brain started straining to come up with a plan for utilization of this rectangular stuff as opposed to using the larger, 3" round stuff, if I could find any I liked.
Well, I came up with Plan A and, headed out the door with one stick of brown down spout, a couple of support clamps and, a couple of extension connectors and the EMT elbow. I got home and went to work. The first thing I had to do was cut a "V-notch" in the center of the EMT elbow and put just a tiny "kink" in the bend to get it to bend straight up. Then I had to cut a couple of slits into the one end so a regular 1 1/2" inch muffler clamp would clamp that EMT bend to the stock exhaust pipe of the gen.
Then came the formation of the double bend brackets that transitioned the EMT elbow to one of the coupler/extensions. As you can see in the pic, I didn't just pop rivet to the coupler. I "sandwiched" the coupler with small pieces of aluminum and then, attached each double-bend bracket to that aluminum. I did that for one main reason. I figured pop riveting just to the thin plastic of one of those couplers would not last all that long and vibration etc. would get to it and I'd have crack appearing soon after it went into service.
So, it was just a tad bit more work to fab up all those little pieces of aluminum but, it made a serious difference in the stoutness of the setup. Once that was done, then I installed it on the coach/gen exhaust pipe. Now, to lower the long stick of down spout into that coupler. The connection is great. Now, I need some stabilization, about half way up that pipe. Hmmmm, what to use? I was thinking of running down to Harbor Freight to pick up some suction cups that I'd seen in another home built genturi. But, DING! A light bulb just popped on in the old brain.
I've got a "Go Pro" camera that I use for motor cycle rides and other actions sports. It came with a suction cup and a mounting arm. So, I retrieved that suction cup and stuck it to the side of the rig, at the highest point I could. Now, all that's needed was something to adapt it to the upright pipe.
Well, about 10 minutes of "MacGyvering" and, DONE! Well, it was all done and mounted. Now, for the true test, will it work? Zoom, the generator started. The home made genturi is as stable as a rock. There's no movement what so ever.
I got out my trusty infra-red heat gun and checked the temp of that plastic tubing etc. at various time and distances up the pipe. The highest the temp ever got, after about 20 minutes to a half hour with no load, was about 120 degrees. I could put my hand on that down spout anywhere and not burn my hand. It had no signs of getting soft from being too hot.
Since I found no real specs on just how far away from the tubing the exhaust tip should be to create the venture effect, I just "Winged" it. I got about a 5/8" gap. When I first fired the gen up, since I don't smoke, I needed something to tell me if a "venture" was actually being created. So, off to the paper towel rack and, a butane lighter was obtained.
I lit the paper towel on the corner and let it get going a bit. Then I blew it out and of course, it was smoldering. I held that smoldering section close to the venture area and wow, it sucked that smoke right up. I was happy.
So, for about $20-$25, I got a perfectly working "Genturi". That of course does not include the spare aluminum I had laying around and, the 1 1/2" muffler clamp I already had and, the Go Pro camera suction cup mount. Take a look at the pics and see what you think.
Scott


- mikeintnExplorerWith 5-7 inches of snow predicted with some ice and heavy snow, I semi brought the MH out of winter slumber to top the gas tank off for running the generator and staying in the MH if the power goes out. Plenty of propane and plenty of fuel now, bring on the snow!


About Motorhome Group
38,769 PostsLatest Activity: Jul 09, 2020