Forum Discussion

TMcArthur's avatar
TMcArthur
Explorer
May 24, 2013

1972 Compact Jr

I bought this little guy in April of 2012 for my Mother who comes on the occasional multi-week trip with me each year.


In October of 2012 I towed the trailer from Colorado to Nor-California where I picked up my Mother. From there we went all the way into Texas and camped there for a few weeks before slowly making our way back to California, and then lastly back to Colorado again.


More than 10,000 miles over 6 months this poor old trailer traveled. It showed every mile in wear and tear, but that was OK. We had planned on a complete overhaul anyway, so I started a complete interior rebuild this April.


I have finished demolishing the interior where I got to repair some of the minor holes and leaks before starting an interior repaint and the new flooring. Next step is to frame in pantry, kitchen, and sleeping areas.


I will update this thread as I go (don't expect it to be a speedy process) or follow my progress on my blog
  • What program are you modeling the layout in? I am gutting and reconfiguring my 5th wheel, and I was thinking about using it to force myself to use a modern modeling package. I have about 23 years of usin CAD in now, but mos of it has been old, out of date stuff that doesn't handle parametric solids. As a college instructor I have free access to anything Autodesk makes, so was thinking abou giving Inventor a try...
  • Btw - who made it? I really like these small, fiberglass shelled units. Cool project.

    Edit - I even read the title when I first opened the post - I'm guessing its a '72 Compact Jr....
  • The trailer was made by a company in California by the name of "Hunter". They only made trailers for a few years in the 70's.

    Tubularfab - I did not create the 3d model. I grabbed the image (and layout idea) from this web page. However, I have used Google's Sketch Up in the past. Easy to use and the image above pretty much is what you get.
  • Hunter Structures built trailers in Chatsworth, California from 1968 thru 1975. They built 2 different 13' molded fiberglass trailers, the Compact Jr and the Compact II. Some models were called Hunters but they were the same as the Jr or II. Both had rear doors and a center part of the roof that lowered for towing. Depending on options they weigh about 1300 lbs. ready to camp. I've owned a Compact Jr for 9 years.

    my Compact Jr
  • Finally, after a weeks worth of daily-back-n-forth to Home Depot, we are complete with the basic build of the Compact Jr trailer, and it is nothing like the original plan.

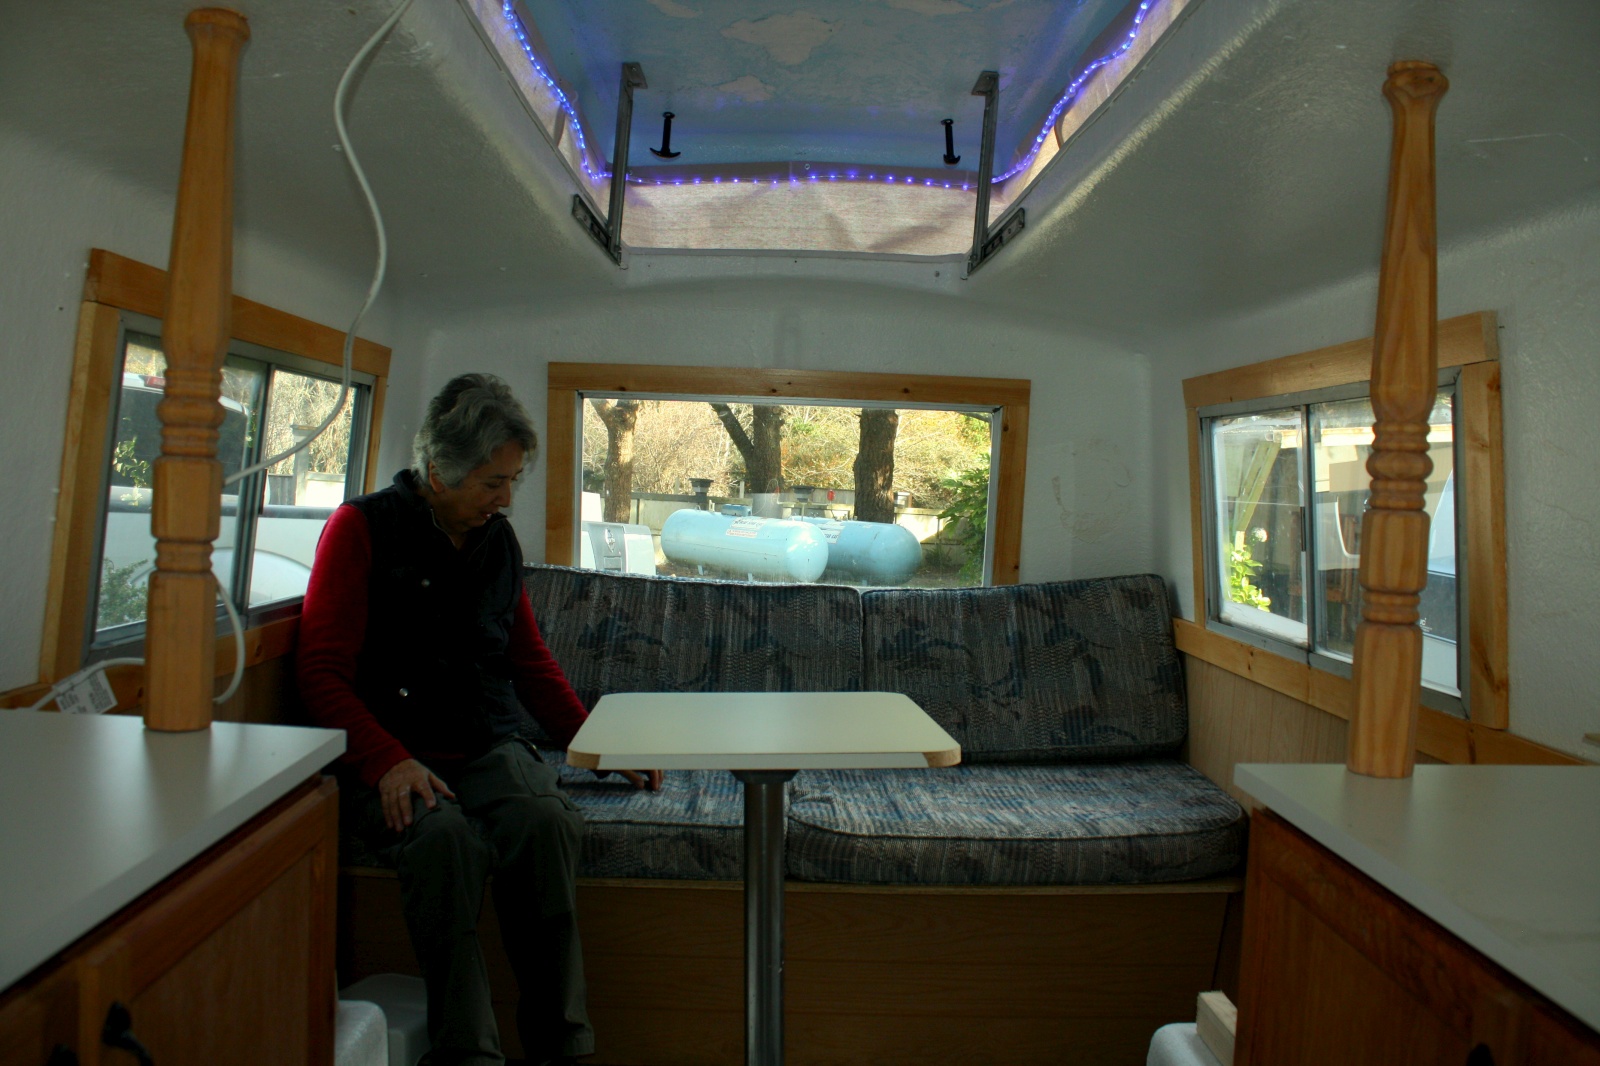
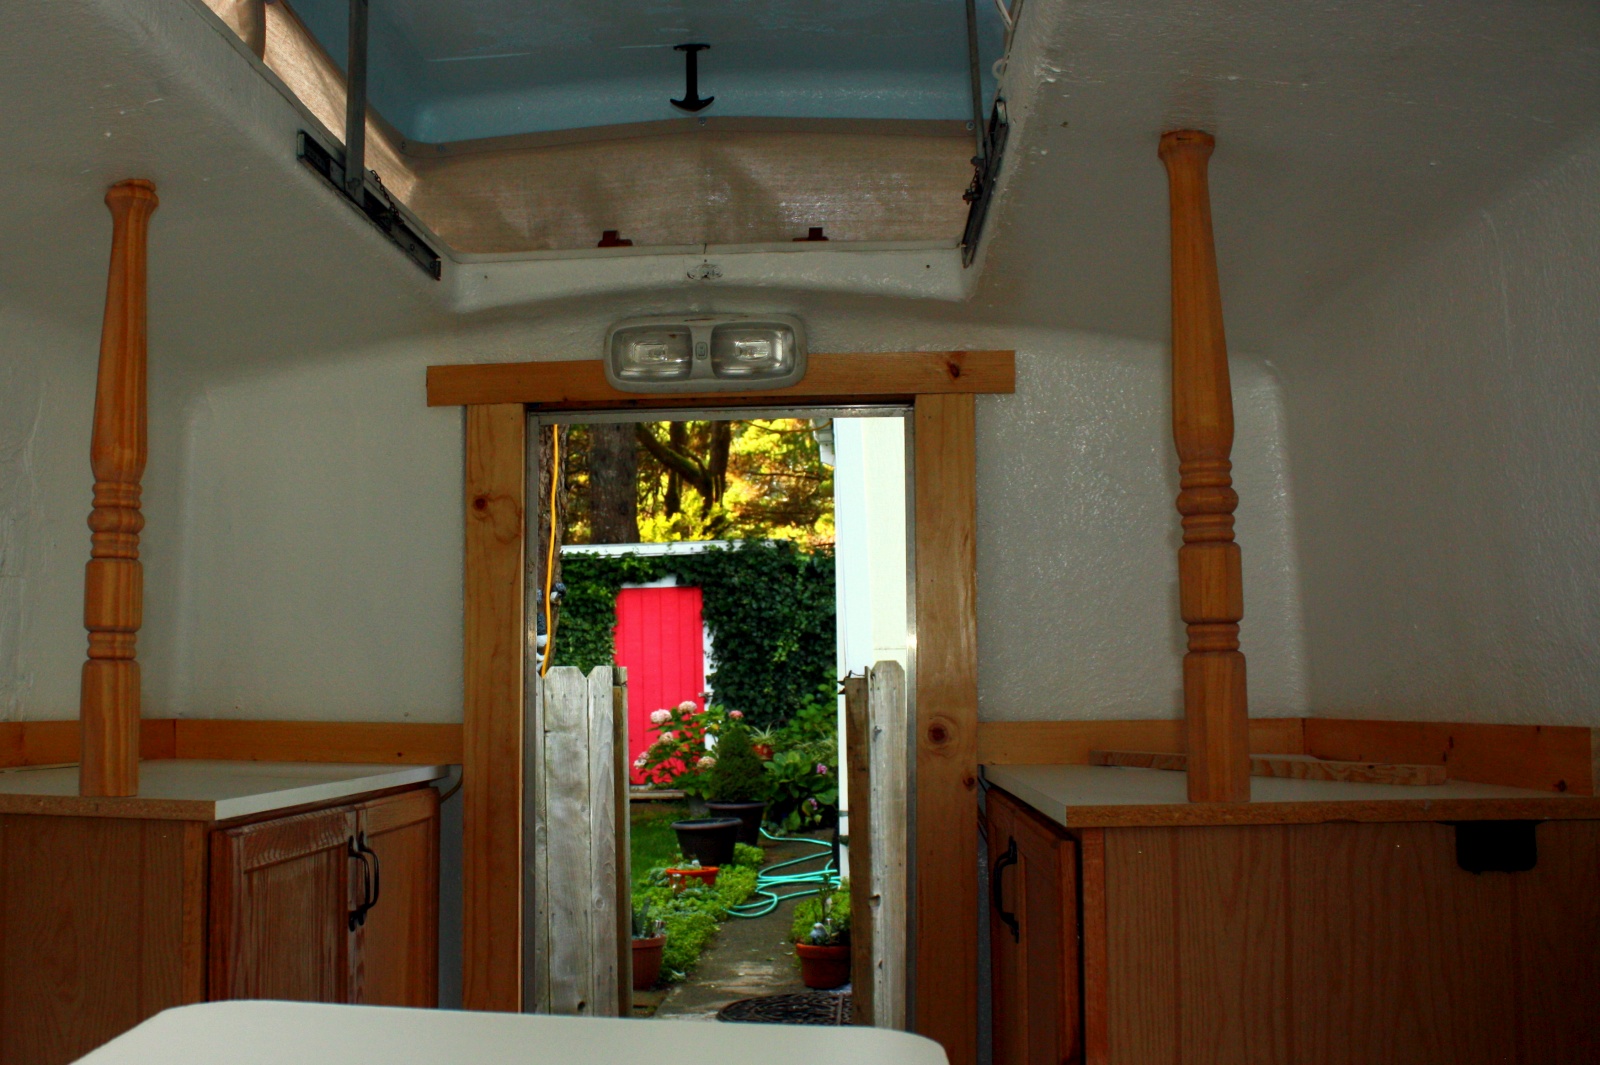
    After consideration, Mother wanted a more nautical-theme to the interior of the trailer. We used stained wood to trim out the windows, and added wayne's coating all the way around the living area. Instead of hard wood floor, we have linoleum. Instead of two thin beds that serve as bench seating, we went with one large fold-out bed with storage underneath. The option of another sleeping space still exists stretching from one wheel-hump to the other (with a well placed plank of wood). Instead of a full-height pantry on one side, we went with two counter tops with cabinets underneath. All of these changes come from my Mothers want for more open floor and counter space. To increase the floor-space the bed compresses back to a couch and the cabinets are only 14 inches deep instead of 20 inches. No walls were put in separating the bed/couch area from the kitchen/pantry area giving it a very open feel.

    While we originally planned to install a 120v/12v fridge, we have changed that to a 12v powered ice-chest style fridge as it can be brought out of the trailer. The same will be done with the cooking range; instead of a permanent fixture, we will use a removable camping stove. This will allow the kitchen to move outside of the trailer so we can better enjoy the outdoors while camping... another request of my Mother; to be able to cook and eat outside more easily.

    The finishing touches were the decorative support posts, staining the cupboards, and adding the hardware to open and close the cupboard doors. Along with a 12v light above the doorway, the changes finished off the kitchen/pantry areas.

    Prior owners glued on a cheap panel board to the inside of top and the entire fiberglass top which was sagging about 3 inches thanks to thin fiberglass and the added weight of the panel board. We spent hours chipping away at the glue and board and then added ribs to the top-outside of the top to lift the fiberglass back into shape. These ribs will double as a place to mount solar panels or even carry a kayak or canoe during the fun travels we see in our future. We also took the time to replace all the aged nuts and bolts associated with mounting the top to the trailer itself. Together with a few drops of lithium grease, it is much easier (and safer) to erect or drop the lid.

    We had talked about painting the inside of the top a sky-blue so she could rest in bed and see the sky even with the top down. A quick sponging of white to the hardened glue areas give the impression of fluffy 3D clouds in the sky (or islands in a sea depending on your view). A blue tinted rope light was brought in to add to the ambiance.

    Finally, to replace the old and mildewed canvas, long since thrown in the dumper, we picked up some canvas of our own and began the two-day job of hemming and then installing the canvas on the pop-top. Instead of small portal windows that the original canvas had, we set it up so four-foot sections on each side can be rolled up to allow massive light and air into the trailer at will.


  • Agreed, very impressive and you have something that you can be very proud of, and a labor of love.
  • Great job on the restoration! The new woodwork looks pretty. Nice to see you could put some of your own spin on the popup feature, really creative at that.

    The only thing I don't like is the support posts but that's the great thing about America, you can love and use any kind of support post you want.:B