Forum Discussion
- GeewizardExplorerI mounted my 120W solar panel with Z-brackets and rivet nuts into the aluminum box tubing under the skin. The wiring went into a PVC LB fitting inserted into a hole drilled through the roof. There was no refrigerator vent on my TC since it's a pop-up.
Everything was liberally coated with Dicor afterwords and the LB fitting completely filled with Dicor.
I haven't had a leak since installed in 2005. - MontanaCamperExplorer
skipro3 wrote:
I used drill free mounts;
http://www.amazon.com/gp/product/B008LMIHNQ/ref=oh_details_o00_s00_i00?ie=UTF8&psc=1
They glue down using the same stuff you would patch a hole in the roof with.
Here is a photo of them on my camper;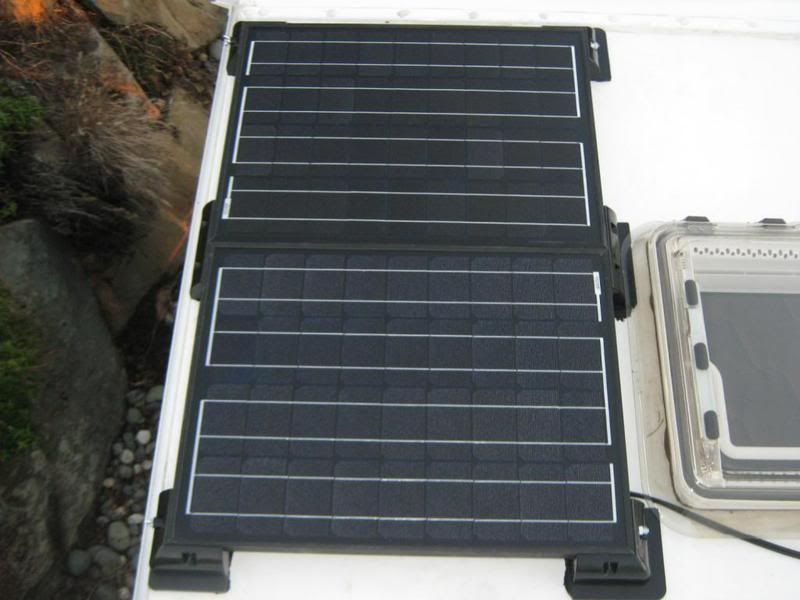
am looking into solar panels, I really don't want to void my warranty, this seems less voidable....but I guess anything you do is voidable...
thanks for the pics and link - Golden_HVACExplorer
Golden_HVAC wrote:
Here is a picture of my roof, after coating it with a roof coating.
It shows the solar panels tilted while I am applying the roof coating. To get the wiring from the roof to controller, I used a coat hanger and pulled in grey #10-2 wire (home Depot) to run the power through. I have about 12 amps going through each of the #10 wires to the controller, and then #8 wire to the battery.
Good luck with your project.Golden_HVAC wrote:
rickthescot wrote:
Sounds like a great idea. I guess asking for pictures again is not going to persuade you though. We are visual creatures and I don't think 1000 words will accomplish what one image will. You can do it, just one pic.
More pictures that I took a few days ago to post pictures of my solar panels, and their mounts. Some pictures are really close up pictures of the solar panel mounts, and give a clear picture of howrough the surface is.Golden_HVAC wrote:
Hi,
This is my front pair of panels. 120 watt mounted on a curved roof, 102" wide.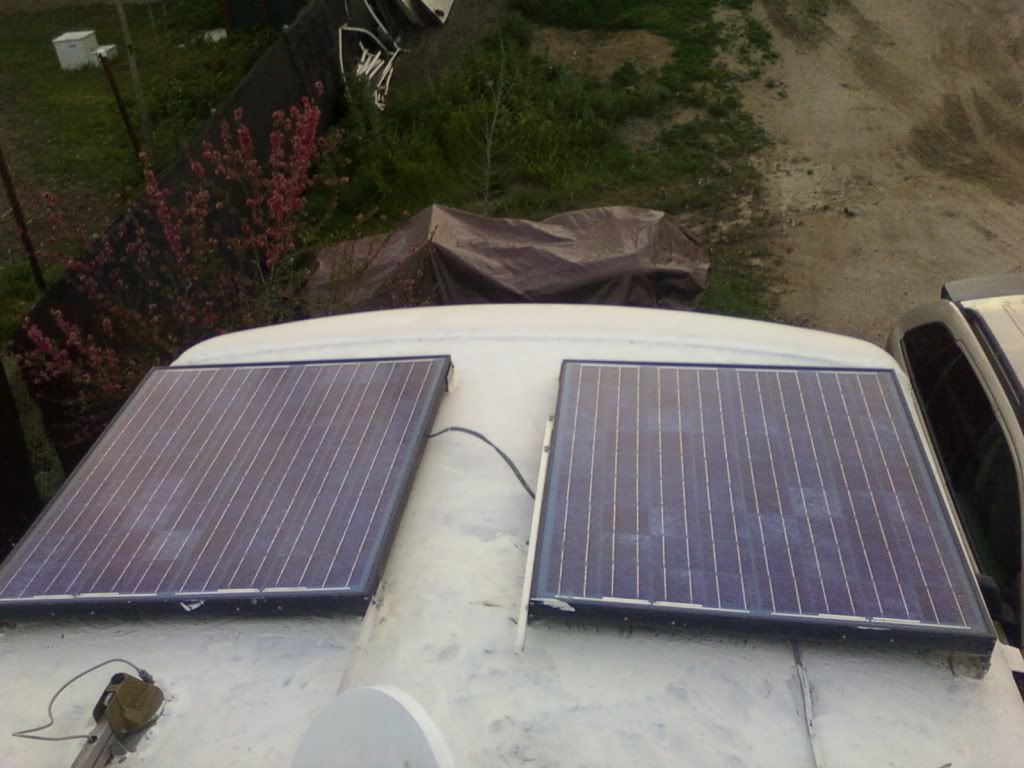
This is the mount it is held on with three rivets into the frame, and then the bottom half is 6" long aluminum, with nutsert in the upper piece, bolt you can not see from the outside edge pointing inward.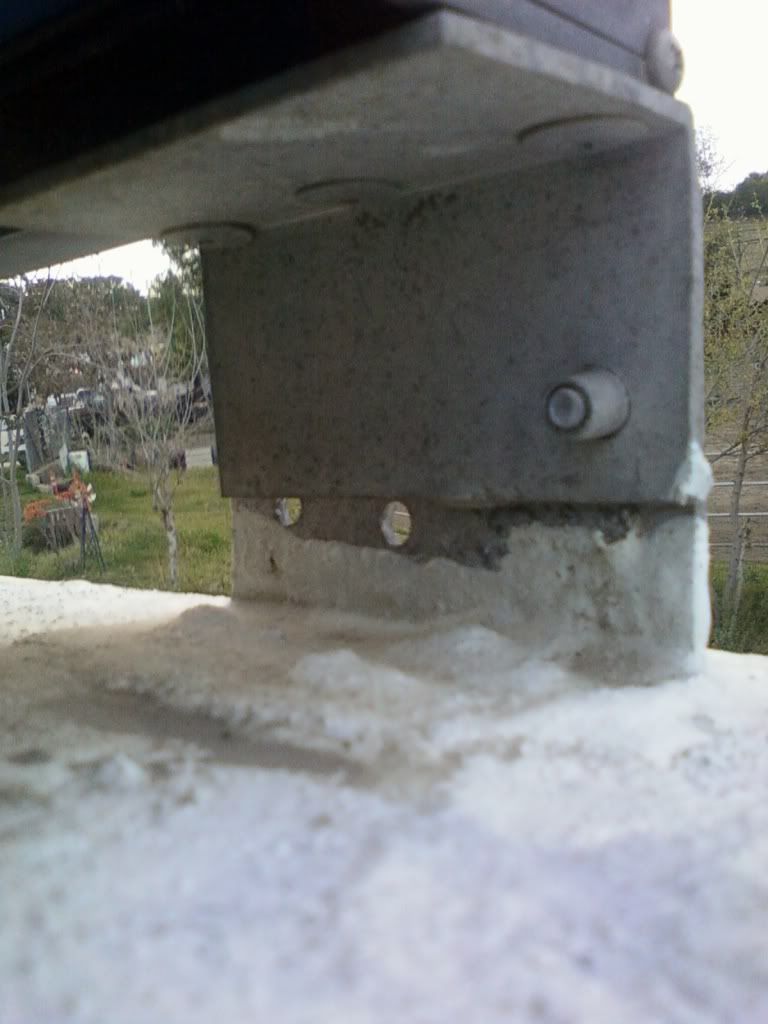
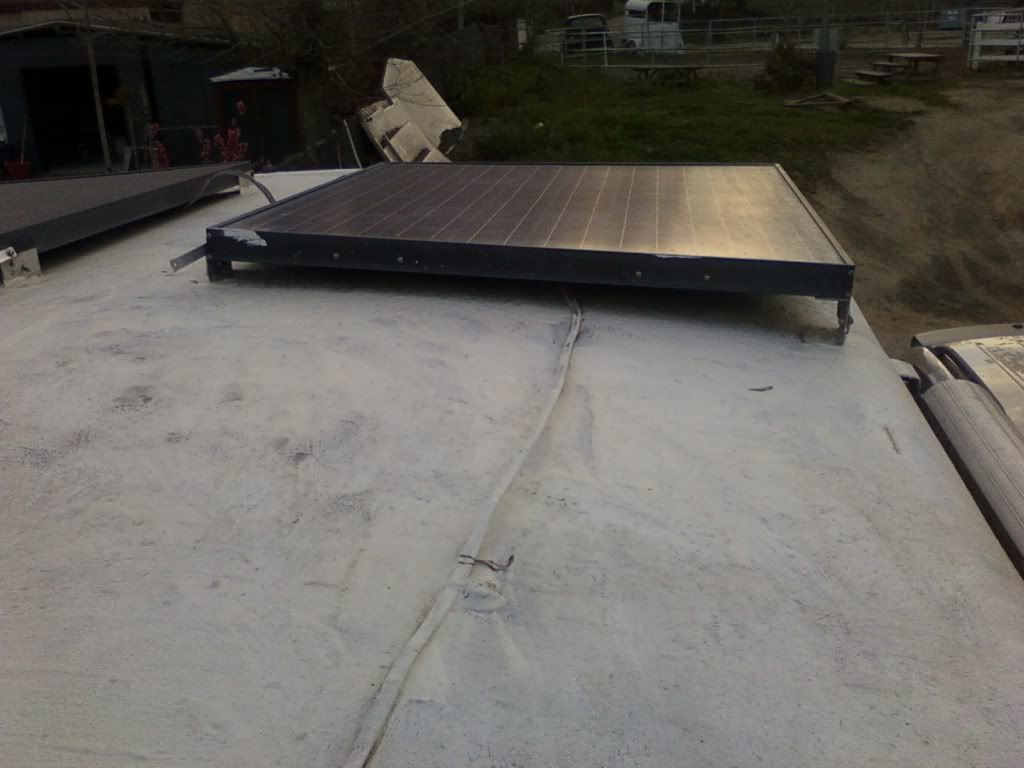
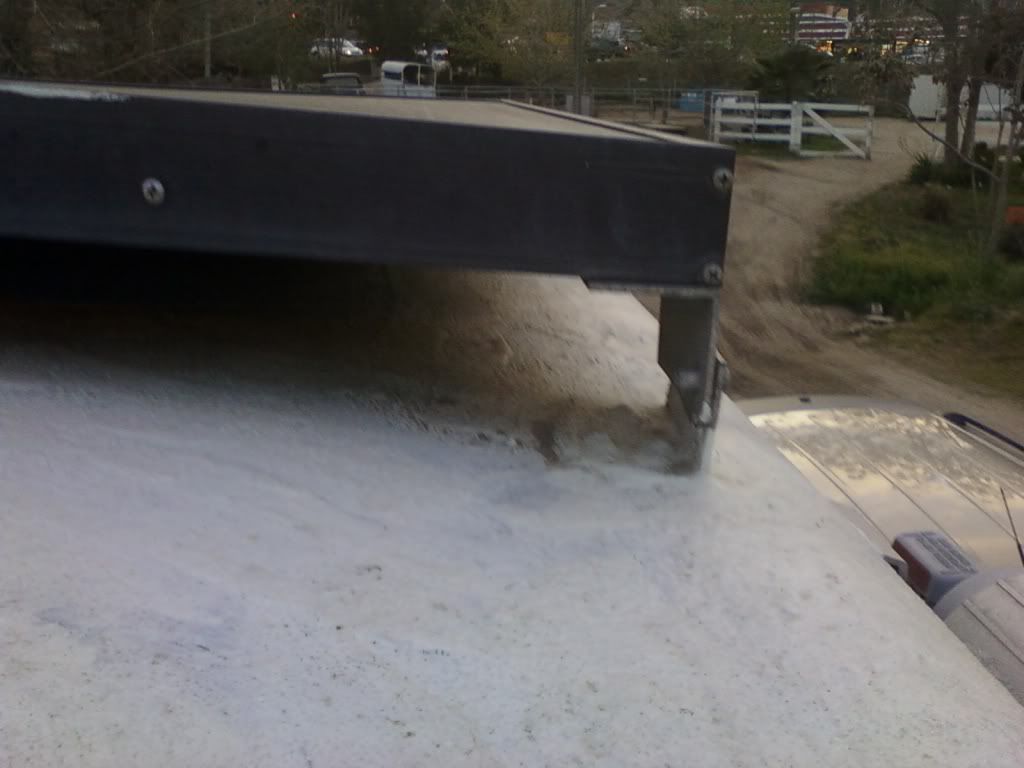
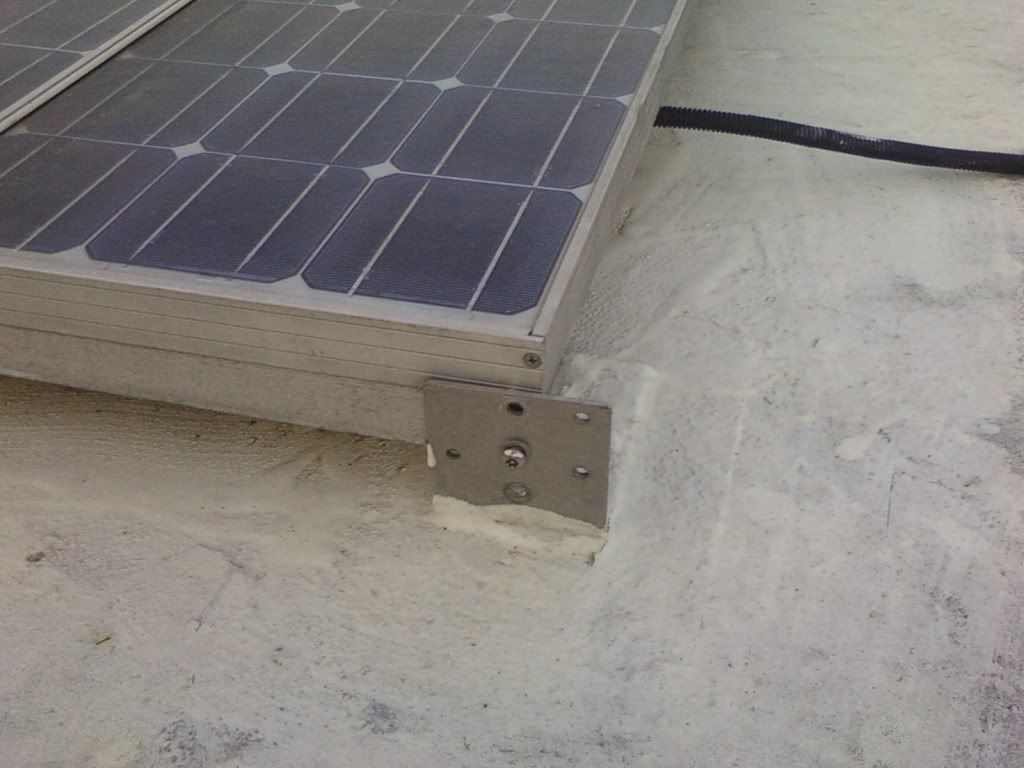
This picture shows the bigfoot panel mount sold by RvSolarElectric for $35 a set back in 1994. I wonder what they cost today?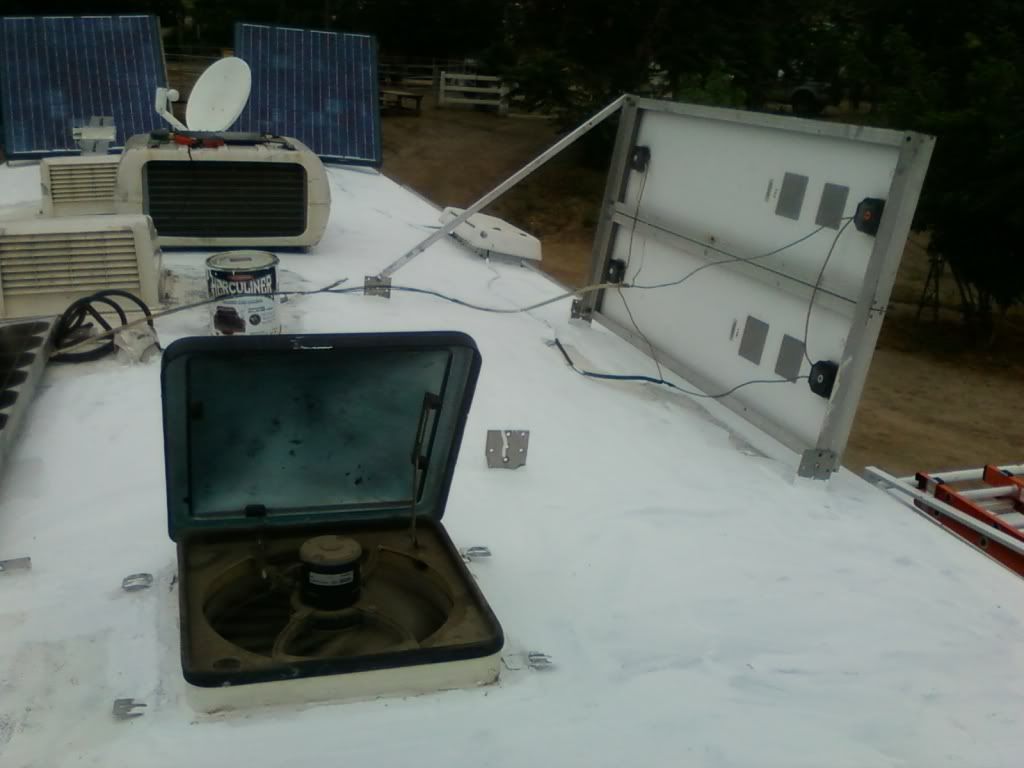
This picture shows the panels tilted while I was working on the roof.
Fred. - Golden_HVACExplorerHi,
I have installed solar panels both ways. Twice through the refrigerator vent, use a metal coat hanger to help pull the wire from the roof to the area behind the refrigerator, then to the closet where the first controller was mounted, and to the battery in the basement storage compartments.
The other was a Holiday Rambler, with a factory installed solar wiring harness consisiting of 15 feet of #8 wire starting at the battery box and ending 2' from the sidewall and 3 feet behind the antenna on the roof. So I measured this distance, expecting to find a buried electrical box or SOMETHING!. All I found was directions to drill a hole into the roof, reach in and pull out the wire! I drilled a 1" diameter hole into the roof, and was able to locate and draw out the wire through that hole. Then I used some rubber roof sealant and a watertight handy box (like to mount a outdoor receptacle on a house) with a blank cover. The wires are connected with a two screw connector to the back of the box, another connector to the wires coming from the solar panel. Wire nuts inside with black tape. Then I mounted a solar panel OVER the top of this box, so no rain will ever get on top of it.
My brackets are under the corners of the solar panel, made from 6" of 2" angle aluminum. I drilled 3 - 3/16" holes for #10 screws into the roof and a single 5/16" hole for a 1/4-20 bolt into the side of the solar panel. I also used a tamper resistant 1/4-20 bolt to hold it onto the bracket, so it is difficult to remove.
Fred. - Ski_Pro_3ExplorerI used drill free mounts;
http://www.amazon.com/gp/product/B008LMIHNQ/ref=oh_details_o00_s00_i00?ie=UTF8&psc=1
They glue down using the same stuff you would patch a hole in the roof with.
Here is a photo of them on my camper;
- 2oldmanExplorer IIEven if I had to drill completely through it wouldn't bother me at all. Just use the proper drilling technique for the material, and seal it up tight.
The only thing I get a bit uneasy about is drilling into wires or ducts. - SentinelistExplorerThanks, if the run is too long or I have to pull the fridge, I may drill into a cabinet. It has an aluminum roof, no rack (yet).
I'm noting Dicor and that adhesive! - bka0721Explorer IIDid your TC come with a rack on the roof? (Maggie Rack)
b - cewillisExplorerWhat is your roof made of? Mine's aluminum framed, so I drilled into (not through) the aluminum bars. Sealed with Dicor.
- tony_leeExplorerIf the roof is fibreglass, just clean it thoroughly with acetone where the brackets go, roughen the contact area and the bottom of the aluminium angle brackets with abrasive paper, put a dollop of polyeurethane adhesive (Sikaflex have some good ones) on the contact area and lower the panel with brackets attached down onto the adhesive blobs. Press down only enough to spread the adhesive and try to maintain an adhesive thickness of 2 to 3 mm. Leave at least 24 hours.
It will never come off until you cut it off.
Down the fridge vent is quick and convenient which is why the so-called professionals use it, but if that means the wiring runs get too long, then I have no qualms about drilling down into a cupboard beneath or just adjacent to the panels and running the wires down and gunking around the cables and for an inch or so on the roof with the same adhesive. Never had one leak yet.
Given that the average RV roof has already has a heap of big holes in it, one or two 1/4" holes is neither here nor there.
About Travel Trailer Group
44,028 PostsLatest Activity: Dec 15, 2014