Downwindtracker2 wrote:
Snip...
Thank you John, that's a post that needs to sticky-ed . With my typing skills it would have taken me days.
It's under one of the bedroom windows, my side.I better check the other side too. When we got it,I didn't pull and reseal with Pro-Flex the windows, just around the edge of the frame. My mistake, which I'm regretting. I did do the trim, though.
I haven't pulled the paneling, yet. So that is how these trailers are repaired. That's going to be difficult.
They used SPF studs which is mostly spruce, a not very rot resistant wood. So I'm honestly afraid of what I'll find in the wall.The floor goes under two cabinet walls.
Thanks again . I do have Multicrafter.
Hi Downwindtracker2,
First, thanks for the good words.
I tried to find your 2012 floor plan on the web, but I could not find it but found this 2016 one, which may be close to yours. Please confirm it is.

I also found this 2012 Creekside video by Outdoors RV showing the features of the camper. They do a good job on those campers. Ron Nash started something good with the Outoors RV division, I like what they have done.
https://www.youtube.com/watch?v=5U8We36NJzISeeing your floor plan, do you have a pass-through cargo area under the bed with cargo doors on both the left and right front side of the camper? Please confirm this.
Now that I see the floor plan and you stated the floor damage is in the front bedroom, I have seen and dealt with water damage repairs where the cargo area had a leak in the camper corner and or a cargo door that damaged the floor. Water wicked into the bedroom area floor from the cargo area. You are correct; the windows, and I will add, the roof line are also possible sources. You may have more than just one source at the same time. It is common to have that.
Have you thought about possibly using a moisture meter to scan the camper before you start taking the camper apart? I'm willing to type and show how they work if you have any interest.
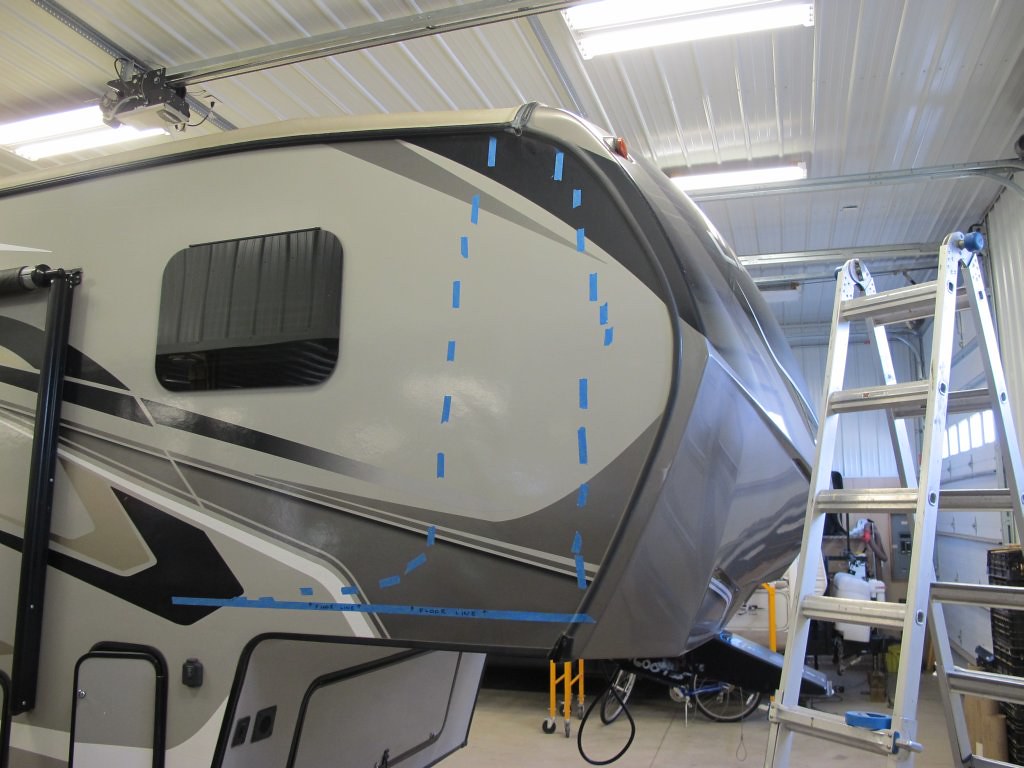
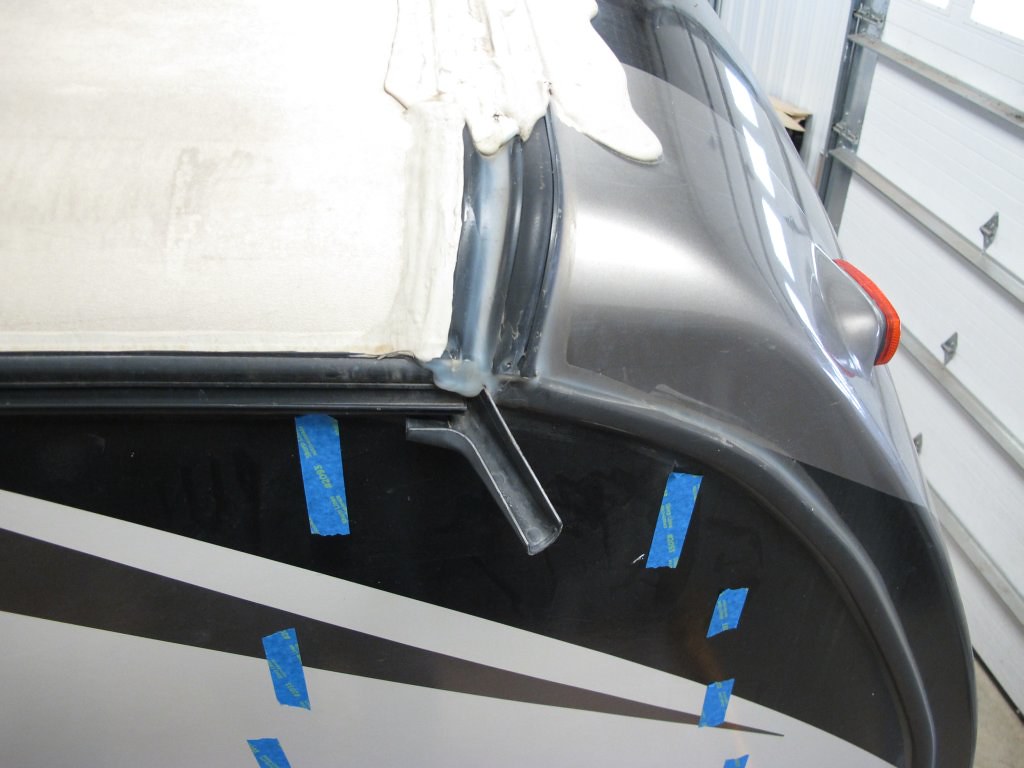
To show how a pinless moisture meter can find moisture behind a fiberglass-sided camper, see this 2019 Keystone Laradeo 5th wheel I worked on for a neighbor this winter. I could see the start of delam, pulled out the meter, and there was a leak starting at the roof line, where the front cap and side wall join the roof. The blue tape is the outline of the moisture, inside, the outline was wet, and outside, it was dry. I also picked up the bottom metal in the wall from the aluminum frame. In this case, the leak was found early, only the outside layer was wet, and the inside of the wall was dry. I scan both sides to understand how progressed the damage is.


I found the leak entry point when I pulled the roof apart at that gutter rail area joint. The meter guided me to where to start.
Let me know if you want more on the moisture meter and how to apply it to find your leak sources.
I hope this helps,
John


