Forum Discussion

JoeChiOhki's avatar
JoeChiOhki
Explorer II
Jun 30, 2016

Rebuilding "Ms. Merry" The Amerigo - Updated 05/29/2021

Once upon a time, I used to break up my Trip Reports and Projects into separate posts, at the time this was heavily "suggested" to me by a former admin.

Going forward, I think it may actually be more prudent to return to more of Sleepy's style, where new stuff is added as replies and a table of contents is kept in the main first post.

So, from here on out, I will be posting any further work on the Ms. Merry the Amerigo, here vs creating a couple hundred separate posts that might get missed.

I'll link to the separate posts that currently make up chapters prior to this one, for those that are just getting started instead of duplicating these posts.

----------------------------------------------------------------------
Table of Contents


Since I need to work on fixing the blog portal, I've been doing some video progress ports on my Youtube channel to catch folks up till I can get back to writing blog entries :).

Video Progress Report Updates

65 Replies

  • Sunday, July 3, 2016

    Rebuilding “Ms. Merry”, the Amerigo–Merry get’s a step up!


    Now, that Ms. Merry’s front wall was all done, the gang and I wasted no time in getting straight to building some side frames for Ms. Merry’s tub so that we could install insulation along her tub sides, which were little more than 5/8” pieces of plywood standing on end, not very warm in the winter!


    These new tub walls, not only will help keep Ms. Merry warmer during the winter, but they also give us a nice strong spot to tie in the wall that will help hold her new 42 gallon fresh water tank .


    Ooops…. need to make a little notch so that we can fill the tank!


    Trying old Ms. Merry’s old tank step top .


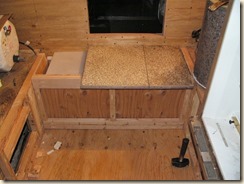
    There we go! Ms. Merry’s new fresh water tank has been plumbed for the pump, and given a pressure test to make sure none of the fittings leak before we close it up in her front step.


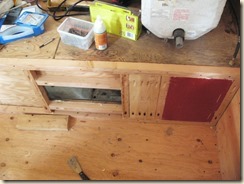
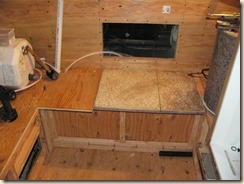
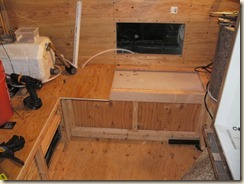
    The plywood on the top on the left is the new bottom for the kitchen cabinet that goes over the top of the tank. We’ve stuck a piece of pipe in the elbow for now to keep saw dust and other stuff out of Ms. Merry’s new fresh water tank until we’re done plumbing in the fill pipe.

    One more wall still needs to be built for the tank step, this one will be lightweight, creating a storage compartment in front of Ms. Merry’s fresh water tank inside the step where we can store all of Ms. Merry’s spare water hoses and cords and what not that Mr. Kit is giving her.

    Even got the rest of the cabinet bottom in on the driver’s side wing, lots of glue and screws to make it good and strong .
  • Friday, July 1, 2016

    Rebuilding “Ms. Merry”, the Amerigo– Enclosing our first wall!


    In our last adventure, the gang and I had set about solving the mystery of Ms. Merry’s trampoline floor, now that that is taken care of, it’s time to start closing up some walls so we can get Ms. Merry’s new fresh water tank installed and then I can get back up to finish her cabover floor.

    First thing that needed doing was to finish up the frame in Ms. Merry’s front wall, it was missing a lot of wood both from be taking stuff out to fix her floor, and because Merry’s original builders cut a lot of corners.

    To get started, we had to take poor Ms. Merry’s other front jack off and remove all the new plugs we’d installed last fall, they were coming through a part of the wall where some new framing needed to go.

    Once all the new wood was cut, and glued and screwed in place, we made short work of cutting all the new insulation panels for Ms. Merry’s new front wall.

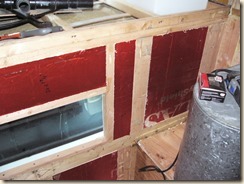
    Before w/new right corner


    After w/all of the insulation installed


    “My, that’s much better!”, exclaimed Ms. Merry after I tapped in the last piece of foam board.

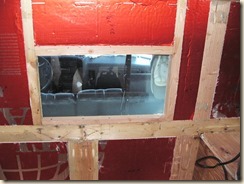
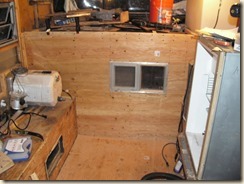
    I don’t know if you noticed, by Ms. Merry’s window opening in her front wall has changed a little as well, its been reshaped to take a spare window off Old Mr. Kit, who hasn’t needed it since he got his wall air conditioner several years ago.

    How nice it is that Mr. KIT has yet another of his old pieces that Ms. Merry can use .

    You’re probably also wondering, “Matt, why does Ms. Merry have an extra 2x4 in her left corner?”

    Well, that’s for when I go to reinstall those connectors for Ms. Merry’s batteries and her lights, I wanted something solid I could cut holes through to anchor those outlets into good and solid so the seal would stay good and tight, before, those plugs were only held on by some caulk and a couple screws through the fiberglass.

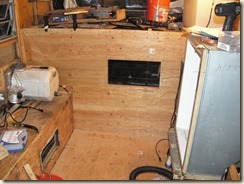
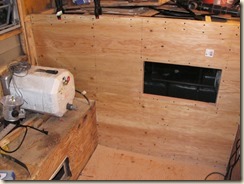
    With a fresh sheet of 3/8” Plywood, it didn’t take long to cut Ms. Merry’s new front wall plywood to shape, and then glue and screw it into place .

    I also got to try out our newest member of the gang, the younger Milwaukee Brother, Router. Mr. Router Milwaukee made short work of cutting out the opening in the new plywood for Ms. Merry’s pass-through window.


    And there’s old Mr. Kit’s spare window, stuck in the opening for a moment on the wrong side to make sure it fights right .


    And now, Ms. Merry’s front wall is done till its time to install the finish paneling to make it look pretty .
  • Joe - I just loved your new writing style! Oh and the floor ain't bad either. ;)

    Haven't taken the opportunity (I blame time constraints) to really read your project. Gonna have to go do it.

    Nice work.
  • Thursday, June 30, 2016


    Rebuilding “Ms. Merry”, the Amerigo – And The Mystery of the Trampoline Floor


    I’ve been reading George and the late Ms. Tioga’s amazing story, again, as of late, and I’ve always loved George’s narrative style, as he described his adventures being a Vagabonder Supreme with all his friends.

    So, today I decided I’d try writing in his fashion, as I’ve always tended to assign human qualities to a great many things that have been a part of my life and talked to them like they were people on many occasions.

    The Amerigo, you should already know her name, its Ms. Merry, of course!

    Now, Merry’s Chaufer, the trusty old white Dodge pickup, might be a tad more challenging, as his name isn’t really straight forward. His name is Jake, named after his Grandfather, an old red 1979 Chevy C20 Camper Special who drove Ms. Dyna around for my parents when I was a little baby. Jake, however, likes to be called “Red” after his nickname “Redneck Express”, because he thinks it makes him sound tough like a junkyard dog, though he’s more like a sleepy black lab.

    Red’s been taking care of Ms. Merry, resting on his back while she undergoes her surgery. Both of them are looking forward to when Ms. Merry is finally done, and its time for Merry, Red, Dawn and Ms. Yuki the Cat to return to the asphalt rivers once again in search of the next horizon.

    ---------------------------------------------

    When we last left off, I was showing you all the new holding tanks for Ms. Merry the Amerigo, who is still feeling rather out of sorts with her insides out and about, scattered into various unsorted piles in the barn with old Mr. Kit, who simply grumbles whenever he’s woke up by me digging around looking for a bit of Ms. Merry to put back and generally mumbles something about “Staying off his lawn”.

    Today, I finally decided to tear into Ms. Merry’s floor, the last big mystery left in her bare skeleton.
    From the day I first looked at Ms. Merry in her dusty tent up in Washington, I noticed that her floor was rather springy, like walking on a trampoline in some areas. This was very disconcerting, as no Truck Camper’s floor should bounce like a trampoline when you walk on it!

    I figured at the time the floor was either built with too thin of plywood when Ms. Merry was put together, or water had gotten into poor Ms. Merry’s floor and the framing had rotted.

    So, with all of Ms. Merry’s walls finally put back together and built stronger than ever before, I set about investigating this danged trampoline, as there was no way I was going to put 348 lbs of water on poor Ms. Merry’s floor only to have the tank drop through the first time she decided to climb of Red’s back.

    After a great deal of struggle, Mr. Ryobi the Saw and I cut out several peep holes in the floor so I could take a look into Ms. Merry’s floor to find what the trouble was.

    The only problem was, every hole I cut, I only found foam!

    After a while, Mr. Ryobi the saw was screaming “Enough, this old vinyl and plywood is hard for me to cut, you should using Mr. Milwaukee for this!”, so I got out big Joe and his little buddy Five-Pound, to start ripping up the stubborn plywood and let Mr. Ryobi’s battery go and recharge.

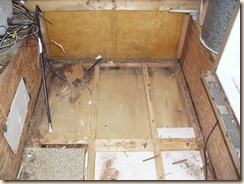
    This is what we found:


    No rot in the frame! Yay!

    Now, there is some water damage to the very thin door skin that covers the bottom, but it appears that’s the only thing affected, and I can replace that later when Ms. Merry’s got all her legs again and she can climb off poor Red’s back and give him a rest.

    The plywood also wasn’t rotten, or thin….. like every other plywood piece in Ms. Merry, it was 5/8” plenty thick. So, why was her floor so bouncy?

    I didn’t find the whole reason until I spent several more hours with Mr. Ryobi, Big Joe and Five Pound.

    Turns out, poor Ms. Merry’s floor wasn’t built very well .

    Instead of properly securing Ms. Merry’s floor every so often with cross boards, her floor was simply made up of four 2x2s running length-wise the entire span of the floor with only a couple of very loose 2x4 pieces up towards the front to stiffen it. You can see those in the pictures above.

    So, with no solid cross beams, the floor in the middle just bowed up as Ms. Merry’s big rear end sagged down.

    Well, we couldn’t have that! So, I asked the two Atwood brothers, “Would you please lift up poor Ms. Merry’s rear end so it straightens back out and I can fix her floor?”

    “Sure thing boss! But, you’re going to have to turn us, you haven’t got us any power, yet!” replied the Atwood brothers, who always love a chance to lift something big.

    So, out came the crank, and I got myself into quite a sweat spinning down each of the Atwood brothers until Ms. Merry’s rear end had lifted just enough to straighten the floor back out.

    Once Ms. Merry’s floor was no longer bent, I got out trusty Mr. Dremel and we cut out the old floor almost all the way back to the rear, removing the bent and twisted floor joists.

    After I had finished vaccuuming up the floor and pounding over the staples left from removing the center floor joists, I proceeded to cut new 2x6s to frame up the floor in the front to be strong enough to support Ms. Merry’s new fresh water tank, and then several 2x4s to provide support for the dinette seat compartments where Ms. Merry’s batteries were going to go.

    Finally, using a 2x6 and a 2x4, I rejoined the remaining portion of the old floor joists from the rear into the new framing in the front portion of the floor.

    My poor arms and Mr. Ryobi the Drill were both fairly sore after driving in all of those large screws to clamp all those new pieces of wood togther so they’d become super strong once the glue set.

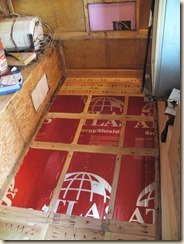
    We also got to cut our first pieces of insulation , finally we’re putting things back together!
    Put down a bunch more glue on the top of all that new wood, then drop in the new sheet of plywood….


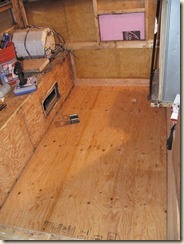
    Driving in a whole bunch of two-inch screws and the front section of Ms. Merry’s floor is done!

    -----------------------------------------------------------------

    Well, that takes care of the front portion of the camper, I’ll be able to replace the plywood on the rear section as soon as I remove the toilet from the bathroom so I can move the shower stall out of the way and tear out the last piece of the original plywood.

    When they built Merry’s floor, they ran a full eight foot sheet from the rear straight up to the front, then a second shorter piece to complete the run, hence the 2x4s in the photo of the original frame structure. The outer edges of the overhanging section simply have small pieces of plywood added on instead of the rear being cut all from one sheet of plywood.

    With the new framing and the same thickness of plywood as the replacement, the new floor doesn’t bounce at all and is quite solid.

    Next up, I’ll be finishing the framing on the front wall so I can then insulate and close it up, allowing me to then build the framed box for the new fresh water tank and then i’ll have a step again so I can easily get up to the cabover and finish the floor.

    Once the cabover floor is in place, I can really start picking up the pace, first repaneling the ceiling up there, then installing the insulation and new quarter inch plywood to the walls in the cabover.

    I’ll be returning to more my regular-style of writing for my following posts, but I’ll probably continue to refer to the camper as Merry and my truck as Red, going forward, however, I think I’ll probably stop giving characterizations to everything else, even if it was kind of fun .

    Till next time,
    Safe Travels .