Forum Discussion
-Oz-
May 01, 2016Explorer
I know this is an older post but I thought I would put some detail onto how I did this.
Supplies:
- 1x Glacier Bay faucet (pretty much the cheapest I could find at Home Depot that met the requirements and wasn't all plastic).
- 2x SharkBite Fittings
Equipment:
- Screwdriver
- Clipping tool (knife) for the PEX line. I didn't use a knife but it definitely would have worked, I had a different tool that worked well
- Electric multitool (to cut the hole for the weight)
What I did:
My wife really wanted a sprayer. I really wanted a steam of water that was somewhere other than where the silly plastic faucet put it. I removed the old faucet using a wrench meant to reach up behind the sink and loosen the plastic retaining "screws". If you don't have one, and aren't going to reuse the sink, you could almost just cut the thing out.
Once removed I was able to dry fit the new faucet. In the process I found that the "gasket" under the plate to cover the other 2 holes needed slightly larger right and left holes to be flush. I used a dremel with the sanding attachment to widen just the part needed. If I had known the faucet was going to work I would have just trimmed the gasket itself.
With the faucet now flush I knew where I needed to trim the pex tubing to take the longer supply lines. A quick cut and that was ready. I then just used the two SharkBite fittings to reconnect the lines. They were very easy and required no tools.
With everything connected I fully attached the facuet. Now i needed to find a way for the weight and hose to swing freely. I used my multitool to cut a rectangular hole that the weight and hose fit through. It worked but kept getting caught on the hot water line heading to the outdoor shower. To fix that I tucked it out of the way and then anchored it to the wall. Here is a picture of the underneath both above and below the cabinet shelf:
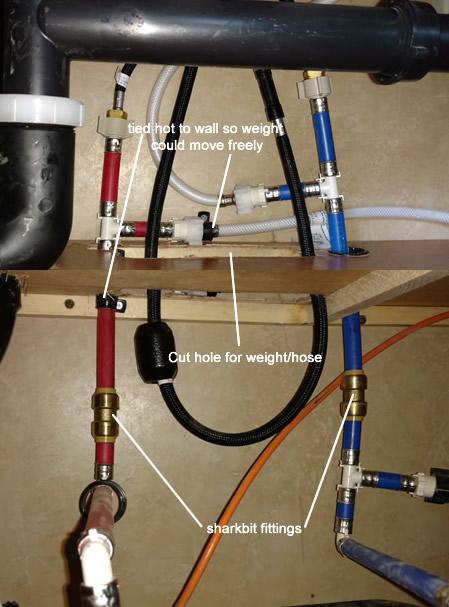
The good news is the supply lines connected directly to the existing PEX hose/fittings.
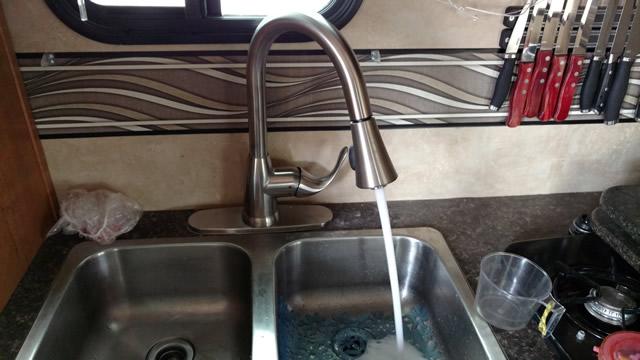
After I dewinterized I tested it out. The good news is the RV pump has enough pressure for the faucet to work with both regular flow and spray. Additionally, it actually uses less GPM than the stock faucet.
Regular flow:
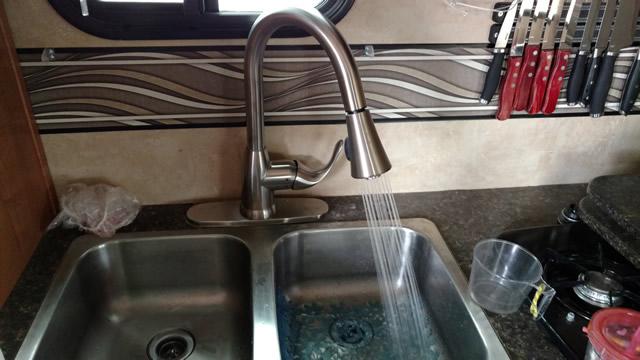
And spray:
Overall not a difficult project that will make doing dishes much easier. Also, this will actually save water both from the flow aspect and also based on the fact we won't need to have the water on as much since the spray is flexible.
Supplies:
- 1x Glacier Bay faucet (pretty much the cheapest I could find at Home Depot that met the requirements and wasn't all plastic).
- 2x SharkBite Fittings
Equipment:
- Screwdriver
- Clipping tool (knife) for the PEX line. I didn't use a knife but it definitely would have worked, I had a different tool that worked well
- Electric multitool (to cut the hole for the weight)
What I did:
My wife really wanted a sprayer. I really wanted a steam of water that was somewhere other than where the silly plastic faucet put it. I removed the old faucet using a wrench meant to reach up behind the sink and loosen the plastic retaining "screws". If you don't have one, and aren't going to reuse the sink, you could almost just cut the thing out.
Once removed I was able to dry fit the new faucet. In the process I found that the "gasket" under the plate to cover the other 2 holes needed slightly larger right and left holes to be flush. I used a dremel with the sanding attachment to widen just the part needed. If I had known the faucet was going to work I would have just trimmed the gasket itself.
With the faucet now flush I knew where I needed to trim the pex tubing to take the longer supply lines. A quick cut and that was ready. I then just used the two SharkBite fittings to reconnect the lines. They were very easy and required no tools.
With everything connected I fully attached the facuet. Now i needed to find a way for the weight and hose to swing freely. I used my multitool to cut a rectangular hole that the weight and hose fit through. It worked but kept getting caught on the hot water line heading to the outdoor shower. To fix that I tucked it out of the way and then anchored it to the wall. Here is a picture of the underneath both above and below the cabinet shelf:
The good news is the supply lines connected directly to the existing PEX hose/fittings.
After I dewinterized I tested it out. The good news is the RV pump has enough pressure for the faucet to work with both regular flow and spray. Additionally, it actually uses less GPM than the stock faucet.
Regular flow:
And spray:
Overall not a difficult project that will make doing dishes much easier. Also, this will actually save water both from the flow aspect and also based on the fact we won't need to have the water on as much since the spray is flexible.
About DIY Maintenance
RV projects you can tackle on your own with a few friendly pointers.4,353 PostsLatest Activity: Feb 14, 2025