imadarling
Jun 11, 2014Explorer
1996 Aljo 2440 Roof Replacement Project
Hello everyone! I have been lurking in the dusty corners of this site for about a year and I have found a number of terrific threads regarding roof replacement projects, but it's time for me to give back.
Here's a little back-story on my project: My wife and I bought our 1996 Aljo 2440 TT two years ago for a very good price. I knew what to look for in terms of chassis and RV systems, but the roof was something I never thought to inspect thoroughly (I know now, BTW). The trailer gave us two very fun year-round camping seasons in Southern California, but the roof had become a growing concern. When I picked the trailer up for a trip last month, I found a line of water stain on the bed from the last rains and I knew it was time to pull the trigger on my roof project.
I ordered all of my materials from Amazon.com and I got almost 300 lbs of merchandise delivered at NO CHARGE! I think Amazon lost on my transaction, LOL!
Here's a quick list of parts I bought:
Dicor BriteTec TPO roof membrane (25' x 9.5')
Dicor TPO installation kit (2 gallons of adhesive, 6 tubes of lap sealant, one 100' roll of butyl tape, and some odds and ends)
2 new 14" roof vents
2 holding tank vents
Refrigerator vent base and cover
Extra 100' roll of butyl tape
On top of the Amazon order, I have been making daily trips to Home Depot for 3/8" plywood sheets, luan sheet, 2x3 lumber, 1x2 lumber, and other assorted goods that I need as the project progresses. I plan to make a final tally of cost and man-hours at the end of the project, but I will proceed with a quick recap of the first three days of work.
Day 1
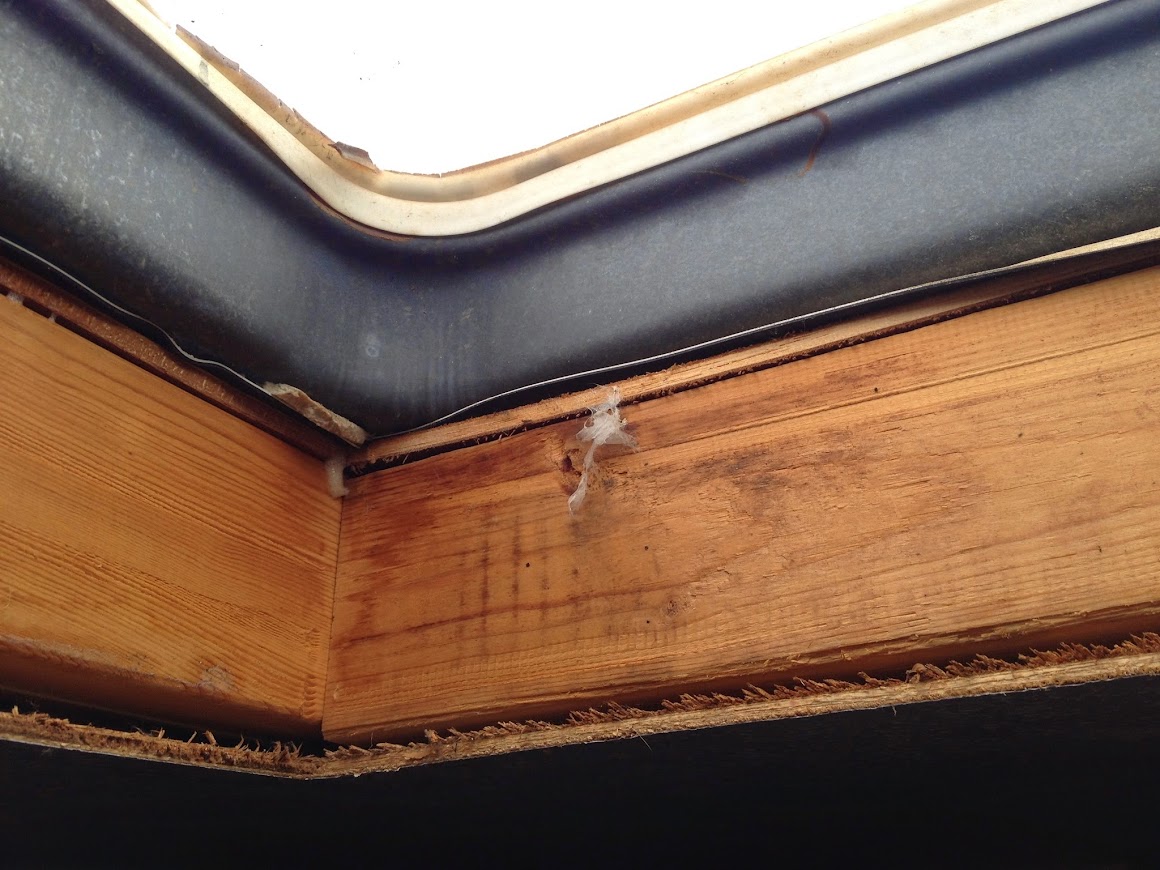
I dropped one of the vents to get a look at the cross section of my roof assembly and was shocked to discover that everything forward of the "walkable" section of my roof was 1/8" luan!

I suppose it shouldn't have been a surprise, but it is now my goal to rebuild the roof in a fully walkable condition. After researching on this site and many others, I have settled on 3/8" CD plywood and some reinforcement of the factory rafters.
Here's the roof right before I started digging in. The rubber was so thin that I was finding tears caused by chassis flex after every trip.

I had three friends come over to help me get the AC and the awning off the trailer, but they all opted to stick around and help me clear the roof. We had the roof down to plywood in about 4 hours. I used two sheets of 3/8" plywood to support my weight as I moved around the roof during the deconstruction phase.

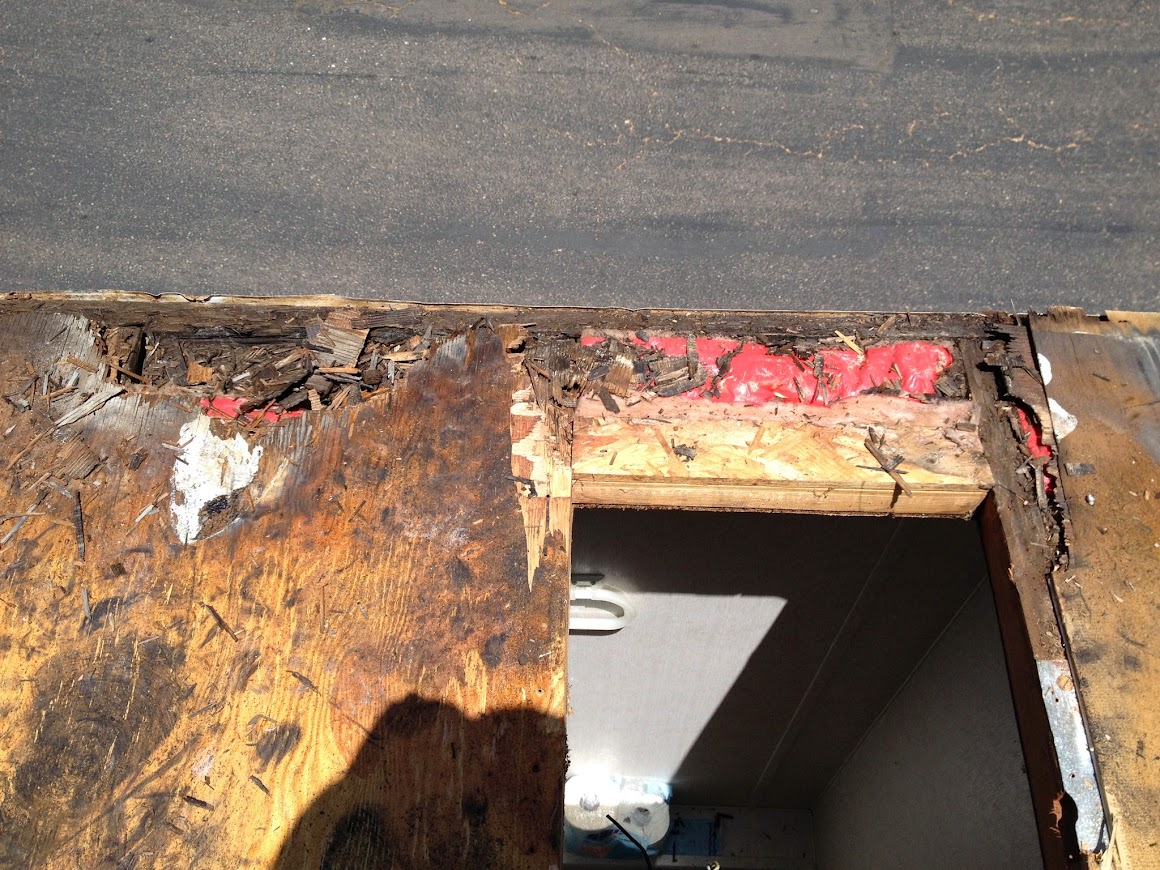
Not surprisingly, I found rot at the two aft corners of the coach. Aside from about two two-foot by two-foot sections of rot in the corners and some previously repaired sections of the roof, the rest of the framing was in great condition. Additionally, the rot did not travel down into the walls! Winner!
Driver's side aft corner.

Passenger's side aft corner:

Driver's side previous damage:

Did I mention that this was filthy work?

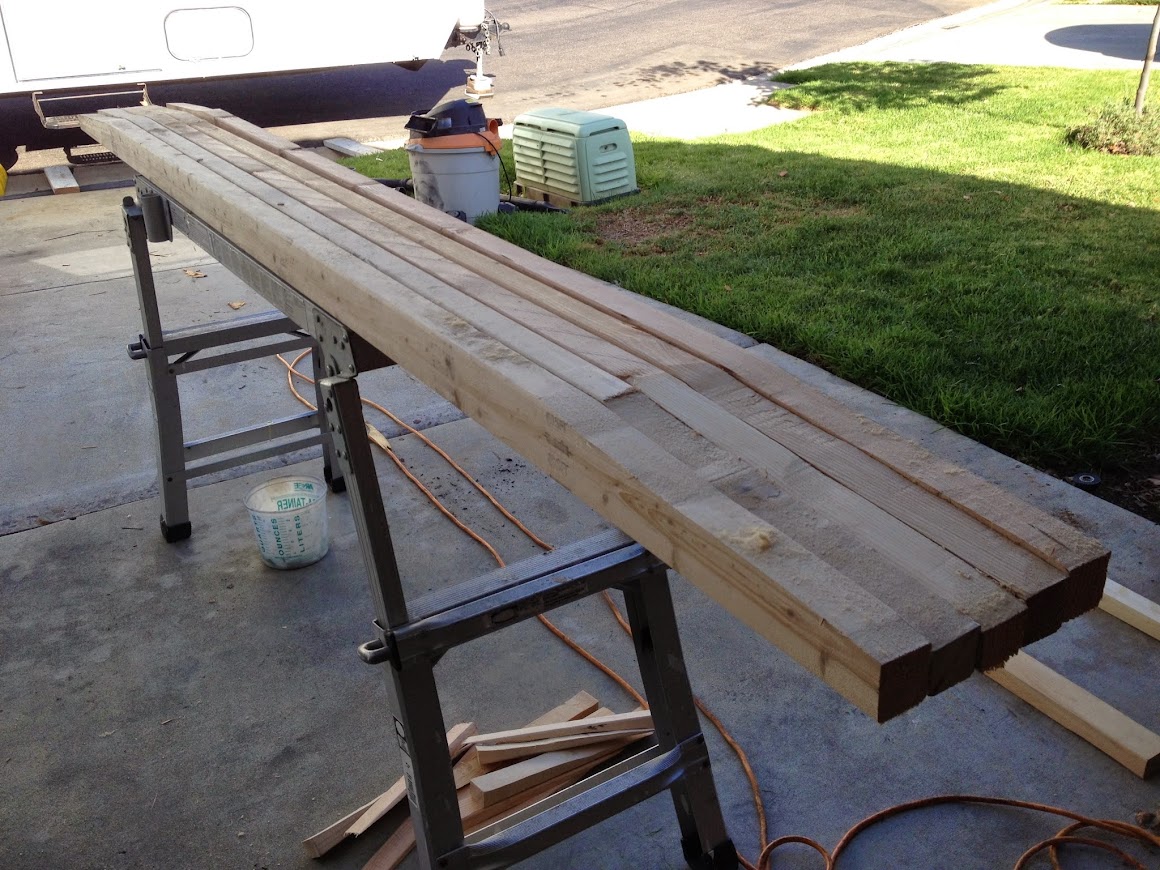
I closed out the day by making some new rafters to reinforce the saggy roof. Don't worry, I sanded the rafters to match after I took this photo.

Here's the roof right before I shut down shop for the day:

More to come...
Here's a little back-story on my project: My wife and I bought our 1996 Aljo 2440 TT two years ago for a very good price. I knew what to look for in terms of chassis and RV systems, but the roof was something I never thought to inspect thoroughly (I know now, BTW). The trailer gave us two very fun year-round camping seasons in Southern California, but the roof had become a growing concern. When I picked the trailer up for a trip last month, I found a line of water stain on the bed from the last rains and I knew it was time to pull the trigger on my roof project.
I ordered all of my materials from Amazon.com and I got almost 300 lbs of merchandise delivered at NO CHARGE! I think Amazon lost on my transaction, LOL!
Here's a quick list of parts I bought:
Dicor BriteTec TPO roof membrane (25' x 9.5')
Dicor TPO installation kit (2 gallons of adhesive, 6 tubes of lap sealant, one 100' roll of butyl tape, and some odds and ends)
2 new 14" roof vents
2 holding tank vents
Refrigerator vent base and cover
Extra 100' roll of butyl tape
On top of the Amazon order, I have been making daily trips to Home Depot for 3/8" plywood sheets, luan sheet, 2x3 lumber, 1x2 lumber, and other assorted goods that I need as the project progresses. I plan to make a final tally of cost and man-hours at the end of the project, but I will proceed with a quick recap of the first three days of work.
Day 1
I dropped one of the vents to get a look at the cross section of my roof assembly and was shocked to discover that everything forward of the "walkable" section of my roof was 1/8" luan!
I suppose it shouldn't have been a surprise, but it is now my goal to rebuild the roof in a fully walkable condition. After researching on this site and many others, I have settled on 3/8" CD plywood and some reinforcement of the factory rafters.
Here's the roof right before I started digging in. The rubber was so thin that I was finding tears caused by chassis flex after every trip.
I had three friends come over to help me get the AC and the awning off the trailer, but they all opted to stick around and help me clear the roof. We had the roof down to plywood in about 4 hours. I used two sheets of 3/8" plywood to support my weight as I moved around the roof during the deconstruction phase.
Not surprisingly, I found rot at the two aft corners of the coach. Aside from about two two-foot by two-foot sections of rot in the corners and some previously repaired sections of the roof, the rest of the framing was in great condition. Additionally, the rot did not travel down into the walls! Winner!
Driver's side aft corner.
Passenger's side aft corner:
Driver's side previous damage:
Did I mention that this was filthy work?

I closed out the day by making some new rafters to reinforce the saggy roof. Don't worry, I sanded the rafters to match after I took this photo.
Here's the roof right before I shut down shop for the day:

More to come...

