2Macs
May 03, 2014Explorer
Homemade Wheel Chocks
Back in 2004, I made a clamping chock out of a 4x4 and threaded rod that worked well for me through the years. During the winter of 2013, it was stolen off of my TT while in storage.
I have made two new clamping chocks like the old one and I thought I would share it. My materials were purchased at Lowes. Some material I had lying around the house.
Materials purchased:
(1) 4X4X8 treated fence post $7.57 ea (enough for 4)
(2) 5/8"X24" threaded rod $3.93 ea (3/8" or 1/2" could be used)
(6) 5/8" galvanized washers $.43 ea
(4) 5/8" galvanized nuts $.27 ea (Only used 2)
(2) 5/8" stop nuts (nylon insert) $.44 ea
(2) 5/8" hex nuts $.17 ea
Total purchase was $19.83 plus tax.
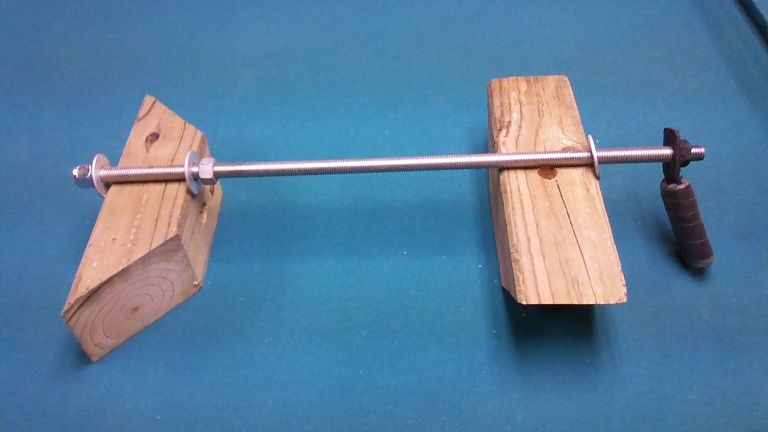
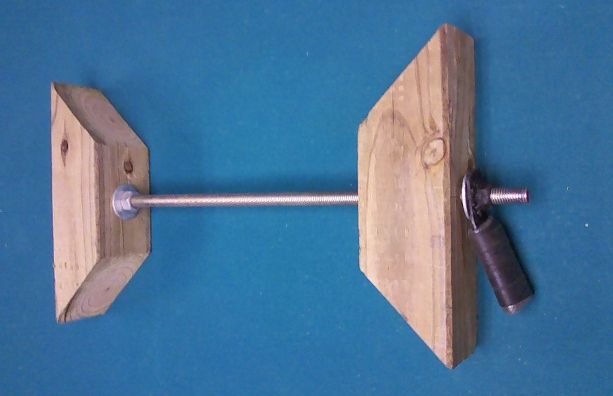
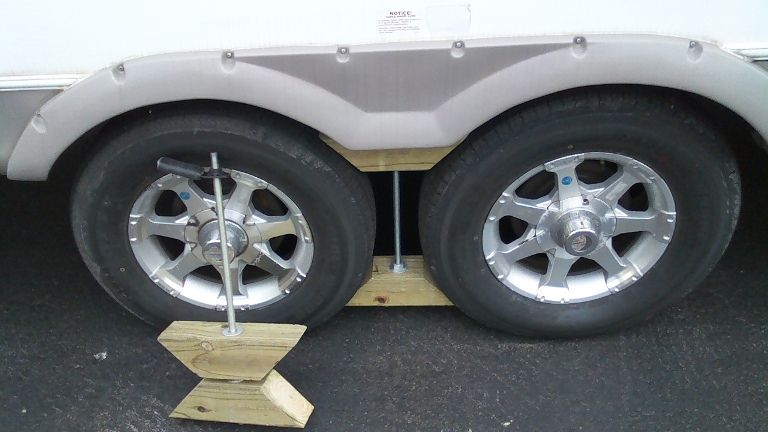
I cut (4) 12" blocks from the post with opposing 45 degree cuts. This is based on the axle spread of 31 1/2" O. C. of my TT. You may want to increase or decrease this based on the axle spread you have. You may want to adjust the degree of opposing cut also. I used 45 degrees because it is convenient.
A 3/4" hole was drilled through the center of each block.
The threaded rod is inserted through the non-moving block and secured on the bottom with washer/stop nut and a washer/galvanized nut on the top.
The top moving block is inserted through the hole and secured with a washer and hex nut welded to a piece of 1/8" X 1 1/4" strap steel I had laying around to turn the nut for tightening the chock. (I tried welding a galvanized nut to the strap steel and found it does not work well. Also, the quality of my welding is terrible, but it works. The padding on the tightening nut is a piece of 1/2" pipe insulation and black tape. The strap steel had a 3/4" hole
pre-drilled in it and the nut welded over the top of it. If you do not have a capability of welding, try your local high school vocational welding class to make the turnbuckle nut.)
The finished chocks provide a significant amount of surface area against the tires and pressure can be applied as necessary to insure your RV stays where it was put. I am including pics of the final result.


