Forum Discussion
8,453 Replies
- This is what happens when you either mix too much resin, or don't get it used up in time.
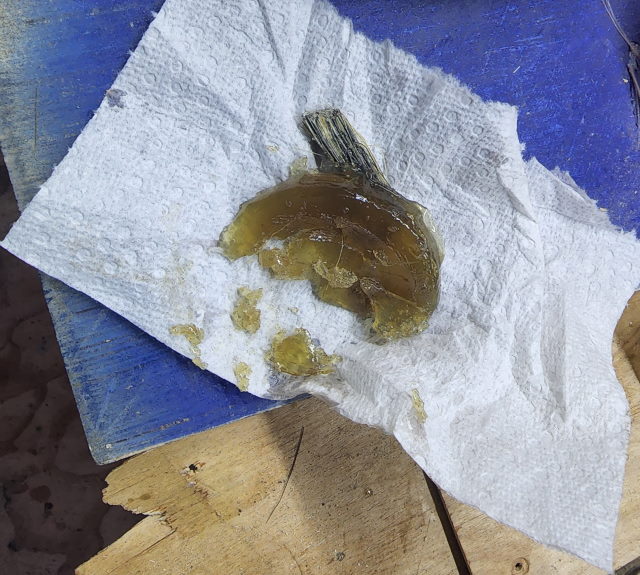
- According to the directions on the fiberglass resin container, weighing small amounts of resin, lets you know how much hardener to add.
This amounts to 1 oz, and the correct mixture of hardener, which is in a small plastic tube, is to add 10 drops, and mix well.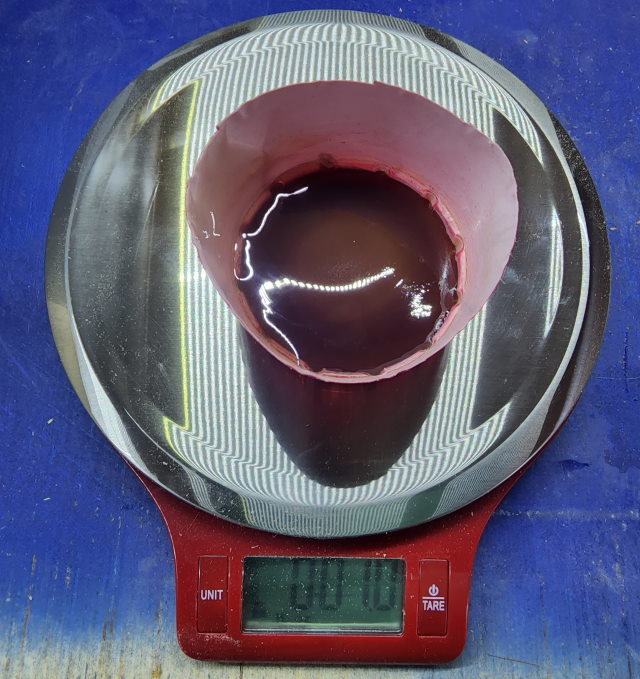
That allows for several minutes to work the mixture into the cloth, before it starts to harden and is no longer workable. - Made it to the "drug den" today. Lol.
I should be good to go for a while now. - Well, looks like I'll have to be off to the drug den for adult males again. Fortunately, Harbor Freight isn't too far away.
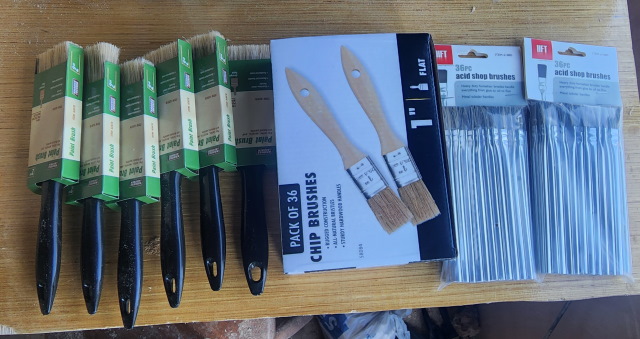
I added another piece of fiberglass to the inside corner yesterday and was planning on adding several more, before realizing I was out of the little brushes I use for small amounts of the fiberglass resin.
I did try using a small foam brush with really bad results. Turns out that the foam absorbs a lot of resin and then expands fairly quickly, making the foam brush worthless for this application.
For small areas, those little acid brushes work very well, are cheap, and do not absorb much resin.
Should have some pics tonight. - Forgot to post this last night. Duh! Lol.
Anywho.... The previous post shows the inside of the fiberglass cap above the pilots seat area in the "corner" area.
This pic shows what this ugliness looks like on the outside of the cap.
The lower left corner, (red square), is the same area as prior pic.
The rest is where I had to cut out the fiberglass cap so I could get to the steel framing when taking this puppy apart.
Since the roof/front cap area no longer has the same contour, I had to cut and remove a small section to make it bend the way I wanted it to. (blue oval).
I added a piece of wood inside the cap to screw the fiberglass to, in order to make it conform to the shape I wanted.
Add a bunch of screws, after countersinking the holes, and a bunch of sanding, and I am soon ready to begin adding new fiberglass to make this look a bit smoother, and water tight.
Hope that makes sense.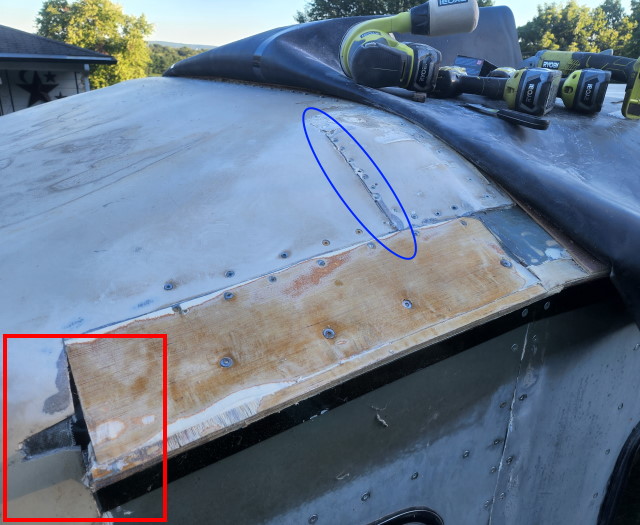
- This is over the pilots seating area. When I took the framing apart, I had to cut some of the fiberglass, to make sure I could remove and replace and weld the new steel in place without frying the fiberglass.
As such, I just put the first layer of fibbberglass in place tonight, in preparation to close that hole up, and be able to do a final finish of that area on the outside.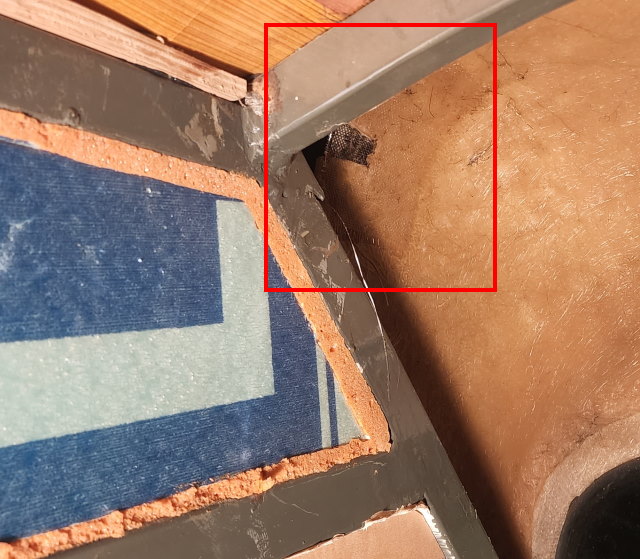
- Things that make you go hmmmmm......
While doing some cleaning and re-arranging inside the moho today, I discovered this.
This is the pilots chair when the back is laid back as far as it will go.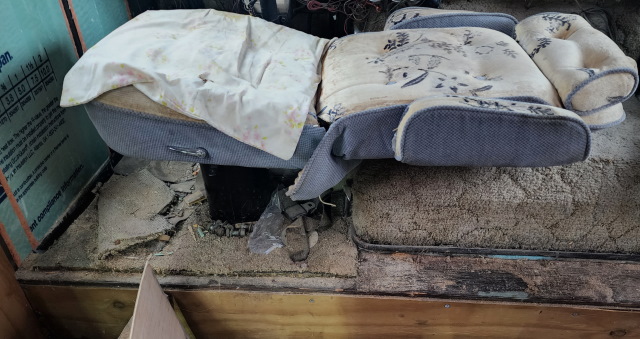
I did not know that it would go basically all the way to a flat position.
On the other hand, this is the co-pilots chair laid all the way back.
Before you say anything, the seat was laid all the way back before I turned it to it's current position, so the dash is NOT preventing it from laying back farther.
That is as far as it would go, and then I turned it about 90 degrees clockwise to it's current position.
Therefore, I don't know if one of them has a problem, or exactly why one goes farther than the other.
Somewhere down the road, I'll have to have a closer look. - This shows the area below the window, and after I get the area around the window frame to match the thickness of the steel framing, I can add 1/2 inch insulation and plywood on the inside. Wahoo!

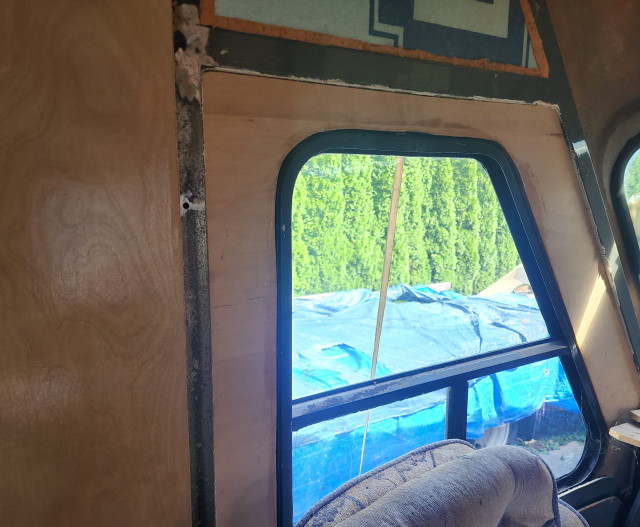
Yes, both the passenger side and the drivers side need to be finished. - Not sure how well this will show up in the pic, but the plywood around the window frame is not the same thickness as the steel framing.
The passenger side window and the drivers side window frame area. I used 3/4" plywood to hold the frame of the window in place.
The steel is 1" thick. Since 3/4" plywood is not 3/4", it will take an additional 1/4" plus 1/8" piece of plywood to make a 1" thickness.
Pet peeve of mine. 3/4 inch plywood is not 3/4 inch, 1/4 inch plywood is not 1/4 inch, and 1/8 inch plywood is not 1/8 inch. Go figure.
Ok, done with that.
I am gluing up pieces to fit around the window frame, so I can add 1/2 inch insulation, and then 1/8" plywood on the inside.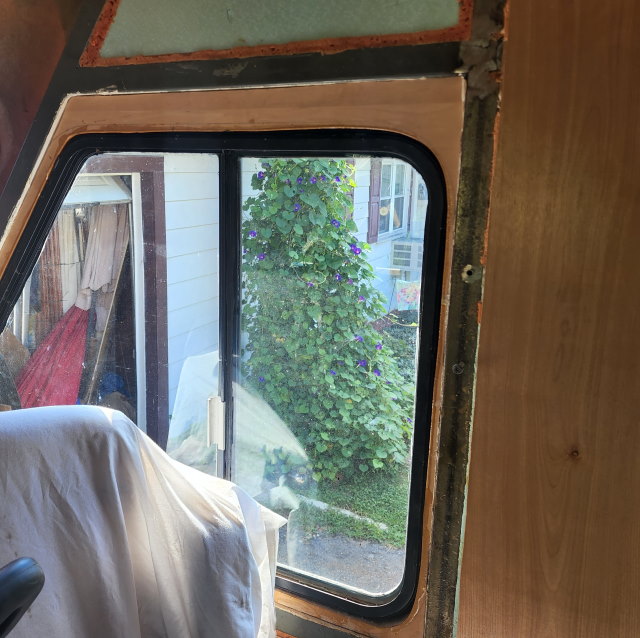
- The cutter itself was an snug fit that required some finger pressure to get in there. The screw was to apply side pressure to keep it from moving sideways, and it worked.
I am sure it's not really recommended.
About Motorhome Group
38,748 PostsLatest Activity: Aug 20, 2025