Forum Discussion
- loving_retiremeExplorer
ryegatevt wrote:
I've always been tempted just to take off the plastic "bumpers" altogether. The RTs I've seen without them look more stealthy and to me neater. We bought our rig off the lot and if I had ordered I would have deleted the ground effects. No plastic would also cure the dreaded "curb anxiety"...
I have been told that a few owners have successfully taken them off of Roadtreks. Anyone that has done so, I would be very interested in knowing the steps in removing the front and rear ground effects. - ryegatevtExplorer III've always been tempted just to take off the plastic "bumpers" altogether. The RTs I've seen without them look more stealthy and to me neater. We bought our rig off the lot and if I had ordered I would have deleted the ground effects. No plastic would also cure the dreaded "curb anxiety"...
- sergeant76ExplorerI have been informed by an individual on the RoadTrek Facebook that he believes the bumpers are ABS Plastic, he also mentioned If it needs body filler I would need a flexible abs plastic body filler.
On another forum I was also informed that they felt it was ABS Plastic.
With the information I have received I will attempt to repair the damage myself.
Ron - MarshaNicholsExplorer
PSW wrote:
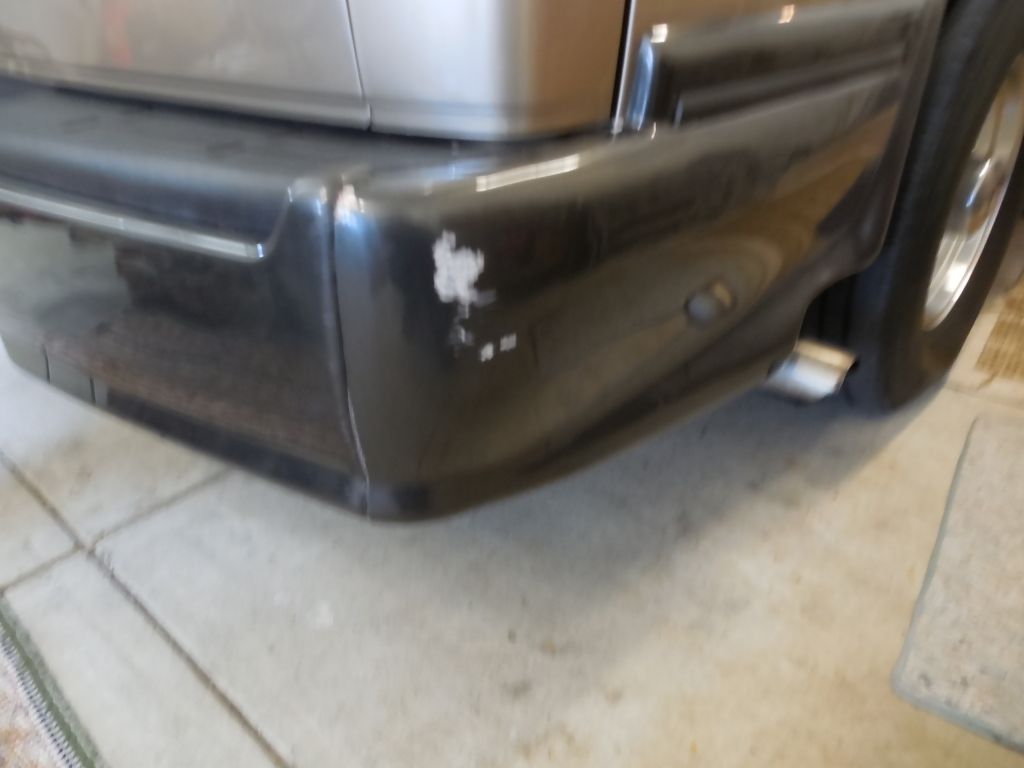
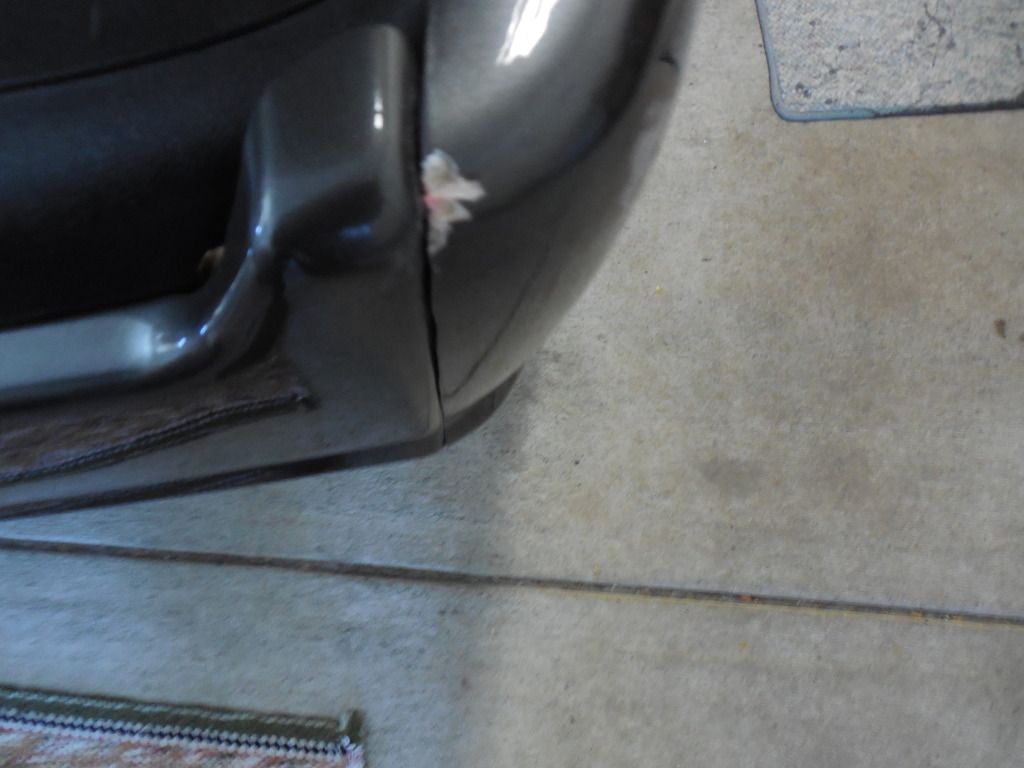
Ron, that seems to be a common place to injure those ground effects.
I had a similar experience on the left front bumper three or four years ago. My plastic actually cracked for a distance of about 3/4 inch. I fixed it myself by cleaning the back side of the plastic and then lightly sanding the affected area with rough sand paper to get a good bond. Then, I applied liberable amounts of J&B Weld up there.
I let it dry for a couple of days then wet sanded lightly the visible damage and touched it up using a matching color auto touch up paint.
I emailed Roadtrek and they sent me the code for the correct color of touch of paint. Interestingly, it was a Pontiac color! It matched perfectly.
I got to thinking how vulnerable those corners were to abrasions and so I went to Home Depot and bought some adhesive backed material used to repair pond liners (the kind of water features people have in the back yard that are lined with a really heavy special plastic material). I cut out four pieces of the patch material to about a 3" by 5" size and cut a radius on each corner of each piece. Then, I removed the backing carefully aligned and applied the piece to the bumper cover corners so that exactly where your damage is would be covered, that obviously being the most vulnerable spots.
The material has a black matte finish and almost perfectly matches the black portion of the bumper. Believe it or not, it looks great and appears to be original to the design. I kept some extra material and figured if I ever zapped a bumper again and scratched up the little guard I had made, I would just replace it. Once the material is in place and pressure applied to it for a minute or so and after it sets overnight, it is on there to stay.
Years later and lots of washings later it has never moved or come loose. Remember this material is designed to be applied in a continually wet environment so it is pretty resilient. If I were doing it again, I would not even bother to use the touch up paint. I actually like the appearance of the four little bumpers better than the plain look from the factory. It makes the bumpers look less vulnerable and we all know those ground effects are exatctly that: vulnerable.
Total cost of the repair: less than ten bucks for the patches and about ten for the touchup kit, which is good to have on hand anyway. I also have a Chevy touchup kit for the Sand color of my RT body.
I am sooo visual...any pictures? - sergeant76ExplorerThanks Loving Retirement and PSW for the information.
I appreciate the info that PSW forwarded regarding the adheshive backed material that is used to repair pond liners.
Will be going to Home Depot to check it out as well as to purchase it.
Ron - PSWExplorerRon, that seems to be a common place to injure those ground effects.
I had a similar experience on the left front bumper three or four years ago. My plastic actually cracked for a distance of about 3/4 inch. I fixed it myself by cleaning the back side of the plastic and then lightly sanding the affected area with rough sand paper to get a good bond. Then, I applied liberable amounts of J&B Weld up there.
I let it dry for a couple of days then wet sanded lightly the visible damage and touched it up using a matching color auto touch up paint.
I emailed Roadtrek and they sent me the code for the correct color of touch of paint. Interestingly, it was a Pontiac color! It matched perfectly.
I got to thinking how vulnerable those corners were to abrasions and so I went to Home Depot and bought some adhesive backed material used to repair pond liners (the kind of water features people have in the back yard that are lined with a really heavy special plastic material). I cut out four pieces of the patch material to about a 3" by 5" size and cut a radius on each corner of each piece. Then, I removed the backing carefully aligned and applied the piece to the bumper cover corners so that exactly where your damage is would be covered, that obviously being the most vulnerable spots.
The material has a black matte finish and almost perfectly matches the black portion of the bumper. Believe it or not, it looks great and appears to be original to the design. I kept some extra material and figured if I ever zapped a bumper again and scratched up the little guard I had made, I would just replace it. Once the material is in place and pressure applied to it for a minute or so and after it sets overnight, it is on there to stay.
Years later and lots of washings later it has never moved or come loose. Remember this material is designed to be applied in a continually wet environment so it is pretty resilient. If I were doing it again, I would not even bother to use the touch up paint. I actually like the appearance of the four little bumpers better than the plain look from the factory. It makes the bumpers look less vulnerable and we all know those ground effects are exatctly that: vulnerable.
Total cost of the repair: less than ten bucks for the patches and about ten for the touchup kit, which is good to have on hand anyway. I also have a Chevy touchup kit for the Sand color of my RT body. - loving_retiremeExplorerI believe the ground effect covers are made of PVC. If so then it is made of the same material that is used for some of the sewer pipes in many homes.
About Motorhome Group
38,705 PostsLatest Activity: Jan 24, 2025

