Forum Discussion

Wikid86's avatar
Wikid86
Explorer
Aug 09, 2013

Soft floor. A lot worse than thought!!

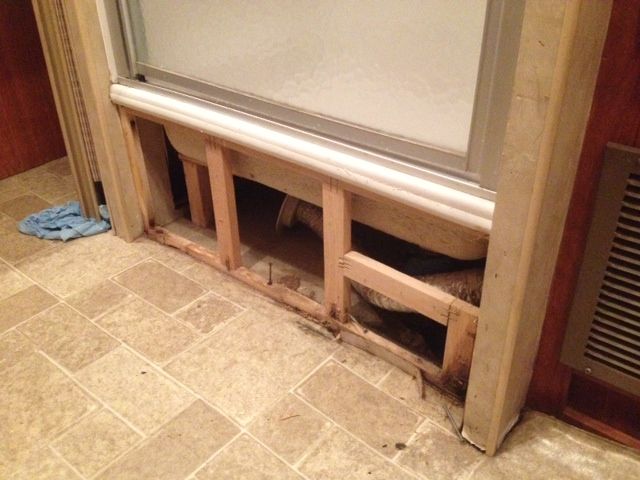
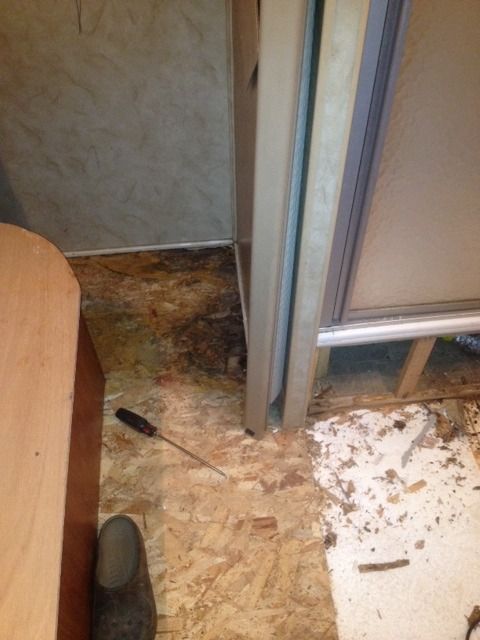
2008 Holiday Rambler . Bought back in march from a dealer here in Fort Worth. The floor was a little soft between the shower and toilet. Salesman said it wasn't bad and the leak had been fixed. I had planned to fix it this winter after camper season.

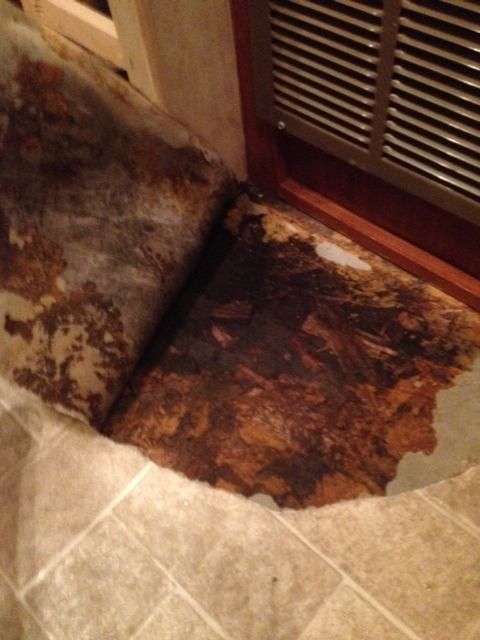
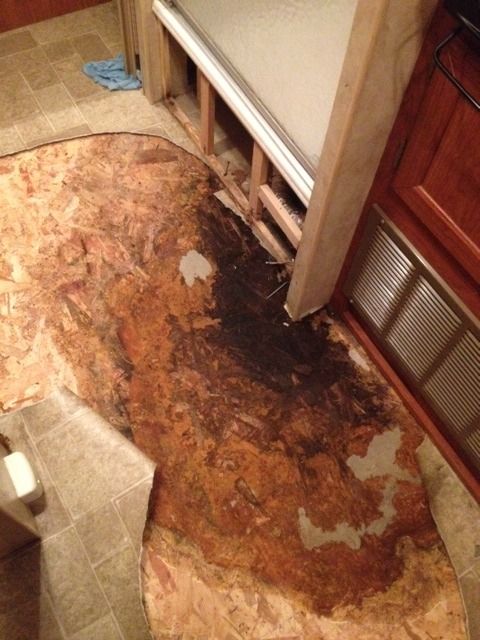
Fast forward to August and the floor has gotten worse and i located the REAL leak under the shower. I started taking it out last night and discovered its all under the shower, infront of shower, and down wall next to bed.

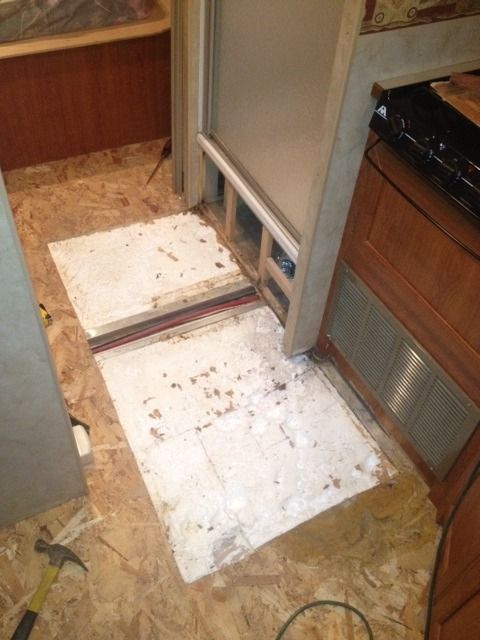
After pulling ply board out last night I discovered it has 1 1/4 inch of styrofoam under the ply board. Then under that has 1/8 inch or so ply board. The aluminum joist are about 32 inches apart.

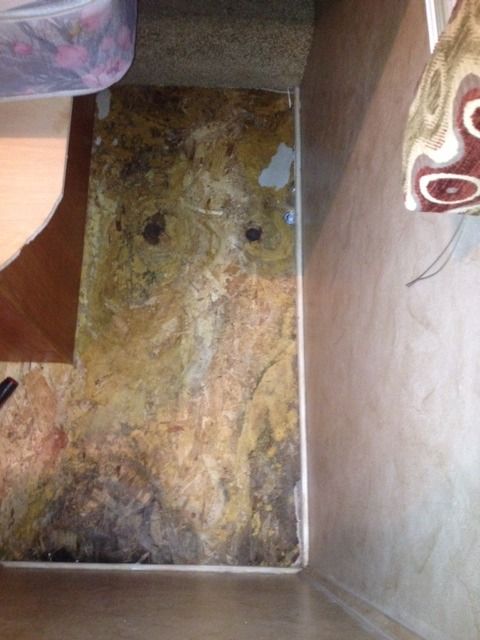
What all should I replace? Do I replace the styrofoam? How about the ply board under the styrofoam? How would I even get to that?
I guess I'm going to take the shower and wall out and replace all that wood too....

Wow this turned REALLY BAD Quick!!!


20 Replies

  • j-d's avatar
    j-d
    Explorer II
    This is my Rot Doctor Project.
    I considered laying a large piece of sheet aluminum (from a sign) over the floor repair, but it turned out very solid with the new wooden (OSB actually) replacement piece and the toilet pedestal.
    If your floor layout would allow slipping an aluminum sheet in to cover the weak flooring, and allow hiding the "step" where the aluminum made the floor a little thicker, that type of repair might be an option.
  • DaHose wrote:
    I'm with Snowman. If the wood is all there, consider CPES. That will kill the mold and encapsulate all the cellulose so it can't grow in there again.

    Jose


    Yeah I agree. Great idea. I went to lowes and they didn't have the Miniwax wood hardener which is similar and very close if resin is applied after. Currently I can't find CPES locally.

    I picked up Elmer's Wood Rot Stabilizer. After reading up on it is rather find Miniwax's product.

    Thoughts of that? I still want to remove all mildewed wood.

    What a freaking nightmare.
  • I'm with Snowman. If the wood is all there, consider CPES. That will kill the mold and encapsulate all the cellulose so it can't grow in there again.

    Jose
  • ADAD437 wrote:
    Why don't you throw it back on the dealer or did you buy it as is?


    Bought as is.

    Was a great deal and I didn't know much about soft floors then. I would have tried to get the price down more had I known the extent of this spot. All in all we're happy with the purchase and have gotten over $11k in rentals since March. We've taken some great trips in it too!

    After this I hope not to have any more issues.
  • Why don't you throw it back on the dealer or did you buy it as is?
  • hotbyte wrote:
    One thing you might consider is when you replace the skirting board that is under the shower is to make it removable so you can open it up and inspect under the shower. I've thought about making mine removable just so I can check under there every so often to be sure nothing is leaking. Right now I have no reason to think it is but you never know!


    I thought about adding a galvanized pan with a drain tube as well...

    But you're right that wouldn't be a bad idea. I'm still unsure how ill match up the back wall of the shower if I remove the wall. I rent this motorhome out on the side and have a rental contract for 8/28 (18 days away). So I need to fix'er up quick!
  • Before you go nuts on it, go to http://www.rotdoctor.com/products/cpes.html and read everything.

    I used CPES on a wood rot repair. It is great stuff. If you can get to the wood and it still is intact, CPES can save you tons of work. CPES soaks into dry wood like crazy, then makes it very strong. If the wood is weak but still retaining its shape, you can use CPES and then a thin epoxy he sells, to coat it.
  • One thing you might consider is when you replace the skirting board that is under the shower is to make it removable so you can open it up and inspect under the shower. I've thought about making mine removable just so I can check under there every so often to be sure nothing is leaking. Right now I have no reason to think it is but you never know!
  • Francesca Knowles wrote:
    Well, you've solved the two main problems:

    You've found the true source of the water (and stopped it?) and you've removed the vinyl that's preventing the underlayment from drying out. Some of that wood may well dry out undamaged except for water stains- you may not have to tear out as much as you think. I'd let it get well dry and then assess what actually has to be torn out.

    One caveat:
    To prevent mold growth, I'd saturate the wet areas with a strong bleach solution while they're still wet. Doing that to wet wood will help to evenly distribute the bleach throughout.


    Yes the leak was the 1st threaded joint under the drain. It wal literally pouring out Tuesday. It had never before ran out in the main floor.

    Now you say about letting dry out I might give that a shot. I wish I'd put a fan on it last night.... I'm a big DIY'er. But thinking of pulling the shower wall scared me last night thinking of doing it myself. I called my neighborhood handyman that's helped me renovate my current house project. He's going to help me pull the shower and wall tonight. I might hold back on cuttin all th way down the bed side. I'm betting that will dry and with bleach should only be water stains

    Thoughts on type of flooring to put back in? I was thinking of the peal and stick premium laminate squares???
  • Well, you've solved the two main problems:

    You've found the true source of the water (and stopped it?) and you've removed the vinyl that's preventing the underlayment from drying out. Some of that wood may well dry out undamaged except for water stains- you may not have to tear out as much as you think. I'd let it get well dry and then assess what actually has to be torn out.

    One caveat:
    To prevent mold growth, I'd saturate the wet areas with a strong bleach solution while they're still wet. Doing that to wet wood will help to evenly distribute the bleach throughout.