JBarca
Feb 01, 2023Nomad II
BAL Accu-Slide maxed out on adjustment
I have two questions dealing with a BAL cable Accu-Slide system. The two questions are below. I am trying to give you the background on the camper.
The camper is a 2019 Keystone Laredo 5th wheel, Model 255SRL. It was bought new in Dec 2019; with the Covid issues, the camper has only been used three camping seasons with light to moderate use. The camper is a friend's who I'm doing some repair/service work on. I noticed the main dinette/fridge slide was not working right, it jerked when it went out and in, and there was a sagging cable outside.
Upon investigation, the cable tensioning hardware was loose inside. The adjustments I have made after seeing the issues are the first time anyone has adjusted this slide since it was bought. I'm unsure if the factory did not tighten the cable block jam nuts or if they vibrated loose from towing. The smaller bedroom slide also has loose hardware but is not far from adjustment. The main slide was very far out of adjustment and is many times heavier.
Here are pictures as found.
The sagging cable on the top front.

The motor drive area shows loose jam nuts and cable tension blocks on an angle. It is hard to see the jam nuts, but they are loose.

The rear "out" cable yoke/block with loose cables. This is with the slide fully retracted. Note the center chain tension bolt is maxed out.
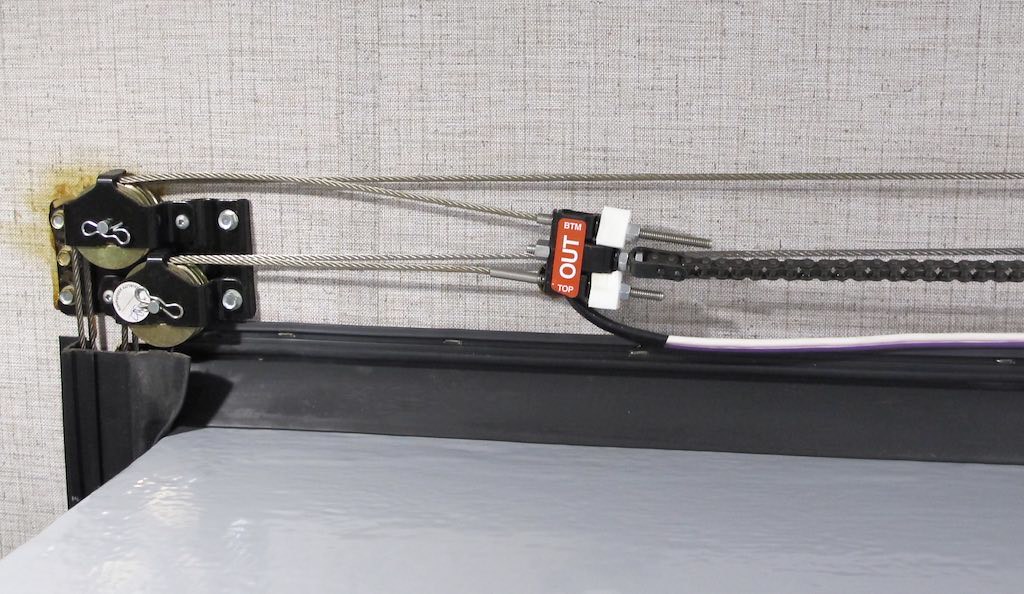
The front "out" cable block with the block on an angle. They are supposed to be vertical.
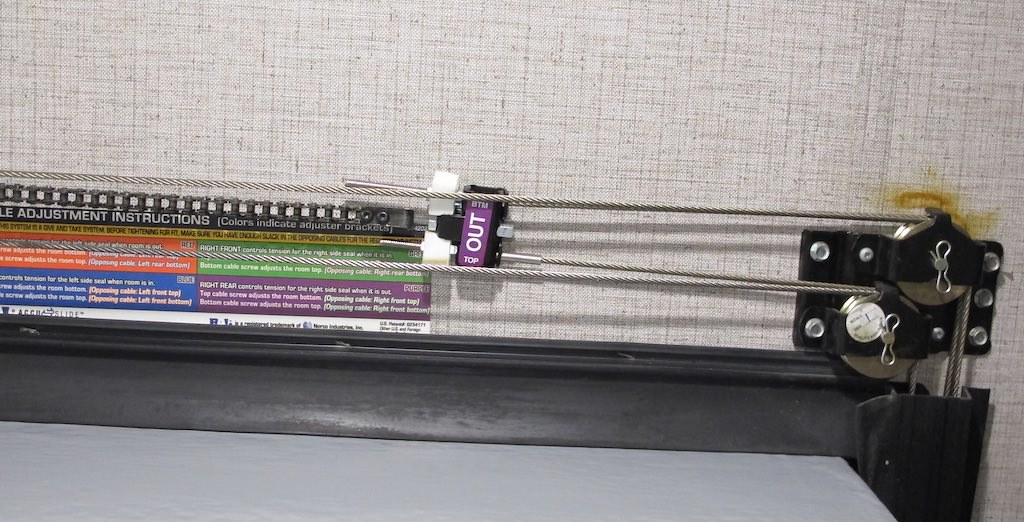
An inside view of the slide

The "inside" bottom of the slide room flanges were not touching when the slide was fully out. The rear inside bottom slide room flange had a 1 1/4" gap. The front inside bottom slide room flange had a 3/4" gap. The tops of the front and the rear inside flange touched the wall flange. This large gap shows the "out" cables are loose from where they are supposed to be and why the slide jerked when the motor started until all the slack tightened up.
NOTE: The drive chain distance from the center of the motor sprocket was even on both sides of the front and rear chains to the cable blocks. This was correct from the factory.
I read all the online BAL service manuals and saw the videos. BAL did a good job on this. However, they did not drill into what I am seeing now. I am seeking help if anyone has seen and dealt with this before.
Question 1. I'm questioning how tight the OUT cables must be to pull the bottom of the slide up against the wall? Or do they not have the bottom touch on a large, fully loaded slide room? BAL states the bottom is to touch.
I used a floor jack to level/lighten the slide, so the inside flanges were even top and bottom, front and rear, and tightened the cables to the 1/2" finger squeeze pressure adjustment. When I released the jack pressure, the OUT tension was not enough, and the bottom of the slide moved away from the wall. I have adjusted in place with full slide load the OUT blocks, but the tension on the cables and chain is banjo tight, and I'm still 1/2" away at the bottom on both ends. I have more room to adjust, but I wanted to ask before cranking some more. The tension on the bearings in that gearbox seems immense.
The way the system was, there was not enough adjustment left on the OUT cable blocks to adjust the bottom of the slide to be pulled into place. I moved the chain 9 links. Yes, that much. This much of a need to move the chain to get the OUT top to come close sort of points to the factory may not have had the bottom of the slide flanges touch as shipped.
Here are pic's as I left them tonight. You can see I still have room to adjust the OUT blocks, and the slide is up to the wall at the top, but the bottom is out 1/2". The jam nuts are not yet tightened, as I am still working through this adjustment process.
The rear OUT chain block
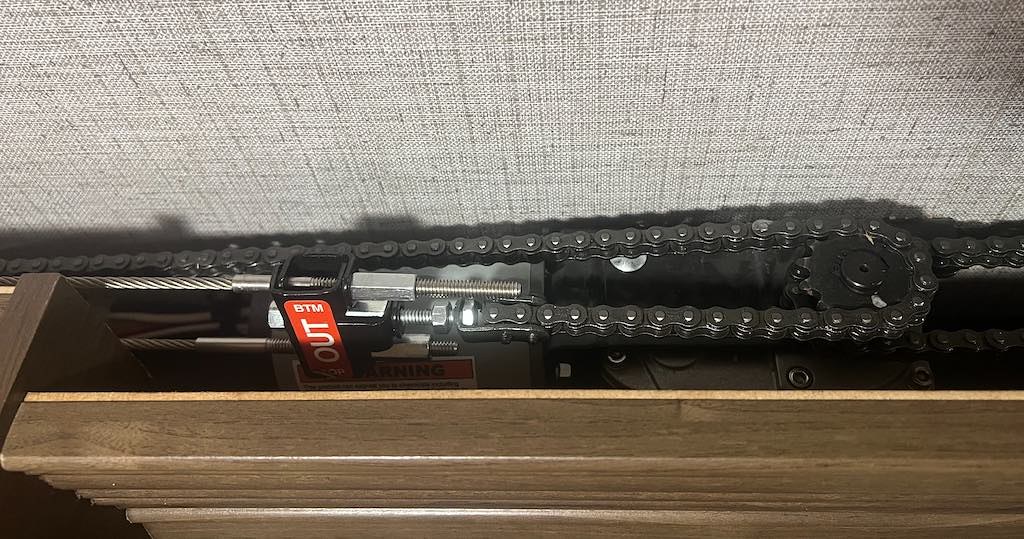
The front OUT chain block

Here is the 1/2" gap at the bottom after my last adjustment
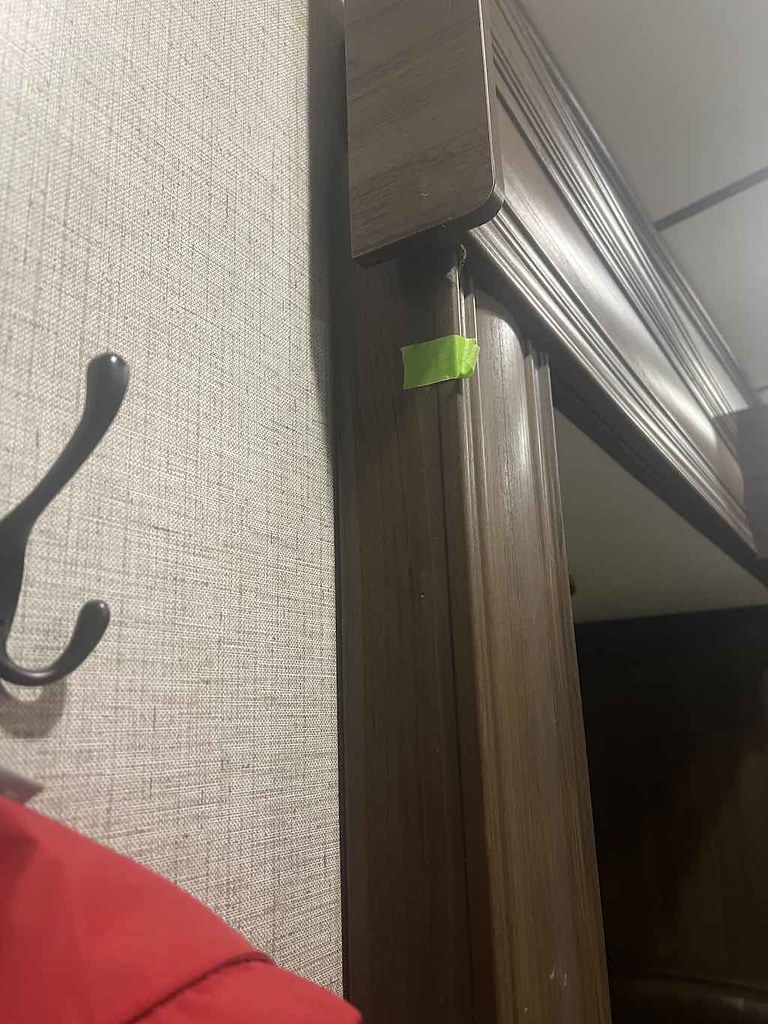
At the bottom, the green tape is where the cable is attached. I use green tape to measure in the same place while adjusting.

The top touching the wall.
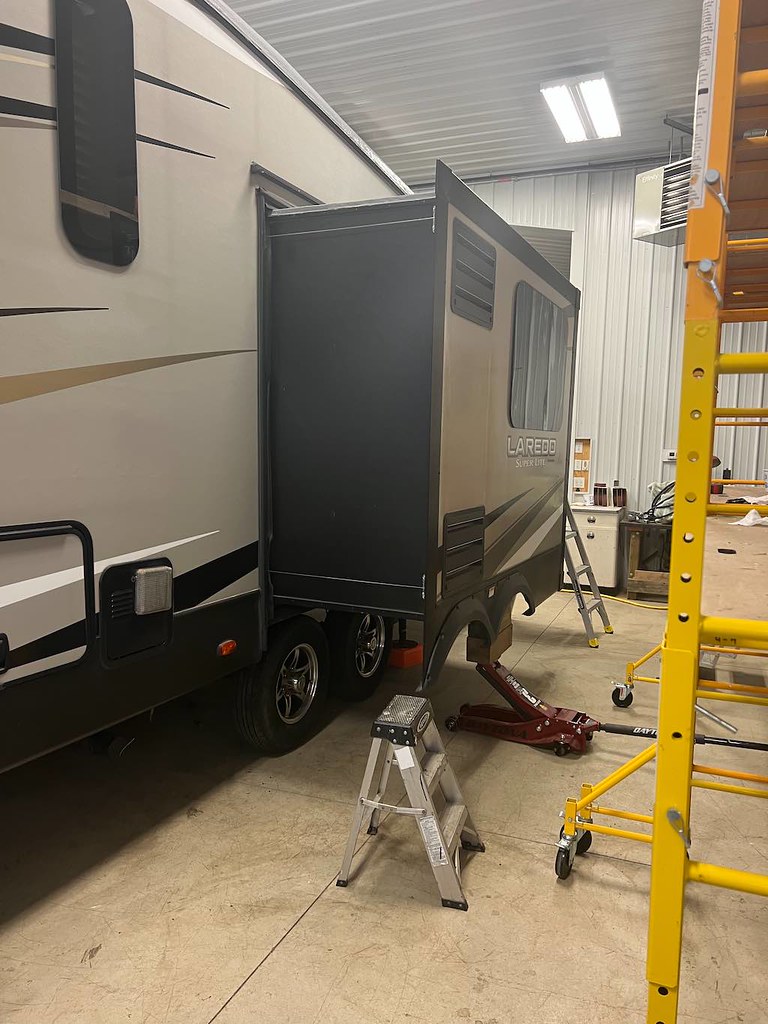
The floor jack setup I used when I unhooked the chains to adjust and even out the slide to start the tensioning.
Question 2: This topic is not mentioned in any service manuals. The way this system is at the moment, there is not enough adjustment left on the "IN" chain blocks. It appears the cable length was wrong, the cable and/or chain stretched, but no adjustment is left to create tension on the IN cable blocks.
The question is, in this case, do I remove chain links? Ideally, I need 1" to 1 1/4" inches of chain on both chains removed to get back into the middle of the adjustment.
It is hard for me to believe the cable pulley bushings are heavily worn in the three years of use; heavy pulley bushing wear could cause some of this. I am not sure the factory ever had the bottom of the slide tight to the wall. Either the crimped cable end on the outside flange brackets was in the wrong location at the factory, or the chain was too long. I'm unsure if the cables come pre-crimped from BAL or if the installer crimps them. The Rear OUT block was maxed on adjustment, as seen in the as found pics. Keystone used all the adjustments available on the rear OUT block on day one. This makes me suspicious of how the system was adjusted when shipped.
Here are pics where the IN chain blocks as I left it. The IN cables are not yet tensioned, and there is still some slack in the system. There is no more adjustment left.
The rear IN block as I left it
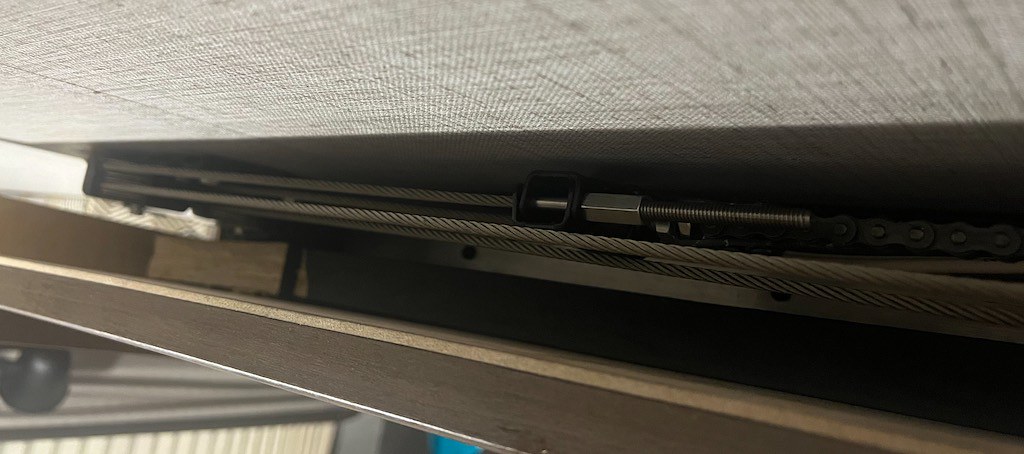

The front IN block as I left it

Recapping my two questions:
No. 1 I'm questioning how tight the OUT cables must be to pull the bottom of the slide up against the wall? Or do they not have the bottom touch on a large, fully loaded slide room? What distance is acceptable?
No. 2: Do I remove chain links to gain more IN adjustment? Or do something else?
Thanks for any help. I have sent a message to BAL tech support, but they have not yet returned the call. Hoping this is not the first time this has happened
Thanks
John
PS. I have adjusted many LCI rack and pinion electric slide drives, flush floor and above the floor, the older Dewald/Power Gear rack and pinion, and the old Barker rack and pinion system. This is, however, my first cable slide to work on.
The camper is a 2019 Keystone Laredo 5th wheel, Model 255SRL. It was bought new in Dec 2019; with the Covid issues, the camper has only been used three camping seasons with light to moderate use. The camper is a friend's who I'm doing some repair/service work on. I noticed the main dinette/fridge slide was not working right, it jerked when it went out and in, and there was a sagging cable outside.
Upon investigation, the cable tensioning hardware was loose inside. The adjustments I have made after seeing the issues are the first time anyone has adjusted this slide since it was bought. I'm unsure if the factory did not tighten the cable block jam nuts or if they vibrated loose from towing. The smaller bedroom slide also has loose hardware but is not far from adjustment. The main slide was very far out of adjustment and is many times heavier.
Here are pictures as found.
The sagging cable on the top front.

The motor drive area shows loose jam nuts and cable tension blocks on an angle. It is hard to see the jam nuts, but they are loose.

The rear "out" cable yoke/block with loose cables. This is with the slide fully retracted. Note the center chain tension bolt is maxed out.

The front "out" cable block with the block on an angle. They are supposed to be vertical.

An inside view of the slide

The "inside" bottom of the slide room flanges were not touching when the slide was fully out. The rear inside bottom slide room flange had a 1 1/4" gap. The front inside bottom slide room flange had a 3/4" gap. The tops of the front and the rear inside flange touched the wall flange. This large gap shows the "out" cables are loose from where they are supposed to be and why the slide jerked when the motor started until all the slack tightened up.
NOTE: The drive chain distance from the center of the motor sprocket was even on both sides of the front and rear chains to the cable blocks. This was correct from the factory.
I read all the online BAL service manuals and saw the videos. BAL did a good job on this. However, they did not drill into what I am seeing now. I am seeking help if anyone has seen and dealt with this before.
Question 1. I'm questioning how tight the OUT cables must be to pull the bottom of the slide up against the wall? Or do they not have the bottom touch on a large, fully loaded slide room? BAL states the bottom is to touch.
I used a floor jack to level/lighten the slide, so the inside flanges were even top and bottom, front and rear, and tightened the cables to the 1/2" finger squeeze pressure adjustment. When I released the jack pressure, the OUT tension was not enough, and the bottom of the slide moved away from the wall. I have adjusted in place with full slide load the OUT blocks, but the tension on the cables and chain is banjo tight, and I'm still 1/2" away at the bottom on both ends. I have more room to adjust, but I wanted to ask before cranking some more. The tension on the bearings in that gearbox seems immense.
The way the system was, there was not enough adjustment left on the OUT cable blocks to adjust the bottom of the slide to be pulled into place. I moved the chain 9 links. Yes, that much. This much of a need to move the chain to get the OUT top to come close sort of points to the factory may not have had the bottom of the slide flanges touch as shipped.
Here are pic's as I left them tonight. You can see I still have room to adjust the OUT blocks, and the slide is up to the wall at the top, but the bottom is out 1/2". The jam nuts are not yet tightened, as I am still working through this adjustment process.
The rear OUT chain block

The front OUT chain block

Here is the 1/2" gap at the bottom after my last adjustment
At the bottom, the green tape is where the cable is attached. I use green tape to measure in the same place while adjusting.

The top touching the wall.

The floor jack setup I used when I unhooked the chains to adjust and even out the slide to start the tensioning.

Question 2: This topic is not mentioned in any service manuals. The way this system is at the moment, there is not enough adjustment left on the "IN" chain blocks. It appears the cable length was wrong, the cable and/or chain stretched, but no adjustment is left to create tension on the IN cable blocks.
The question is, in this case, do I remove chain links? Ideally, I need 1" to 1 1/4" inches of chain on both chains removed to get back into the middle of the adjustment.
It is hard for me to believe the cable pulley bushings are heavily worn in the three years of use; heavy pulley bushing wear could cause some of this. I am not sure the factory ever had the bottom of the slide tight to the wall. Either the crimped cable end on the outside flange brackets was in the wrong location at the factory, or the chain was too long. I'm unsure if the cables come pre-crimped from BAL or if the installer crimps them. The Rear OUT block was maxed on adjustment, as seen in the as found pics. Keystone used all the adjustments available on the rear OUT block on day one. This makes me suspicious of how the system was adjusted when shipped.
Here are pics where the IN chain blocks as I left it. The IN cables are not yet tensioned, and there is still some slack in the system. There is no more adjustment left.
The rear IN block as I left it


The front IN block as I left it

Recapping my two questions:
No. 1 I'm questioning how tight the OUT cables must be to pull the bottom of the slide up against the wall? Or do they not have the bottom touch on a large, fully loaded slide room? What distance is acceptable?
No. 2: Do I remove chain links to gain more IN adjustment? Or do something else?
Thanks for any help. I have sent a message to BAL tech support, but they have not yet returned the call. Hoping this is not the first time this has happened
Thanks
John
PS. I have adjusted many LCI rack and pinion electric slide drives, flush floor and above the floor, the older Dewald/Power Gear rack and pinion, and the old Barker rack and pinion system. This is, however, my first cable slide to work on.
