sky_free
May 28, 2014Explorer
Arctic Fox basement fan mod
Winter is way off, but I had some time recently to work on my AF 990 basement fan. I wanted the ability to run the fan to circulate air into the basement area without using the propane furnace. This would happen when we winter camp with electric hookups and use a space heater for the primary source of heat. Typically this would be at RV parks close to ski resorts like in Mammoth, CA and Park City, UT. I thought this might help someone because I wasn't sure how to do it myself and poked around for a while until I figured it out.
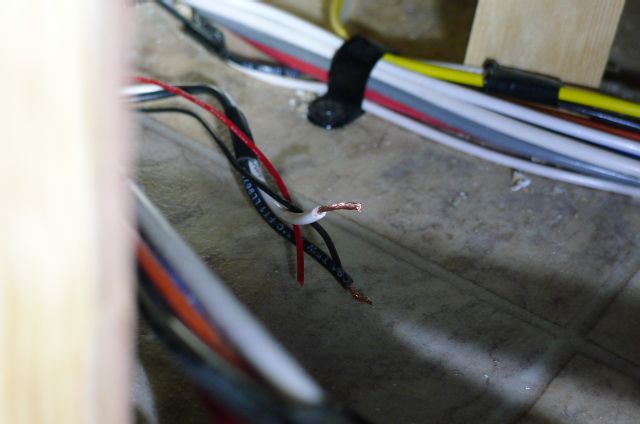
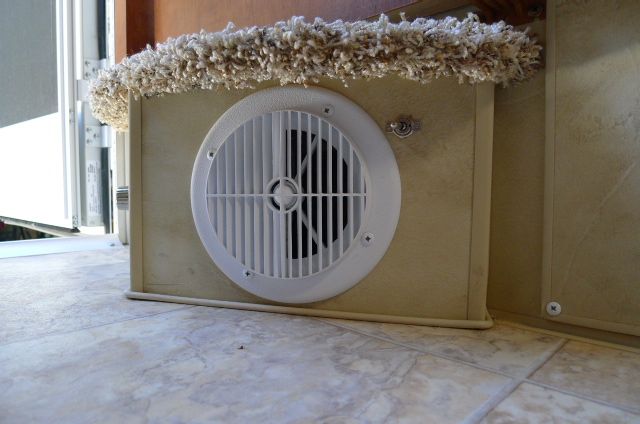
First, I removed the access panel under the bathroom door to the right of the fan, as well as the fan cover itself. I identified the wires that power the fan and clipped and stripped them. I wasn't 100% sure of the positive/negative, but anyone doing this won't have to clip the white (negative) like I did. The fat white/black wire pair come from the thermostat and are powered on when the thermostat is triggered.
Next, I reconnected the negative (fat white from thermostat, thin black from fan) and spliced in some short extensions to the original positive (fat black from thermostat, thin red from fan). Everything was soldered and shrink-wrapped.
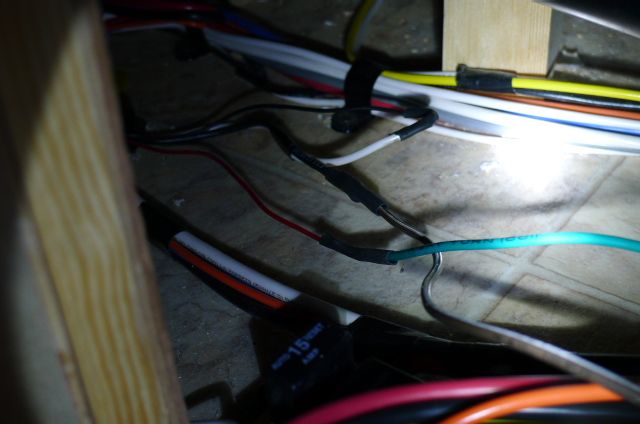
Next, I needed a hot positive to power the fan in override. There is a wire harness there with a big red wire. I stripped off the connector and soldered in the yellow wire.
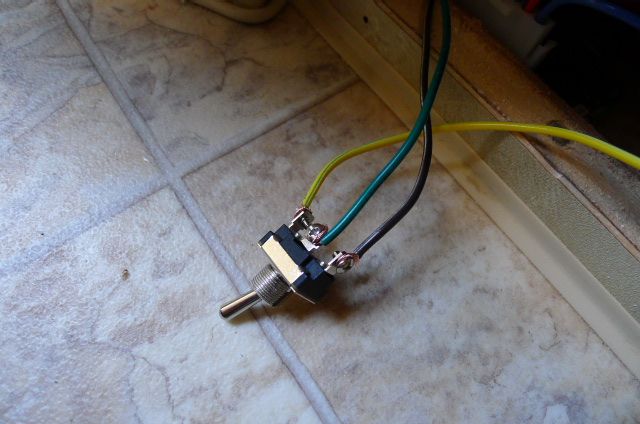
I got a 3 position ON-OFF-ON switch from an auto parts store. This gives me the ability to disable the fan completely if I want to save a small amount of power in above freezing conditions. I thought about just using a 2 position ON-ON switch, but decided I could trust myself to not forget to have the fan on when needed.
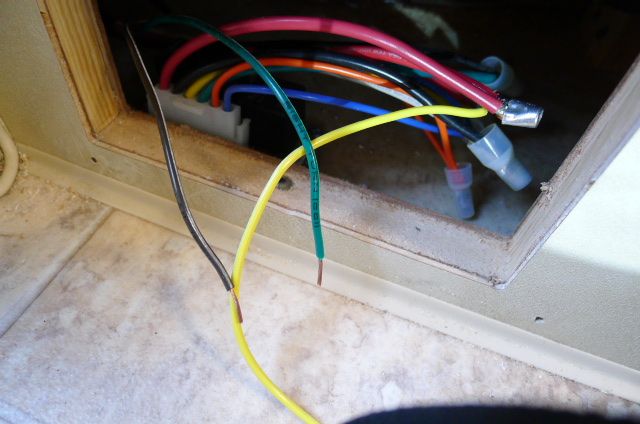
The green wire feeds the fan and is the common. The yellow is from the hot positive, and the brown is from the thermostat positive. It's important to NOT bridge the hot positive and thermostat positive, because that feeds power back into the thermostat and turns the furnace on. The two circuits have to be completely isolated. I ended up soldering the screw-on connections because it looked shaky at best just screwed on.
I drilled a small hole next to the fan vent and installed the switch, leaving enough room for the large plastic cover.

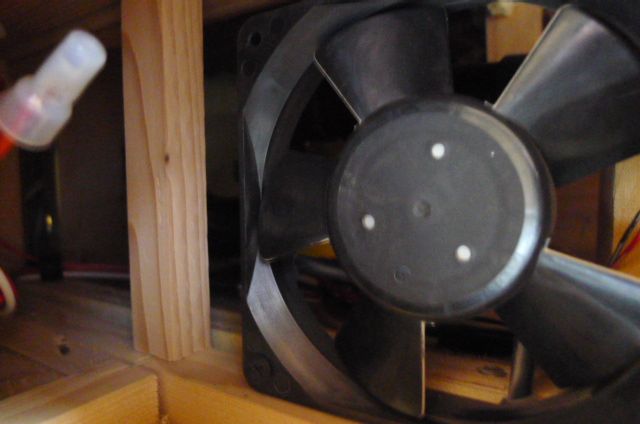
This is all that was needed to manually control the fan, but when I was in there I noticed that the fan is not sealed in at all, just pointing in the right direction instead of having a tight seal. To move more air this needs to be fixed.
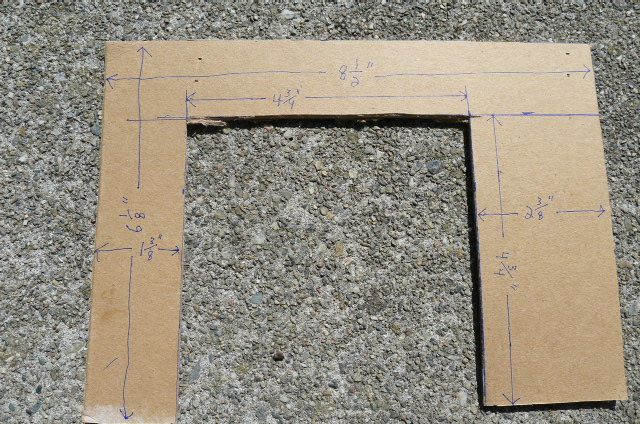
I decided to cover the gaps with thick cardboard to provide a tight seal and force more air into the basement. This is what I started with, but I did end up trimming an additional 1/4" from the bottom to get it to fit.
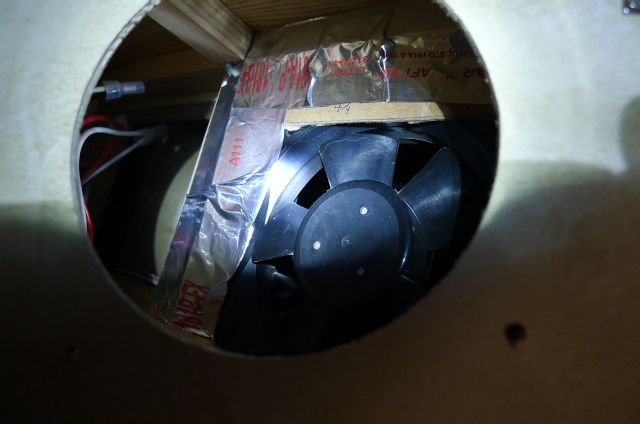
I installed it with some metal duct tape.
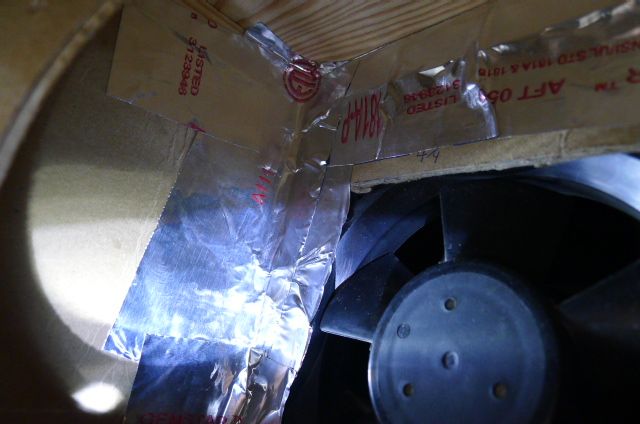
I cut a rectangular piece for the hole on the left. Can't remember the exact size, but that one is pretty easy to get right with a little trial/error.
Here it is all put back together. The switch is high enough off the floor that it doesn't get kicked on or off.
Now the long wait for winter...
First, I removed the access panel under the bathroom door to the right of the fan, as well as the fan cover itself. I identified the wires that power the fan and clipped and stripped them. I wasn't 100% sure of the positive/negative, but anyone doing this won't have to clip the white (negative) like I did. The fat white/black wire pair come from the thermostat and are powered on when the thermostat is triggered.
Next, I reconnected the negative (fat white from thermostat, thin black from fan) and spliced in some short extensions to the original positive (fat black from thermostat, thin red from fan). Everything was soldered and shrink-wrapped.
Next, I needed a hot positive to power the fan in override. There is a wire harness there with a big red wire. I stripped off the connector and soldered in the yellow wire.
I got a 3 position ON-OFF-ON switch from an auto parts store. This gives me the ability to disable the fan completely if I want to save a small amount of power in above freezing conditions. I thought about just using a 2 position ON-ON switch, but decided I could trust myself to not forget to have the fan on when needed.
The green wire feeds the fan and is the common. The yellow is from the hot positive, and the brown is from the thermostat positive. It's important to NOT bridge the hot positive and thermostat positive, because that feeds power back into the thermostat and turns the furnace on. The two circuits have to be completely isolated. I ended up soldering the screw-on connections because it looked shaky at best just screwed on.
I drilled a small hole next to the fan vent and installed the switch, leaving enough room for the large plastic cover.
This is all that was needed to manually control the fan, but when I was in there I noticed that the fan is not sealed in at all, just pointing in the right direction instead of having a tight seal. To move more air this needs to be fixed.
I decided to cover the gaps with thick cardboard to provide a tight seal and force more air into the basement. This is what I started with, but I did end up trimming an additional 1/4" from the bottom to get it to fit.
I installed it with some metal duct tape.
I cut a rectangular piece for the hole on the left. Can't remember the exact size, but that one is pretty easy to get right with a little trial/error.
Here it is all put back together. The switch is high enough off the floor that it doesn't get kicked on or off.
Now the long wait for winter...