Carb_Cleaner
Aug 05, 2014Explorer
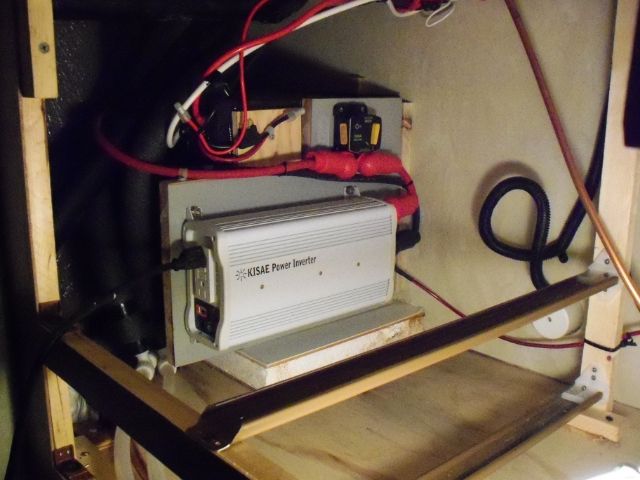
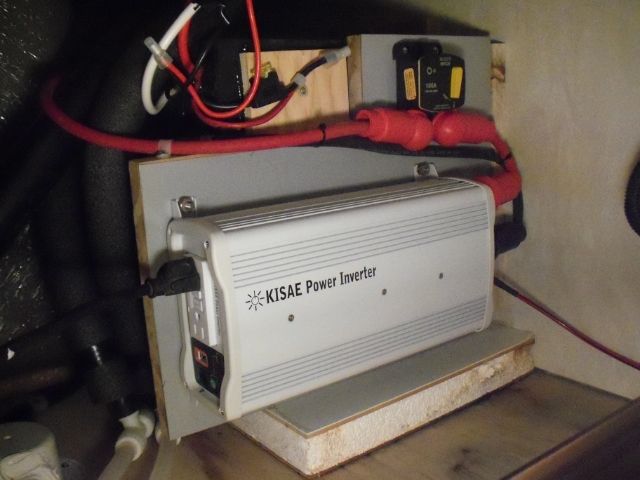
Inverter installed
I put a KISAE SW1210 Pure Sine Wave, 1000 watt inverter in our Wolf Creek 850 Truck camper.
It's mounted to a piece of 3/4 inch MDF that's over-layed with a piece of powder coated grey sheet metal (scrap from a standing-seam metal roof on a S&B). The instructions say to mount it to a non-flammable surface. I'm actually a little concerned by that requirement, but I guess it's a precaution. Two mounting bolts through-bolt the inverter, mounting board and the camper's plastic battery box. Two more screws go from inside the battery box into the back of the mounting board. I squirted a little hot glue behind the board before securing with the fasteners. The MDF's botton edge rests on the styrofoam support for the battery box.
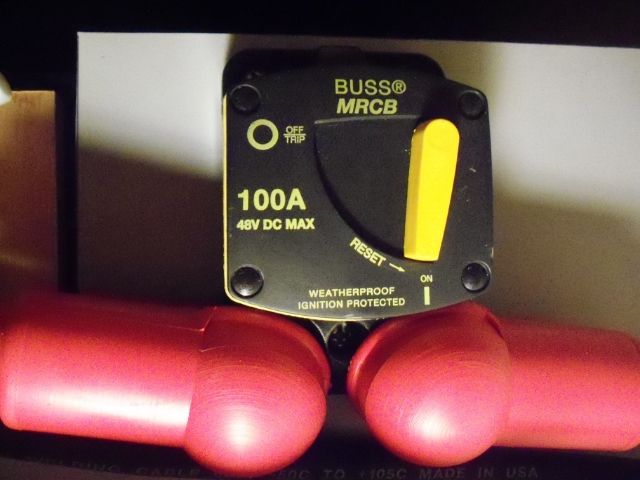
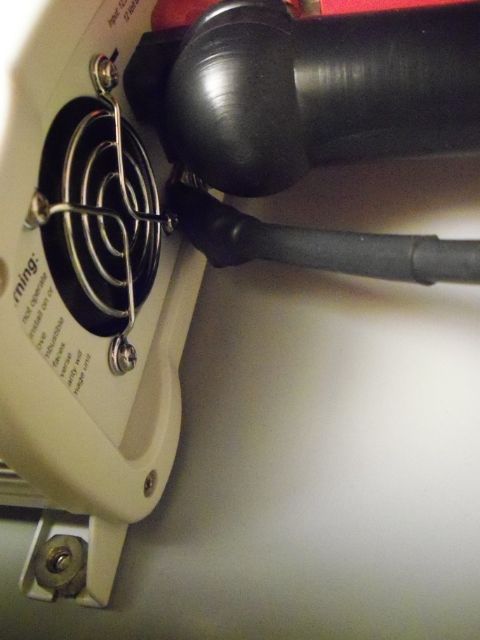
The cables are #2 at 3' long with a 6" pigtail for the 100 Amp breaker The other ends poke through the back of the battery box (with grommets in the openings) and are secured to the two group 27 batteries. The chassis ground has a gold-plated lug with #8 and is barely visible in the last pic. Once I figured out where to mount the inverter, the rest fell in place pretty easy. The little square of plywood (the solar panel fuse is attached to it) in the pics was existing from the dealer and was mounted with screws/caulk, so I decide to work around it.
The only thing I've tried is a 25' drop light with a 60 watt bulb, which is plugged in for the pics. It worked. This is a cheap inverter, but I figured I'd take the gamble. We plan on running things like a 24" LED TV (it doesn't have a 12v wart), laptops, DVD/BlueRay player and/or a gaming console. A 110v LED droplight might be useful while setting up camp, too. It also has a 5 watt USB. I think our 900 watt microwave would be a bit much.
Inverter, cables and fancy-pants terminal covers from DonRowe.com.
Breaker from Solar-Electric.com
Questions, comments and criticisms/concerns are welcome.
View through the drawer holes:
Closer:
The 100 Amp breaker:
Connections and chassis ground:
It's mounted to a piece of 3/4 inch MDF that's over-layed with a piece of powder coated grey sheet metal (scrap from a standing-seam metal roof on a S&B). The instructions say to mount it to a non-flammable surface. I'm actually a little concerned by that requirement, but I guess it's a precaution. Two mounting bolts through-bolt the inverter, mounting board and the camper's plastic battery box. Two more screws go from inside the battery box into the back of the mounting board. I squirted a little hot glue behind the board before securing with the fasteners. The MDF's botton edge rests on the styrofoam support for the battery box.
The cables are #2 at 3' long with a 6" pigtail for the 100 Amp breaker The other ends poke through the back of the battery box (with grommets in the openings) and are secured to the two group 27 batteries. The chassis ground has a gold-plated lug with #8 and is barely visible in the last pic. Once I figured out where to mount the inverter, the rest fell in place pretty easy. The little square of plywood (the solar panel fuse is attached to it) in the pics was existing from the dealer and was mounted with screws/caulk, so I decide to work around it.
The only thing I've tried is a 25' drop light with a 60 watt bulb, which is plugged in for the pics. It worked. This is a cheap inverter, but I figured I'd take the gamble. We plan on running things like a 24" LED TV (it doesn't have a 12v wart), laptops, DVD/BlueRay player and/or a gaming console. A 110v LED droplight might be useful while setting up camp, too. It also has a 5 watt USB. I think our 900 watt microwave would be a bit much.
Inverter, cables and fancy-pants terminal covers from DonRowe.com.
Breaker from Solar-Electric.com
Questions, comments and criticisms/concerns are welcome.
View through the drawer holes:

Closer:

The 100 Amp breaker:

Connections and chassis ground:
