fcooper
Jul 31, 2012Explorer
Dual Pane Window Repair-My Way
My two section, dual pane passenger side window has been fogged up for about 4 years (upper section) with the lower section having only recently began fogging. After pricing replacement windows (about $450 for complete unit), I decided to tackle the project myself. I took a few notes and pictures, outlined below. Maybe this will help others that want to do their own repair.
I removed the window, removed the 4 screws & matching plate that held the major frame together. I also removed two screws that held the mid window divider in place. I could then spread the frame and remove the two sections of windows. The picture below shows the plate removed from the frame.
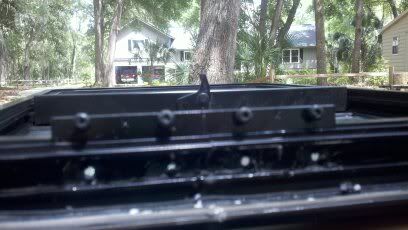
This picture shows the frame being split open so that the two window sections can be removed.
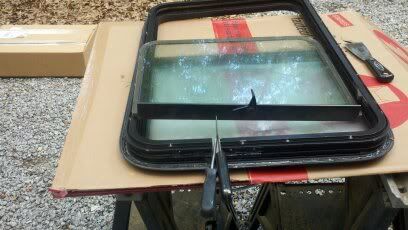
The lower window had a handle with lock pressed onto the top of the window. I had a lot of trouble removing this handle. It was a force fit with a rubber gasket and glue. I finally used a propane torch to add heat which loosed the adhesive.
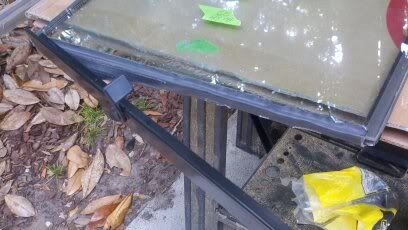
Using a razor knife and a single edge razor blade, I carefully cut the old sealant away from the glass. On the top one, the glass was no longer stuck to the adhesive.
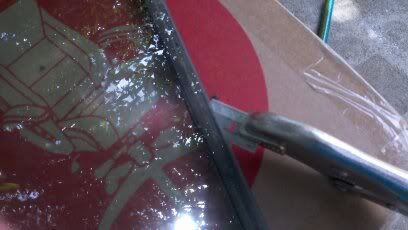
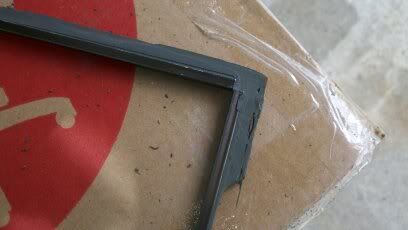
My windows had 3/16 inch spacers. I could not locate replacement 3/16 inch spacers, so I elected to reuse the old spacers after cutting away the old sealant. The picture below shows the spacer with some of the sealant cut away. I left a small amount of old sealer on the corners where two sections of spacer were joined to keep it glued together. I did remove more of the old sealer than is displayed in this picture.
I carefully cleaned all of the inside surfaces of the glass panes. One of the top panes could not be cleaned. I tried all manner of solutions and mild abrasives, but the glass was too etched to clean. I ordered a replacement tempered pane (special cut) from a local glass company for $80.00.
The sealant for the windows is C.R. LAURENCE 877 CRL Super Spacer Sealant, which is available from Amazon.com. It's about $13.00 per tube. I ordered two tubes, but only used one for these two window sections. The sealant tube fits a standard caulk gun, and comes with a screw on plastic tip that helps with getting the sealant between the glass surfaces.
Having no way to inject inert gas into the inside of the window, I used the motorhome as a "lower humidity" environment. I live in coastal Georgia, where the humidity is very high. I stored the window components in the motorhome for several days with the air conditioning and the dehumidifier running to get everything as dry as possible. I did the assembly inside the motorhome, and left everything to dry for a couple of days before reassembly.
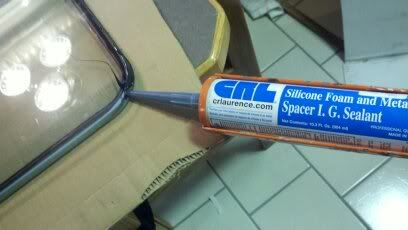
After carefully positioning the 3/16 inch spacer and the panes, I used the caulk gun to inject sealer between the panes up to the spacer. I did not place sealer on the spacer before placing between the glass panes. I was careful to insure that the spacer remained centered, and the two panes were aligned. My advice is to assemble over cardboard, as some sealant will get between the window and the surface it is laying on. This is easily cleaned up with a razor knife or razor blade when dry, and the cardboard is disposable.
This picture shows the caulk being injected between the panes.
Reassembly was the reverse of the disassembly process. I did have difficulty getting the handle/lock on using the old rubber gasket. I finally left the old rubber gasket off, and used the sealant as a glue to attach the handle to the window. This worked well.
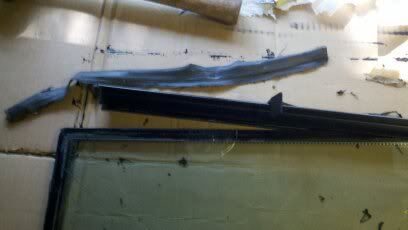
This picture shows the handle/lock ready to install.
My window had a thin rubber seal between the window flange and the outside surface of the motorhome. I did not reuse this seal, but used butyl tape instead.
I know that some will question the durability of this repair, but I'm expecting that it will last several years at least.
My costs were: $80 for one window pane, $26.00 for sealant, and $7.00 for butyl tape, total $113. If you repair your windows soon after they first show moisture between the panes, your cost will be lower as you will not need to buy new glass.
Reinstalled, the window looks as good as new.
Fred
I removed the window, removed the 4 screws & matching plate that held the major frame together. I also removed two screws that held the mid window divider in place. I could then spread the frame and remove the two sections of windows. The picture below shows the plate removed from the frame.

This picture shows the frame being split open so that the two window sections can be removed.

The lower window had a handle with lock pressed onto the top of the window. I had a lot of trouble removing this handle. It was a force fit with a rubber gasket and glue. I finally used a propane torch to add heat which loosed the adhesive.

Using a razor knife and a single edge razor blade, I carefully cut the old sealant away from the glass. On the top one, the glass was no longer stuck to the adhesive.

My windows had 3/16 inch spacers. I could not locate replacement 3/16 inch spacers, so I elected to reuse the old spacers after cutting away the old sealant. The picture below shows the spacer with some of the sealant cut away. I left a small amount of old sealer on the corners where two sections of spacer were joined to keep it glued together. I did remove more of the old sealer than is displayed in this picture.

I carefully cleaned all of the inside surfaces of the glass panes. One of the top panes could not be cleaned. I tried all manner of solutions and mild abrasives, but the glass was too etched to clean. I ordered a replacement tempered pane (special cut) from a local glass company for $80.00.
The sealant for the windows is C.R. LAURENCE 877 CRL Super Spacer Sealant, which is available from Amazon.com. It's about $13.00 per tube. I ordered two tubes, but only used one for these two window sections. The sealant tube fits a standard caulk gun, and comes with a screw on plastic tip that helps with getting the sealant between the glass surfaces.
Having no way to inject inert gas into the inside of the window, I used the motorhome as a "lower humidity" environment. I live in coastal Georgia, where the humidity is very high. I stored the window components in the motorhome for several days with the air conditioning and the dehumidifier running to get everything as dry as possible. I did the assembly inside the motorhome, and left everything to dry for a couple of days before reassembly.
After carefully positioning the 3/16 inch spacer and the panes, I used the caulk gun to inject sealer between the panes up to the spacer. I did not place sealer on the spacer before placing between the glass panes. I was careful to insure that the spacer remained centered, and the two panes were aligned. My advice is to assemble over cardboard, as some sealant will get between the window and the surface it is laying on. This is easily cleaned up with a razor knife or razor blade when dry, and the cardboard is disposable.
This picture shows the caulk being injected between the panes.

Reassembly was the reverse of the disassembly process. I did have difficulty getting the handle/lock on using the old rubber gasket. I finally left the old rubber gasket off, and used the sealant as a glue to attach the handle to the window. This worked well.
This picture shows the handle/lock ready to install.

My window had a thin rubber seal between the window flange and the outside surface of the motorhome. I did not reuse this seal, but used butyl tape instead.
I know that some will question the durability of this repair, but I'm expecting that it will last several years at least.
My costs were: $80 for one window pane, $26.00 for sealant, and $7.00 for butyl tape, total $113. If you repair your windows soon after they first show moisture between the panes, your cost will be lower as you will not need to buy new glass.
Reinstalled, the window looks as good as new.
Fred