Forum Discussion
westend
Apr 03, 2012Explorer
Tile-101 Part 3: The grouting.
This morning, I pulled out the last of the spacers and scraped out any inapropriate bits of thinset. I then mixed a small bucket of grout. This is when things went a little South on my grouting efforts and I apologize for the lack of pictures and the poor quality of these posted, time was in short supply to finish the grouting.
I custom blended some grout from bags I had in storage and one or both of these grouts were beyond their useful life. When grout in it's powdered form sits and absorbs moisture for a period, it won't mix right and the chemical reaction of the Portland cement portion won't readily happen. Lesson learned, pitch the old stuff and get some new material.
I was able to recover what I had mixed and proceeded to get ready to grout. This picture shows the rubber float and mix of grout waiting to be applied.

I had some other crappy pics of the process but my camera batteries were failing, also, so I'll fill in the details. The grout is pushed into the joints with the rubber float in the direction of the grout lines. The remaining grout on the surface of the tile is then scraped off by holding the float on an angle and scraping diagonally across the joints. Since this is a small job, I filled all the joints and then scraped the excess after that. On bigger projects or if the surfaces are in the sun or if a large amount of latex additive is used, it's necessary to stop and sponge off any excess as you work. The grout sets fast and will tell you how fast or slow your progress can be.
After the initial damp-sponging of the excess, I allow the grout to set for a short period and develop a haze across the tile's surface. At this point, using a fresh bucket of clean water, I sponge the haze off of the tile, also in a diagonal manner. A second wash of the haze follows, again with clean water and a the final sponge off of any haze is also done.
After these steps, the tile and grout is allowed to set and any remaining haze can be buffed off when all is dry, using a damp cloth.
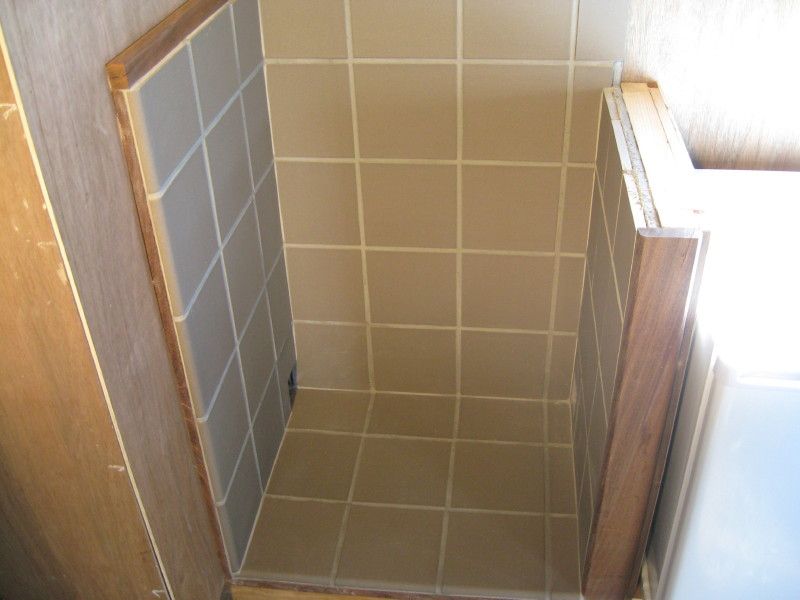
The completed tile enclosure:

Edit: Better picture of the finished heater area:
This morning, I pulled out the last of the spacers and scraped out any inapropriate bits of thinset. I then mixed a small bucket of grout. This is when things went a little South on my grouting efforts and I apologize for the lack of pictures and the poor quality of these posted, time was in short supply to finish the grouting.
I custom blended some grout from bags I had in storage and one or both of these grouts were beyond their useful life. When grout in it's powdered form sits and absorbs moisture for a period, it won't mix right and the chemical reaction of the Portland cement portion won't readily happen. Lesson learned, pitch the old stuff and get some new material.
I was able to recover what I had mixed and proceeded to get ready to grout. This picture shows the rubber float and mix of grout waiting to be applied.
I had some other crappy pics of the process but my camera batteries were failing, also, so I'll fill in the details. The grout is pushed into the joints with the rubber float in the direction of the grout lines. The remaining grout on the surface of the tile is then scraped off by holding the float on an angle and scraping diagonally across the joints. Since this is a small job, I filled all the joints and then scraped the excess after that. On bigger projects or if the surfaces are in the sun or if a large amount of latex additive is used, it's necessary to stop and sponge off any excess as you work. The grout sets fast and will tell you how fast or slow your progress can be.
After the initial damp-sponging of the excess, I allow the grout to set for a short period and develop a haze across the tile's surface. At this point, using a fresh bucket of clean water, I sponge the haze off of the tile, also in a diagonal manner. A second wash of the haze follows, again with clean water and a the final sponge off of any haze is also done.
After these steps, the tile and grout is allowed to set and any remaining haze can be buffed off when all is dry, using a damp cloth.
The completed tile enclosure:
Edit: Better picture of the finished heater area:
About Travel Trailer Group
44,070 PostsLatest Activity: Aug 07, 2020