cancel
Showing results forย 
Search instead forย 
Did you mean:ย 

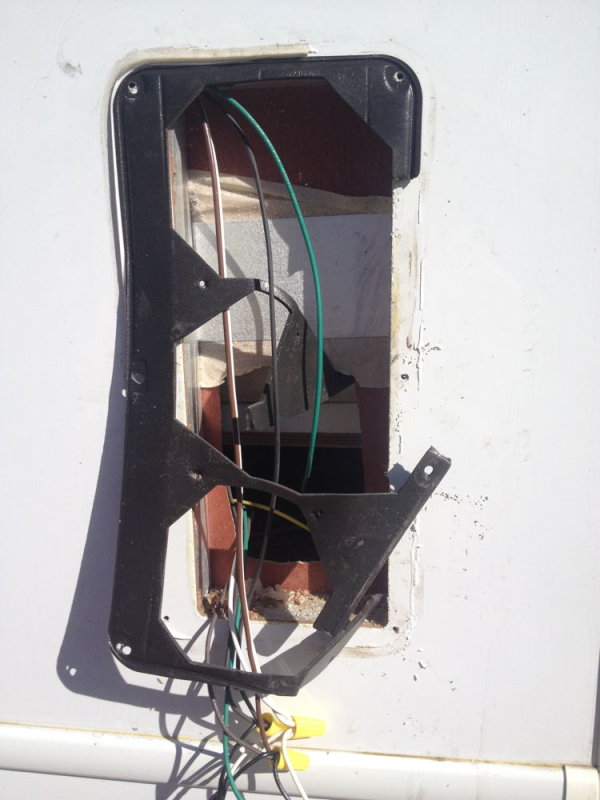
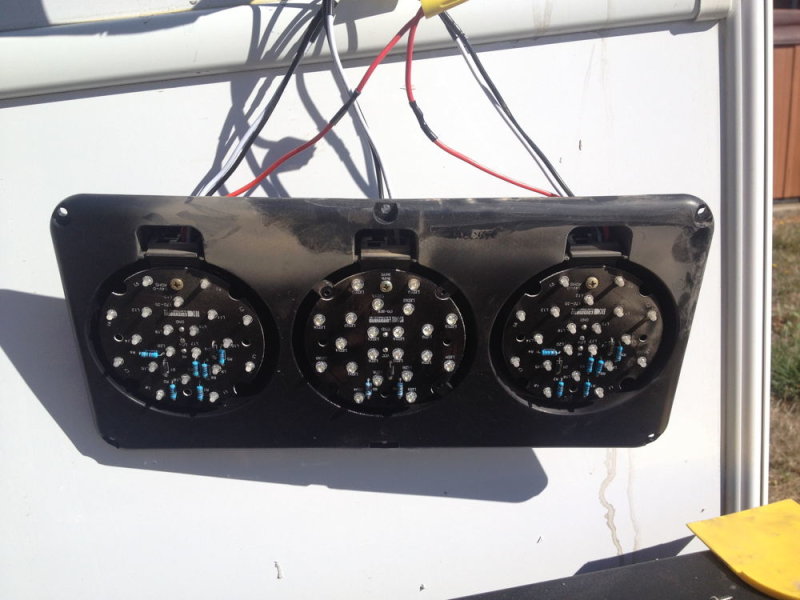
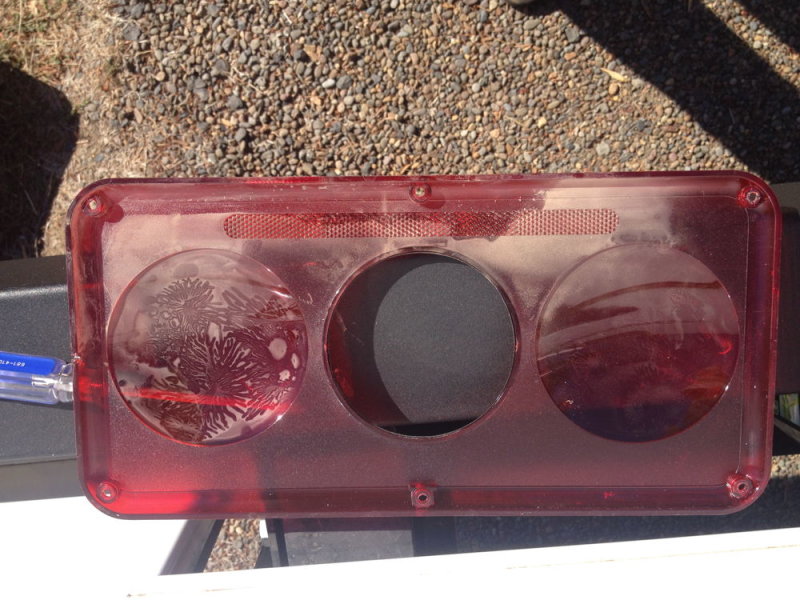
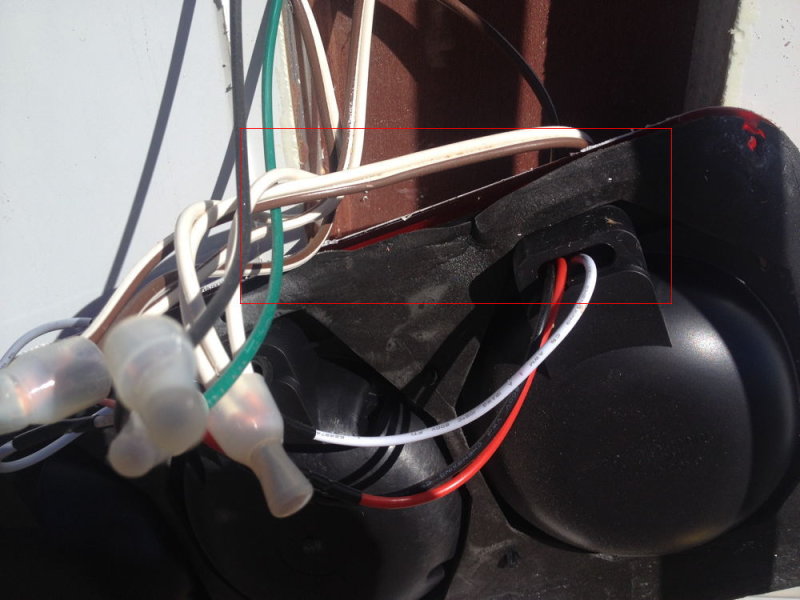
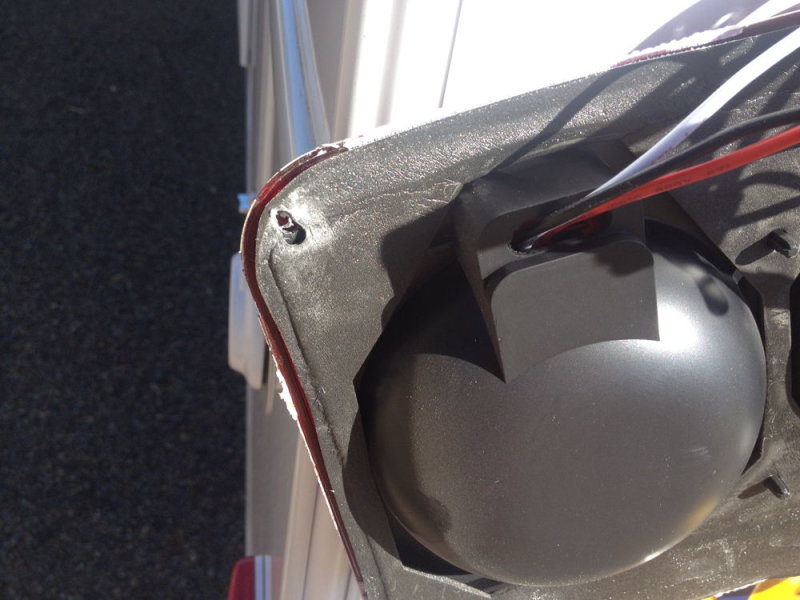
Command Electronics Taillight gasket leak

garyemunson
Explorer
Explorer
I'd posted this some time back. Since I find I need to do it again, thought I'd repost. The poor design of this light requires you to regularly replace the main gasket on a regular basis. The lens of the light only seals at the very perimeter of the lens. As the gasket shrinks from heat/age/UV rays, once it passes the outside edge of the lens, it begins to allow water into the interior of your RV's wall! The gasket barely protrudes a 1/8th inch when new so it does not take much shrinkage to put the back wall of your RV in peril. Many coaches from different manufacturers use this taillight assembly and all share this problem. Left alone, it allows water to leak inside the rear wall at both rear corners with the potential of rotting both the wall panel and the floor at the point where they attach to each other. If you have this type light, be sure to keep an eye on the gasket and replace it when it shrinks to the point it cannot seal out water anymore. A couple years is all you can expect out of this cheap gasket. Commandelectronics.com sells the replacement gaskets.

https://static1.squarespace.com/static/55144804e4b021a56f31ce24/t/599f0b2a9f7456fccccafbfe/1503595323561/003-30ProductInfo.pdf
2 REPLIES 2

BruceMc
Explorer III
Explorer III
These command taillight assemblies are very poorly designed. They don't lend well to crappy assembly either. Here's what I found after my taillights started filling with water not long after we purchased it new in October '15:

After initially removing the taillight, it was apparent the assembler forgot to install the gasket before wiring the fixture. They tore it in spots, then kinda tossed it in the hole:


The fixture, when it wasn't wet, was filling with dust:


In spots, the gasket wasn't even in place:


Additionally, the center clear lens gasket was the same material. One was designed with 2 screws, the other had 4.

To rectify this issue, I cleaned all surfaces, then laid a thin bead of clear sealant at the mating surfaces between the red & clear lenses, then assembled them. No more leaks there...

Next, I ran a bead of clear sealant around the perimeter of the red lens & set it in place, ensuring some squish-out around the perimeter of the lamp. I had re-drilled the holes as some were stripped, thus ensuring all 6 screws would seal the lens properly. I added a touch of sealant in the screw holes, then gently seated the screws. Once all was in place, I cleaned up the excess sealant.

I did not attempt to reuse the existing gasket. The new seal was created purely from sealant.

I've had zero leaks since then. No fogging, no water setting in the bottom, no dust, nothing.


If you are having similar issues, replacing the anemic gasket isn't going to help much unless you give it a little help. Don't just put sealant around the edge - if anything, back out the screws, pull the fixture away from the surface a bit, then force sealant in the gap. Pull the screws one at a time, put a dab of sealant in the screw hole, then reinstall the screw. Tighten gently & remove the excess. Next, remove the center clear lens & do the same thing.

Again, these are cheap fixtures, but they can be made watertight.

Good luck, and let us know what you did and how well it worked.
2016 Forest River Sunseeker 2250SLEC Chevrolet 6.0L

austinjenna
Explorer
Explorer
Cant you just put some caulk around it?

2010 F350 CC Lariat 4x4 Short Bed
2011 Crusader 298BDS 5th Wheel
Reese 16K