cancel
Showing results forย 
Search instead forย 
Did you mean:ย 

Cool Mods - Thread restored 10/18/2012

2Rad4U
Explorer II
Explorer II
My daughter was getting a little warm in her bunk during our last camping trip, so I decided to put her a fan in to keep the air flowing.

I had been wanting to add a 12-volt fan to the main living area anyway, so I decided to tackle both jobs today. A trip to Wal-Mart for two fans($8.48 each) and we're halfway there.

She picked the spot, and I got to work -


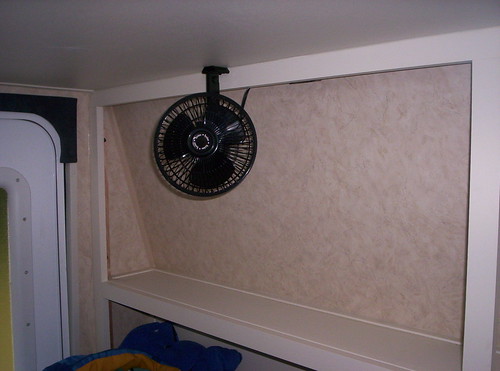
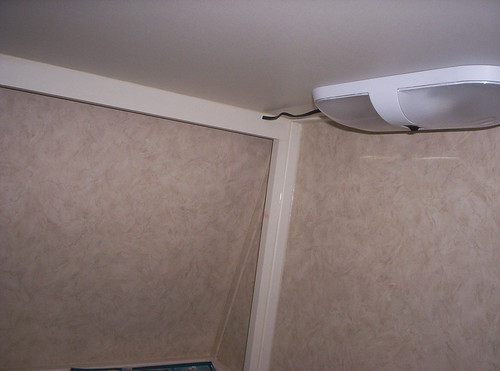
I picked up the power from her overhead light. All I have left is to install a short piece of wire cover and I'm done -


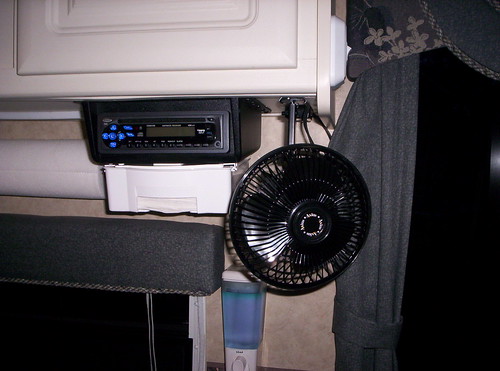
I added one in the main area -


I dropped by Lowe's and found this cool soap dispenser. I also just installed these Pop-a-Toothbrush holders -


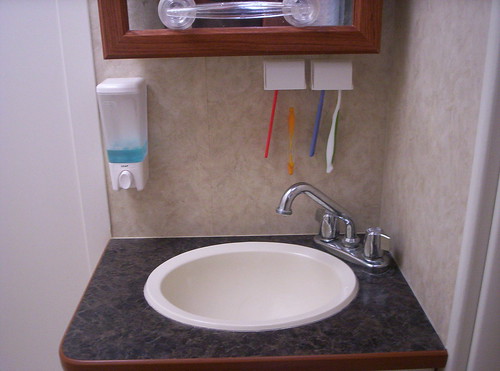
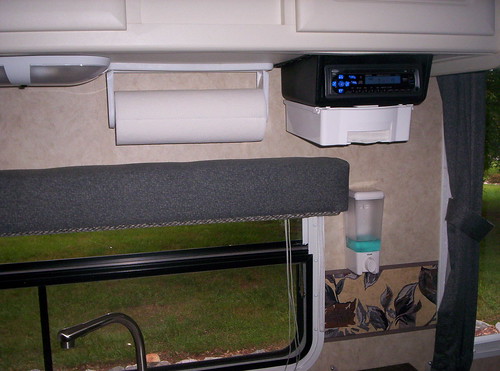
I added a sopa dispenser to the kitchen area as well. I also installed a Pop-a-Napkin under the radio -


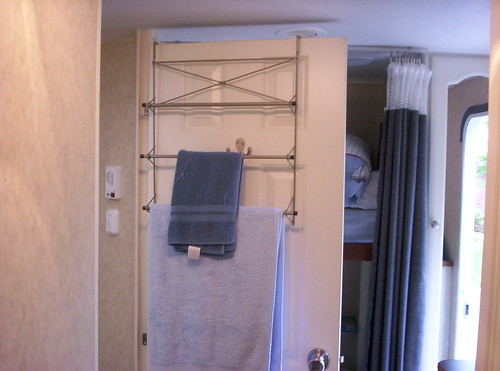
Here's an easy mod. I found this over the door towel rack at Walmart and it works great -

Chris
2005 Rockwood 2516G (sold)
2005 Max-Lite 24RS (sold)
2019 Rockwood 2608BS (sold)
2020 Grand Design 337RLS
2018 Chevy 2500HD
2,727 REPLIES 2,727

TreeSeeker
Explorer
Explorer
Most likely the solvent in the ProFlex will melt the Styrofoam so you don't want to try using ProFlex to glue together Styrofoam pieces.

85AllegroSam
Explorer
Explorer
I was using some Proflex the other day and noticed a note on the tube to not apply to styrofoam. I was sealing up a add on hose coupling so I could hook a hose to the entry side of the trailer. I was not too worried that some of the caulk would go into the opening and make contact with the styrofoam but wondered what type of reaction the styrofoam has with ProFlex. I did not have a piece of styrofoam handy to test so I proceeded with the job.
2008 Dutchmen Kodiak 27CDSL,-94Dodg4x4Cummins- Mods:Auto switchover Honda EU3000IS gen cabeled to gen in truck.-Propride 3P hitch:)-Cold weather mods:Valves/tanks heated-insulated, storm windows, plumbing drains to low point. Barker 24" tongue jack

batman99
Explorer
Explorer
I finally found a good "partial" video of using tape to create a nice caulk edge. For my wife's TT, here's the steps I used:

1 - With strong cleaner, clean dirt off the edge of TT's window. Clean the edge of window and the TT's siding. Wipe dry.
2 - Apply green painter's tape around window's edge - on the TT's wall. Leave approx 1/8" gap between window edge and this tape.
3 - Remove the window - by simply unscrewing the many inside screews. During this step, another person should hold the window from the ouside - so it doesn't accidentally fall outwards.
4 - With window removed, take a strong cleaner and remove any dirt / mold from the trailer's wall (where the window over lapped its siding).
5 - Clean the outside of the removed window (where it over laps onto the siding wall). And if you want, clean the entire window. My wife found its much easier to clean the removed window.
6 - With window removed, apply painter's masking tape to the window's outer edge (outside edge). I find its easier to perform this step when window is removed.
7 - Apply caulking bead to inside lip of removed window. Only need to caulk its upper and sides. Do NOT caulk the lower edge of the window.
8 - Within window removed, apply bead of caulking on window's outer lip (on the inside) - where window lip overlaps onto the wall.
9 - Push window back into postion and press firmly. If needed, slide window sideways 1/4 inch - so its centered into the previous making tape position. See above Step 2. Yes. Lots of caulk comes oozing out the window edge (which is a good thing). After a few windows, one gets a good feeling on the proper amount of caulking to apply (to reduce oozing over-load).
10 - From outside of TT, have someone hold the window firmly in place. Go inside the screw down the window. I start from the top and evenly screw down all screws - so it "sucks down" the outer windows using even pressure around entire window. When all screws are in place and snug, I then give each screw a final 1/8 turn.
11 - From the outside of TT, I then remove extra `oozed out` caulk with my left hand finger. I then use a wet finger (other hand) and smooth out the caulk beween the tape lines. When all looks great, I then remove both masking tape lines.
12 - One final visual look and if needed, I use "wet finger" to smooth out an caulking within the window's outer edge.

For a visual on using TAPE (to create a nice edge), see 6 minutes / 40 seconds within: http://www.youtube.com/watch?v=uPGKdwnHhaE

This works for me...

Good luck!!!!

.

batman99
Explorer
Explorer
Fisherguy wrote:
I've used that caulking, just wasn't sure if you skipped the butyl which is some kinda sticky stuff but tends to ooze outa the seams. I think most people use butyl and caulk it later, but I'm not sure what the recommended pocedure is? Is the trailer a hard wall or alum skinned?


Hard wall 2006 Jayco FBS. Appears to be a tin wall with white paint. Yes. That stuff does OOZE out. Very critical to use painter's masking tape around the window - before removing the window. Once the stuff oozes onto the tape (after window re-installed), I simply wipe away the extra with my finger, then remove the masking tape. Then, use wet finger to smooth that stuff even more. Works great. From my other computer, I'll try to find a U-Tube video - on simular caulking method.

.

Fisherguy
Explorer
Explorer
I've used that caulking, just wasn't sure if you skipped the butyl which is some kinda sticky stuff but tends to ooze outa the seams. I think most people use butyl and caulk it later, but I'm not sure what the recommended pocedure is?

Is the trailer a hard wall or alum skinned?
06 Dodge Ram 3500 Cummins 6 spd std with a few goodies.

2007 Komfort 274TS, 480 watts solar, Trimetric 2025RV, PD9280, Honda EU2000i, Xantrex SW600

2019 Timber Ridge 24RLS, 600 watts solar, 3-100Ah Lithiums, 12volt Norcold Fridge

batman99
Explorer
Explorer
That is correctly. I simply used http://www.geocelusa.com/php/retail/product.php?prdb_product_id=39 and it works great. This stuff reminds me of clear silicone but it sticks much better. It's also mold and mildew resistant as well... And when this stuff dries, it sticks much better then exterior silicone. If wondering, I bought this stuff at my local RV Dealer.

.

Fisherguy
Explorer
Explorer
batman99 wrote:
This last weekend, I removed 3 windows from my wife's TT\s windows, applied some RV Sealer / Caulking around them and re-installed. The stuff I used is: - Click Here -

If wondering, the windows are NOT currently leaking. Just a proactive mod to eliminate them from leaking in he future. Each visit, I plan t seal another 3 windows. Within 1 month, I'll have all windows "properly" sealed. Properly sealed the way each window should have been done at the factory.

Tip: Apply masking tape around the outside of the window (on frame on on trailer siding). The masking tape strips can be easly removed afterwards and eliminate "over spreading" of sealer material. Lesson learned on the first window...

If into proactive maintanence / mods, you may want to remove your TT's windows, apply sealer between their inner frame and siding walls, and screw them back down again. Very easy proactive task to perform...


So you just used the stuff in the tube your linked to? Didn't use butyl tape at all?
06 Dodge Ram 3500 Cummins 6 spd std with a few goodies.

2007 Komfort 274TS, 480 watts solar, Trimetric 2025RV, PD9280, Honda EU2000i, Xantrex SW600

2019 Timber Ridge 24RLS, 600 watts solar, 3-100Ah Lithiums, 12volt Norcold Fridge

batman99
Explorer
Explorer
> Batman99, you've mounted your plate in the cubby, is that to beat the toll cameras on the 407? LOL

Actaully, my wife's TT is at a seasonal site. Her TT hasn't been towed for 3 years. Got tired of waxing around its license plate. Thus, I simply removed it, and stored witin the cubby hole. It works for me...

.

revrnd
Explorer
Explorer
TURK2500 wrote:
revrnd wrote:
I'll be finishing up a dual battery setup on my trailer this weekend....snip

Are you using 6volt or 12volt batteries? What amp? Series or parallel circuit? Post some pics of your finished system.

I'm looking into a possible dual battery setup with my TT as well, but want to maximize amp output with a dual setup..

Turk2500


I just mounted 2 Group 24 12 V RV batteries in the box & wired them parallel (2 "jumpers" connecting - to - and + to +) as per the 2nd sketch in link:

Click

Not sure what the amperage of them is. I'll check tomorrow.
1986 Monte Carlo SS
2011 Chevrolet K2500HD (P3 controller, Husky WD hitch)
2009 Rockwood 2106 Mini Lite


Retired GM of Canada Oshawa Truck Assembly Plant
Opened 1965 Closed 2009

revrnd
Explorer
Explorer
batman99 wrote:


- Installed 110/120V-30A Surge Guard (hard wire) version. Surf:
- Click Here 1 -
- Click Here 2 -

.


Batman, you've mounted your plate in the cubby, is that to beat the toll cameras on the 407?

LOL

Well, I got the dual battery box installed & added a BEP Marine Battery switch.

Made a cable to lock the propane bottles to the tongue.

Mounted a couple of the small Sylvania LED lights over my bed, under the bunk.

Reworked my flagpole holder & fabricated a bracket to mount to rear bumper.

Installed Maxxair vent covers.
1986 Monte Carlo SS
2011 Chevrolet K2500HD (P3 controller, Husky WD hitch)
2009 Rockwood 2106 Mini Lite


Retired GM of Canada Oshawa Truck Assembly Plant
Opened 1965 Closed 2009

batman99
Explorer
Explorer
This last weekend, I removed 3 windows from my wife's TT\s windows, applied some RV Sealer / Caulking around them and re-installed. The stuff I used is: - Click Here -

If wondering, the windows are NOT currently leaking. Just a proactive mod to eliminate them from leaking in he future. Each visit, I plan t seal another 3 windows. Within 1 month, I'll have all windows "properly" sealed. Properly sealed the way each window should have been done at the factory.

Tip: Apply masking tape around the outside of the window (on frame on on trailer siding). The masking tape strips can be easly removed afterwards and eliminate "over spreading" of sealer material. Lesson learned on the first window...

If into proactive maintanence / mods, you may want to remove your TT's windows, apply sealer between their inner frame and siding walls, and screw them back down again. Very easy proactive task to perform...

pextron
Explorer
Explorer
This site has a lot of great mods for RV's and TT's.

http://www.modmyrv.com

Community Alumni
Not applicable
revrnd wrote:
I'll be finishing up a dual battery setup on my trailer this weekend....snip

Are you using 6volt or 12volt batteries? What amp? Series or parallel circuit? Post some pics of your finished system.

I'm looking into a possible dual battery setup with my TT as well, but want to maximize amp output with a dual setup..

Turk2500

revrnd
Explorer
Explorer
I'll be finishing up a dual battery setup on my trailer this weekend. I built the battery box out of some plywood we had in storage. I also added a BEP Marine battery switch to disconnect the power.

I've also picked up a couple of different Sylvania LED light lits to use for reading in the bed.
1986 Monte Carlo SS
2011 Chevrolet K2500HD (P3 controller, Husky WD hitch)
2009 Rockwood 2106 Mini Lite


Retired GM of Canada Oshawa Truck Assembly Plant
Opened 1965 Closed 2009

cheezy26_81
Explorer
Explorer
welsteach wrote:
I just added an Adjust-a-Shower rod by Stromberg-Carlson. I can now move my shower rod into the tub with a push of a finger (creating more room in the tiny bathroom) or outside the shower (creating more shower space in the shower itself). It was a pain to install (would be much better with electric drill), but WELL worth it. My shower last night felt almost luxurious. It is similar to the bent shower rods in hotel rooms, except that it can move in and out. It is heavy duty metal, not plastic, which I thought it might be. I would recommend it.


if you liked that then add an Oxygenics Body Spa RV Showerhead you wont ever want to leave the shower. well worth the money also.