AnEv942
Jun 08, 2014Nomad
Cleaning up rear rotted 'skirts' on camper...
Literally
Drivers side 06/08/14
Passenger Side 07/23/14

Last thing yesterday, swept up our rear driver side skirt or rear wing.
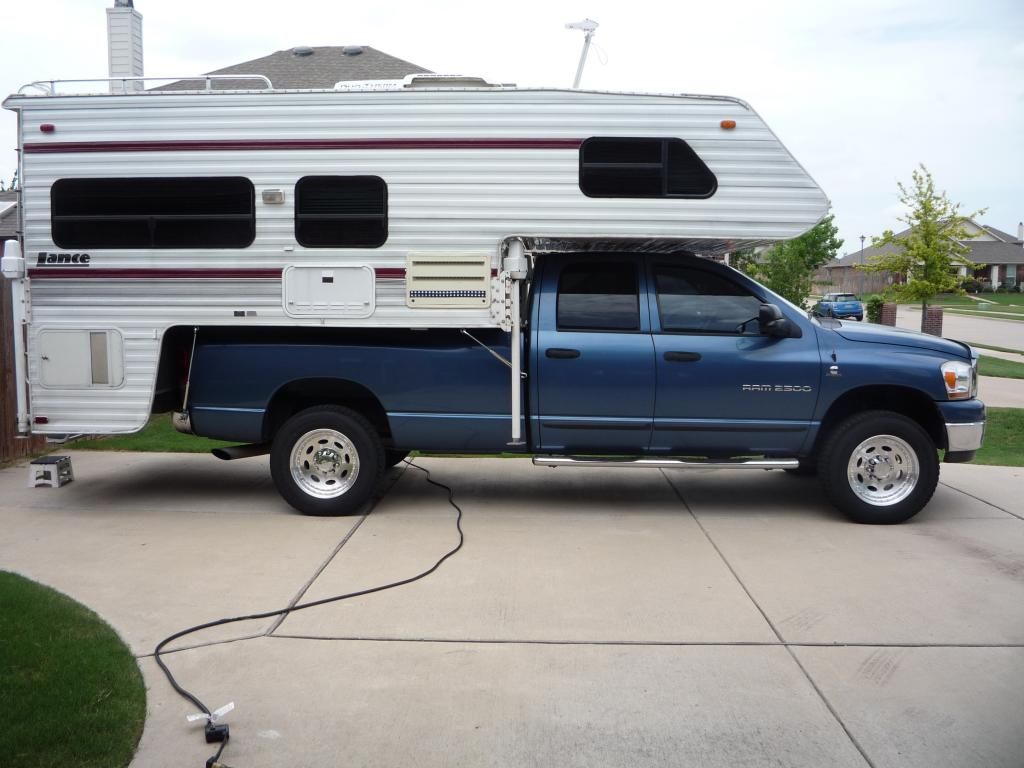
After putting it off for way too long- forced to start the rebuild of skirt. Simply didnt want to address but last trip out, when I opened door the whole frame was moving, trying to come out of the wing (skirt). There are a few good skirt rebuild threads linked in the TCU. Ive studied them 'till my eyes are swimming & blue, seems a simple repair. Not sure why it seems such a task...I guess because camper still 'looked' ok. However aux battery is on shelf, plumbing valves etc. are in there- need to fix, before door falls off.
But I have some questions for some that have done this or thoughts. Ill outline with pics where Im at and plans. Same as most, a stapled 1x2 frame with luan glued to both sides/filon on outer side. Once I removed I realized the skirt really isnt as structural as I had thought to the box and shelfs. I have no clue why the wing overhangs the box other than appearance, boxed square would be a better design as far as structure/sealing. But Ill duplicate swept look just 'cause .
When I get around to the generator side skirt (not as bad I think) Ill use same original method to reconstruct. 1x2 frame sandwiched. But only because it has no doors. And its rather large.
The drivers side though is allmost all door. I am considering using a single piece of ~7/8" plywood. It would be a lot stronger, simpler to build and reattach. Edge sealing only critical concern? Though no more/less than the luan which I do have a sheet of 1/8". Opinions?
Most of the water intrusion source was the corner wall trim which Im addressing. Second was just the edge trim allowing to wick-but that mostly because what it was attached to rotted.
At any rate where Im at so far.
First clue problem was greater than appeared was pulling off the filon seam trim.

When slipping the putty knife under to cut adhesive tape the filon was squishing. Couple of staples completely rusted off. Oh boy...
Continuing decided to cut the edge trim.

Allow removing only whats needed to remove filon and subsequent cleaning and resealing. I did carry up a bit.
Removed jack.

This is where most of the water is coming from. Ive dealt with this on front jacks. The edge trim has a vinyl cosmetic screw cover trim. Water gets behind. On ours its tucked under jack mounts, water seeps.. On the front of camper especialy on nose bottom the 'trim' literally fills with water. I cut ends before termination under jacks so water could drain out. Underneath nose I also used a hole punch on vinyl added a few holes so water could get out before direct down wall. If its not being channeled to where it shouldn't be its sweating and rusting out screws...

At any rate, once trim removed you can see at lower edge is the nocthed edge of skirt 1x2, above that is the corner of aluminum frame.

Door removed, getting quite discouraged at this point what I going to find under filon, obvious rot..Margaret actually picked up some photo adds. In an attempt to save the filon skin I used a sonic (oscillating multi tool) cutter to cut the perimeter staples. The skin fell off.

wow...
Amazing how something can almost look good and function yet nothing there. Most of the wood visible isnt. Trying to remove just turned to dust.

Once all the rot removed looks pretty good. I expected to see rot traveling into camper. But its all sound and was contained to the 1x2s of the skirt. The very bottom right edge was starting to be attacked but mostly discolored.
The top of skirt frame was screwed from above and thru the aluminum wing frame. No way to get to without loosening a LOT of upper filon. I left the top most 1x2 and shaped lead section of ply block attached (hidden behind filon). As its still sound I can reattach new skirt frame to the existing wood behind upper filon and from the back side of inside of cabinet. Ill also add some blocking inside. Upper and lower filon panels re-stalled along seam to new wood.
If I were replacing the filon think I would have cut lower section up to aluminum frame.
Spent 2 hours cleaning old silicone from filon panel and years of re-caulking ..Because of the limited free area of drivers side skirt/filon panel, though Ill reglue I 'think' a non issue on this side.
The purposeless and exposed back side of wing Im unsure. Could glue plastic or vinyl to back side but thinking just cover exposed area with aluminum sheet. Ding ding, use 3/4 ply, laminate luan to back side running long on top to glue/staple to existing blocking. Allow tucking behind cabinet wall, stapling/tying front & upper block piece. Cool-knew there was a reason to documenting this. Then cover-Aways off yet.
Off to the hardware...
Drivers side 06/08/14
Passenger Side 07/23/14
Last thing yesterday, swept up our rear driver side skirt or rear wing.
After putting it off for way too long- forced to start the rebuild of skirt. Simply didnt want to address but last trip out, when I opened door the whole frame was moving, trying to come out of the wing (skirt). There are a few good skirt rebuild threads linked in the TCU. Ive studied them 'till my eyes are swimming & blue, seems a simple repair. Not sure why it seems such a task...I guess because camper still 'looked' ok. However aux battery is on shelf, plumbing valves etc. are in there- need to fix, before door falls off.
But I have some questions for some that have done this or thoughts. Ill outline with pics where Im at and plans. Same as most, a stapled 1x2 frame with luan glued to both sides/filon on outer side. Once I removed I realized the skirt really isnt as structural as I had thought to the box and shelfs. I have no clue why the wing overhangs the box other than appearance, boxed square would be a better design as far as structure/sealing. But Ill duplicate swept look just 'cause .
When I get around to the generator side skirt (not as bad I think) Ill use same original method to reconstruct. 1x2 frame sandwiched. But only because it has no doors. And its rather large.
The drivers side though is allmost all door. I am considering using a single piece of ~7/8" plywood. It would be a lot stronger, simpler to build and reattach. Edge sealing only critical concern? Though no more/less than the luan which I do have a sheet of 1/8". Opinions?
Most of the water intrusion source was the corner wall trim which Im addressing. Second was just the edge trim allowing to wick-but that mostly because what it was attached to rotted.
At any rate where Im at so far.
First clue problem was greater than appeared was pulling off the filon seam trim.
When slipping the putty knife under to cut adhesive tape the filon was squishing. Couple of staples completely rusted off. Oh boy...
Continuing decided to cut the edge trim.
Allow removing only whats needed to remove filon and subsequent cleaning and resealing. I did carry up a bit.
Removed jack.
This is where most of the water is coming from. Ive dealt with this on front jacks. The edge trim has a vinyl cosmetic screw cover trim. Water gets behind. On ours its tucked under jack mounts, water seeps.. On the front of camper especialy on nose bottom the 'trim' literally fills with water. I cut ends before termination under jacks so water could drain out. Underneath nose I also used a hole punch on vinyl added a few holes so water could get out before direct down wall. If its not being channeled to where it shouldn't be its sweating and rusting out screws...
At any rate, once trim removed you can see at lower edge is the nocthed edge of skirt 1x2, above that is the corner of aluminum frame.
Door removed, getting quite discouraged at this point what I going to find under filon, obvious rot..Margaret actually picked up some photo adds. In an attempt to save the filon skin I used a sonic (oscillating multi tool) cutter to cut the perimeter staples. The skin fell off.
wow...
Amazing how something can almost look good and function yet nothing there. Most of the wood visible isnt. Trying to remove just turned to dust.
Once all the rot removed looks pretty good. I expected to see rot traveling into camper. But its all sound and was contained to the 1x2s of the skirt. The very bottom right edge was starting to be attacked but mostly discolored.
The top of skirt frame was screwed from above and thru the aluminum wing frame. No way to get to without loosening a LOT of upper filon. I left the top most 1x2 and shaped lead section of ply block attached (hidden behind filon). As its still sound I can reattach new skirt frame to the existing wood behind upper filon and from the back side of inside of cabinet. Ill also add some blocking inside. Upper and lower filon panels re-stalled along seam to new wood.
If I were replacing the filon think I would have cut lower section up to aluminum frame.
Spent 2 hours cleaning old silicone from filon panel and years of re-caulking ..Because of the limited free area of drivers side skirt/filon panel, though Ill reglue I 'think' a non issue on this side.
The purposeless and exposed back side of wing Im unsure. Could glue plastic or vinyl to back side but thinking just cover exposed area with aluminum sheet. Ding ding, use 3/4 ply, laminate luan to back side running long on top to glue/staple to existing blocking. Allow tucking behind cabinet wall, stapling/tying front & upper block piece. Cool-knew there was a reason to documenting this. Then cover-Aways off yet.
Off to the hardware...


 high traffic floor polish. Looks a lot newer after the Zep