GlennLever
Jul 14, 2014Explorer
How to replace an awning strap for a Carefree awning.
Quick project this time.
The loop on the awning strap on the bedroom awning broke off.
Went to An RV store and to my surprise they had on hand the correct strap from my awning manufacturer (CareFree). I did not go to CW because of the current problems which they still have not taken responsibilities for (description of CW problem).

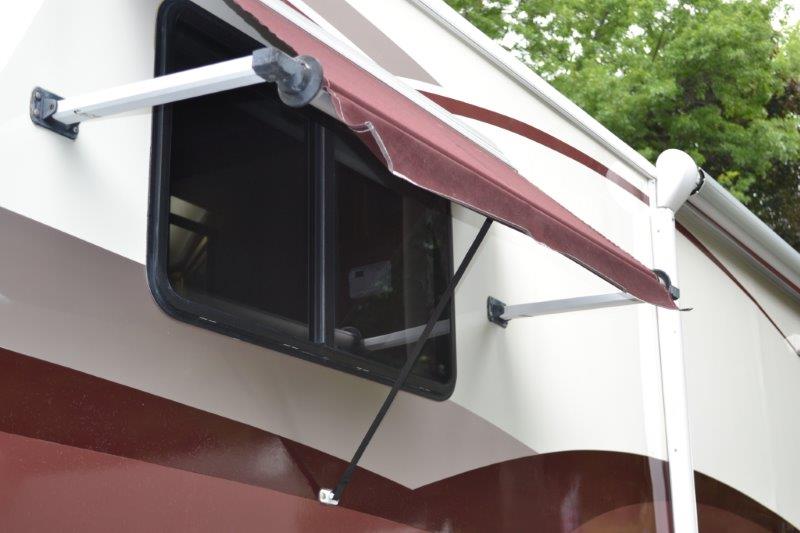
The awning will not stay down without the loop on the end of this strap.

The instructions on the back of the replacement strap say 1)Roll awning out. 2)Move to one end of the awning and drill out the rivets attaching the end cap to the roller tube. 3)Slide end cap off of the roller tube. 3) slide the attached 3" vinyl bead into the open slot of the roller tube. 4) Rerivet the end cap to the roller tube.
Before you do that make sure you 1) have a rivet gun

2) It has the right size hole in the nozzle. This is an old Sears Craftsman rivet gun and has two different size nozzles, the large one is the correct one. If you do not have one I will propose a second method of doing this install at the end of this post.


On to the install.
To hold the awning down so I could work on it I used a ratchet strap.

This is the rivet in the end cap that must be drilled out.

This is the Window awning kit with the strap and the two rivets.

There will be two rivets 180 degrees apart on the roller tube, this is the one on the bottom.

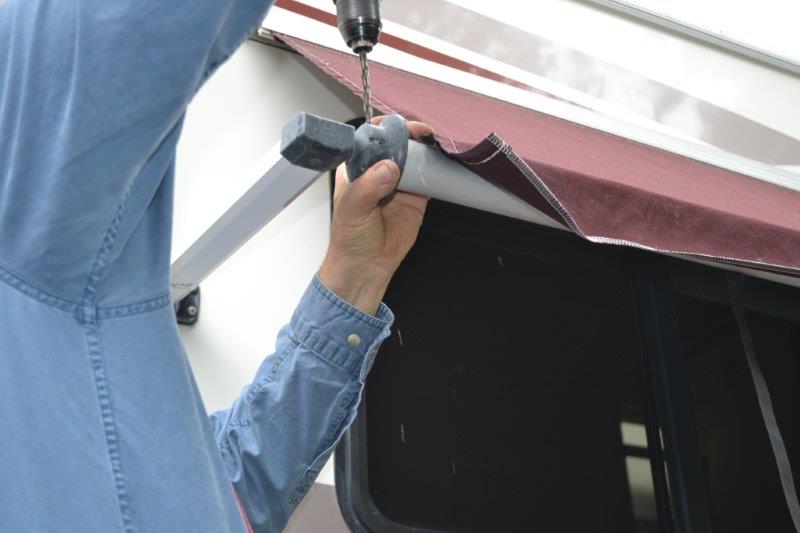
Use a drill about the size of the rivet head and drill the head of the rivet out (the spring inside the tube will not unwind when both rivets are drilled out and the awning is held down in place by the ratchet strap.

And this is what it looks like with the rivet removed.

Now to drill out the top rivet.

Slide the end cap off the roller tube.

Slide the old strap out of the roller tube.

Now slide the new bead on the new strap into the slot on the roller tube (this takes a little juggling but is not hard).

Slide the end cap back onto the roller tube (again you do not have to worry about the spring unwinding as the other end of the awning is strapped down and cannot move).

Line up the holes in the roller tube with the slots in the end cap.

Insert the top replacement rivet.

I have always made it a practice to get all the fasteners in place before tightening anything, so the bottom rivet goes in place.

Now for the magic, bring out the pop rivet gun and cinch the rivets up.

Now the bottom one.

With a new strap that has a loop in the end of it the awning now can be deployed.

Do a test and roll it up and down a couple of times to make sure it is straight.


Ok...now for the promised second method.
If you do not have a rivet gun or do not want to drill out the rivets, what you can do is at one end or the other (and this is how the manual big awning worked on my MH before it was replaced with an electric one) take a Dremel tool with a conical bit and widen the slot in the roller tube for a length of 2 1/2 inches wide enough to accept the bead on the end of the pull strap. Slide the old strap down to the slot you just made and it will come out, slide the new strap bead into the slot and slide it to the center of the roller tube. So long as the strap is keep in the center of the tube and not at the end where you widened the slot it will never come out. If you need to replace it again, just slide it down to the end and it will come out and you can install the new one with no tools.


Just a thought.
The loop on the awning strap on the bedroom awning broke off.
Went to An RV store and to my surprise they had on hand the correct strap from my awning manufacturer (CareFree). I did not go to CW because of the current problems which they still have not taken responsibilities for (description of CW problem).

The awning will not stay down without the loop on the end of this strap.

The instructions on the back of the replacement strap say 1)Roll awning out. 2)Move to one end of the awning and drill out the rivets attaching the end cap to the roller tube. 3)Slide end cap off of the roller tube. 3) slide the attached 3" vinyl bead into the open slot of the roller tube. 4) Rerivet the end cap to the roller tube.
Before you do that make sure you 1) have a rivet gun

2) It has the right size hole in the nozzle. This is an old Sears Craftsman rivet gun and has two different size nozzles, the large one is the correct one. If you do not have one I will propose a second method of doing this install at the end of this post.


On to the install.
To hold the awning down so I could work on it I used a ratchet strap.

This is the rivet in the end cap that must be drilled out.

This is the Window awning kit with the strap and the two rivets.

There will be two rivets 180 degrees apart on the roller tube, this is the one on the bottom.

Use a drill about the size of the rivet head and drill the head of the rivet out (the spring inside the tube will not unwind when both rivets are drilled out and the awning is held down in place by the ratchet strap.

And this is what it looks like with the rivet removed.

Now to drill out the top rivet.

Slide the end cap off the roller tube.

Slide the old strap out of the roller tube.

Now slide the new bead on the new strap into the slot on the roller tube (this takes a little juggling but is not hard).

Slide the end cap back onto the roller tube (again you do not have to worry about the spring unwinding as the other end of the awning is strapped down and cannot move).

Line up the holes in the roller tube with the slots in the end cap.

Insert the top replacement rivet.

I have always made it a practice to get all the fasteners in place before tightening anything, so the bottom rivet goes in place.

Now for the magic, bring out the pop rivet gun and cinch the rivets up.

Now the bottom one.

With a new strap that has a loop in the end of it the awning now can be deployed.

Do a test and roll it up and down a couple of times to make sure it is straight.


Ok...now for the promised second method.
If you do not have a rivet gun or do not want to drill out the rivets, what you can do is at one end or the other (and this is how the manual big awning worked on my MH before it was replaced with an electric one) take a Dremel tool with a conical bit and widen the slot in the roller tube for a length of 2 1/2 inches wide enough to accept the bead on the end of the pull strap. Slide the old strap down to the slot you just made and it will come out, slide the new strap bead into the slot and slide it to the center of the roller tube. So long as the strap is keep in the center of the tube and not at the end where you widened the slot it will never come out. If you need to replace it again, just slide it down to the end and it will come out and you can install the new one with no tools.


Just a thought.