LAdams
Jul 03, 2008Explorer
Dexter HD Suspension & EZ-Flex Install (long w/ pictures)
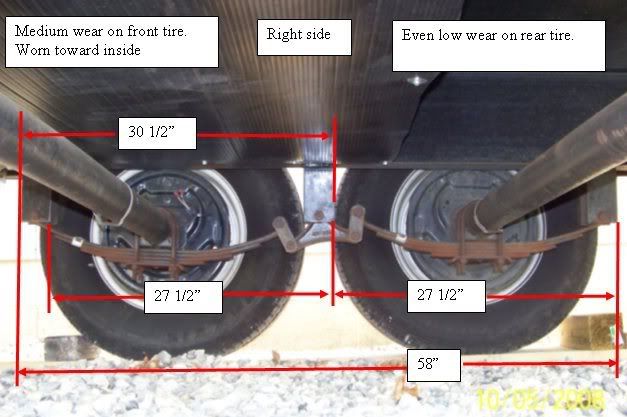
I recently purchased the Dexter HD suspension kit that comes with the new EZ-Flex Idler... I had installed a similar kit on my previous Nomad 27' TT and it worked quite well so I decided to install the newer kit on my 31' Nomad... Below is a picture of the kit I installed...


Now it's worth mentioning here that this type of job isn't exactly for the "faint of heart"... Basically what your going to do is to put your TT on Jack stands and rip off the suspension and install a new one... Your going to need a pretty good assortment of standard mechanics hand tools and an air compressor with a variety of air tools is also very helpful... I would also suggest that you buy the
You could just use a big hammer and beat things into submission, but pressing the bearings and bolts in is a lot more elegant and easier on the frame and also the installers hands... I also used an air operated impact (gun) wrench, an air operated ratchet wrench, demolition bar, numerous 1/2" drive sockets, 3 pound hammer, grease gun, assorted screwdrivers, vise grips and other hand tools...
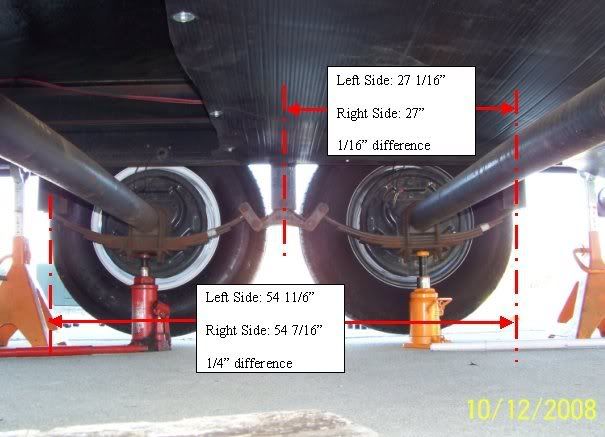
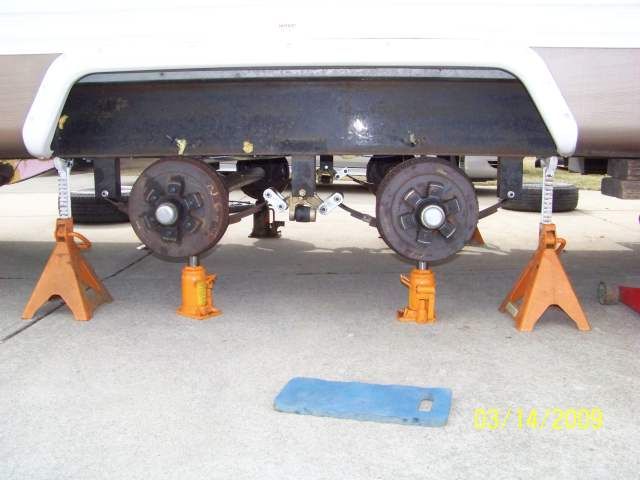
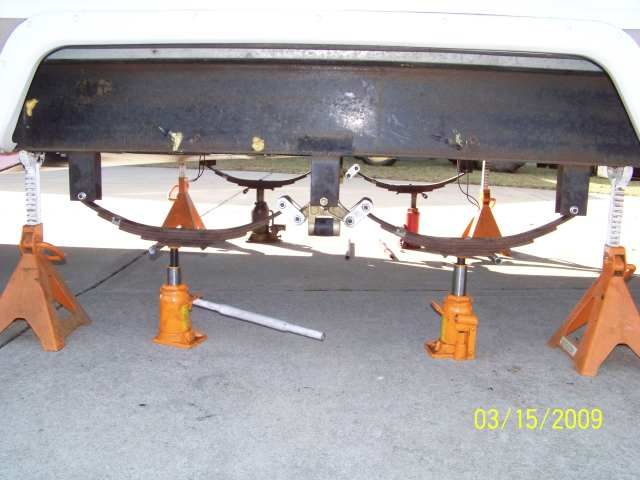
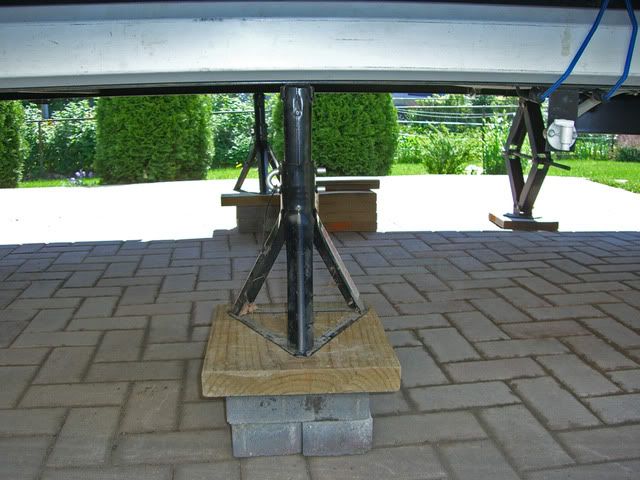
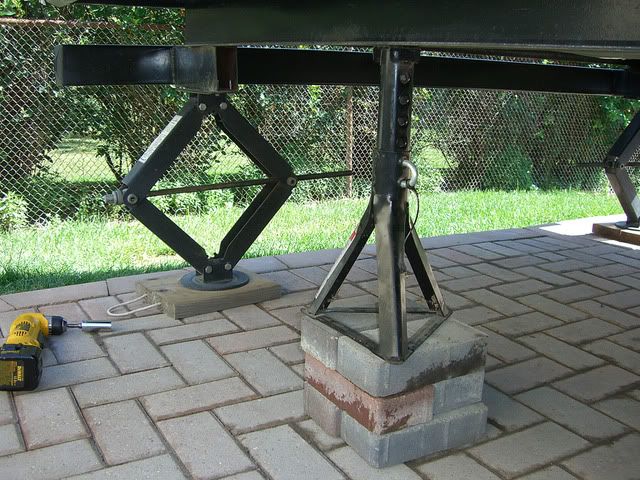
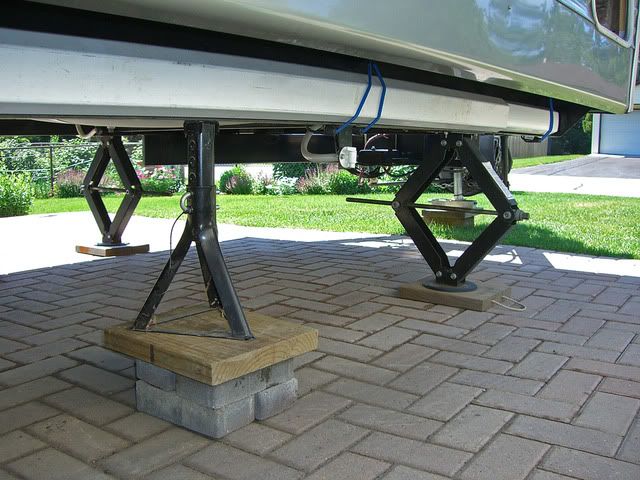
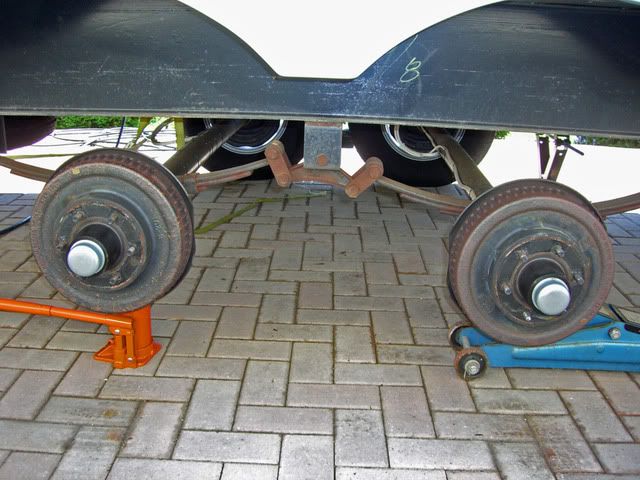
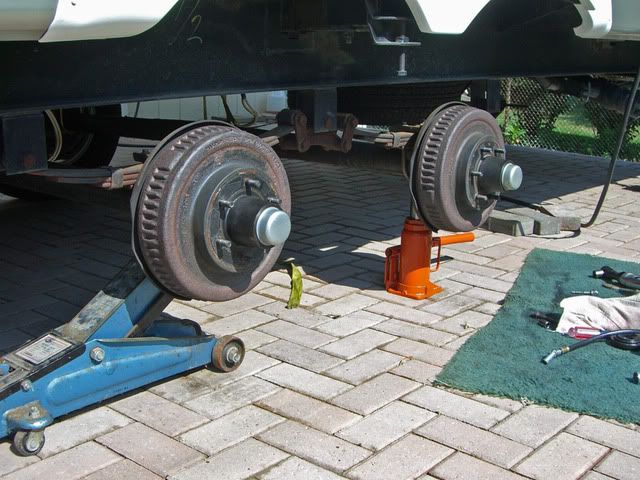
Start the project by putting your trailer on jack stands on a good firm surface... I also used my 6 stabilizer jacks attached to the trailer to further aid with stability... Here are some photos of that...
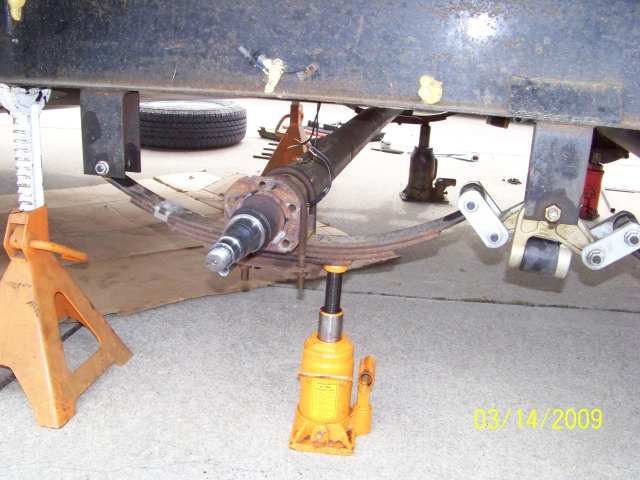
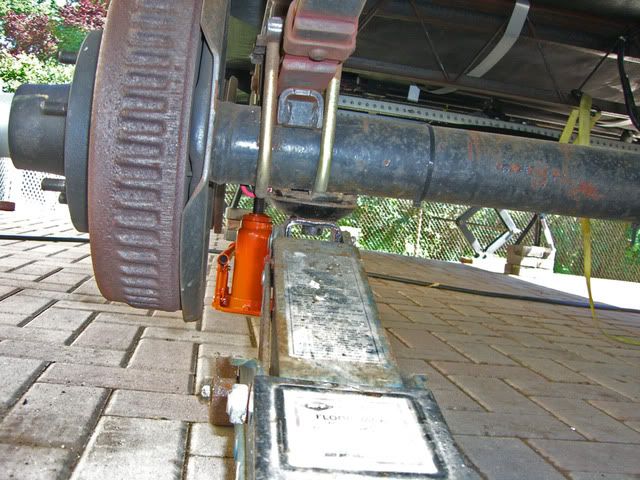
You should also have 2 or 3 hefty jacks, either the bottle type or floor type to aid in the installation... I use a 4 ton floor jack and a 12 ton bottle jack... The 12 ton picks up the TT effortlessly and is small and compact... Here are a few photos of them...
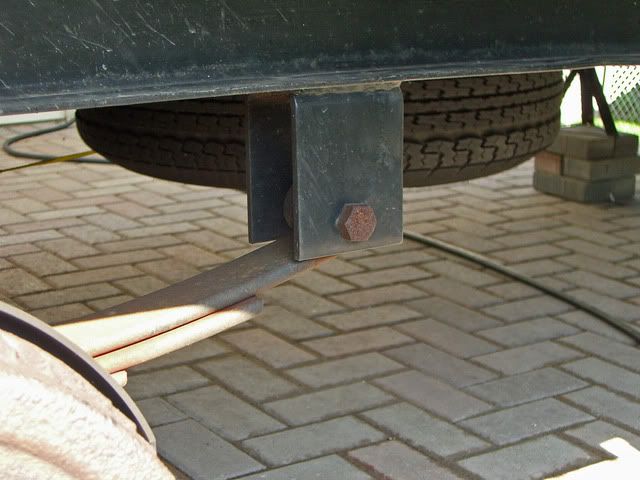
Start by removing the standard OEM idlers and shackles... This is done by removing the lock nuts on the inside of the suspension components and then hammering the bolts out of the hangers... All the bolts on my OEM suspension system were serrated, so using the impact gun to turn them and remove them would have damaged the shackle hangers by reaming out the mounting hole... If I would have done that then the new serrated bolts would have no material to bite in to... Here are a few pictures of the old suspension components...
Here is the rear OEM bolt...
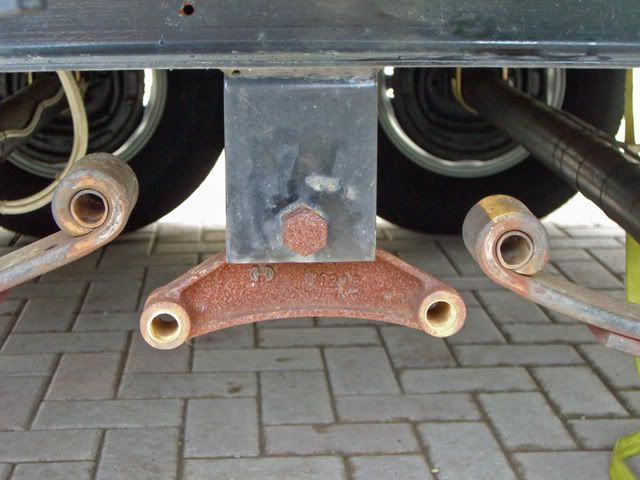
In this photo the springs have been removed from the idler and their plastic bearings have not yet been removed...
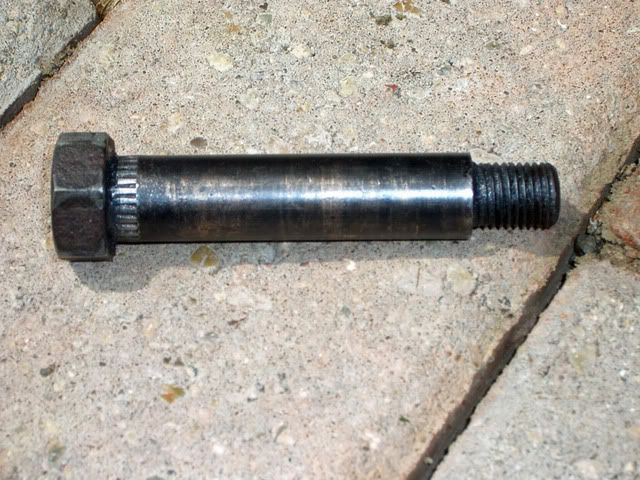
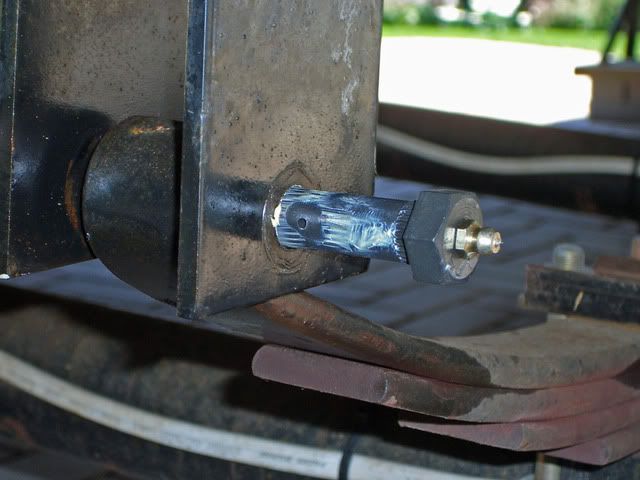
Once the old components have been removed, you can begin to install the new ones... When pressing in the new bronze bushings, it is a good idea to use a pilot bolt or installation bolt so that the soft bronze bearing does not distort or bend... Here is a bolt I used for that purpose... Note that I ground off the serrations... This bolt is also used to push out (hammer out) the plastic bearings...
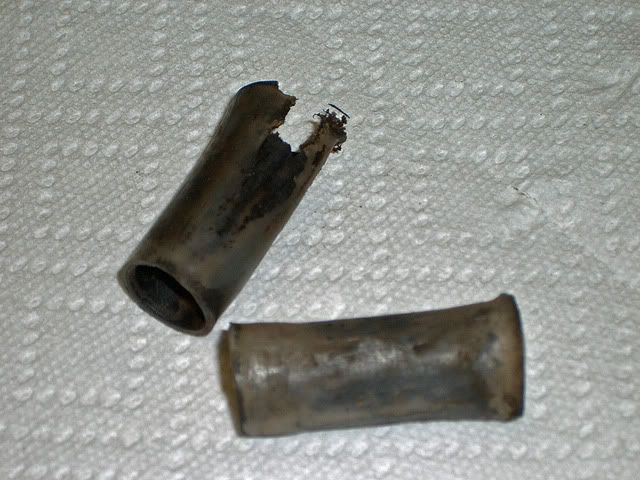
Here are a few typical plastic bearings after about 6000 miles... Some were already showing signs of extreme wear...
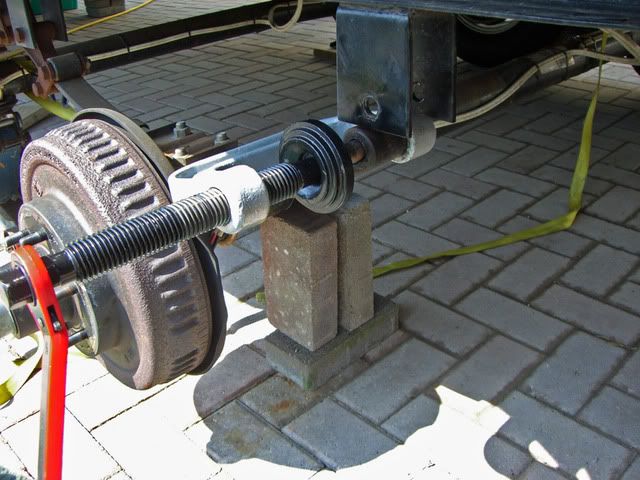
Now we can install the bronze bushings in the spring eyes... Apply grease to the inside of the spring eye, the outside of the bronze bearing, and the inside of the bronze bearing as well... Then use the Harbor Freight Ball Joint Tool (HFBJT) to push the bronze bearings into the spring eye as shown below...

Once the bearing is pressed into the spring eye, then we press the serrated greasable bolt into hanger using the HFBJT...
This isn't the spring eye but here we are pressing the idler bolt into the hanger the same way you would do it with the spring hanger...
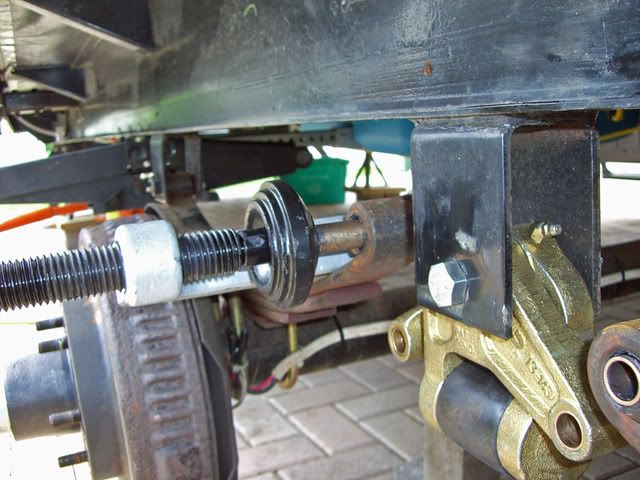
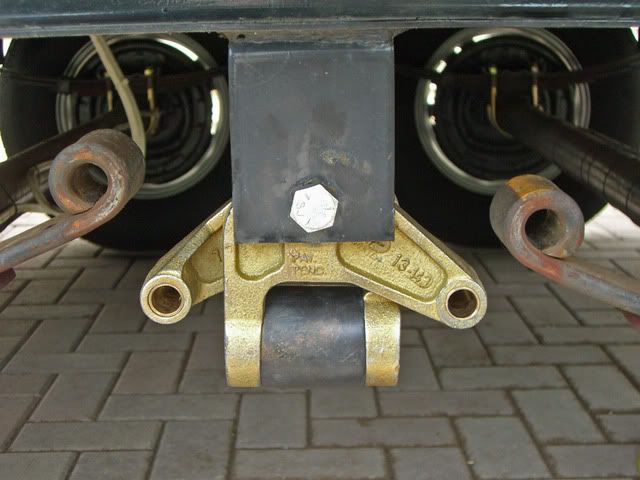
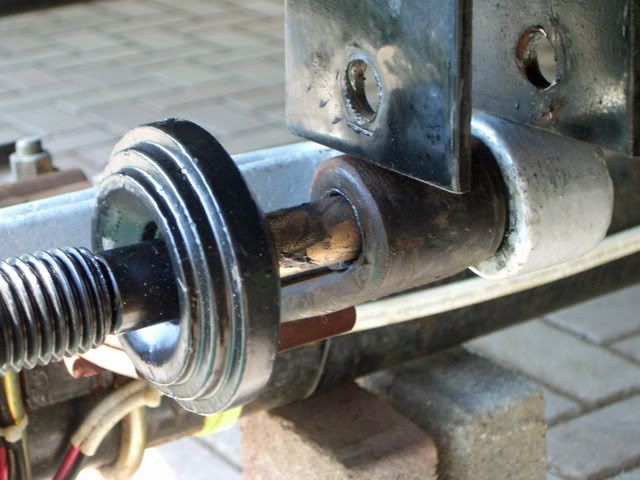
Once you complete the spring eye ends, then you can install the EZ-Flex Idler... It is installed by holding the idler between the frame hanger, inserting the proper size bolt and using the HFBJT to press the serrated bolt into the hanger... In the picture below the EZ-Flex idler has been hung on the bolt...
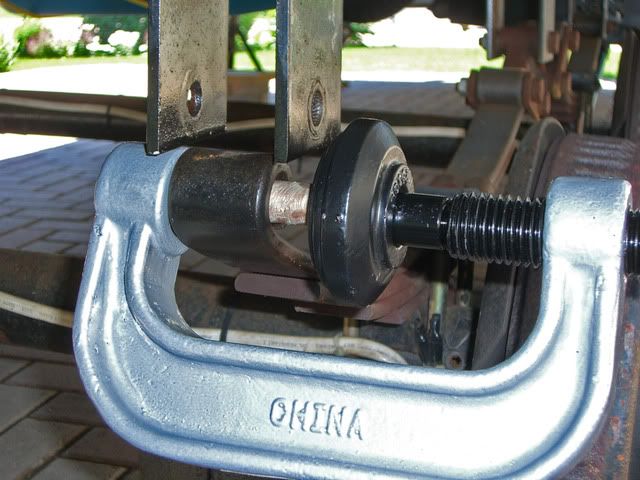
In the picture below, the serrated bolt is being pressed into the hanger...
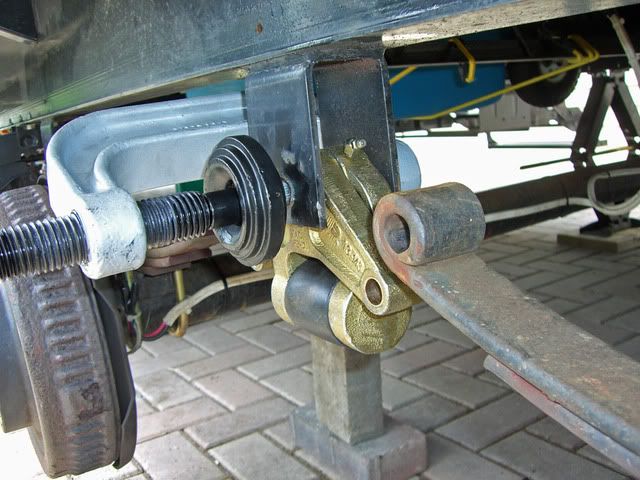
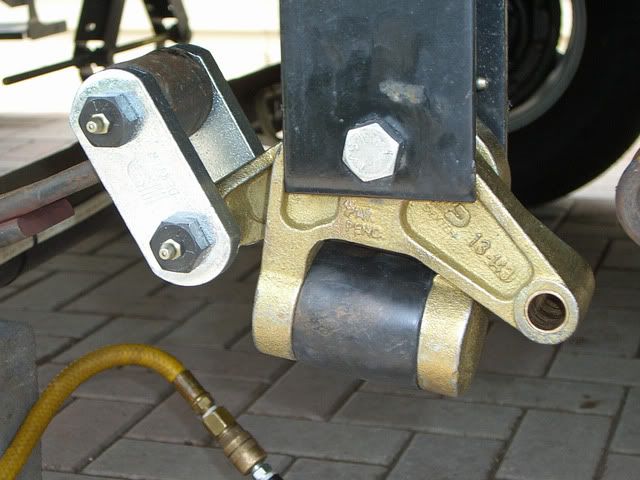
Once you have the EZ-Flex Idler mounted you can install the HD shackles for the front and rear springs... Here are a few photos of that operation... The photo below shows one shackle in place...
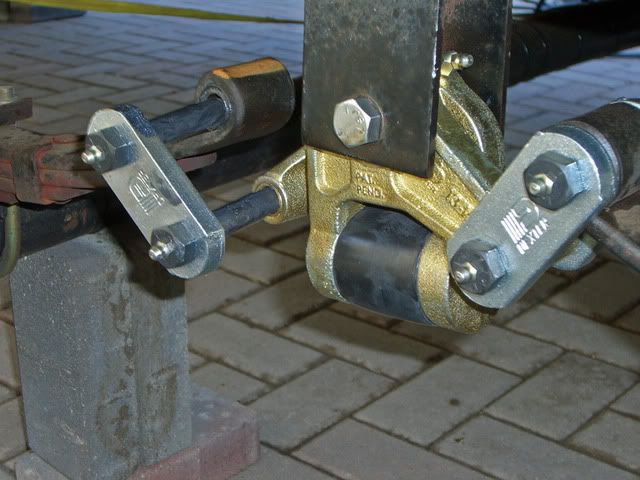
The photo below shows the second HD shackle being installed...
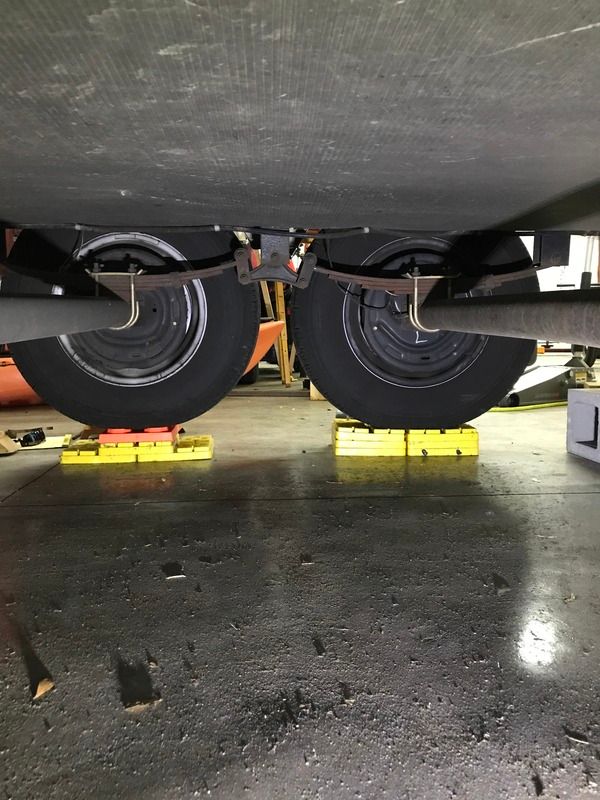
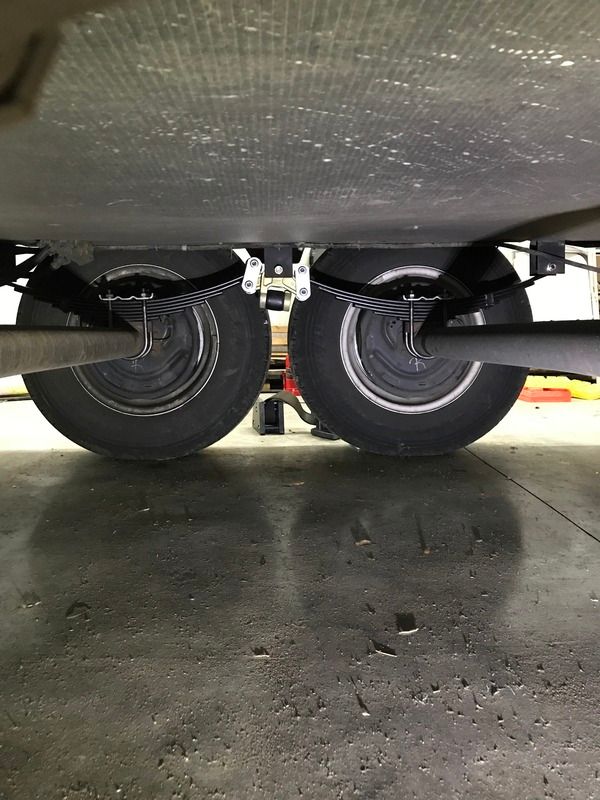
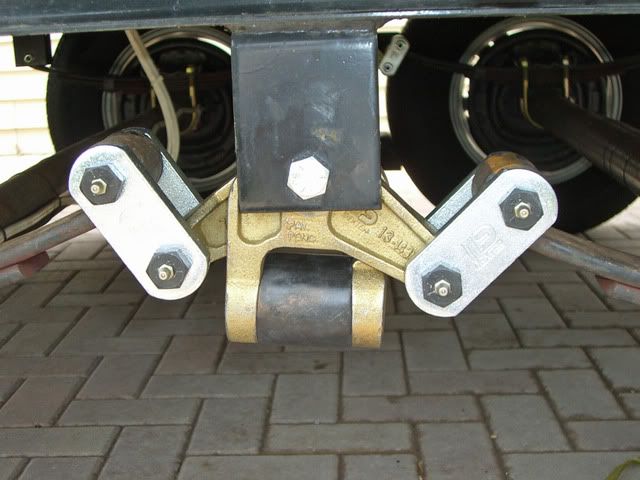
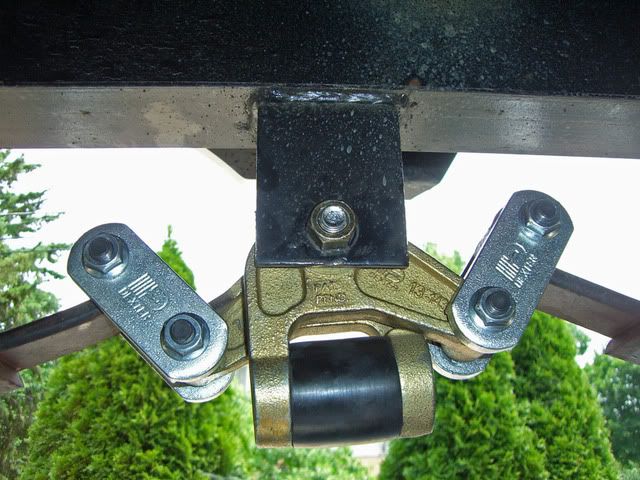
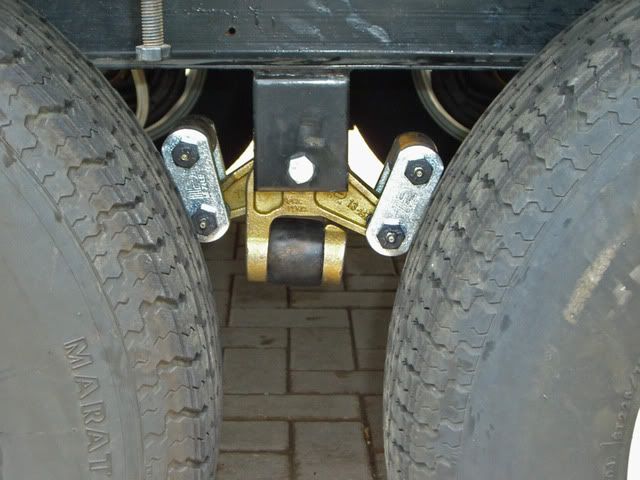
And this is what the assembly looks like when completely installed...
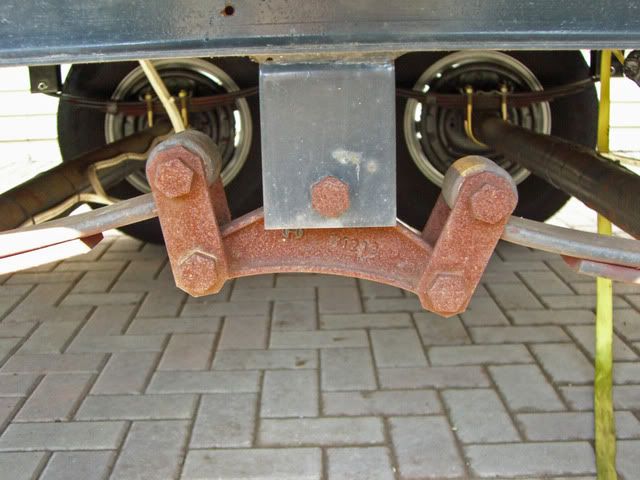
Here are a few photos from underneath the trailer looking at the inside view of the suspension components...

And here are a few extra views of the HFBJT in use... This tool was really a life saver... We used a similar tool that my buddy had at his shop when we did the previous trailer and I knew I would need a similar tool to successfully complete the installation of the HD EZ-Flex Kit...
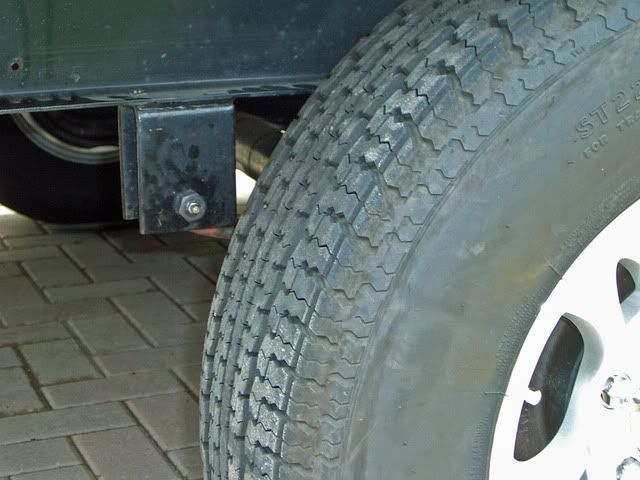
And the finished product with the TT wheels again mounted...
It took me all day yesterday to install the EZ-Flex kit and HD suspension shackles on the curb side of the TT... I spent about 8+ hours on it but it was somewhat a learning experience... Today I installed the street side portion of the kit and I did that in about 4 hours... Not too bad for the first time although I don't plan to do another any time soon...
I haven't done a test ride yet - that will come in about 2 weeks when we attend another rally, but I suspect the HD Suspension shackles and EZ-Flex will be a big improvement just like the last one was, although my last one had a solid idler assembly, not rubber shock mounted like the EZ-Flex...
I'm having some problems getting grease to flow in the spring eye portions of the greasable bolts... I called Dexter Tech support and they suggested I reverse their direction... All the greasable bolt holes should run in a horizontal plane facing either the front of rear of the TT as opposed to pointing either skyward or ground ward... Dexter says the grease will not migrate properly if they are in the up or down position... So I reversed the direction of the leaf spring eye bolts and I still can't get grease into them...
I'm going to run the TT a bit and see if the bronze bearings loosen up to the point where they will take grease readily... I remember my last TT being like this and sometimes I had to jack the frame a bit to relieve pressure on the greasable bolts... We'll see what happens with this issue... There were no problems getting grease into the center idler and shackles...
Les
Now it's worth mentioning here that this type of job isn't exactly for the "faint of heart"... Basically what your going to do is to put your TT on Jack stands and rip off the suspension and install a new one... Your going to need a pretty good assortment of standard mechanics hand tools and an air compressor with a variety of air tools is also very helpful... I would also suggest that you buy the
Harbor Freight Ball Joint Tool
that you see in this post... It is used for pressing in bronze bearings and serrated bolts and works very well for this application...You could just use a big hammer and beat things into submission, but pressing the bearings and bolts in is a lot more elegant and easier on the frame and also the installers hands... I also used an air operated impact (gun) wrench, an air operated ratchet wrench, demolition bar, numerous 1/2" drive sockets, 3 pound hammer, grease gun, assorted screwdrivers, vise grips and other hand tools...
Start the project by putting your trailer on jack stands on a good firm surface... I also used my 6 stabilizer jacks attached to the trailer to further aid with stability... Here are some photos of that...
You should also have 2 or 3 hefty jacks, either the bottle type or floor type to aid in the installation... I use a 4 ton floor jack and a 12 ton bottle jack... The 12 ton picks up the TT effortlessly and is small and compact... Here are a few photos of them...
Start by removing the standard OEM idlers and shackles... This is done by removing the lock nuts on the inside of the suspension components and then hammering the bolts out of the hangers... All the bolts on my OEM suspension system were serrated, so using the impact gun to turn them and remove them would have damaged the shackle hangers by reaming out the mounting hole... If I would have done that then the new serrated bolts would have no material to bite in to... Here are a few pictures of the old suspension components...
Here is the rear OEM bolt...
In this photo the springs have been removed from the idler and their plastic bearings have not yet been removed...
Once the old components have been removed, you can begin to install the new ones... When pressing in the new bronze bushings, it is a good idea to use a pilot bolt or installation bolt so that the soft bronze bearing does not distort or bend... Here is a bolt I used for that purpose... Note that I ground off the serrations... This bolt is also used to push out (hammer out) the plastic bearings...
Here are a few typical plastic bearings after about 6000 miles... Some were already showing signs of extreme wear...
Now we can install the bronze bushings in the spring eyes... Apply grease to the inside of the spring eye, the outside of the bronze bearing, and the inside of the bronze bearing as well... Then use the Harbor Freight Ball Joint Tool (HFBJT) to push the bronze bearings into the spring eye as shown below...
Once the bearing is pressed into the spring eye, then we press the serrated greasable bolt into hanger using the HFBJT...
This isn't the spring eye but here we are pressing the idler bolt into the hanger the same way you would do it with the spring hanger...
Once you complete the spring eye ends, then you can install the EZ-Flex Idler... It is installed by holding the idler between the frame hanger, inserting the proper size bolt and using the HFBJT to press the serrated bolt into the hanger... In the picture below the EZ-Flex idler has been hung on the bolt...
In the picture below, the serrated bolt is being pressed into the hanger...
Once you have the EZ-Flex Idler mounted you can install the HD shackles for the front and rear springs... Here are a few photos of that operation... The photo below shows one shackle in place...
The photo below shows the second HD shackle being installed...
And this is what the assembly looks like when completely installed...
Here are a few photos from underneath the trailer looking at the inside view of the suspension components...
And here are a few extra views of the HFBJT in use... This tool was really a life saver... We used a similar tool that my buddy had at his shop when we did the previous trailer and I knew I would need a similar tool to successfully complete the installation of the HD EZ-Flex Kit...
And the finished product with the TT wheels again mounted...
It took me all day yesterday to install the EZ-Flex kit and HD suspension shackles on the curb side of the TT... I spent about 8+ hours on it but it was somewhat a learning experience... Today I installed the street side portion of the kit and I did that in about 4 hours... Not too bad for the first time although I don't plan to do another any time soon...
I haven't done a test ride yet - that will come in about 2 weeks when we attend another rally, but I suspect the HD Suspension shackles and EZ-Flex will be a big improvement just like the last one was, although my last one had a solid idler assembly, not rubber shock mounted like the EZ-Flex...
I'm having some problems getting grease to flow in the spring eye portions of the greasable bolts... I called Dexter Tech support and they suggested I reverse their direction... All the greasable bolt holes should run in a horizontal plane facing either the front of rear of the TT as opposed to pointing either skyward or ground ward... Dexter says the grease will not migrate properly if they are in the up or down position... So I reversed the direction of the leaf spring eye bolts and I still can't get grease into them...
I'm going to run the TT a bit and see if the bronze bearings loosen up to the point where they will take grease readily... I remember my last TT being like this and sometimes I had to jack the frame a bit to relieve pressure on the greasable bolts... We'll see what happens with this issue... There were no problems getting grease into the center idler and shackles...
Les