WesternHorizon
Jan 19, 2016Explorer
An experimental cheap RV cover: project notebook
When I bought a 19-year-old Class C the EPDM roof was showing the effects of nearly two decades in the southwest sun. Since the RV is parked at nearly 6000 feet elevation, I wanted something to block UV. We only average about 10 inches of precipitation a year, but when it rains it pours and hail is not uncommon. Very high winds occur in the spring and summer. Ice and snow usually melt off in a couple days during the winter months.
The first cover I considered is the “ADCO 32813 Designer Series Tan/White Tyvek Class-C RV Cover” http://www.amazon.com/dp/B005NFNUCM. It gets generally good reviews, but comments like “Not durable in a desert environment” and “watched the cover deteriorate at a very fast pace” did concern me.
If you add this cover to the Amazon “Saved for later” area of the shopping cart you can watch the price vary greatly over the year. But it is a big investment and I was concerned it would not hold up in our spring winds.
Having made various things out of Costco tarps over the years, I decided to try a low-cost experimental cover. The Costco tarps are very impermeable, unlike the Adco with its layers for breathability. My goal was to cover just the roof, which I hoped would reduce any problems with moisture buildup.
Costco often sells two 12x16 foot tarps for about $22 (may vary by region). Over the years these have proved to be high quality tarps. They currently have, at least in my area, brown and blue sides. I preferred the blue and more reflective silver but have not seen those for many years.
My Tioga Montara is 23 feet long. I took one 12x16 tarp and added a 4 foot extension from another tarp to make a cover that is 20 feet long by 12 feet wide. Since I don’t have a heavy-duty sewing machine, I just used a few brass grommets http://www.amazon.com/gp/product/B00FAU93TY to “sew” the two tarps together.
The simplest way to install the cover would be to bungie each side. But the left side of my RV is more visible to the neighborhood, so I decided to give that side a more finished appearance.
After considering options like eye hooks, I settled on turn buttons. Turn buttons are often used to secure covers on boats.
I found “TWIST Fastener Turn Button with Eyelet Prong Grommet and Washer” on eBay from Sea & Shore Custom Canvas & Upholstery, Inc. This kit gives you a matched set of special grommets and turn buttons.
http://www.ebay.com/itm/TWIST-Fastener-Turn-Button-with-Eyelet-Prong-Grommet-and-Washer-12-sets-/121744228991
You don’t need a tool to install the grommets, just a block of wood and a hammer. After each grommet is in place, use a sharp knife to cut out all of the the tarp inside it. This makes turning the button much easier.
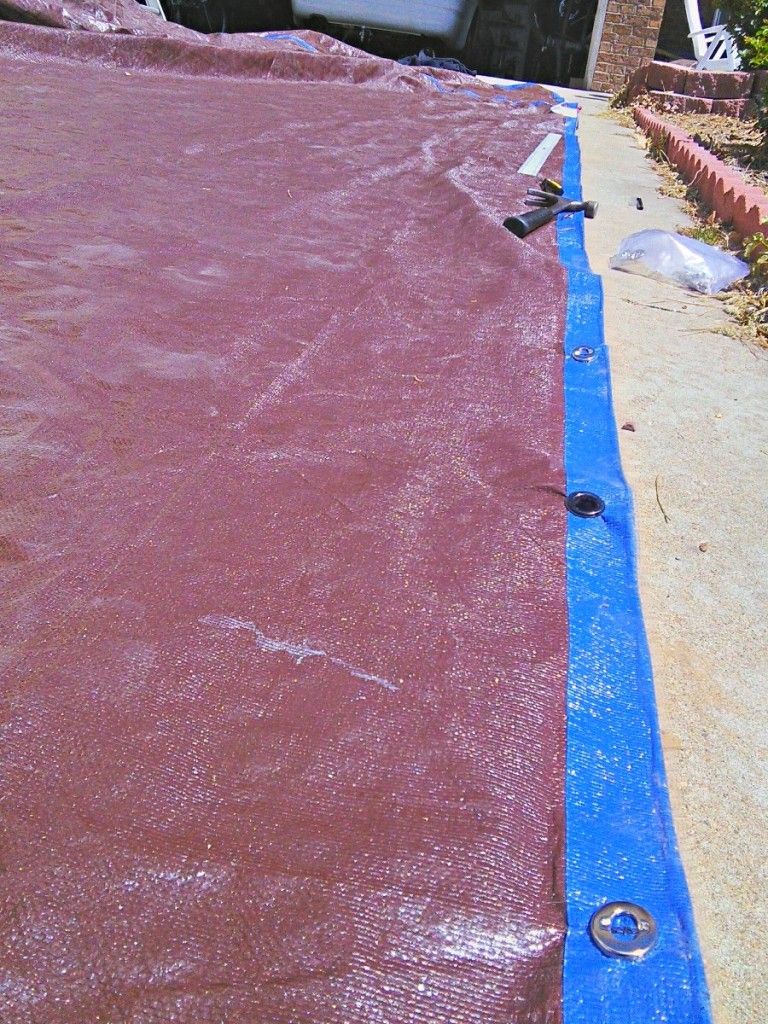
I used a 24 inch spacing for the turn button grommets (silver) between the existing grommets (black) in the tarp:
The installation of the turn buttons must be carefully measured and laid out along a guide line on the RV. At some spots I had to drill the pilot holes into pretty solid steel. (Not sure I would do this project on a nice new RV.)
To install the turn buttons, I used #6 by 1 inch stainless steel phillips sheet metal screws, with an oval head. I sealed each screw and hole with silicone:
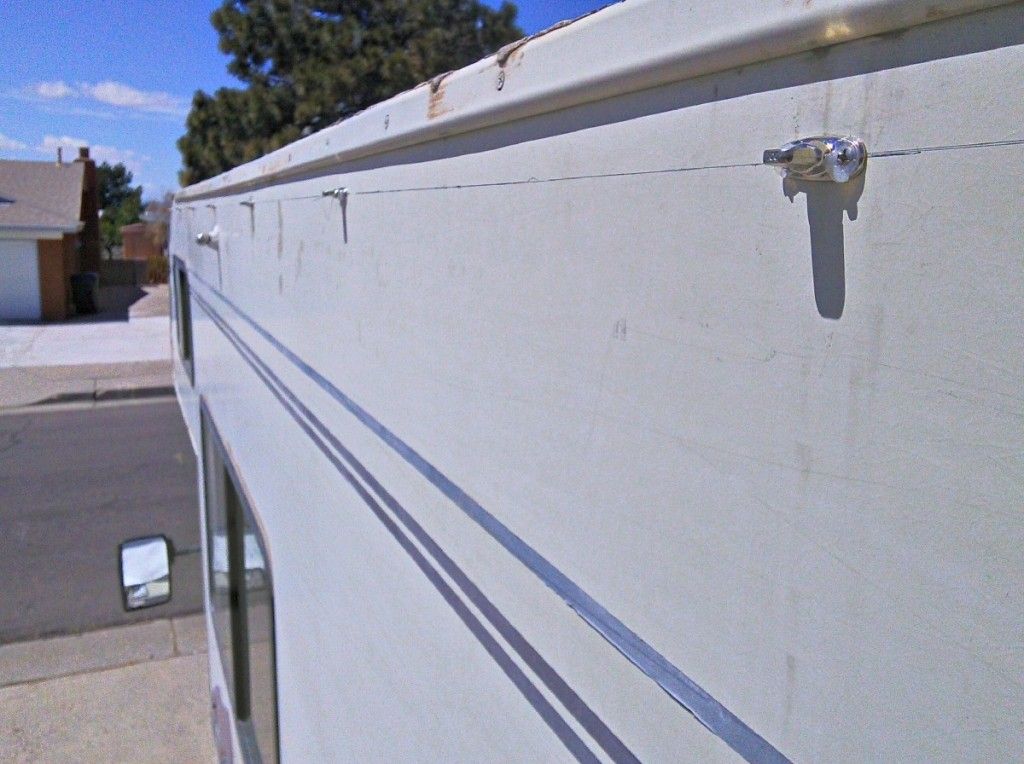
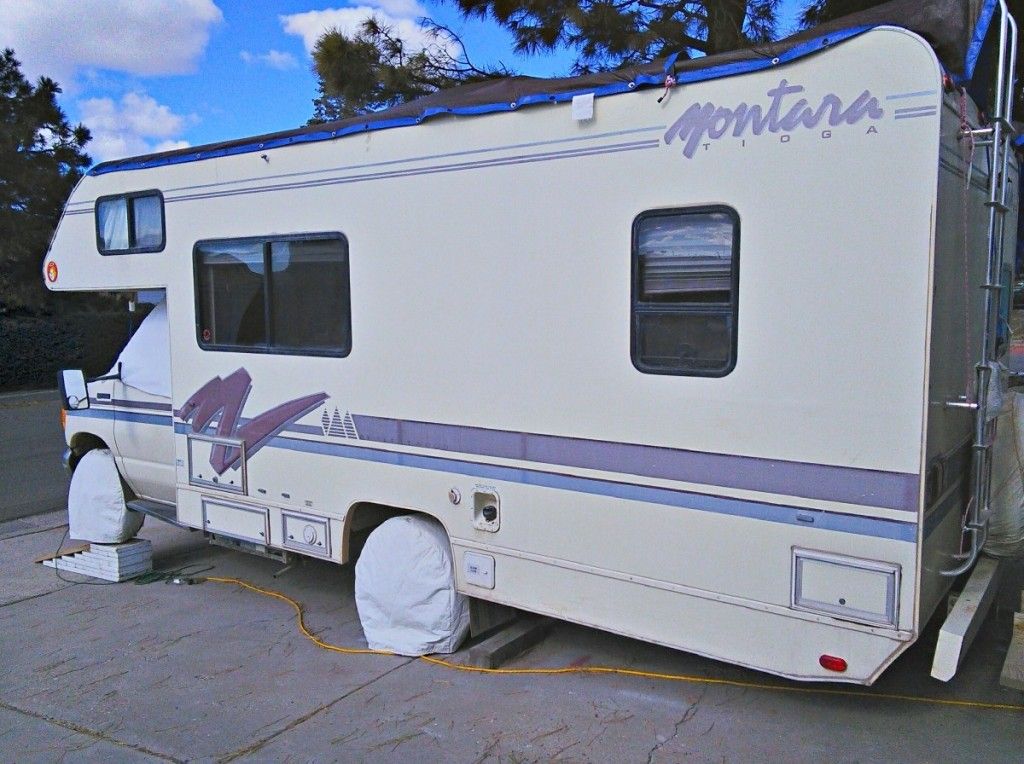
The left side has a pretty clean appearance:
On a right side, six or so bungies hold everything snug:
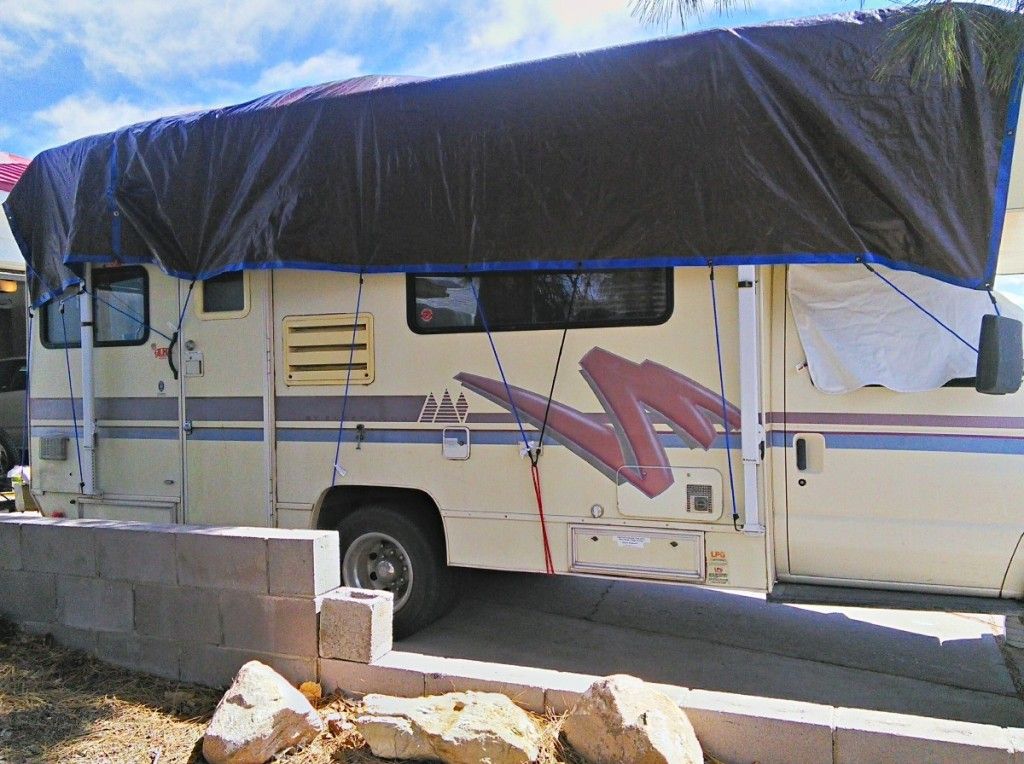
There is a thick folded towel on top of the AC unit to protect the cover. I can put the cover on by myself in about 7 minutes:
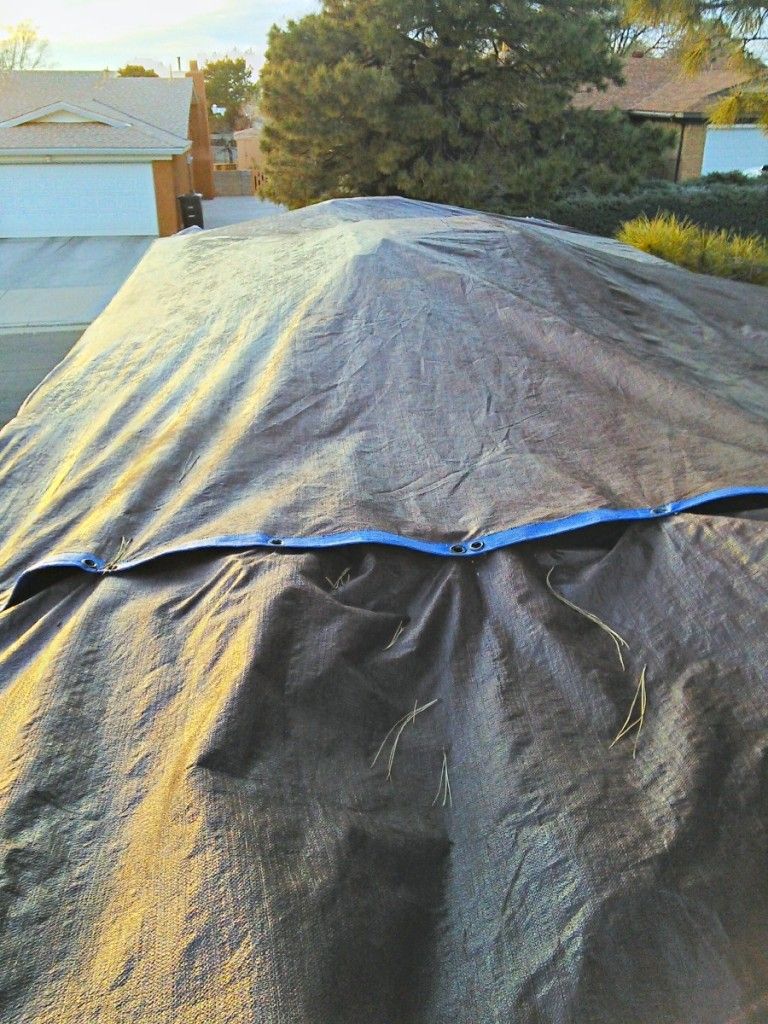
What about moisture buildup? The cover is more of a short cap than a tent. And because the AC unit and various roof structures hold the cover up, it does not fit tightly against the roof. This also provides some hail protection: the cover is like a trampoline for hailstones.
Air circulation appears to be pretty good. I may stick a couple of foam “pool noodles” under the cover at spots to provided more ventilation. While I would hesitate to use an impermeable tarp in a high rainfall area, it seems to be working fine in the high desert.
Results: It’s still an experiment but after nearly a year, the cover is holding up well. I expect it will last 3-4 years. For less than $50 plus a few hours work I am pleased with it. Most of the work was installing the turn buttons, but they do give the left side a much cleaner appearance. Will update this post with any further results.
I’m just posting my notes to give people ideas for projects.
The first cover I considered is the “ADCO 32813 Designer Series Tan/White Tyvek Class-C RV Cover” http://www.amazon.com/dp/B005NFNUCM. It gets generally good reviews, but comments like “Not durable in a desert environment” and “watched the cover deteriorate at a very fast pace” did concern me.
If you add this cover to the Amazon “Saved for later” area of the shopping cart you can watch the price vary greatly over the year. But it is a big investment and I was concerned it would not hold up in our spring winds.
Having made various things out of Costco tarps over the years, I decided to try a low-cost experimental cover. The Costco tarps are very impermeable, unlike the Adco with its layers for breathability. My goal was to cover just the roof, which I hoped would reduce any problems with moisture buildup.
Costco often sells two 12x16 foot tarps for about $22 (may vary by region). Over the years these have proved to be high quality tarps. They currently have, at least in my area, brown and blue sides. I preferred the blue and more reflective silver but have not seen those for many years.
My Tioga Montara is 23 feet long. I took one 12x16 tarp and added a 4 foot extension from another tarp to make a cover that is 20 feet long by 12 feet wide. Since I don’t have a heavy-duty sewing machine, I just used a few brass grommets http://www.amazon.com/gp/product/B00FAU93TY to “sew” the two tarps together.
The simplest way to install the cover would be to bungie each side. But the left side of my RV is more visible to the neighborhood, so I decided to give that side a more finished appearance.
After considering options like eye hooks, I settled on turn buttons. Turn buttons are often used to secure covers on boats.
I found “TWIST Fastener Turn Button with Eyelet Prong Grommet and Washer” on eBay from Sea & Shore Custom Canvas & Upholstery, Inc. This kit gives you a matched set of special grommets and turn buttons.
http://www.ebay.com/itm/TWIST-Fastener-Turn-Button-with-Eyelet-Prong-Grommet-and-Washer-12-sets-/121744228991
You don’t need a tool to install the grommets, just a block of wood and a hammer. After each grommet is in place, use a sharp knife to cut out all of the the tarp inside it. This makes turning the button much easier.
I used a 24 inch spacing for the turn button grommets (silver) between the existing grommets (black) in the tarp:

The installation of the turn buttons must be carefully measured and laid out along a guide line on the RV. At some spots I had to drill the pilot holes into pretty solid steel. (Not sure I would do this project on a nice new RV.)
To install the turn buttons, I used #6 by 1 inch stainless steel phillips sheet metal screws, with an oval head. I sealed each screw and hole with silicone:

The left side has a pretty clean appearance:

On a right side, six or so bungies hold everything snug:

There is a thick folded towel on top of the AC unit to protect the cover. I can put the cover on by myself in about 7 minutes:

What about moisture buildup? The cover is more of a short cap than a tent. And because the AC unit and various roof structures hold the cover up, it does not fit tightly against the roof. This also provides some hail protection: the cover is like a trampoline for hailstones.
Air circulation appears to be pretty good. I may stick a couple of foam “pool noodles” under the cover at spots to provided more ventilation. While I would hesitate to use an impermeable tarp in a high rainfall area, it seems to be working fine in the high desert.
Results: It’s still an experiment but after nearly a year, the cover is holding up well. I expect it will last 3-4 years. For less than $50 plus a few hours work I am pleased with it. Most of the work was installing the turn buttons, but they do give the left side a much cleaner appearance. Will update this post with any further results.
I’m just posting my notes to give people ideas for projects.