Turn on suggestions
Auto-suggest helps you quickly narrow down your search results by suggesting possible matches as you type.
Showing results for
- Good Sam Community
- Groups
- Motorhome Group
- Forum
- Re: 84 Shasta Motorhome Rebuild/ Repair
Options
- Subscribe to RSS Feed
- Mark Topic as New
- Mark Topic as Read
- Float this Topic for Current User
- Bookmark
- Subscribe
- Mute
- Printer Friendly Page
84 Shasta Motorhome Rebuild/ Repair
Options
- Mark as New
- Bookmark
- Subscribe
- Mute
- Subscribe to RSS Feed
- Permalink
- Report Inappropriate Content
Jan-14-2013 04:42 PM
Hello all I'm new to this forum and after reading for 2 soild days of oldtrucker63 Dodge rebuild has really inspired me to share my project.
Here is go's....
In the begining there was a CL ad, a poorly taken care of motorhome and a dumb guy (me) willing to buy it! lol, here is what I ended up with:
1984 Shasta - unsure if there is a model name.
Built on a Ford E350 Club Van chassis powered by a 460 big block backed with a C6 transmission.
Has 103k miles and runs and drives like a champ! (except the 6 square tires)
I knew this was a project, well more like of a piece of******but have love for things like this and it turns out it was in better shape than I expected but was in serious need of repair.
The seller didn't really know much about it and had vey little to tell me. The asking price was 600.00 and I talked hime down to 400.00 and sight unseen me and my brother were off to bring it home. Well when we got there It seemed a little worse than I thought but the seller said "it fires right up and everything works......" (then the "except" part came in) but the fridge and "I can't get the genset to stay running annnnnnnd there is some impact damage to the overhead bunk, and I think one of the windows is broke. I'm thinking to myself your unsure of this? lol then the story comes out that he barrowed it to somebody and they hit a tree and his fix was a plastic tub lid and 2500 feet of blue painters tape lots of plastic and enough staples to buil a whole motorhome!! Well after walking around this thing I said sure I'll take it as that was my terms of the sight unseen 200.00 off the asking price deal we made on the phone. So I started it up and it fired right up and ran great!, then I started smelling gas and looked under and sure it was pouring all over the ground!! damn, not going to drive it home now. I made the deal anyways and he had no problem if it sat for a few days so I could fix it or get it towed. So I handed him the cash and got the paperwork and headed home.
The next day I dove back to the MH and looked into what was leaking, could not get the engine cover off due to the welded nut in the body was broke free and spun so I had to pop the rivits out of the clamp and deal with it later. The source of the leak was the accelerator pump no big deal, it was a Motorcraft version Holley and they have not changed that pump desigin in years so off with the carb and to the auto parts store. I got the pump, installed it and she was running again!! and good! prepaired it to run down the road and away I went. Had no problem this thing runs smoother than my late model vehicles. on the way home I stoped a Uhaul and filled the propane tank and made it all the way home and put in a long term parking spot in the yard, because I knew I had some work to do, lots of work to do!
Well that's the beginning, I will try to figure out how to post pic and will get a visual up!
Labels:
- Labels:
-
Class C
85 REPLIES 85
Options
- Mark as New
- Bookmark
- Subscribe
- Mute
- Subscribe to RSS Feed
- Permalink
- Report Inappropriate Content
May-17-2013 01:43 PM
Gale Hawkins wrote:
That is coming along nicely.
Thank you, I think so. My biggest problem is not enough time.
Options
- Mark as New
- Bookmark
- Subscribe
- Mute
- Subscribe to RSS Feed
- Permalink
- Report Inappropriate Content
May-17-2013 01:14 PM
That is coming along nicely.
Options
- Mark as New
- Bookmark
- Subscribe
- Mute
- Subscribe to RSS Feed
- Permalink
- Report Inappropriate Content
May-17-2013 12:35 PM
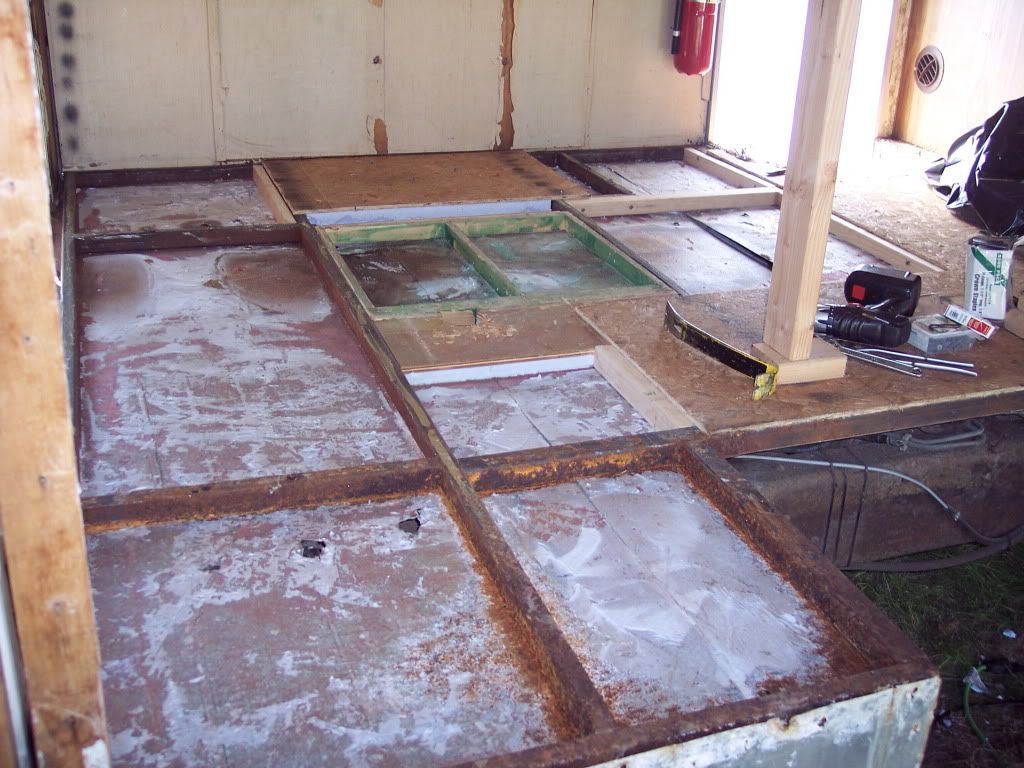
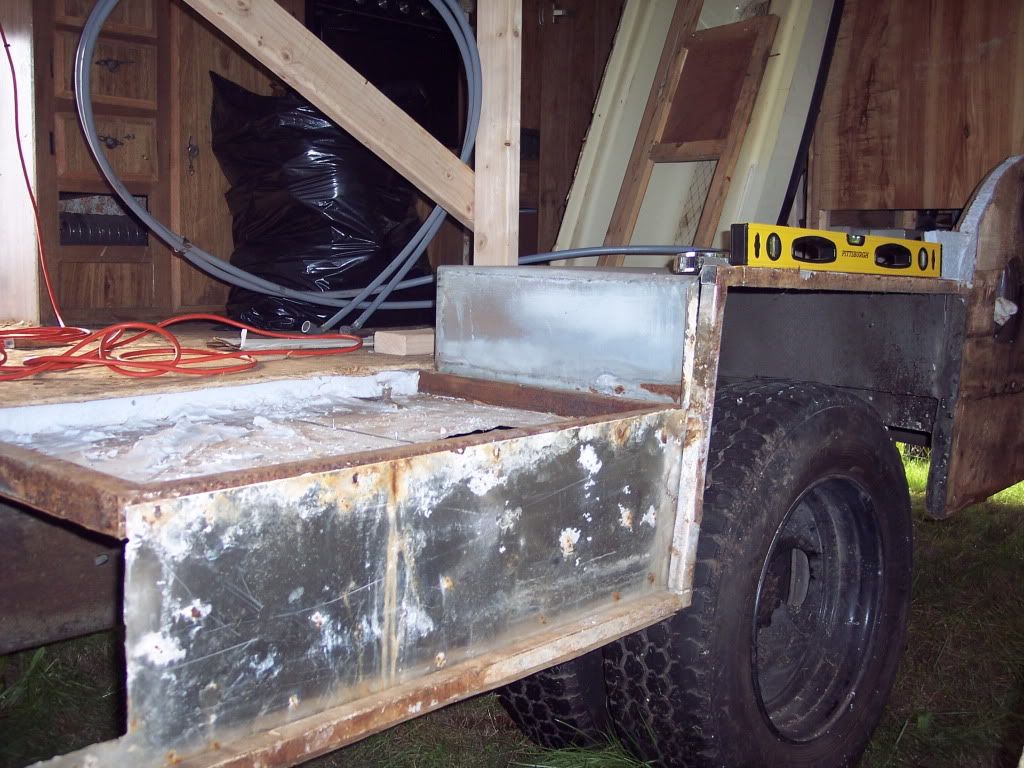
Well I got the floor replaced last night, still need to bolt the floor back down to the vans frame.
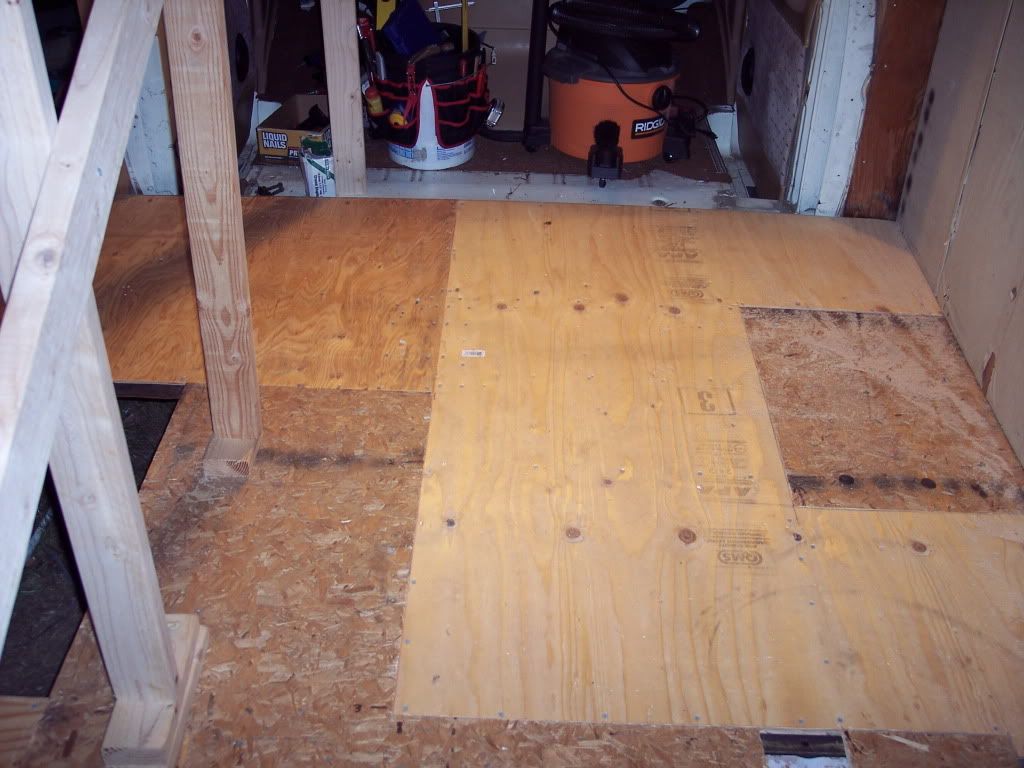
I may need to lay another layer of wood like 5mm underlayment or 1/4 plywood as there are some spots of the floor that sag just a bit when you stand on them I just couldn't get the layer of the floor sucked tight enough like the factory did. But with that said I still have to secure some more of the sheet metal underside and still need to bolt floor down to the vans frame and that may do the trick I guess worst case I have to lay something later if I'm not happy with it. I plan on using vinyl in the cabinet areas and a plush carpet with a 20# padding in the walk areas, you may not even feel any sag....?
I need to keep in mine that the more cabinets and walls etc will make this rv stronger with every part installed.
Well I'm going to try to get the overhead bunk floor torn out and replaced this Sunday. we will see, I'm also tring to get my motorcycle finished too!
Options
- Mark as New
- Bookmark
- Subscribe
- Mute
- Subscribe to RSS Feed
- Permalink
- Report Inappropriate Content
May-16-2013 12:57 PM
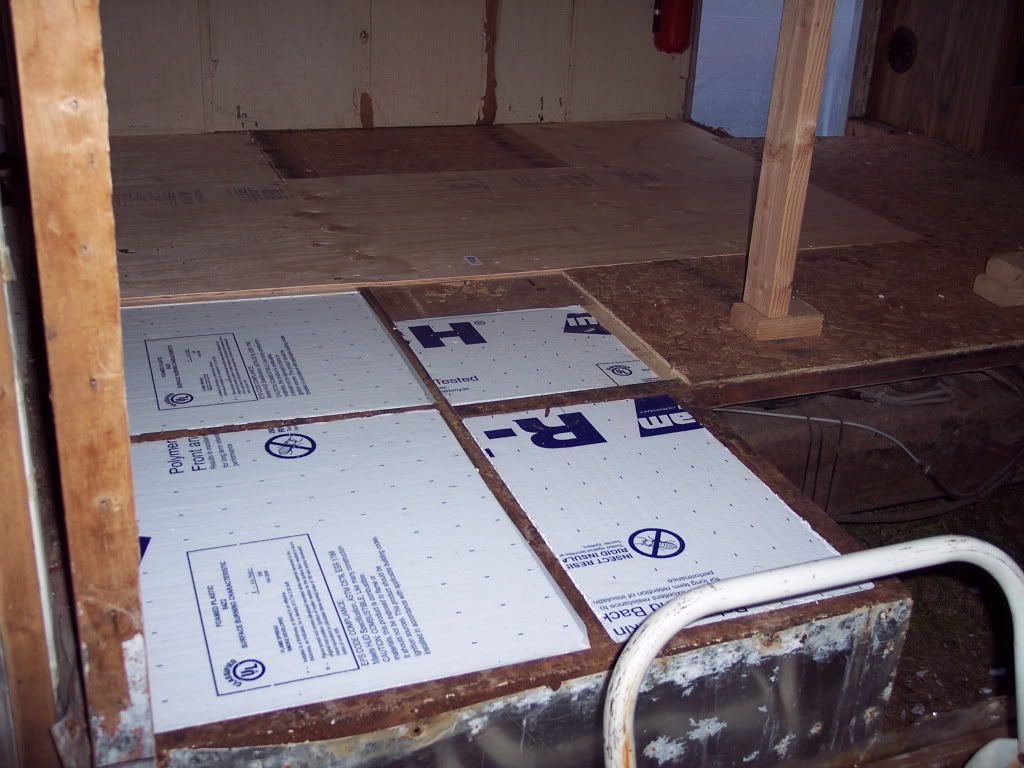
Ok so I have done a bunch since my last posting of repairs, I'm just going to focus on the floor for now and will touch base with other repairs as I get back to them.
I have got all of the old floor torn out and cleaned up. Had to re attach some of the sheet metal to the floors frame that I had knocked loose prying the old floor up. Then I added wood strips to sections of the metal frame for something to tie the old to new floor seems together. Original floor was one solid sheet of 3/8" OSB.
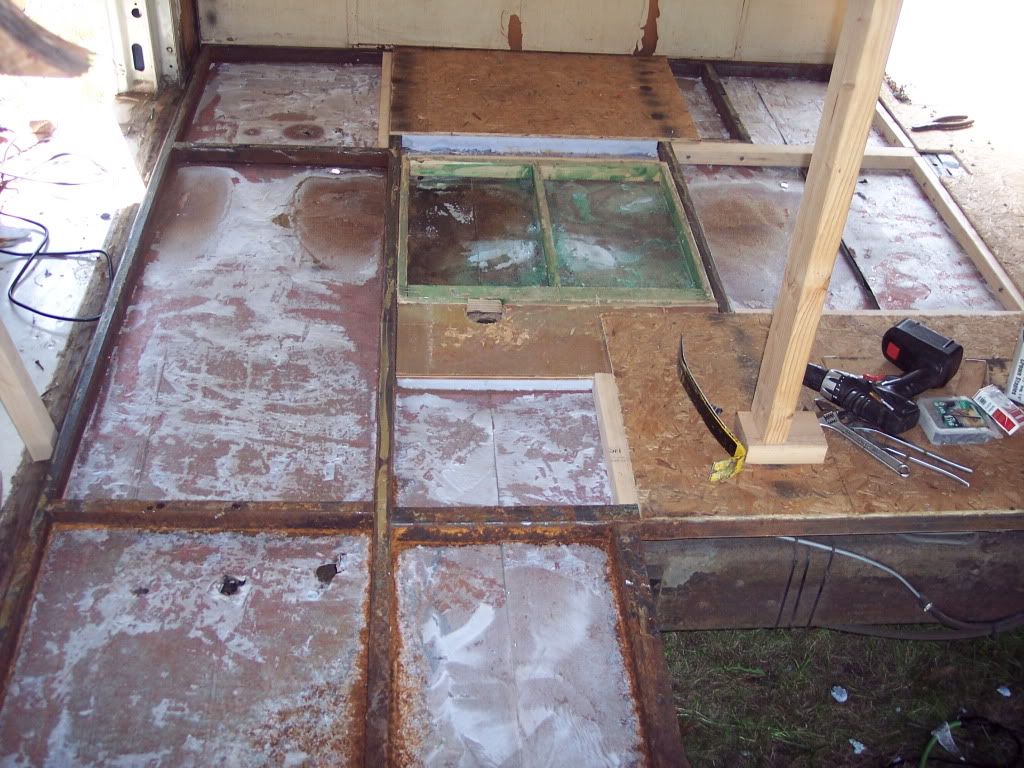
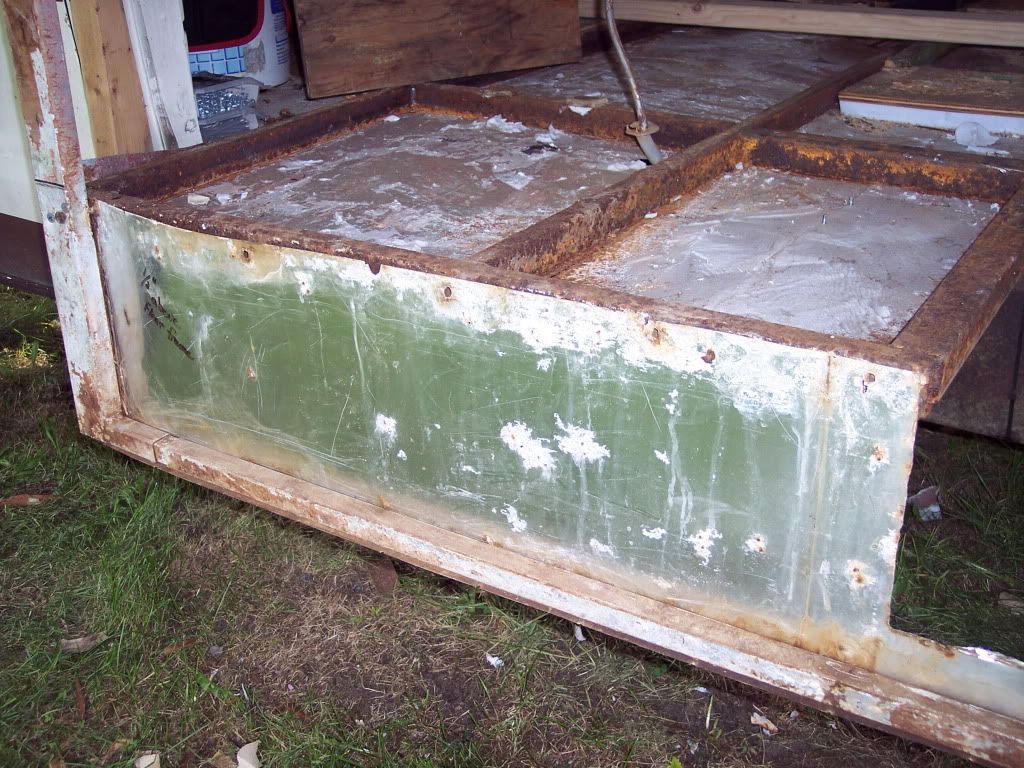

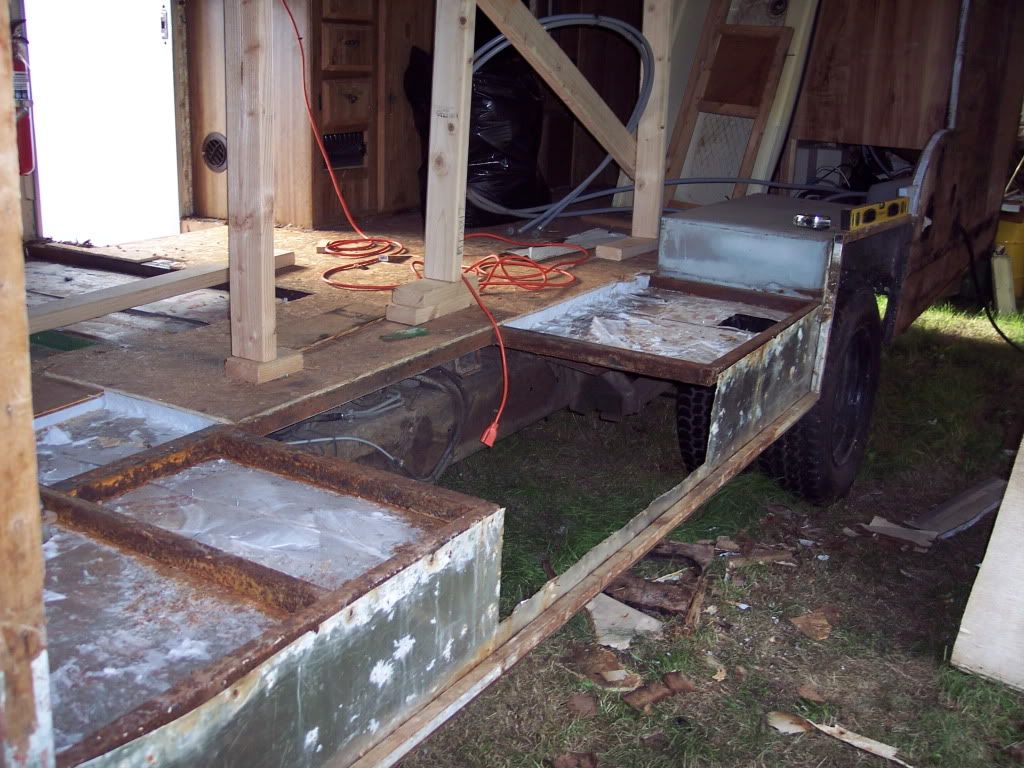
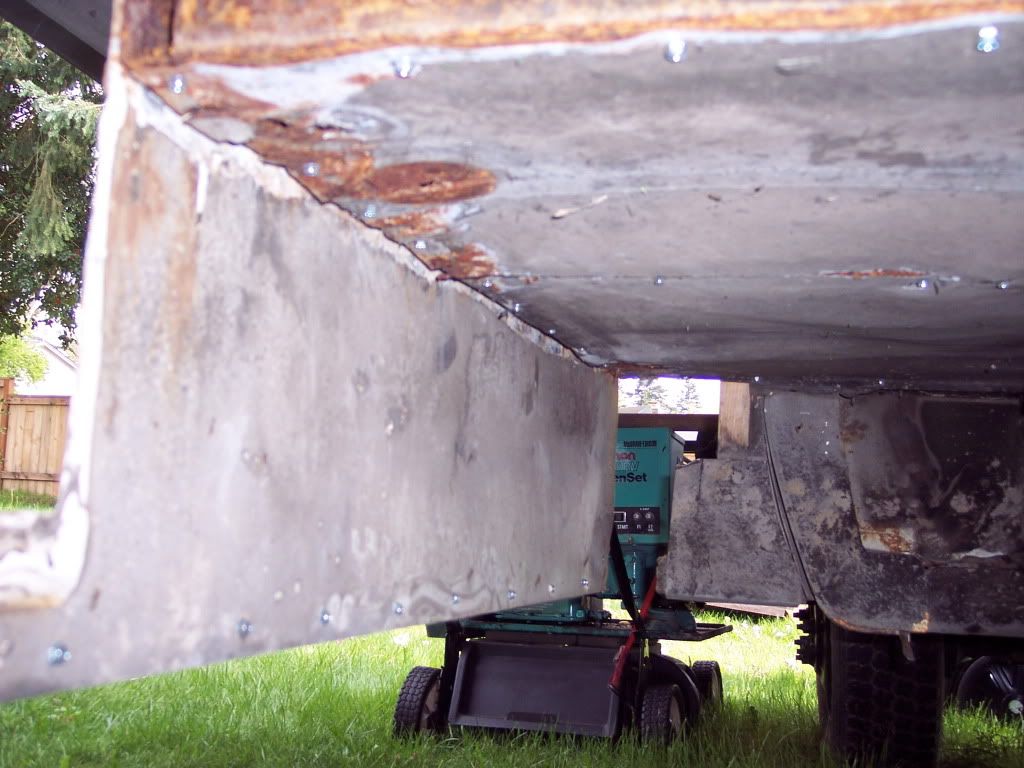
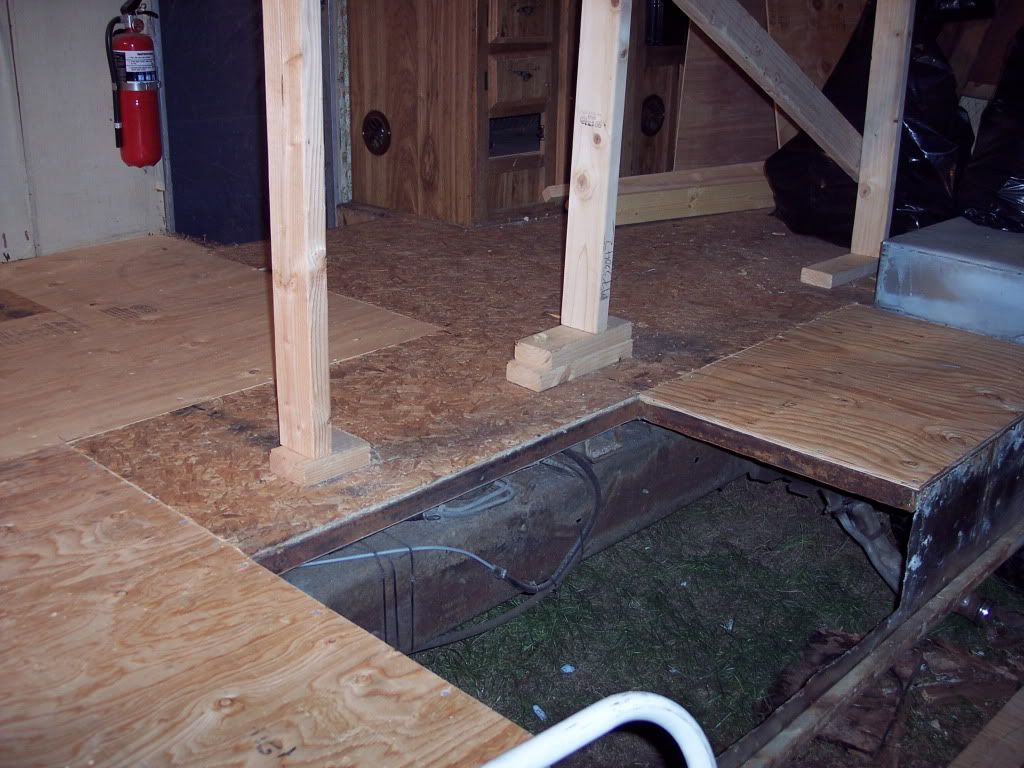
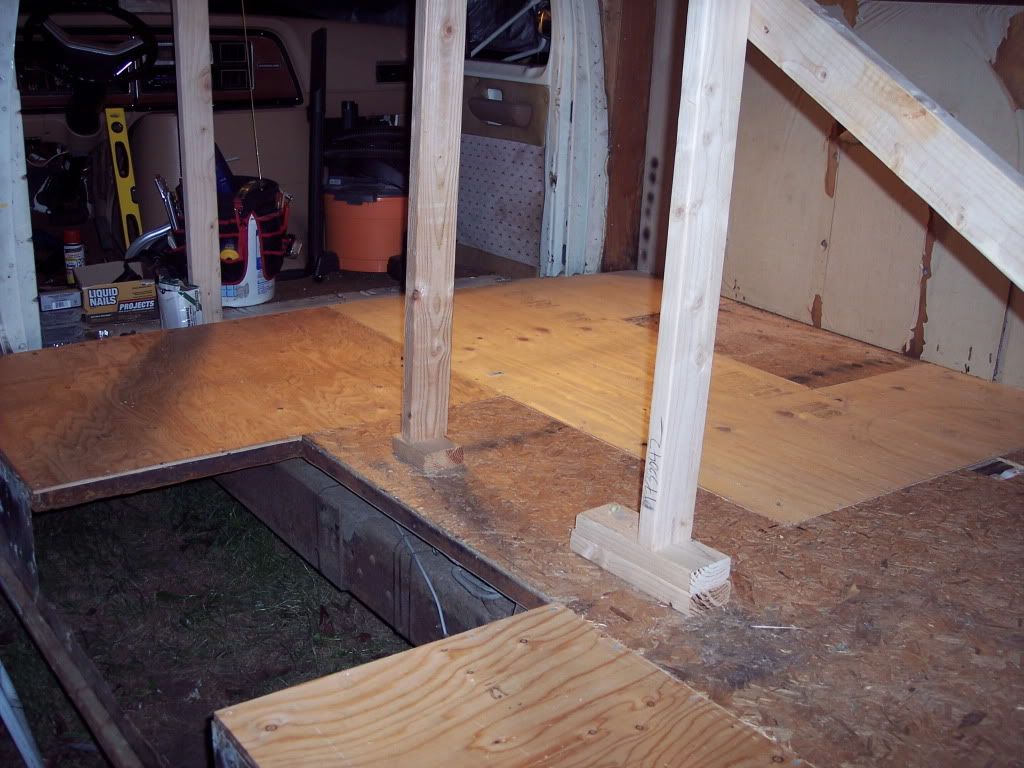
Notice how much off the wheel well frame area is, I found that the rear section of wall has sagged a little bit, I will correct that when I get there.
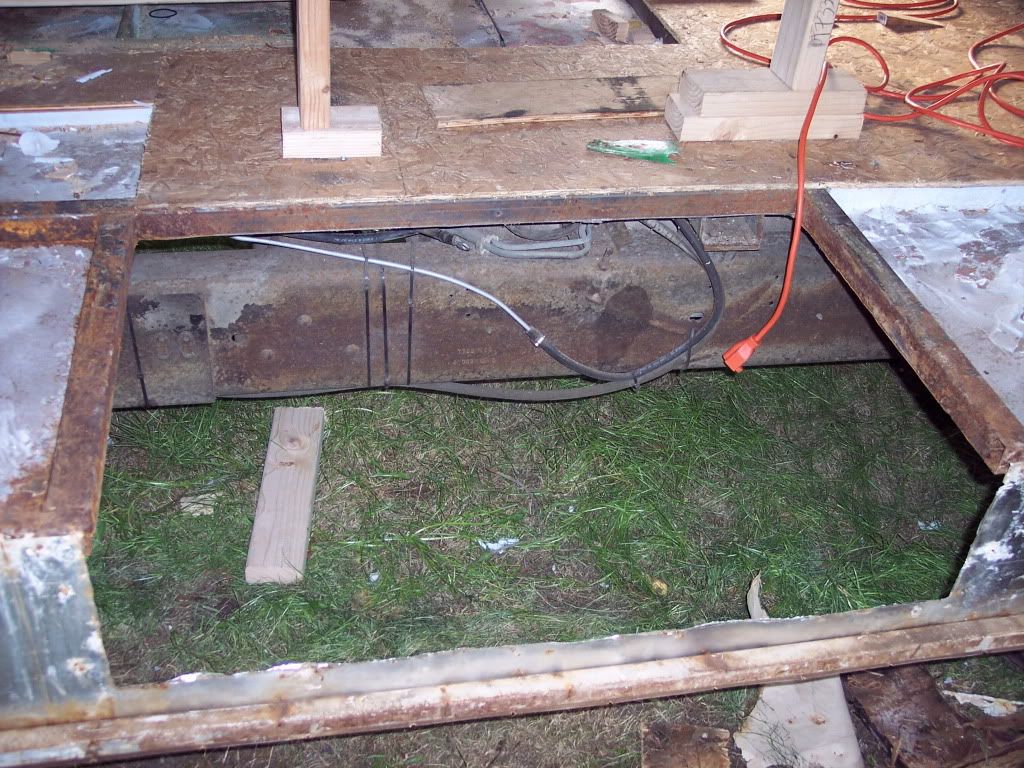
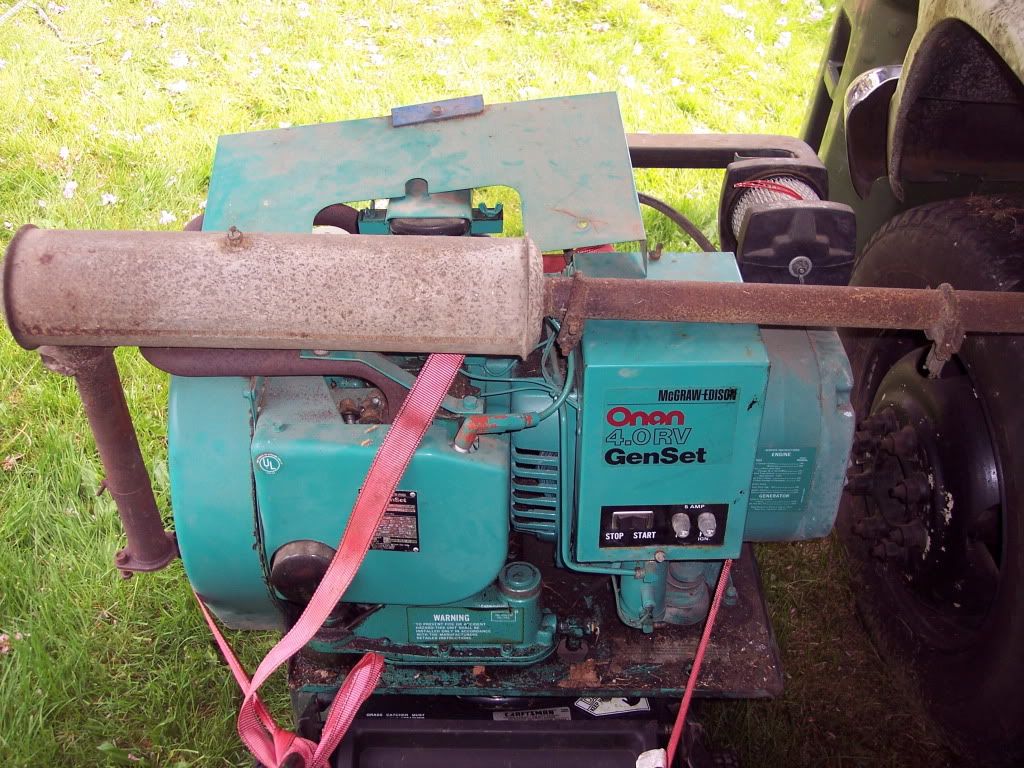
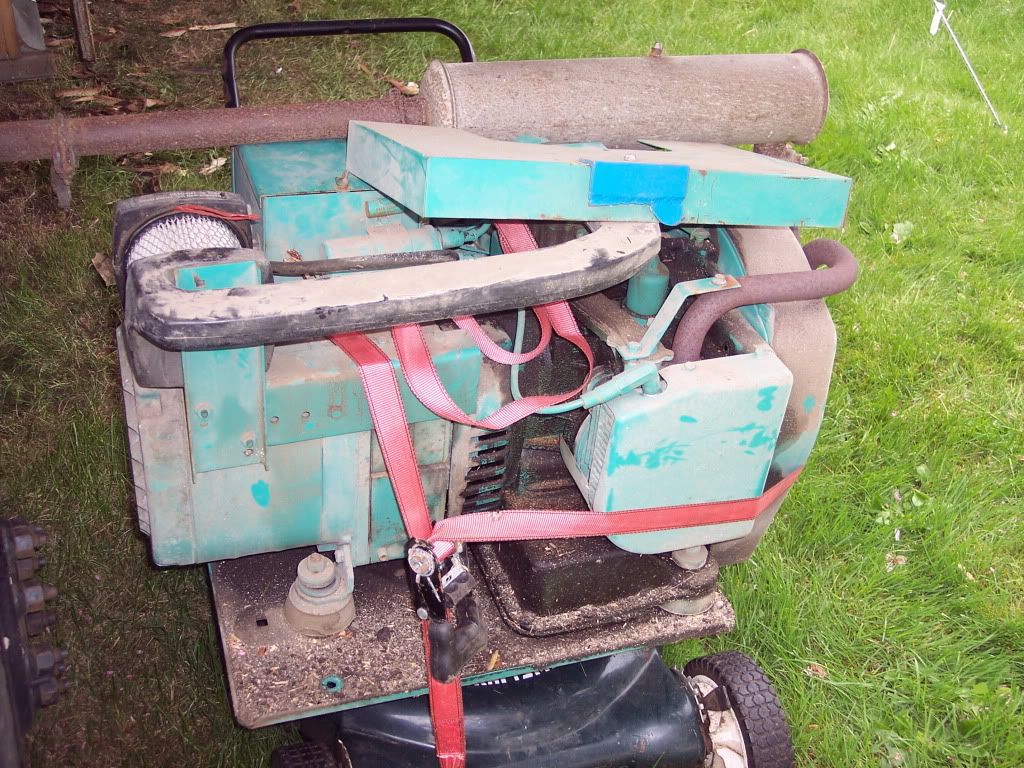
This is where the genset sat, that was fun to remove, I will put it back in before I build the wall. I need to finish floor and wash the genset and make sure the oil thats everwhere was a spill and not a leak before I reinstall it.
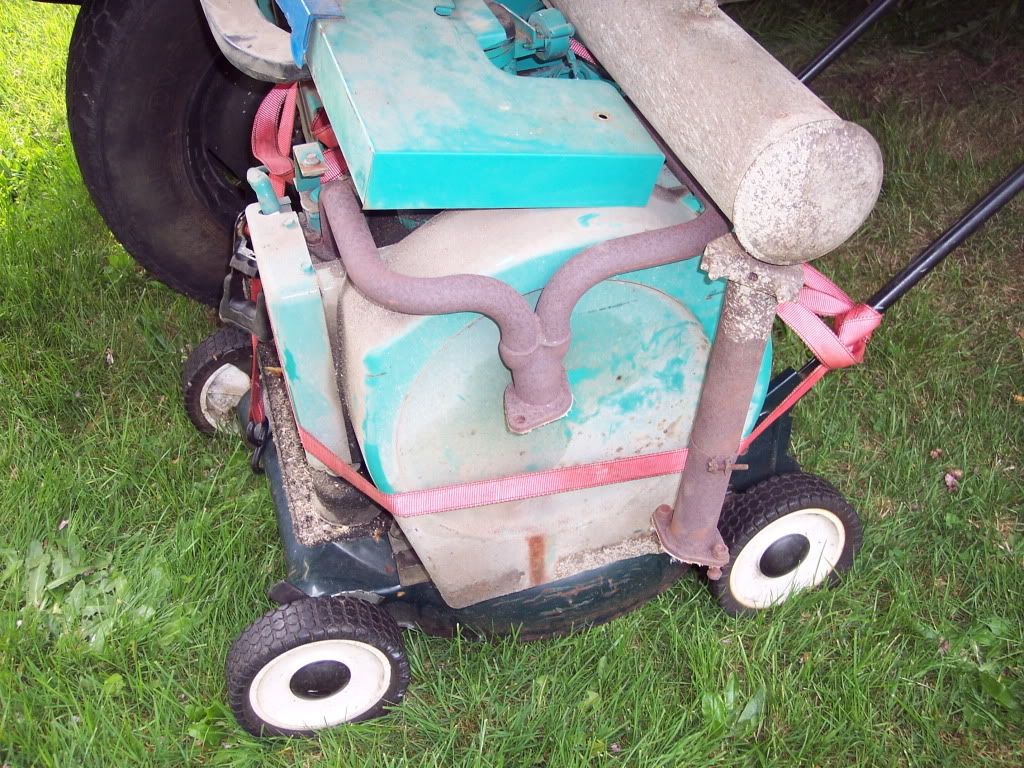
LOL I couldn't think of a better use for this old lawn mower I had, don't roll good but it moves just enought 🙂
So that's were I'm at right now, stay tuned!
I have got all of the old floor torn out and cleaned up. Had to re attach some of the sheet metal to the floors frame that I had knocked loose prying the old floor up. Then I added wood strips to sections of the metal frame for something to tie the old to new floor seems together. Original floor was one solid sheet of 3/8" OSB.
Notice how much off the wheel well frame area is, I found that the rear section of wall has sagged a little bit, I will correct that when I get there.
This is where the genset sat, that was fun to remove, I will put it back in before I build the wall. I need to finish floor and wash the genset and make sure the oil thats everwhere was a spill and not a leak before I reinstall it.
LOL I couldn't think of a better use for this old lawn mower I had, don't roll good but it moves just enought 🙂
So that's were I'm at right now, stay tuned!
Options
- Mark as New
- Bookmark
- Subscribe
- Mute
- Subscribe to RSS Feed
- Permalink
- Report Inappropriate Content
May-15-2013 03:48 PM
There, I fixed the link.... for now lol I need to stop moving and deleting pictures on photobucket.
And thanks to anybody for letting me know that there not working, forums without pictures stink.
And thanks to anybody for letting me know that there not working, forums without pictures stink.
Options
- Mark as New
- Bookmark
- Subscribe
- Mute
- Subscribe to RSS Feed
- Permalink
- Report Inappropriate Content
May-15-2013 03:38 PM
tenbear wrote:
I just found your thread. I followed OldTrucker's and now can follow yours. Looks like you made good progress, anxious to see how you transform it into a useable motorhome. Keep up the good work.
BTY, still one broken link back near the start.
I hope you enjoy, I read all pages of oldtrucker63 posts. I have done much work than shown here, need to get to work posting.
Thanks for letting me know there is still a broken link, will get that fixed.
Options
- Mark as New
- Bookmark
- Subscribe
- Mute
- Subscribe to RSS Feed
- Permalink
- Report Inappropriate Content
May-15-2013 02:11 PM
I refinished all the cabinets in the coach. I used a gel stain that I got from a company call Woodcraft. Not sure if you have one in your area, if not, you can order it online. It's the best stuff out there. The product is made by General Finish. No sanding, just apply on top of the cabinet surface even it out and your finished. You can use a rag or a brush. Made a huge difference within the coach and the work was minimal. I did remove all the doors and hinges then stained them.
Yes my coach came with the cabinets over the drivers cabin. The cabinets are very deep and holds a ton of stuff.
You're correct, the bed is in the back and I have a mid-bath and across is the water closet. Where the dinette was, I made a platform and bought a sofa (Walmart's fake leather) that fit the space to a TEE and has built in cup holders. Haha. I was having a real tough time trying to find a affordable couch that fit this space. Most leather couches have huge side arms. Anyway this is a bed for our 12 year old as well if his tent isn't working for him.
Options
- Mark as New
- Bookmark
- Subscribe
- Mute
- Subscribe to RSS Feed
- Permalink
- Report Inappropriate Content
May-15-2013 01:17 PM
I just found your thread. I followed OldTrucker's and now can follow yours. Looks like you made good progress, anxious to see how you transform it into a useable motorhome. Keep up the good work.
BTY, still one broken link back near the start.
BTY, still one broken link back near the start.
Class C, 2004/5 Four Winds Dutchman Express 28A, Chevy chassis
2010 Subaru Impreza Sedan
Camped in 45 states, 7 Provinces and 1 Territory
2010 Subaru Impreza Sedan
Camped in 45 states, 7 Provinces and 1 Territory
Options
- Mark as New
- Bookmark
- Subscribe
- Mute
- Subscribe to RSS Feed
- Permalink
- Report Inappropriate Content
May-15-2013 01:09 PM
oh I think I get it, you have a mid-ship bathroom? tub and shower on one side and sink and toilet on the otherside?
Options
- Mark as New
- Bookmark
- Subscribe
- Mute
- Subscribe to RSS Feed
- Permalink
- Report Inappropriate Content
May-15-2013 01:06 PM
I got to thinking, where is the bed? lol.... no overhead bunk, dinnette is gone, do you have a rear bedroom?
Options
- Mark as New
- Bookmark
- Subscribe
- Mute
- Subscribe to RSS Feed
- Permalink
- Report Inappropriate Content
May-15-2013 12:55 PM
Jimmymac603 wrote:
Here's a picture about a week after I got my Shasta. It really needed a lot of elbow grease, but I'm not afraid of hard work. It was missing the dinette and 1 of the swivel chairs behind the passengers seat.
Inside of my RV when I got it last Oct 2012
This a pic of the kitchen that has been completely redone. All the cabinets refinished, new faucet, painted counter-tops, tile back splash and a new microwave installed. The cabinet was re-lumbered to make it fit in the standard cabinet space. It had a convectional oven in it that was very, very old. Also, you can see in the pic that I had to build a platform (furnace and storage) for the couch to sit on.
Finished Kitchen pic
Looks great! I really like the color of the cabinets, was that a stain or paint? or is that factory?
Like the tile back slash, real tile?
I like the layout of your kitchen, mine is on the otherside and there is no counter working space, have not figured out just what to do about that as it the sink just flows into a stove. My shasta has the dinnette and couch down the left side and think I may move the dinette to the front and make more kitchen. But i have a genset and water heater and storage tank to work with.
I guess I just need to focus on the floor and wall for now.
Options
- Mark as New
- Bookmark
- Subscribe
- Mute
- Subscribe to RSS Feed
- Permalink
- Report Inappropriate Content
May-15-2013 12:46 PM
Jimmymac603 wrote:
In the front of coach. I took out... ok, had to smash the old tube TV that sat in this space. The previous owner cut the top cabinet crossbar( by the ceiling) to get a larger TV in the space then screw and glued it back. It was very old, so the only way to get out without taking this wood cross bar off again, was to dismantle the TV into pieces.
I've replaced the TV with a 27" LCD TV with PC gaming subwoofer and speakers that I fit into the side panels. This speaker set has bass and volume adjustments. Plus, has input for an MP3 player and TV. In the near future, I'll connect a Xbox 360 to play movies for when it rains or at night.
TV Gone and the speakers in the space
TV and speakers installed
I like to smash things apart sometimes!! lol
I really like the cabinet set up there in the front in place of the bed, did it come that way? I've never seen that.... it's giving me ideas.....
Options
- Mark as New
- Bookmark
- Subscribe
- Mute
- Subscribe to RSS Feed
- Permalink
- Report Inappropriate Content
May-15-2013 12:44 PM
Jimmymac603 wrote:
Thanks Mudshovel!! Yes, it does have a wave down the left-hand side. Anyway of fixing this wave from the outside in?
BTW, thanks for the trim link!!! It was exactly what I was looking for, need trim to go around all the exterior compartment doors.
I'll post more pics in the next few minutes.
Well not to sure about fixing from the outside, you can us some steel roofing screw (ones with gasket) and try to suck some of it in or you can use regular sheet metal screws and apply some butyl to the threads before hand, I'v done that a few times. its a bit tricky to find any of the studs in the wall and there is not many but if the plywood is in somwhat ok shape you may be able to get most of it secured I'm sure your is built like mine, 1" foam in the middle and 1/8" plywood all glued and sandwiched together. What I found on mine is the last layer thats glued to the siding and inside paneling had delaminated. But obviously mine is much worse but oddly on the same side 🙂
If you haven't I recomend resealing the windows buy removing them and replacing the butyl tape as they are clamped in and have no screws applied into the structure, I was planing on using some black finish screws on the exterior like they use to do on older RV's. I find these windows leak alot and most people just goop the******out of them around the outside and to me that really looks ugly and usally don't fix all the leaking. And worst of all a 30 to 50 foot roll of butyl tape is less than a tube of sealer.
Options
- Mark as New
- Bookmark
- Subscribe
- Mute
- Subscribe to RSS Feed
- Permalink
- Report Inappropriate Content
May-15-2013 10:54 AM
Jimmymac603 wrote:
Mudshovel, Here's a pic of the cabin's power connector. Been trying to find a female connector for the 4=prong twist to a 3 prong standard 30amp connector. Can't find it anywhere. I have to step up to 50amp then convert to 30amp standard to the 3-prong. A lot of "dogbones" or adapters to connect into a campground 3 prong 30amp shoreline service.
4-prong twist cabin connector
If you have any ideas, I'm all ears! Thanks
Well that connector is a 30amp found on things like welders compressors etc, used with 220 Volt, we use them around the shop. You can get a female end from home depot, but I recomend converting to use with standard 25amp service plug that most (all?) rv parks use and get a adaptor to 15amp house plug for when your at home etc.
The 25amp rv connection is what you want, seems funny that somebody put that one on your RV, like I said before that's used with 220v service thats why there are 4 prongs, 2 110 load, 1 common and 1 ground. I can post a picture tonight of mine, very easy to change.
Options
- Mark as New
- Bookmark
- Subscribe
- Mute
- Subscribe to RSS Feed
- Permalink
- Report Inappropriate Content
May-15-2013 04:10 AM
In the front of coach. I took out... ok, had to smash the old tube TV that sat in this space. The previous owner cut the top cabinet crossbar( by the ceiling) to get a larger TV in the space then screw and glued it back. It was very old, so the only way to get out without taking this wood cross bar off again, was to dismantle the TV into pieces.
I've replaced the TV with a 27" LCD TV with PC gaming subwoofer and speakers that I fit into the side panels. This speaker set has bass and volume adjustments. Plus, has input for an MP3 player and TV. In the near future, I'll connect a Xbox 360 to play movies for when it rains or at night.
TV Gone and the speakers in the space
TV and speakers installed


