cancel
Showing results forย 
Search instead forย 
Did you mean:ย 

2004 Damon Challenger upgrades-handle, valances & diner tops

Tucson_Lawrence
Explorer
Explorer
I hope it's OK, but I'd like to keep a running post here about our upgrades we are doing to our 2004 Damon Challenger we bought in November.


At first, our "to do" list was quite short-
- get our 2012 CRV equipped to tow
- switch out the old original plastic toilet with a porcelain one
- tear out wardrobe area and build bunk beds

Since then, our "to do" list has grown a bit... all of the above plus
- replace or refinish all the brass hardware including shower surround
- refinish the gelcoat in the shower
- add 12v usb ports and power points to the boys' bunk areas
- replace the main mattress
- replace the bedroom lights
- replace all incandescent bulbs with LEDs
- recover dining room dinette cushions
- rebuild dining room table
- recover/simplify window drapery/valances
- paint interior
- replace or refinish kitchen counters
- relocate or replace television
- add additional seat belts and properly anchor those already in place
- fix or replace captain's chairs
...not to mention general upkeep and maintenance!

Pics and updates on how things are coming along to come... we've done quite a bit all ready and I'd like to both share my experience (as well as my budget) and would love any tips/hints etc any of you can provide.

V/r
Lawrence
"Never remain neutral for the victor will consider you part of his spoils and the vanquished will have no room for you in his cave"
-unknown author

Click herehere to visit my woodworking portfolio
13 REPLIES 13

Tucson_Lawrence
Explorer
Explorer
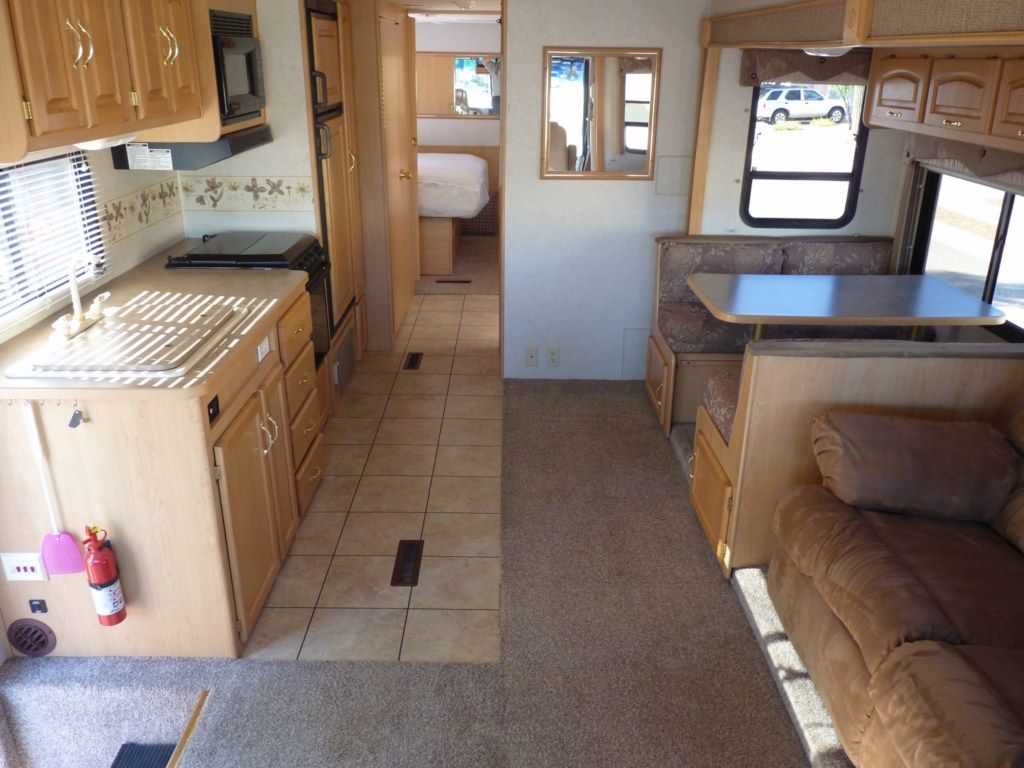
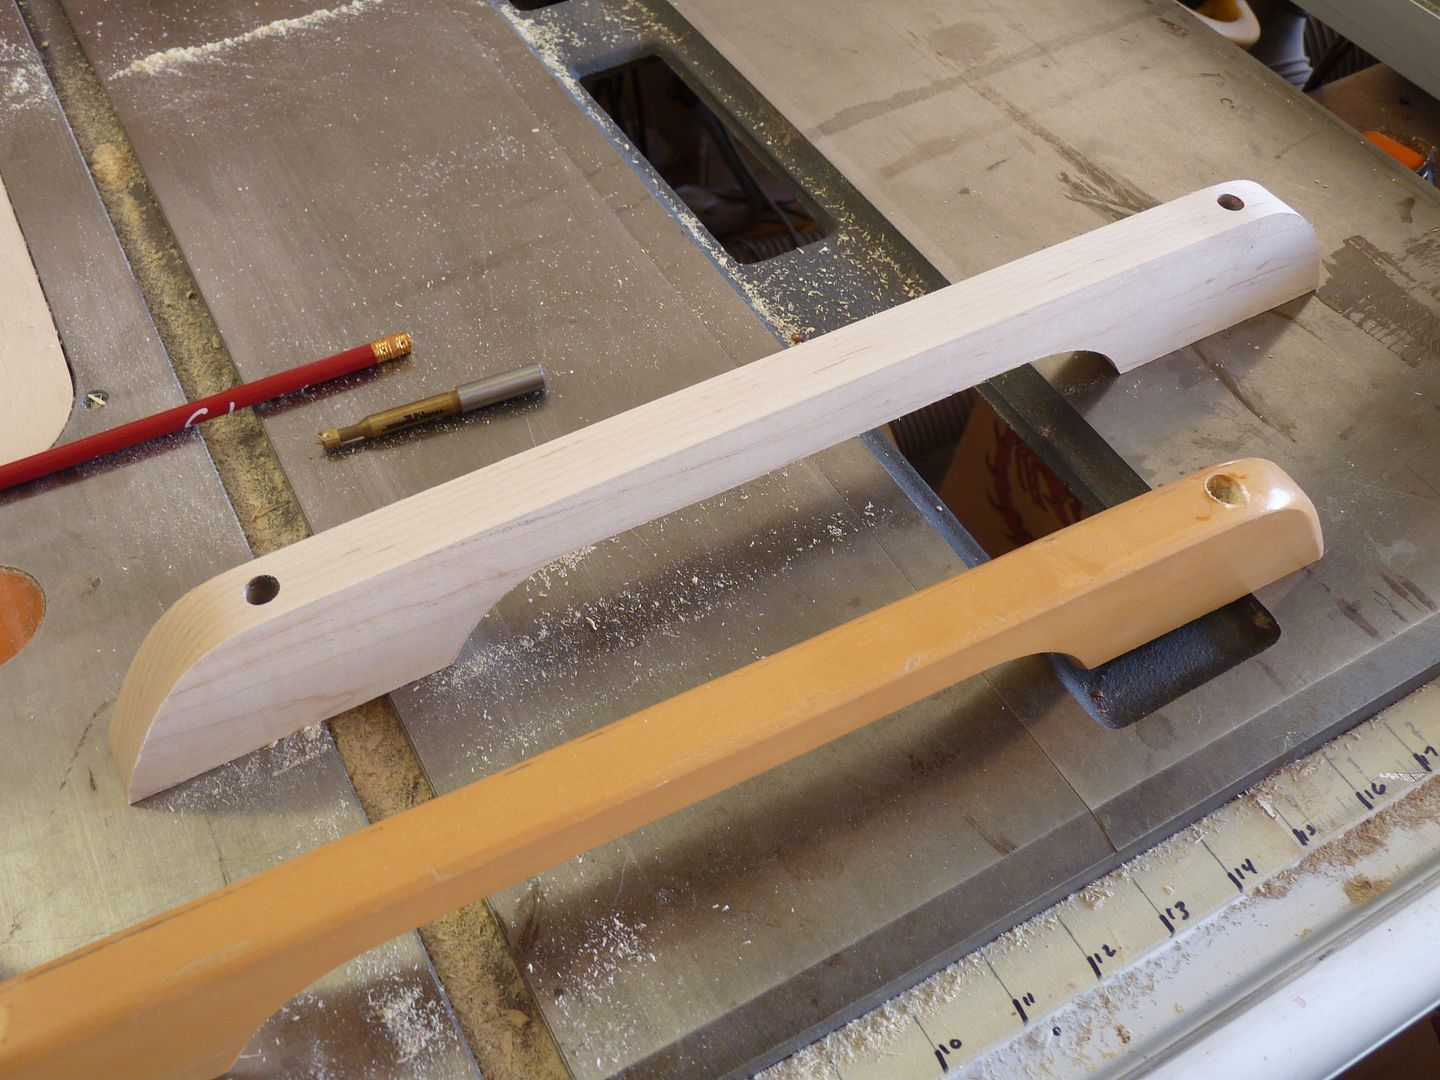
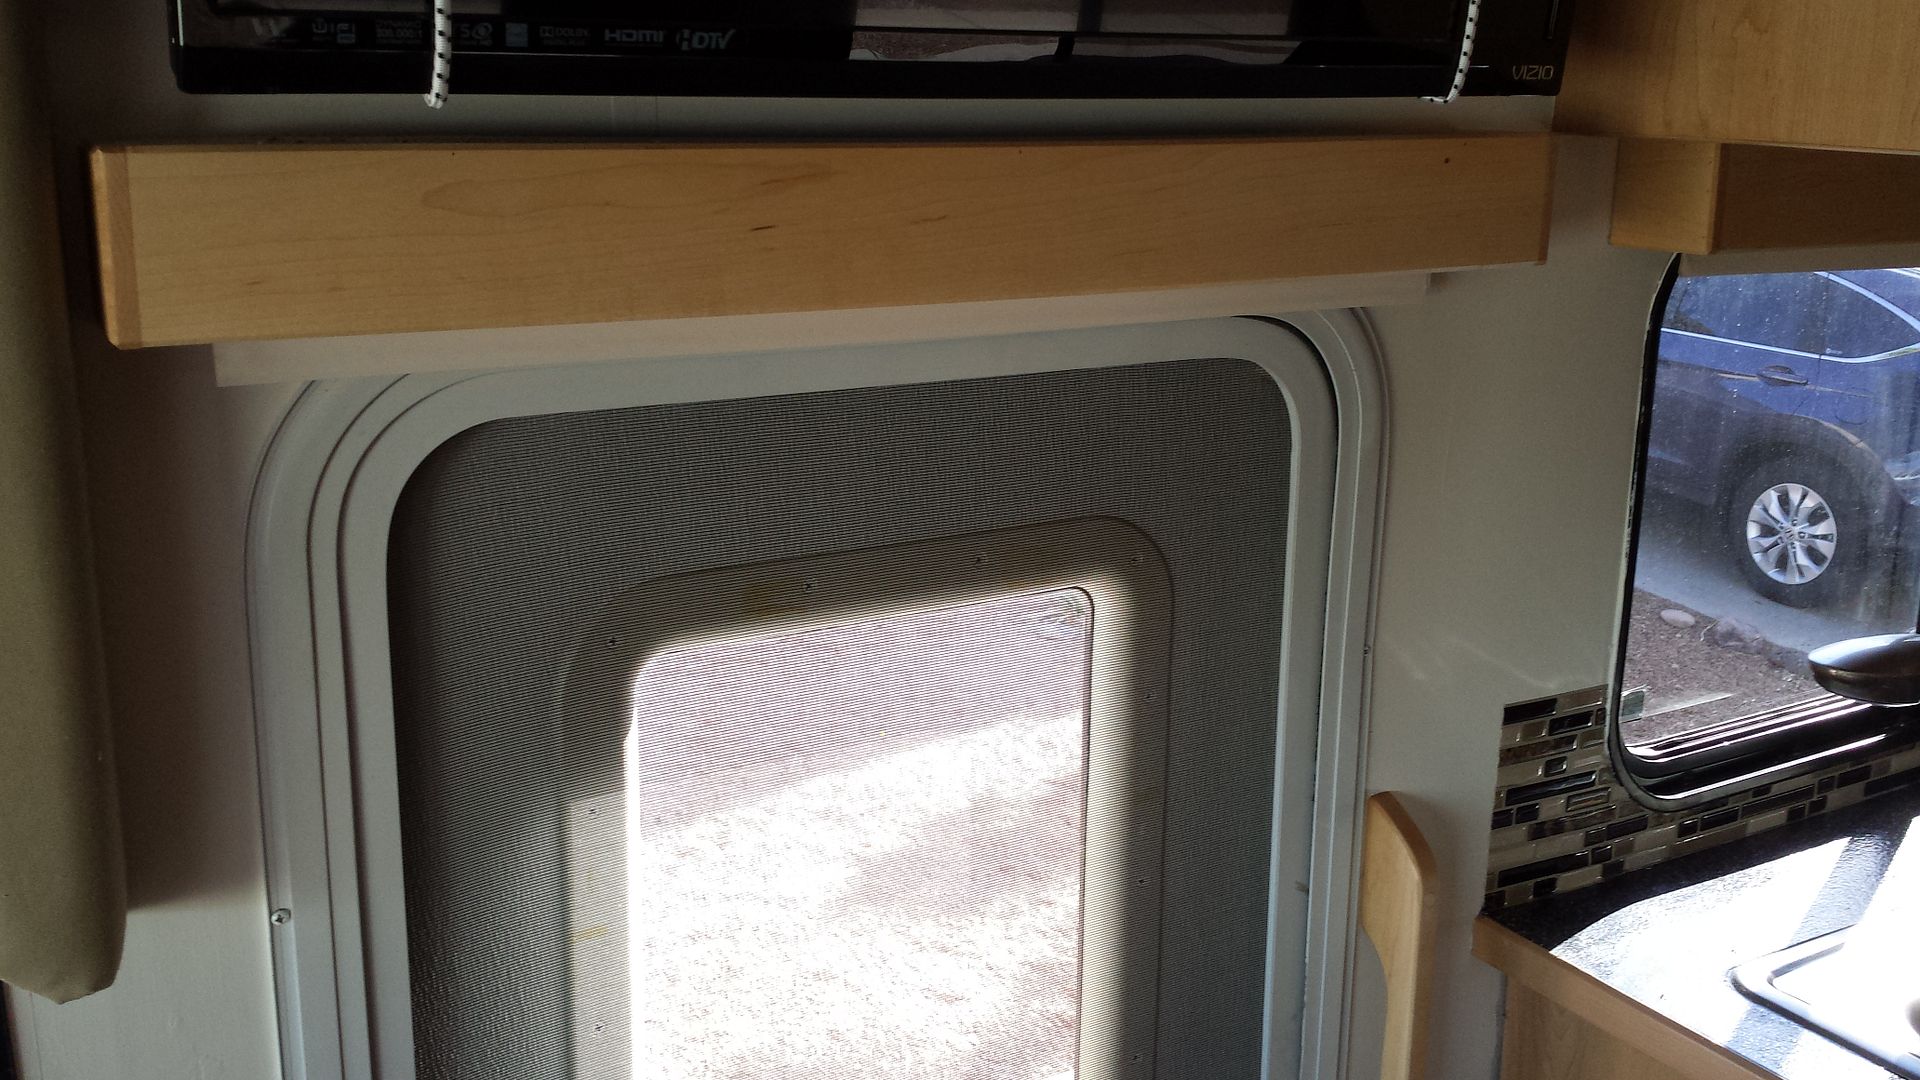
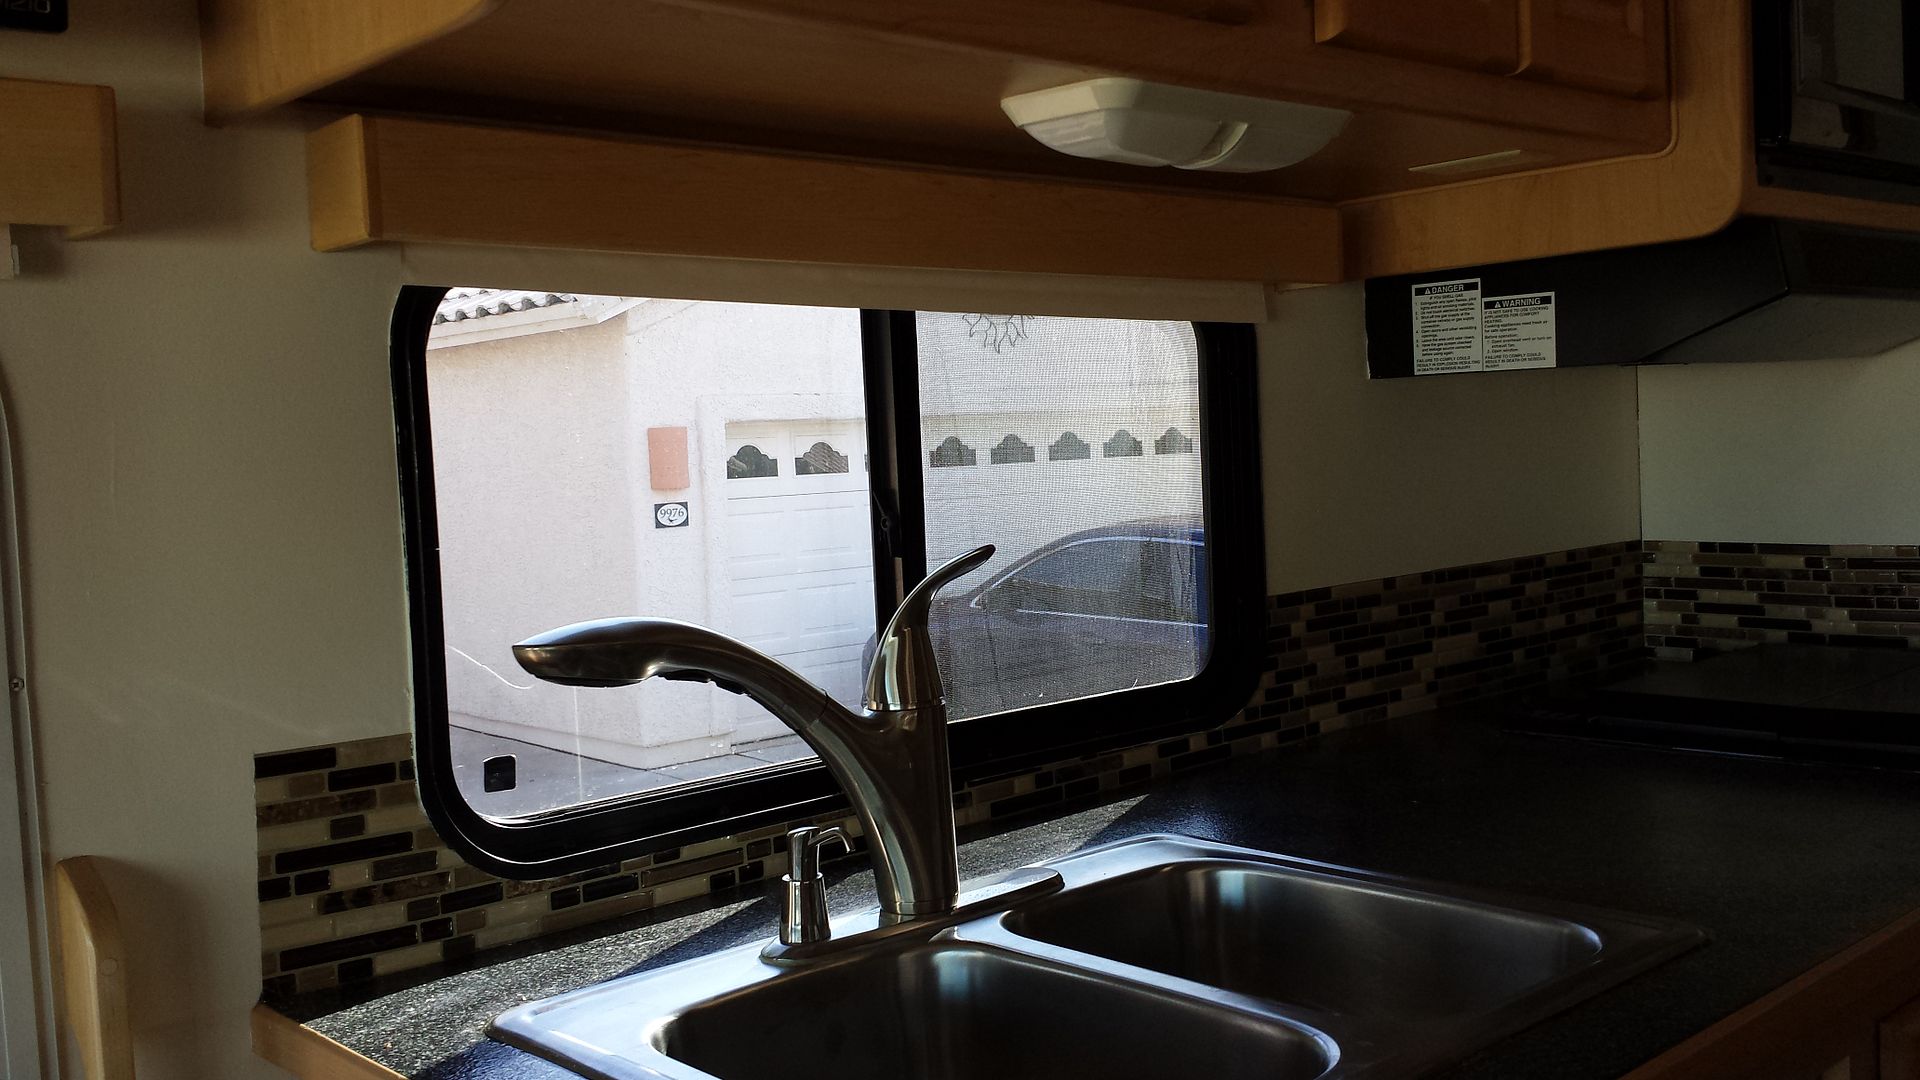
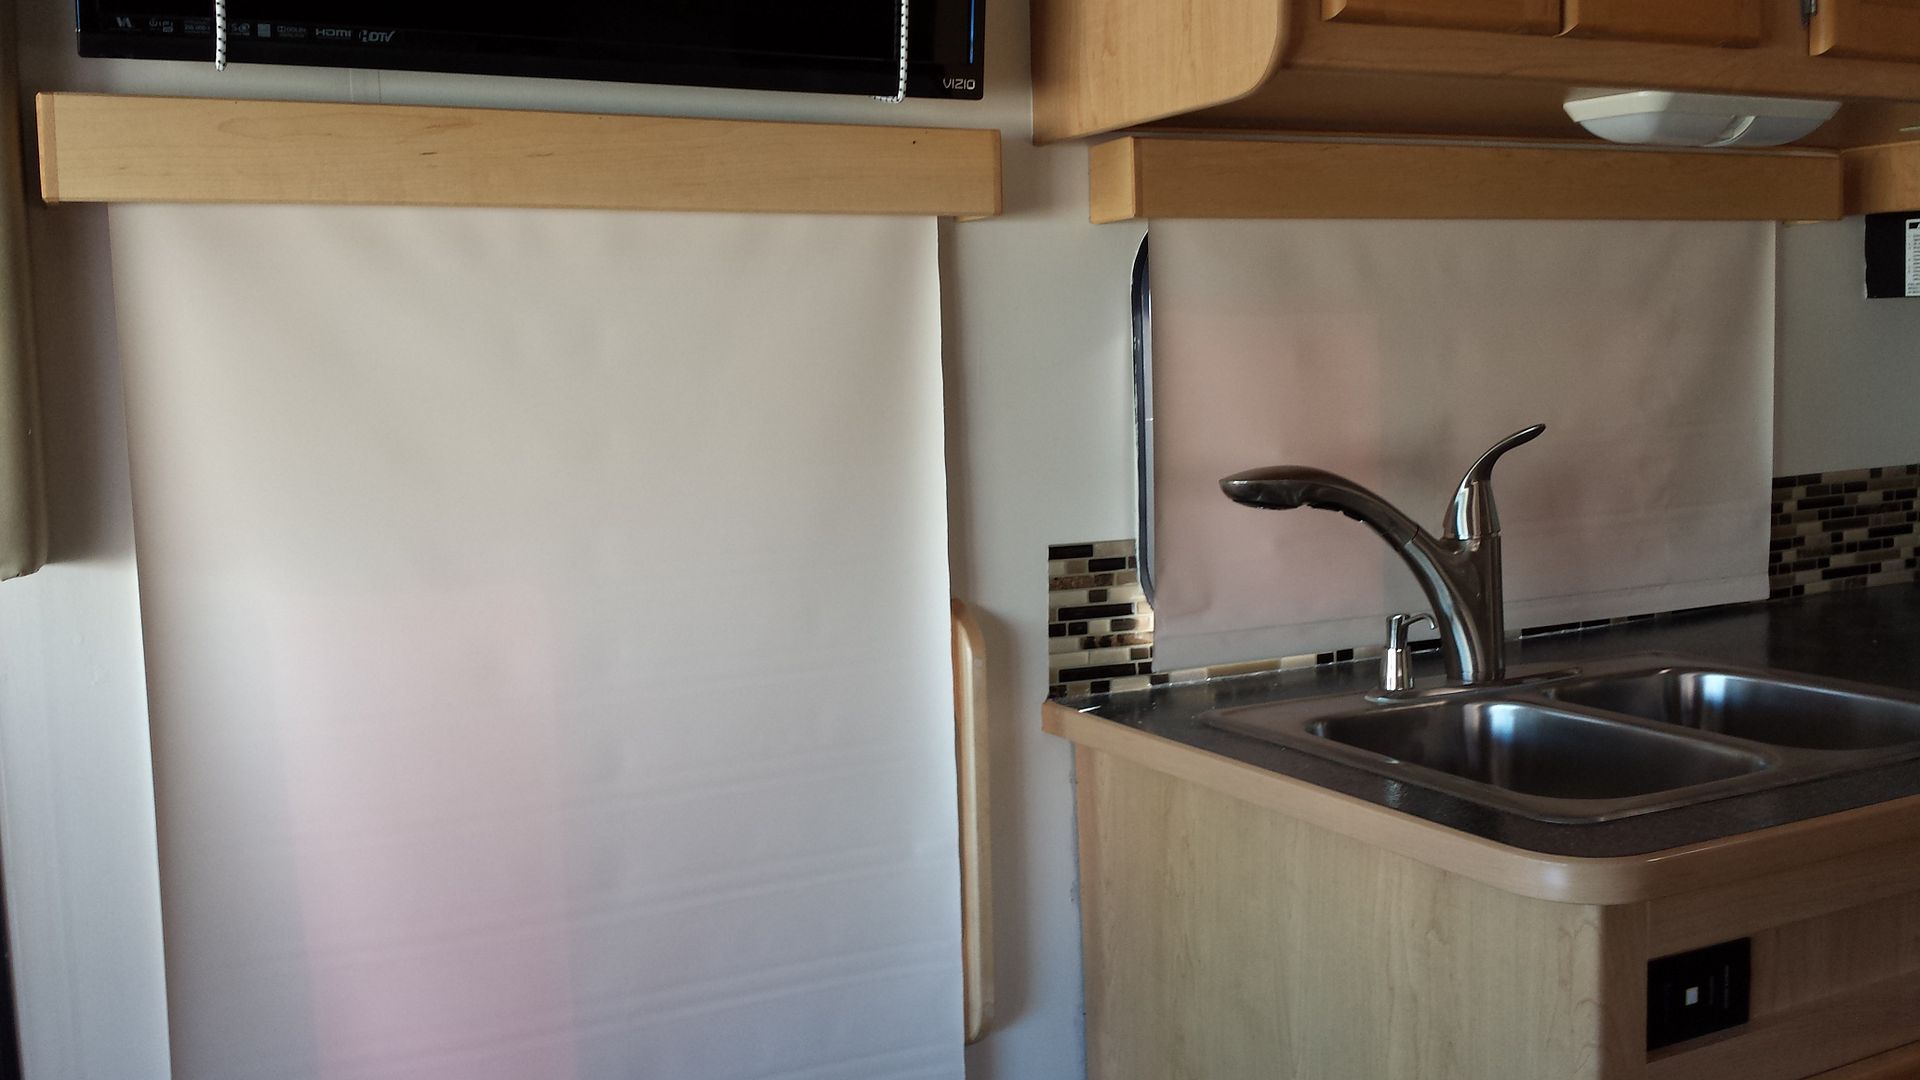
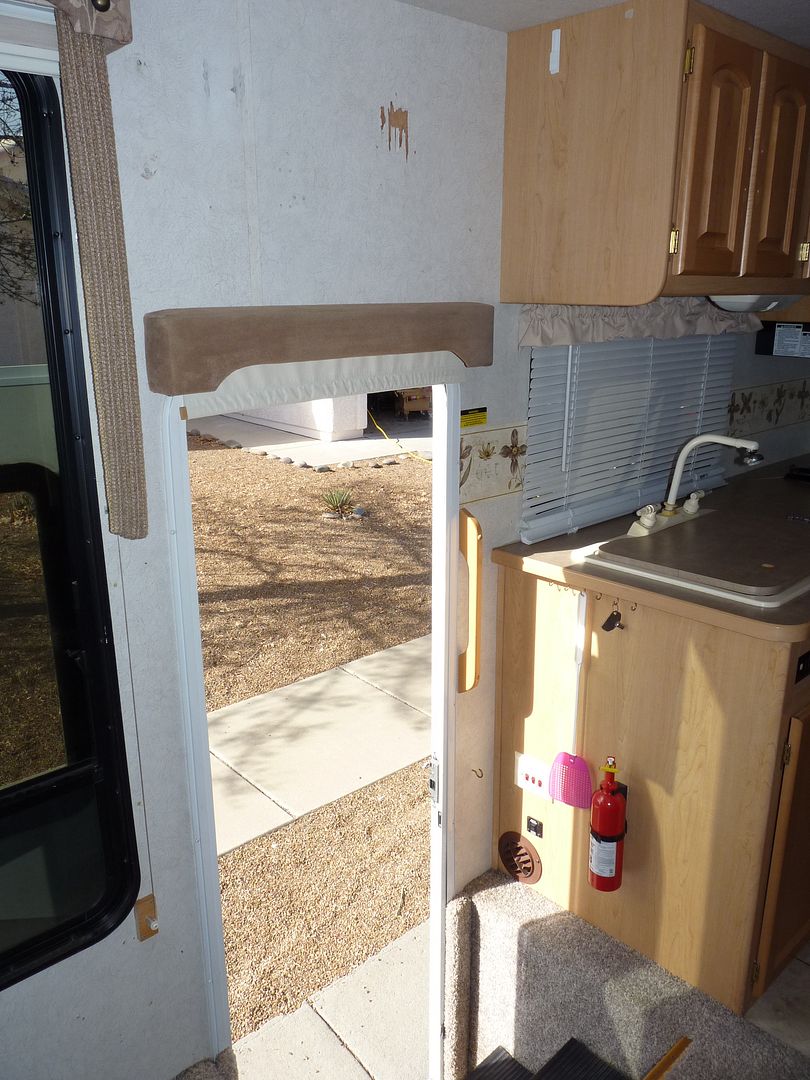
more updates-- we took off the (really grungy) valances over the kitchen window and door and the cloth toppers for the dinette and I made new ones out of maple and color matched it to the interior. In addition, I made new handles for the door exit-

Before (you can see the valances and toppers in these pics


Here are the results when I was done
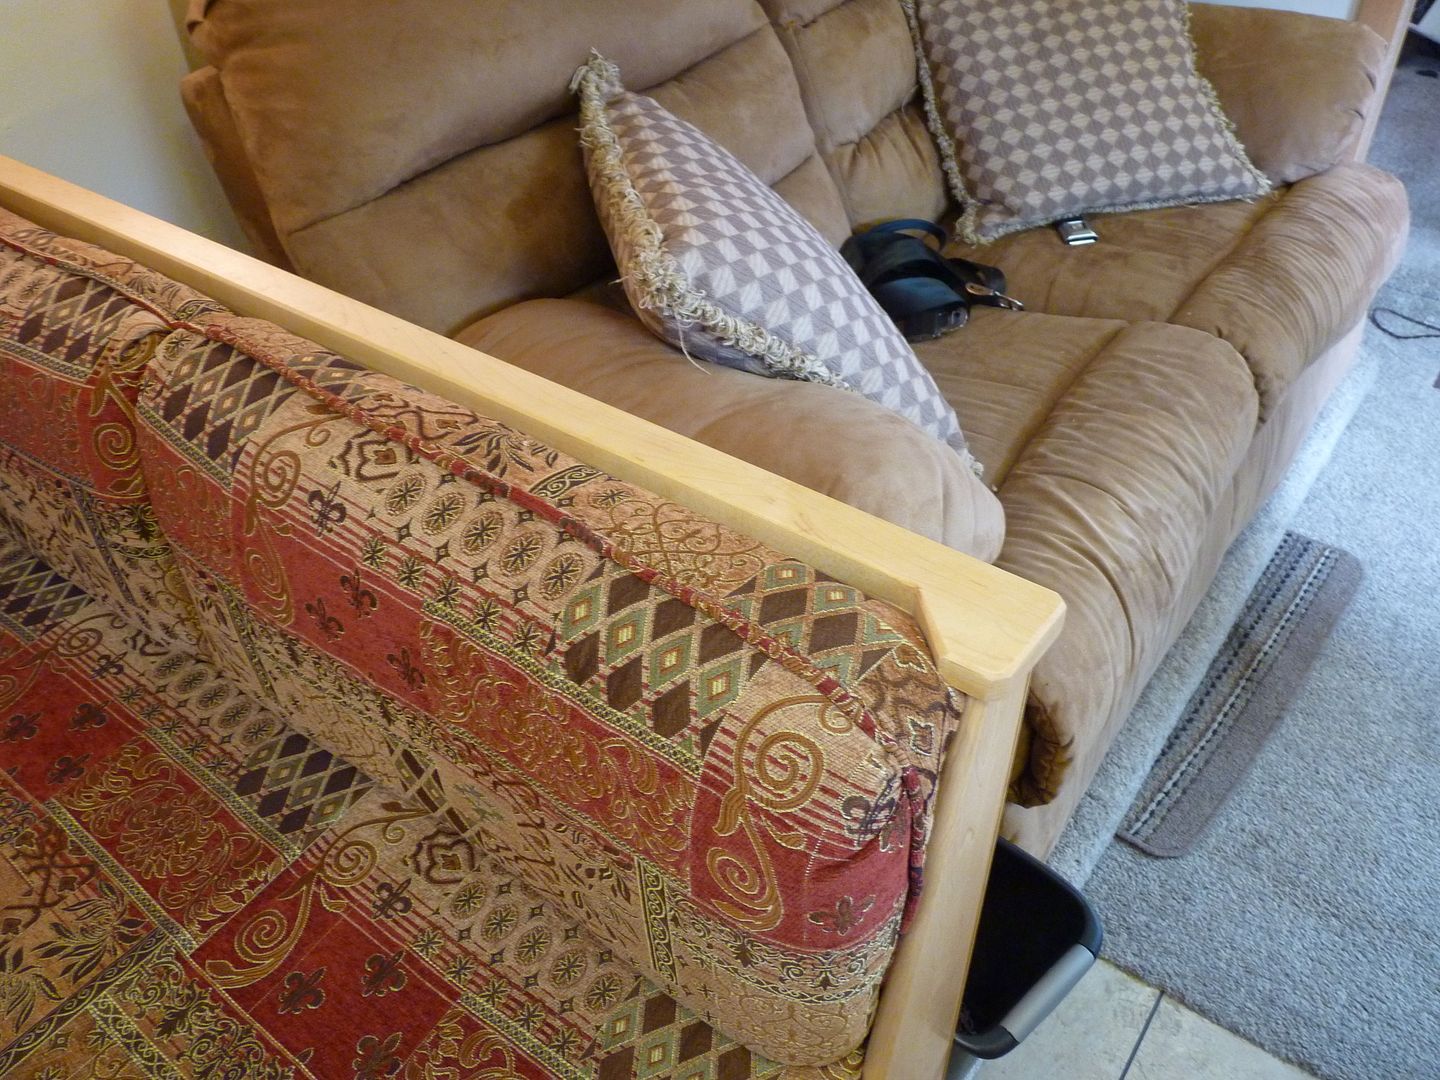


As for total costs, we had budgeted $10K for everything.. (get car and RV set for tow, paint inside, new bunks, new br lights, new leds throughout, redo shower, new porcelain toilet, box in bathroom (take out carpet in bath), new dining table, recover cushions, new sofa and chairs, new TV, refurbish counters, renew hardware from gold to nickel, new sinks and faucets, oil change and checkup, tuneup, new slide seals, got AC fixed (new squirrel cage and maintenance)

All together, we're at about $7K so far... (but lots of sweat equity)
Thanks for looking- we're getting there, slowly but surely we are closing in on being done. Next up is a new dining table in maple. Our new captain's chairs and sofa arrive in about 2 weeks.

Lawrence
"Never remain neutral for the victor will consider you part of his spoils and the vanquished will have no room for you in his cave"
-unknown author

Click herehere to visit my woodworking portfolio

magik235
Explorer
Explorer
Outstanding project and results. I will be following your progress.

David_R
Explorer
Explorer
Job well done! And great inspiration for the rest of us.
2007 BT Cruiser 5231
2002 Heritage Softail Classic

Tucson_Lawrence
Explorer
Explorer
Of course, those of you that really understand how this RV is laid out will see one problem... what about the slide?

In the original, the bed pushed RIGHT up to the edge of the hot water tank/electrical box...

We bought a new (RV length) mattress for the master bed so that now it is 60" versus the longer size, but this still wouldn't be enough room...

So I came up with this... when the slide comes in, the bottom bunk lifts up (manually) on piano hinges

Underneath is storage room (three cloth boxes) as well as room underneath that for shoes

When the slide comes in, the bottom bunk nests over top of the master bed (excuse the trim in this pic)


As to the other question folks had... weight... I worked really hard to keep the weight down and though the structure looks "weighty" it is an optical illusion created by the framework being structured out in a torsion frame. We also removed considerable weight when we took out the closet-- 3 heavy mirrors and lots of solid wood came out.

As for color matching (I know someone is going to ask)
I pulled a piece of the original wood and took it to my local woodworker's source-- then I went from gelstain to gelstain (with the manger's permission) putting a q-tip in their test can and trying it on a piece of maple. When I found the closest match, I took a can home and dialed in the color with dyes.

Thanks again for looking all- more update pics to come soon (we've been doing a lot)

Lawrence
"Never remain neutral for the victor will consider you part of his spoils and the vanquished will have no room for you in his cave"
-unknown author

Click herehere to visit my woodworking portfolio

Tucson_Lawrence
Explorer
Explorer
Of course, that looked WAAY too rough ๐Ÿ™‚ (I called the better half and said "it's done!" when it was just studded out... she about freaked ๐Ÿ™‚

Then I furred and covered the whole thing with 1/8 ply which I colormatched to my RV's interior.


Here you can get an idea of how much room the boys will have... it's plenty (and plenty strong too... I am 200+ and was jumping up and down in them without a creak)

After the ply, I edge trimmed the whole thing to finish it off (and cover my poor workmanship when needed ๐Ÿ™‚ )
Here is what it looks like now (note I moved all the controls to the bath side when I re-sheathed the wall I expanded)
"Never remain neutral for the victor will consider you part of his spoils and the vanquished will have no room for you in his cave"
-unknown author

Click herehere to visit my woodworking portfolio

Tucson_Lawrence
Explorer
Explorer
Bunk bed upgrade-

As I've mentioned, we wanted to add bunk beds to our bedroom area.

Here is what it looked like originally


We tore everything out and then added 6 inches or so to the wall (and enforced it to hold the bunk's weight better)


Then I studded out the framework which is where the bed gets its sturdiness without being too heavy. The wood I picked is VERY light but strong (kiln dried DF)


more to come
"Never remain neutral for the victor will consider you part of his spoils and the vanquished will have no room for you in his cave"
-unknown author

Click herehere to visit my woodworking portfolio

Koop
Explorer
Explorer
Looks really good. Keep us updated as you go!
Mike
2003 Alpine Coach 40MDTS
400HP Cummins ISL

Entropy69
Explorer
Explorer
Very nice! Subscribing to this thread.
2007 Four Winds 5000 28A
Chevy Workhorse Chassis, 6.0L Vortec

K9-24
Explorer
Explorer
Very impressive. I wish I had half of your skills!

donhoward49
Explorer
Explorer
Great job. I just hope my wife wont see all this.. I could have a winter project.

crimmps49
Explorer
Explorer
Nice work!

Tucson_Lawrence
Explorer
Explorer
The kitchen counter wasn't bad.... but it wasn't good either

Although I keep leaning towards just getting some corian (I have the ability and the tools to shape man made countertops) the cost would be prohibitive to refinish something that although not exactly appealing, wasn't all that bad.

Hard to see in this pic... but it is this color of laminate...


Well... out came the kitchen (and bathroom sinks, oven, and counters...)
and into the shop they went.

Options-
1- replace with corian or other manmade surface.
cost- about $400 if I did the work myself

2- add a piece of laminate sheet on top to change the color.
cost about $170...
but there was a problem. On the edge of the countertop is a PVC edgeband. If I just add more laminate on top, the edgeband wouldn't match up in height... so this wouldn't work...

3-redo laminate and underlay
cost about $220

4- (and what we went with) Rust-Oleum counter transformations kit
cost- $112
http://countertops.rustoleumtransformations.com/

With the money back satisfaction guarantee, I figured I couldn't lose. (and I almost didn't in the end)

First, remove countertops

Second, CLEAN - CLEAN - CLEAN (and then TSP and then clean some more)
Third, Add adhesive and then (with my beautiful assistant's... uh... assistance...) add chips


On a side note, the "removal" process revealed several "interesting" build quality issues such as sink holes that looked like they were cut out by a drunken beaver and cabinets held together by 608 differently lengths of screws with stripped out heads... (sigh..)

Next, sand sand sand... the kit came with a small bit of diamond plate that quickly gave up the ghost so I moved on to my ROS with good dust collection


Finally, add the 2 part epoxy, roll on... let dry and enjoy... almost...


the finish ended up drying to a quite ripply orange peel... sanding only started to break through to the chips and simply wasn't acceptable. I called rustoleum and asked if there was a fix available and the technician was VERY helpful and both offered some alternatives and ALSO very generously offered a full refund on the product as we were not satisfied with their product out-of-the-box

I even told the tech that it was probably usable as-is but would be trying additional materials as recommended to get it up-to-snuff and she still said they would send a refund. I very much appreciated the pleasant and unexpected way in which rustoleum stood up for their 100% satisfaction guarantee even though I was not fishing for a refund.

So after a LOT of additional sanding, $39 additional dollars worth of west-systems 2-part marine epoxy, and some buffing with micromesh, the final results are pretty darned good IMHO.


A new stainless steel sink is on the way too... pics to come of that...but in the meantime, I am quite thrilled with the results of the refinishing job and think it looks much better.

Cost
- Kit $112 (refunded - did not cure properly due to low humidity) great job again rustoleum.
- West-system 2 part epoxy - altered mix for low humidity (thanks John at West Systems for the assistance!) $39
- Sandpaper - $15
- Time- approx 8 hours- not including several days' cure times (would have been less except for the topcoat SNAFU

The bathroom counter was done as well, but I've got a little surprise in store for that one and will add more at another time...

Thanks for reading and please comment/ask any questions you have. I'm enjoying sharing this experience with you,

V/r
Lawrence


(we got the refund check in the mail 3 days after the phone call- great job rust-oleum in backing up your product!) It looks like our drastic lack of humidity (about 3-5%) may have been the culprit. I believe that this product will work "out of the box" quite well in most climates and really like the final result
"Never remain neutral for the victor will consider you part of his spoils and the vanquished will have no room for you in his cave"
-unknown author

Click herehere to visit my woodworking portfolio

Tucson_Lawrence
Explorer
Explorer
hardware remodel -

My wife and I both HATE shiny brass hardware. Because we bought our motorhome at a very good price, we weren't going to look a gift horse in the mouth and let a little thing like 149 pieces of shiny brass stand between us and our 6-wheeled dreams.

First thing was to remove a couple of pieces of brass hardware from cabinets that were destined to be torn out... if the refinish didn't work out it would be no harm, no foul.


I then broke out my trusty sandblast box, some aluminum oxide, and a good respirator.... after sandblasting the paint off I primed and then painted the handles with 2 thin coats of rustoleum satin nickel paint. After these cured I sprayed them with 3 quick coats of satin lacquer with a quick rub down with a paper bag before the final coat. This left the handles looking better than new.

I then removed and refinished ALL of the gold from the coach, including the shiny lamp... which got both a coat of nickel and a sandblast on the glass to give it new life.


Even the screwheads were refinished by putting them into foam, sandblasting and then finishing...


Why go to all this trouble instead of just re-buying? Although I could buy similar replacement hardware for about $300, it likely would not have matched up to the holes/fade patterns on my cabinets. Refinishing created the look we wanted at a very low cost


-Cost
1 can grey primer - $3.50
1 can satin nickel spray paint $7
2 cans satin lacquer $12

Total- $22.50

Time - approx 6-8 hours

Next up... the kitchen counter

comments/questions/anecdotes etc are always appreciated...

V/r
Lawrence
"Never remain neutral for the victor will consider you part of his spoils and the vanquished will have no room for you in his cave"
-unknown author

Click herehere to visit my woodworking portfolio