Turn on suggestions
Auto-suggest helps you quickly narrow down your search results by suggesting possible matches as you type.
Showing results for
- Good Sam Community
- Groups
- Travel Trailer Group
- Forum
- Re: '71 Starcraft Wanderstar- "The Hilton"
Options
- Subscribe to RSS Feed
- Mark Topic as New
- Mark Topic as Read
- Float this Topic for Current User
- Bookmark
- Subscribe
- Mute
- Printer Friendly Page
'71 Starcraft Wanderstar- "The Hilton"
Options
- Mark as New
- Bookmark
- Subscribe
- Mute
- Subscribe to RSS Feed
- Permalink
- Report Inappropriate Content
Jan-09-2012 07:10 PM
Thought I should post this up because the "Search" feature doesn't return any results and there might be some useful info for older Starcraft owners or those that are mad enough to embark on a complete restoration.
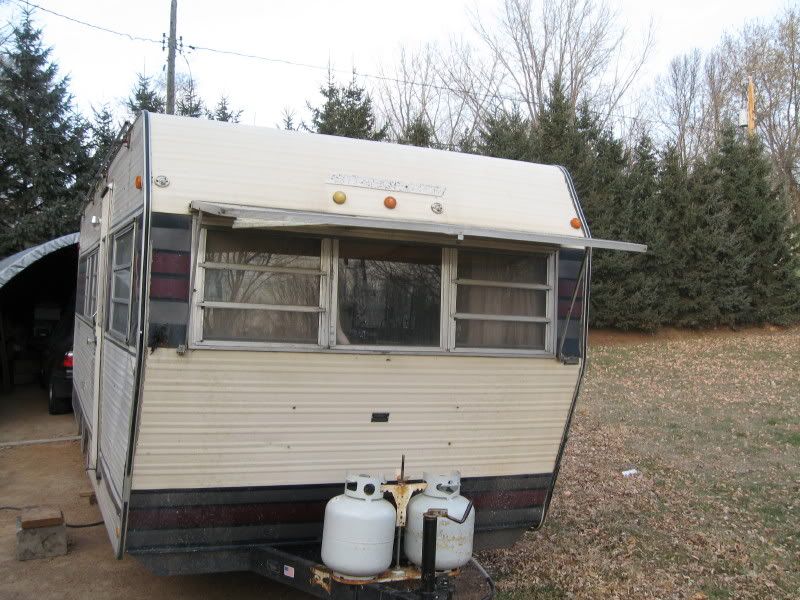
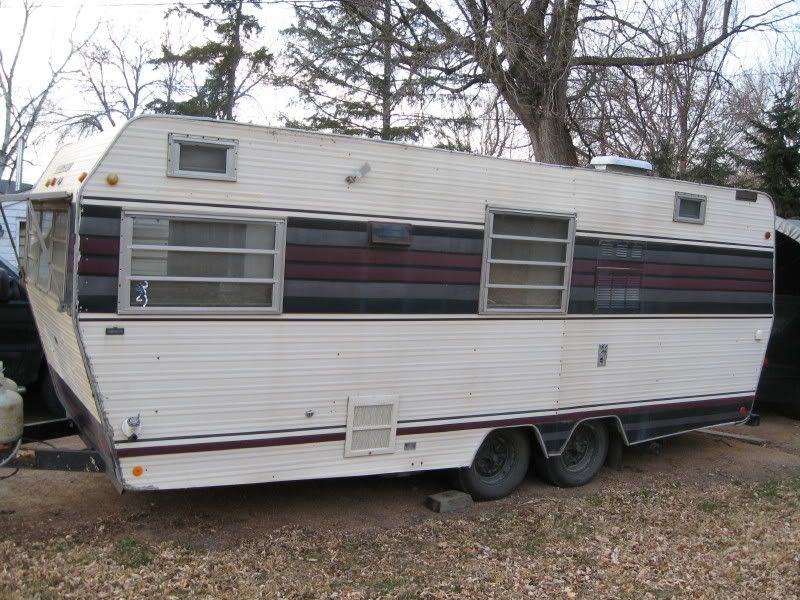
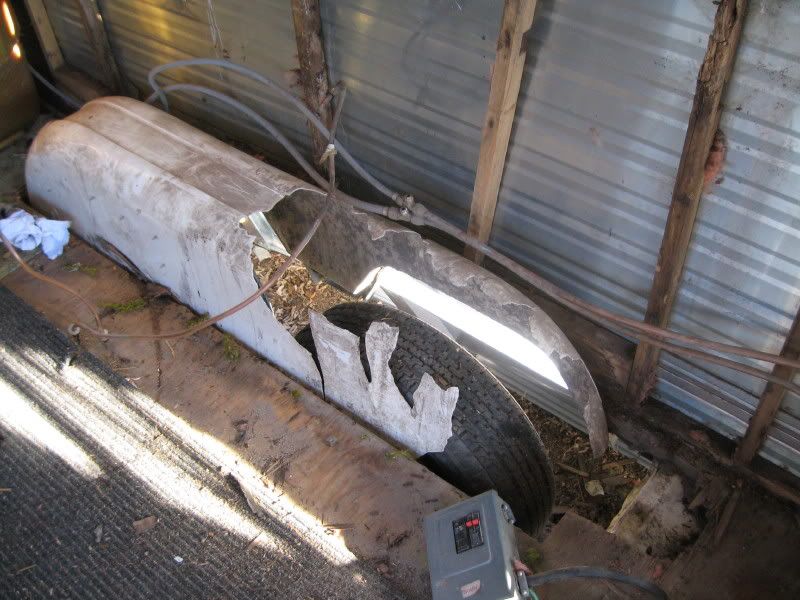
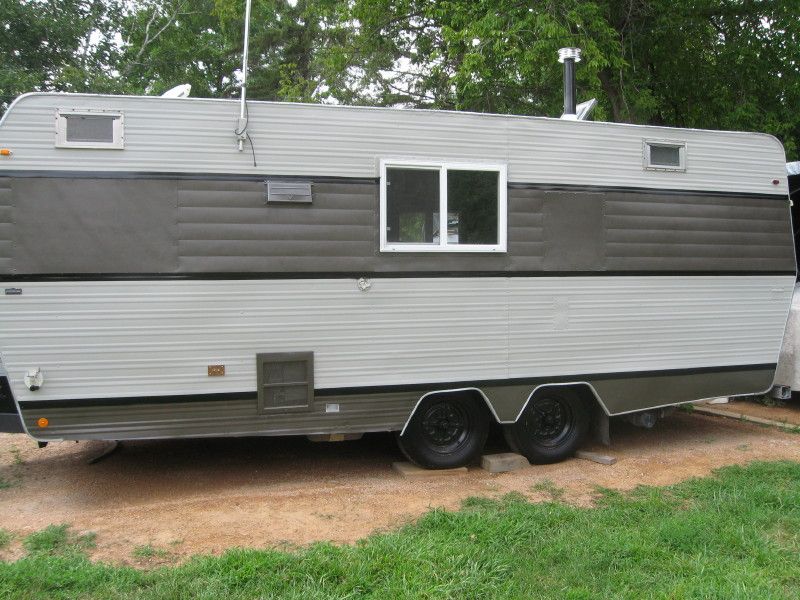
I purchased this 1971 Starcraft-Wanderstar from a local chap with a special purpose in mind: Gutting out the interior to insulate and make comfrotable for working stiffs like myself and, in particular, for those doing work-camping in the upper Midwest. My criteria was: a name brand with solid fame construction, a body that could be worked with (no accident damage, and good running gear (wheels, tires, bearings, and hitch, etc.) I also focused my purchase towards a TT from 19'->26'. I have a Ford F-250 4x4, CC with trailer and tow package. Pictures of "The Hilton" (named and painted by a previous owner) as bought:

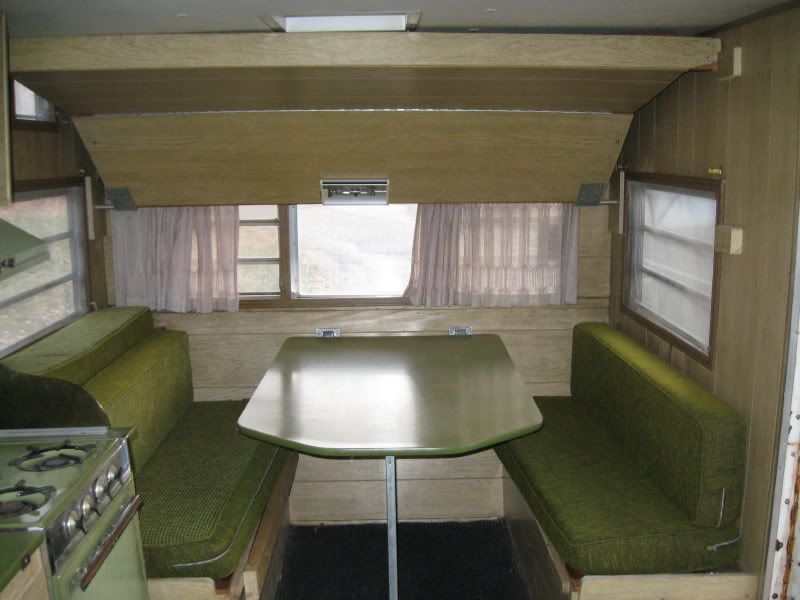
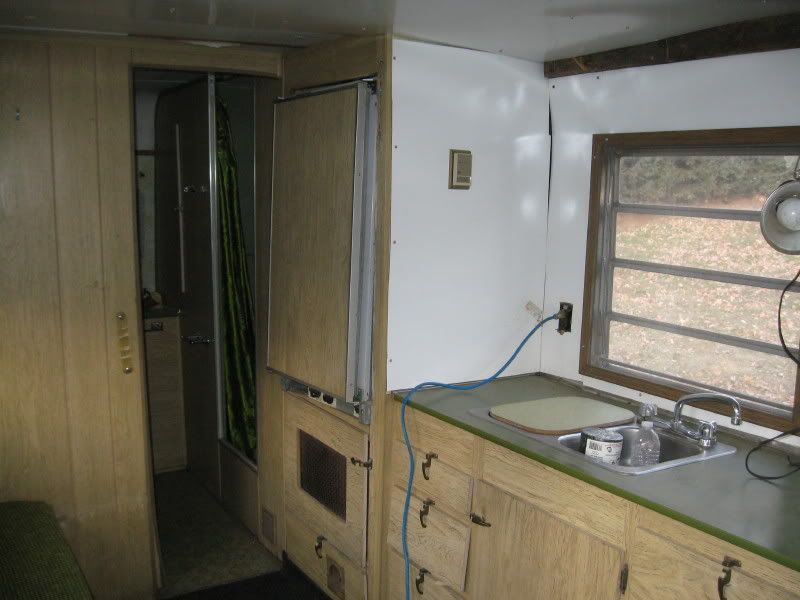
I am currently still working on the Hilton and have about three weeks into it, so far. I am keeping a pictorial work log and will share most of it if others are interested. I have totally gutted the inside and am discarding most of the mechanicals, along with replacing and eliminating windows, repairing water-damaged framing (all of the wall top plates and half of the studs), relocating most of the plumbing, replacing all of the wiring, and installing a completely different decorative style.
To give an idea of what I found after gutting out the inside, here is a picture of the driver's side and the wheel well:
Here is that same area after reconstruction, the new wheel well frame is skinned with 16 ga. steel sheet, inside, and sprayed with truck bed liner. The frame is insulated and there is a thermal break between any out side joining surfaces and the inside sheeting.

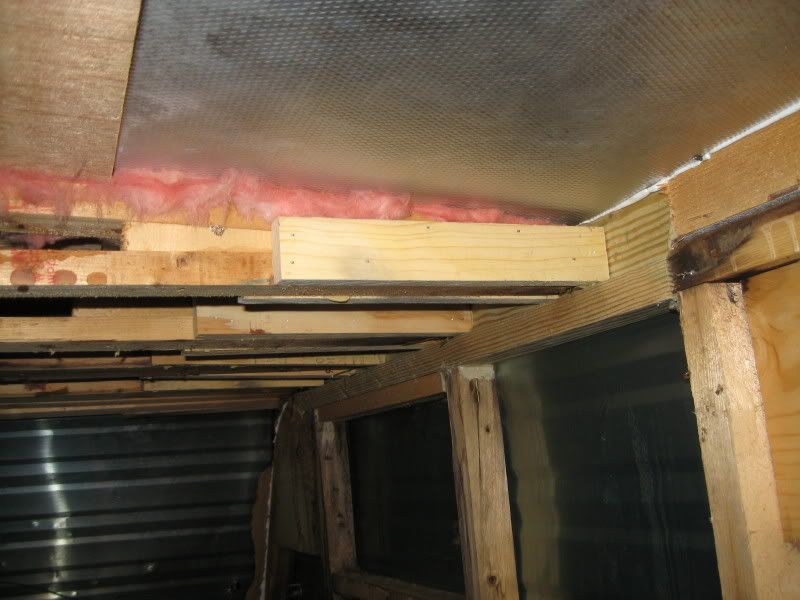
Two of the most cantankerous aspects have been the replacement of the top wall plates and aluminum trim rail and removal of the floor to insulate. The major obstacle to the first is the amount of various goop that was used by previous owners to stop water intrusion. That, and the thousands of clutch drive screws and staples that were removed. The basic carpentry was simple, I replaced the rotten wood with pressure treated fir and, after a day with a grinder fitted with a steel wire wheel to clean the trim rail, the surfaces were all sealed, stapled, and screwed back together.
This picture shows the new top plates and the rafter reinforcement I thought was necessary:
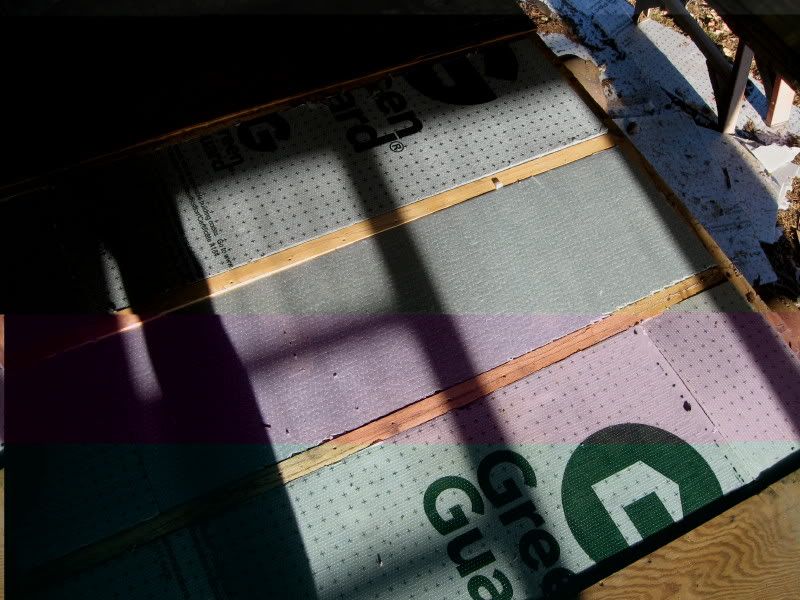
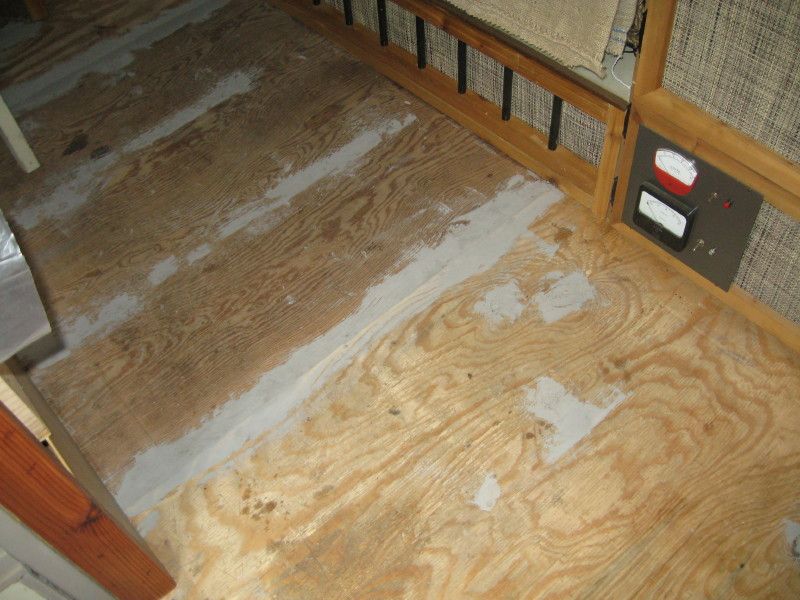
While diving into the wheel well repair I noticed the floor had deteriorated under the water heater. Closer examination showed that the 1 1/2" space underneath the floor was uninsulated, excepting the 1/2" Buildrite on top of the aluminum belly skin. I pulled all of the plywood and installed 1 1/2" of extruded polystyrene in that space:
I've replaced two of the three windows I planned on and have removed two, all together. Those vacated jalousie windows are framed and will become insulated wall.
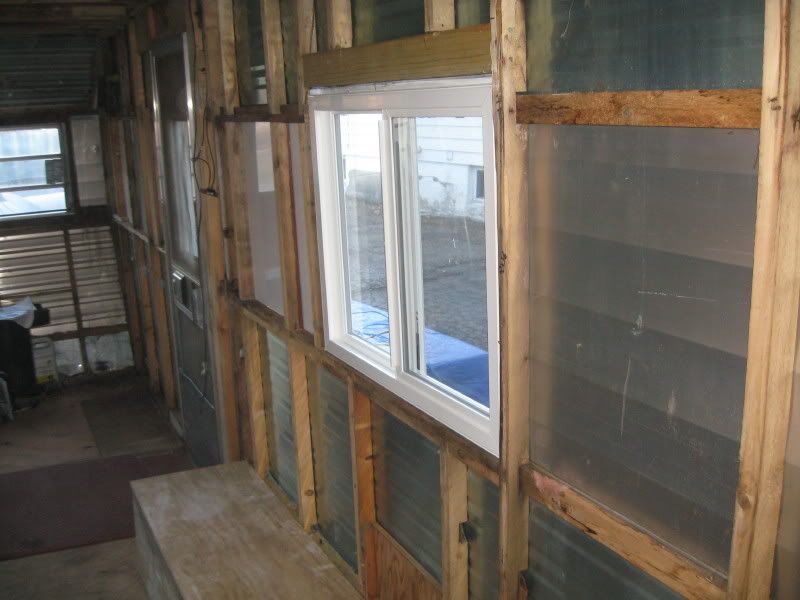
Tomorrow, I'll be replacing the 72" front window and will then move on to the wiring. The existing Precision Dynamics converter tested to be OK and has a solid state battery charger so I will use that for the DC. I am upgrading the older 30 amp service to 50 amp. If there's interest, I can post some more pictures up of the restoration, as I progress, and am always open to any ideas from others.
FWIW, I am going with a Western motif for the interior and have already renamed my baby, "The Cowboy/Hilton".
Edit: Pictures in this thread are unviewable because of Photobucket's recent change in Terms of Service. I plan to migrate to a different hosting site and to repair the images. Please, be patient, as there are many images in this thread.
Edit: Anyone wanting to view images can download this browser extension:Browser extension. It makes all the images in this thread viewable.
I purchased this 1971 Starcraft-Wanderstar from a local chap with a special purpose in mind: Gutting out the interior to insulate and make comfrotable for working stiffs like myself and, in particular, for those doing work-camping in the upper Midwest. My criteria was: a name brand with solid fame construction, a body that could be worked with (no accident damage, and good running gear (wheels, tires, bearings, and hitch, etc.) I also focused my purchase towards a TT from 19'->26'. I have a Ford F-250 4x4, CC with trailer and tow package. Pictures of "The Hilton" (named and painted by a previous owner) as bought:
I am currently still working on the Hilton and have about three weeks into it, so far. I am keeping a pictorial work log and will share most of it if others are interested. I have totally gutted the inside and am discarding most of the mechanicals, along with replacing and eliminating windows, repairing water-damaged framing (all of the wall top plates and half of the studs), relocating most of the plumbing, replacing all of the wiring, and installing a completely different decorative style.
To give an idea of what I found after gutting out the inside, here is a picture of the driver's side and the wheel well:
Here is that same area after reconstruction, the new wheel well frame is skinned with 16 ga. steel sheet, inside, and sprayed with truck bed liner. The frame is insulated and there is a thermal break between any out side joining surfaces and the inside sheeting.
Two of the most cantankerous aspects have been the replacement of the top wall plates and aluminum trim rail and removal of the floor to insulate. The major obstacle to the first is the amount of various goop that was used by previous owners to stop water intrusion. That, and the thousands of clutch drive screws and staples that were removed. The basic carpentry was simple, I replaced the rotten wood with pressure treated fir and, after a day with a grinder fitted with a steel wire wheel to clean the trim rail, the surfaces were all sealed, stapled, and screwed back together.
This picture shows the new top plates and the rafter reinforcement I thought was necessary:
While diving into the wheel well repair I noticed the floor had deteriorated under the water heater. Closer examination showed that the 1 1/2" space underneath the floor was uninsulated, excepting the 1/2" Buildrite on top of the aluminum belly skin. I pulled all of the plywood and installed 1 1/2" of extruded polystyrene in that space:
I've replaced two of the three windows I planned on and have removed two, all together. Those vacated jalousie windows are framed and will become insulated wall.
Tomorrow, I'll be replacing the 72" front window and will then move on to the wiring. The existing Precision Dynamics converter tested to be OK and has a solid state battery charger so I will use that for the DC. I am upgrading the older 30 amp service to 50 amp. If there's interest, I can post some more pictures up of the restoration, as I progress, and am always open to any ideas from others.
FWIW, I am going with a Western motif for the interior and have already renamed my baby, "The Cowboy/Hilton".
Edit: Pictures in this thread are unviewable because of Photobucket's recent change in Terms of Service. I plan to migrate to a different hosting site and to repair the images. Please, be patient, as there are many images in this thread.
Edit: Anyone wanting to view images can download this browser extension:Browser extension. It makes all the images in this thread viewable.
'03 F-250 4x4 CC
'71 Starcraft Wanderstar -- The Cowboy/Hilton
'71 Starcraft Wanderstar -- The Cowboy/Hilton
391 REPLIES 391
Options
- Mark as New
- Bookmark
- Subscribe
- Mute
- Subscribe to RSS Feed
- Permalink
- Report Inappropriate Content
Sep-08-2012 05:04 PM
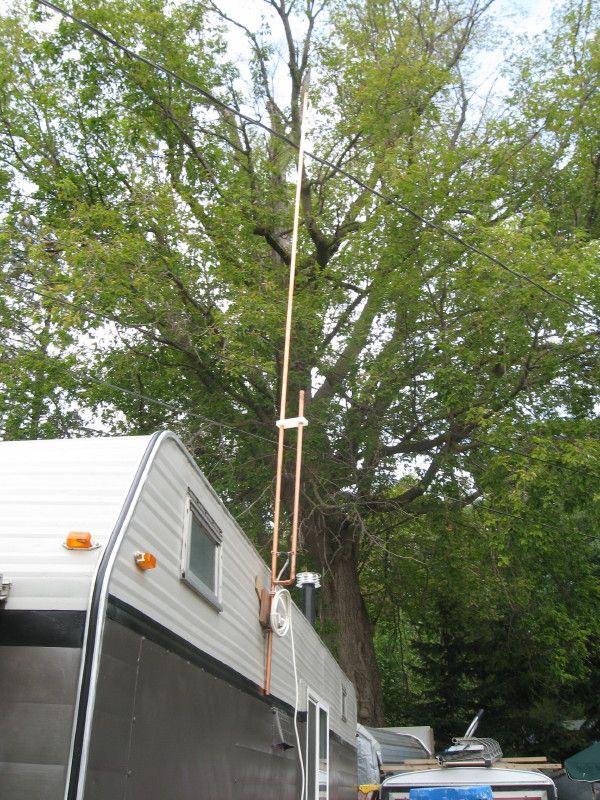
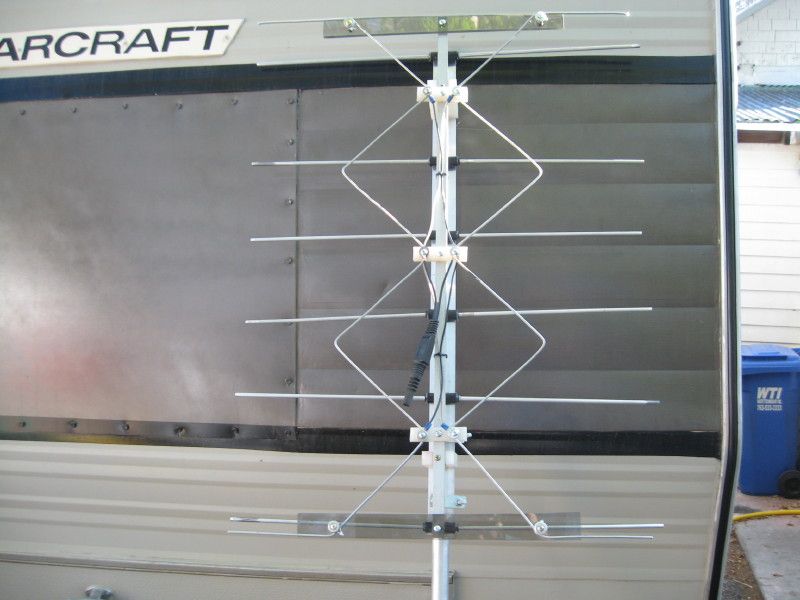
Getting a few more things squared away. Antennas, I built two, one an FM J-pole to listen to my favorite FM jazz stations and the other, a UHF Gray-Hoverman array for OTA digital TV.
Today, I'm working on an improvement for the propane heater. Trying to keep the heating as efficient as possible, I was doing some reading on exhaust vents, air supply for combustion, and such so thought I might be able to improve on what I had. Most of the sources I had on hand all agreed that the amount of air that exits the inside of a stucture through the exhaust stack while a heater of this type is used, is drawn from the surrounding area and exits along with the flue gasses. The amount of this incidental air is 3 -> 4 times the amount of heated air from the combustion chamber. That is a lot of air flying up the exhaust vent and it has to create a negative pressure inside the cabin, meaning air entering through doors and windows, especially if the structure is sealed tightly. Enter the WE-EGSAD1000 (Westend Exhaust Gas Supplimentary Air Displacement Model 1000):
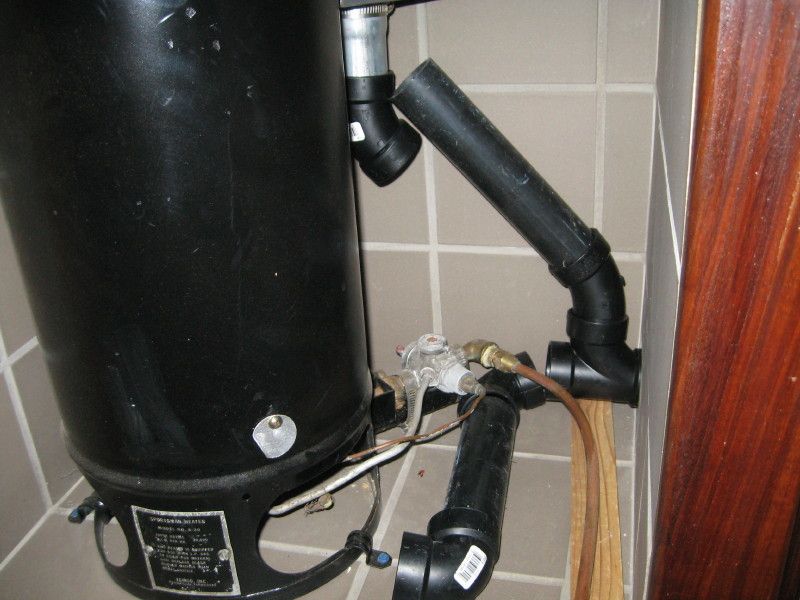
I have the input ABS pipe "T'ed" as it enters the heater area, one pipe for the exhaust and the other for the combustion chamber. I made a hood for that back of the heater with a steel pipe that fits into the 1 1/2" ABS fitting. As pictured, I haven't glued it all together. I found that I need to enlarge the hole that the input comes through so that my pipes fit correctly.
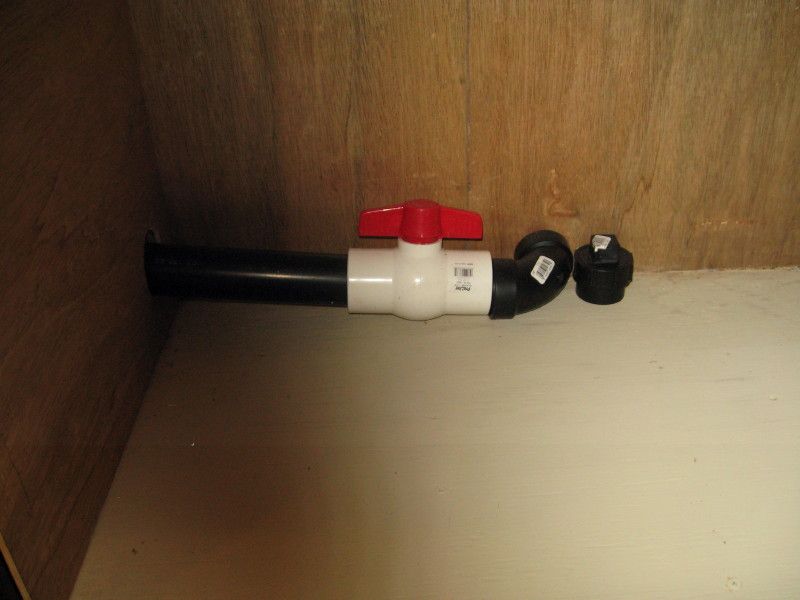
Under the kitchen cabinet will be this ball valve that will control how much outside air can be delivered to the heater. If the heater isn't in use, I'll be able to shut it off.
I hope my thermal engineering on all of this is OK. I've piped outside combustion supply air into many appliances, including the heater in the Hilton but am in new territory with the exhaust. I guess if it doesn't work on the exhaust part, that branch can easily be eliminated.
Today, I'm working on an improvement for the propane heater. Trying to keep the heating as efficient as possible, I was doing some reading on exhaust vents, air supply for combustion, and such so thought I might be able to improve on what I had. Most of the sources I had on hand all agreed that the amount of air that exits the inside of a stucture through the exhaust stack while a heater of this type is used, is drawn from the surrounding area and exits along with the flue gasses. The amount of this incidental air is 3 -> 4 times the amount of heated air from the combustion chamber. That is a lot of air flying up the exhaust vent and it has to create a negative pressure inside the cabin, meaning air entering through doors and windows, especially if the structure is sealed tightly. Enter the WE-EGSAD1000 (Westend Exhaust Gas Supplimentary Air Displacement Model 1000):
I have the input ABS pipe "T'ed" as it enters the heater area, one pipe for the exhaust and the other for the combustion chamber. I made a hood for that back of the heater with a steel pipe that fits into the 1 1/2" ABS fitting. As pictured, I haven't glued it all together. I found that I need to enlarge the hole that the input comes through so that my pipes fit correctly.
Under the kitchen cabinet will be this ball valve that will control how much outside air can be delivered to the heater. If the heater isn't in use, I'll be able to shut it off.
I hope my thermal engineering on all of this is OK. I've piped outside combustion supply air into many appliances, including the heater in the Hilton but am in new territory with the exhaust. I guess if it doesn't work on the exhaust part, that branch can easily be eliminated.
'03 F-250 4x4 CC
'71 Starcraft Wanderstar -- The Cowboy/Hilton
'71 Starcraft Wanderstar -- The Cowboy/Hilton
Options
- Mark as New
- Bookmark
- Subscribe
- Mute
- Subscribe to RSS Feed
- Permalink
- Report Inappropriate Content
Aug-27-2012 08:57 PM
MrSurly wrote:I think I posted up my reasons for keeping the air pressure fresh water system in one of your threads but for convenience......
Wow! Just Wow! I only recently found his thread and it has taken days to read it all!
I'm working on a repair of my old TT but not a full-on gut and restore as you've done here.
I think it would only be fair to call this a remanufacture. Except, of course, that you have manufactured this trailer far better than the manufacturer ever could have. I'd bet that the current manufacturers don't do that pressure test and would be amazed to see the leaks they would see. I am very very impressed with your skills. I have experience, I have the same tools, I could in no way duplicate your quality with these hands.
Hats off to you, WestEnd.
Mine also has the metal pressure tank. The compressor is bad and I decided to get a demand pump, but I'm not sure that's best. It is the way it's done now...but which is "better"?
I decided to keep the little diaphragm air pump rather than go to a supply pump for basically two reasons: 1)If the compressor fails when I'm on the road, I will be carrying a backup air compressor that can pressurize the tank to deliver water. If the backup fails and we are camped in Mongolia, there is a Schrader valve on the fill spout that could be pumped with a bicycle pump. I won't be out of water because of a failed pump. 2) The air system pump is a much quieter pump (I've even done some mounting isolation) and it runs on quite a bit less of a duty cycle i.e. almost everytime water is demanded from a supply pump system, the pump will cycle. With an air pressure system the pump only cycles when pressure drops to a very low level.
I guess the biggest trade-off is the additional weight of a metal tank and maybe keeping it rust free. I'm guessing rust won't be to much of an issue. I sanitized the tank a couple of times and the water is clear. I did have to tinker a bit with the little Jabsco pump and the pressure switch, initially, but pumps like this are easy to fix.
I'll be following your rebuild, Mr Surly, and have already enjoyed what you've shared with the tanks and bathroom. That is some good work, don't disrespect your hands, you've got some gooduns'.:W
Hiltonwise (heh), I've been without AC power inside since I started the rebuild. I was stretching cords out for tools, lights, and heaters for monthes. Part of the procrastination was my own cheapness (a lot of sticker shock when pricing just 6AWG wire) and without a 240v receptacle other than my welder outlet. That outlet is the older 3 terminal that won't fit Nema 14-50, standard for RV AC plugs. All that is now in the wake of the Hilton (and pretty timely too).
The cord I purchased while shopping at CW, a couple of weeks ago. They had a new Marinco 50 amp cord on clearance and it was cheaper than I can make one by about $100. I installed a range receptacle in the garage and plugged in.
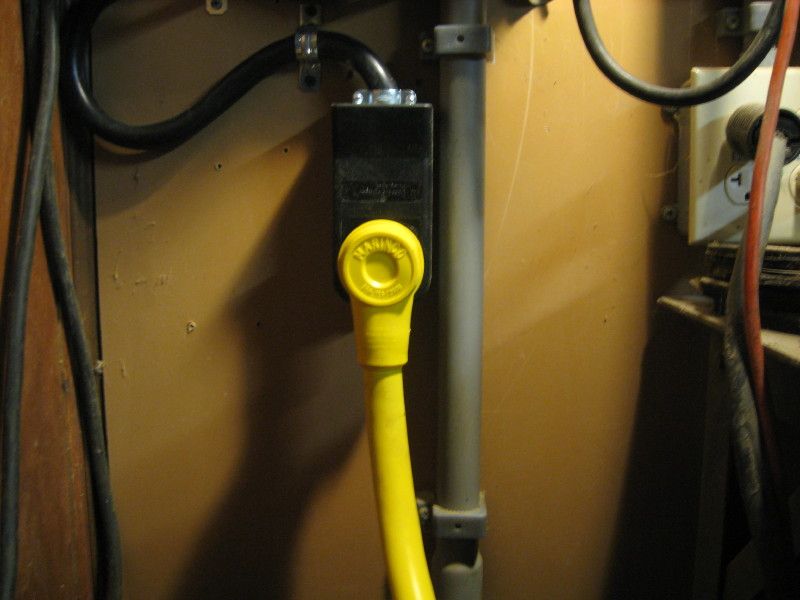
Threw the breakers and had no power, check cord, gave it a push and all is well. Gauges are reading 13.6 DC and 121 AC:
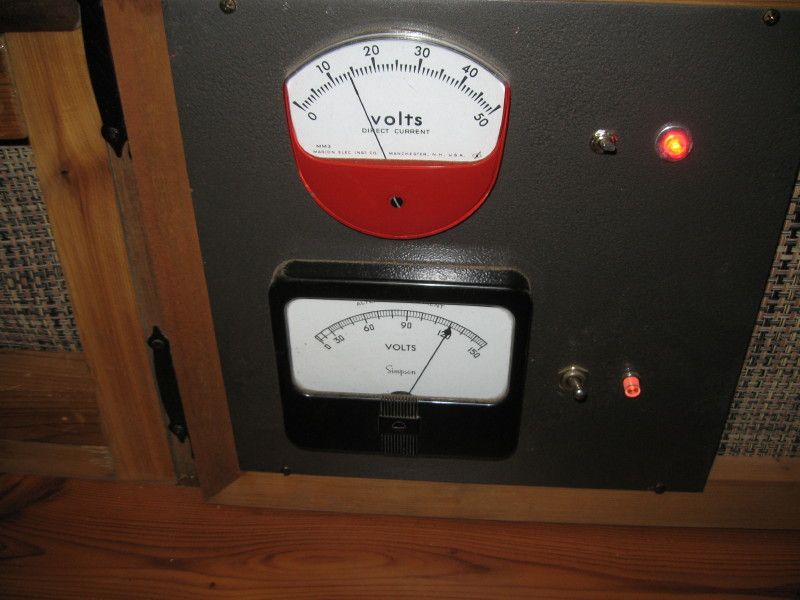
Didn't even know the GFCI's had an indicator light. That red light in a black receptacle is evil! :B:
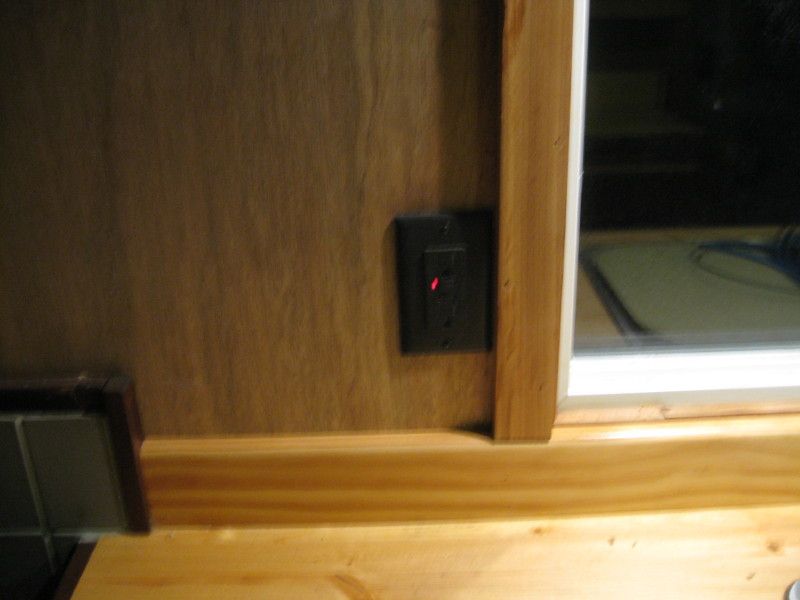
Good thing that I was able to check this as the Polish Princess and I will be on the road, this coming weekend, and I'll drive easier knowing the power is all good and working. Time to get the TV inside, I guess.
'03 F-250 4x4 CC
'71 Starcraft Wanderstar -- The Cowboy/Hilton
'71 Starcraft Wanderstar -- The Cowboy/Hilton
Options
- Mark as New
- Bookmark
- Subscribe
- Mute
- Subscribe to RSS Feed
- Permalink
- Report Inappropriate Content
Aug-22-2012 09:50 PM
Wow! Just Wow! I only recently found his thread and it has taken days to read it all!
I'm working on a repair of my old TT but not a full-on gut and restore as you've done here.
I think it would only be fair to call this a remanufacture. Except, of course, that you have manufactured this trailer far better than the manufacturer ever could have. I'd bet that the current manufacturers don't do that pressure test and would be amazed to see the leaks they would see. I am very very impressed with your skills. I have experience, I have the same tools, I could in no way duplicate your quality with these hands.
Hats off to you, WestEnd.
Mine also has the metal pressure tank. The compressor is bad and I decided to get a demand pump, but I'm not sure that's best. It is the way it's done now...but which is "better"?
Options
- Mark as New
- Bookmark
- Subscribe
- Mute
- Subscribe to RSS Feed
- Permalink
- Report Inappropriate Content
Aug-20-2012 02:42 PM
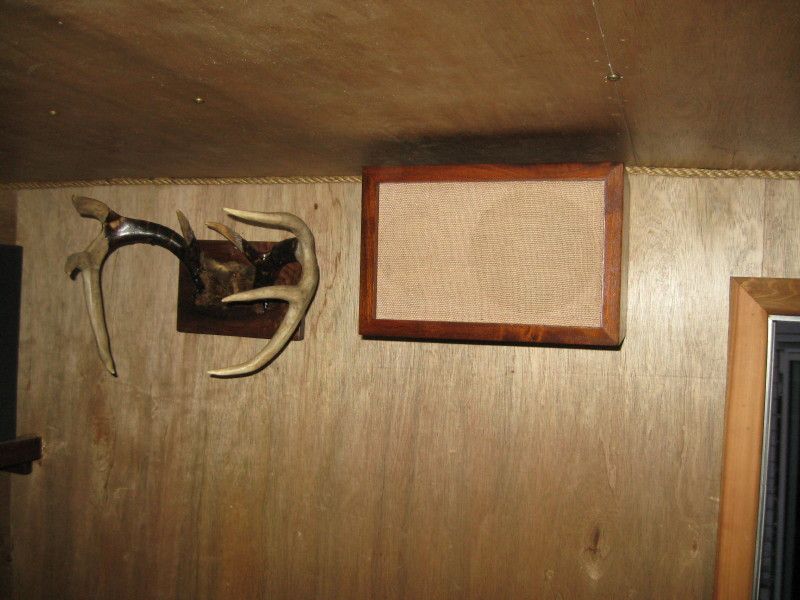
Just for you UP (and for any other audio geeks+), I installed another pair of speakers in the Hilton. I built a pair, using Fostex full-ange drivers but they turned out too good, lol. I decided to keep those in the shop and put the shop speakers in the TT. They seem to fit the decor, anyway. They are some vintage ADC-404 speakers, 1" Philips tweeter and a 5" woofer, the little speakers that play way past their size.
Driver'sside:
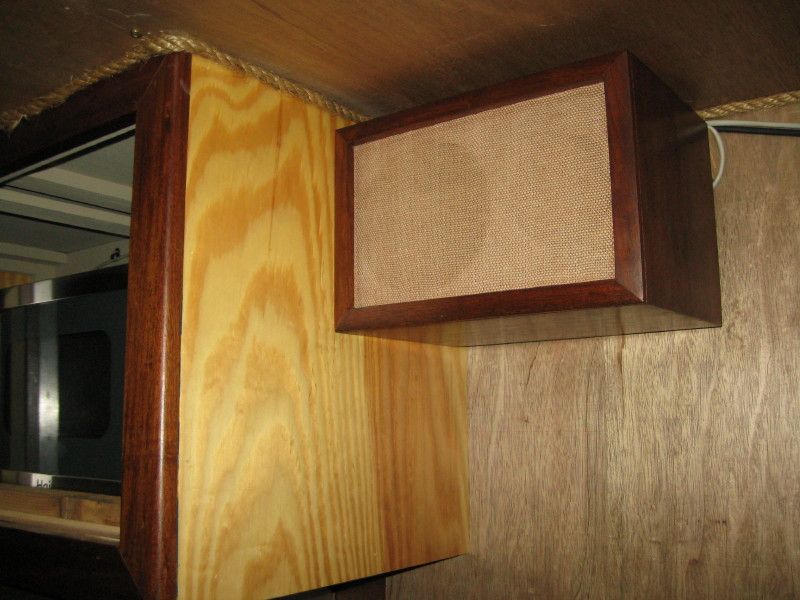
Passenger's side:
I feel like I should post some numbers up here, the financial side and, since I just back from the Cat scale, some weights.
First, the weights: Truck and Hilton=12,780, truck on first axle pad= 8,420, Hilton on second axle pad= 4,360. Hilton detached from truck= 4,920.Hitch weight= 560. These weights were with the Hilton unloaded, for the most part. I did have 1 1/2 tanks of propane, a gallon or two in the black tank, and some residual fresh water on board, not enough to make a huge difference, I'm thinking. I was a little surprised that it came out as heavy as it did but my truck handles the weight well so it is what it is.
Financials: I had totalled the amount spent, a couple of weeks ago and was just about spot on $4k. That includes the purchase price, registration, and new license tabs for this year. Since then, I've spent another $338 at Camping World for a 50 amp cord, a new sewer hose, a new water hose, a Prodigy2 brake controller, and some other sundry bits. Not repair items but I guess it could be added to the total. I also spent $60 at Lowes for a 5" PVC fence post, 4" PVC gutter, the end caps, and two chain hooks. The plastic bits are going to be made into one of thos nice sewer hose carriers and the chain hooks are for the safety chains. Grand total is close to $4,400. For those comparing budgets, the total doesn't include the materials I had on hand or what appeared free of charge during the restoration. This would be most of the lumber involved, some wire and devices. The batteries came from a friend and what I had on hand, as did the box on the tongue.
Driver'sside:
Passenger's side:
I feel like I should post some numbers up here, the financial side and, since I just back from the Cat scale, some weights.
First, the weights: Truck and Hilton=12,780, truck on first axle pad= 8,420, Hilton on second axle pad= 4,360. Hilton detached from truck= 4,920.Hitch weight= 560. These weights were with the Hilton unloaded, for the most part. I did have 1 1/2 tanks of propane, a gallon or two in the black tank, and some residual fresh water on board, not enough to make a huge difference, I'm thinking. I was a little surprised that it came out as heavy as it did but my truck handles the weight well so it is what it is.
Financials: I had totalled the amount spent, a couple of weeks ago and was just about spot on $4k. That includes the purchase price, registration, and new license tabs for this year. Since then, I've spent another $338 at Camping World for a 50 amp cord, a new sewer hose, a new water hose, a Prodigy2 brake controller, and some other sundry bits. Not repair items but I guess it could be added to the total. I also spent $60 at Lowes for a 5" PVC fence post, 4" PVC gutter, the end caps, and two chain hooks. The plastic bits are going to be made into one of thos nice sewer hose carriers and the chain hooks are for the safety chains. Grand total is close to $4,400. For those comparing budgets, the total doesn't include the materials I had on hand or what appeared free of charge during the restoration. This would be most of the lumber involved, some wire and devices. The batteries came from a friend and what I had on hand, as did the box on the tongue.
'03 F-250 4x4 CC
'71 Starcraft Wanderstar -- The Cowboy/Hilton
'71 Starcraft Wanderstar -- The Cowboy/Hilton
Options
- Mark as New
- Bookmark
- Subscribe
- Mute
- Subscribe to RSS Feed
- Permalink
- Report Inappropriate Content
Aug-16-2012 04:28 PM
Thanks, man! Yeah, it was a bit of work but definitely worth it. Your rebuild of the Sunliner gave me a lot of inspiration!
The pressure testing worked well. I would recommend any TT owner to get it done. I had leaks in places in the siding that may not have caused a water problem but it was good to find them and make sure all was sealed.
I took the Hilton on the road, fianlly, last weekend. I rolled down to my buddy's place about 75 mi. away. He had just finished fixing up his barn with a new roof and some painting so I wanted to see that and also keep to a short trip. The Hilton towed along beautifully. My F-250 4x4 had no problem with the load (still haven't got to a scale). I installed a new Prodigy 2 brake controller and that also worked out well, easy to dial in and I like the voltage readout when the brakes are applied.
Sorry, no pictures of the trip, I think I wore out my camera batteries. 😃
'03 F-250 4x4 CC
'71 Starcraft Wanderstar -- The Cowboy/Hilton
'71 Starcraft Wanderstar -- The Cowboy/Hilton
Options
- Mark as New
- Bookmark
- Subscribe
- Mute
- Subscribe to RSS Feed
- Permalink
- Report Inappropriate Content
Aug-09-2012 10:48 AM
West you sure have done a great job with the Hilton! From one builder to another, I know how much time and effort you've put in and it's no small task. You've got to be pleased with your work.
Pressure testing sure is an excellent thing to do. Some of those leaks may have gone unnoticed, until it was too late. I've said it before, with all the insulation we put in our rigs and the interior wraps water infiltration may never be seen and just collect in the walls and floor. I really need to do this to mine just to be sure. Once again Great work brother!
Pressure testing sure is an excellent thing to do. Some of those leaks may have gone unnoticed, until it was too late. I've said it before, with all the insulation we put in our rigs and the interior wraps water infiltration may never be seen and just collect in the walls and floor. I really need to do this to mine just to be sure. Once again Great work brother!
1981 Sunline 17 1/2SB - under construction
2003 Toyota Tundra SR5 TRD 4x4 4.7lt
2003 Toyota Tundra SR5 TRD 4x4 4.7lt
Options
- Mark as New
- Bookmark
- Subscribe
- Mute
- Subscribe to RSS Feed
- Permalink
- Report Inappropriate Content
Aug-06-2012 04:57 PM
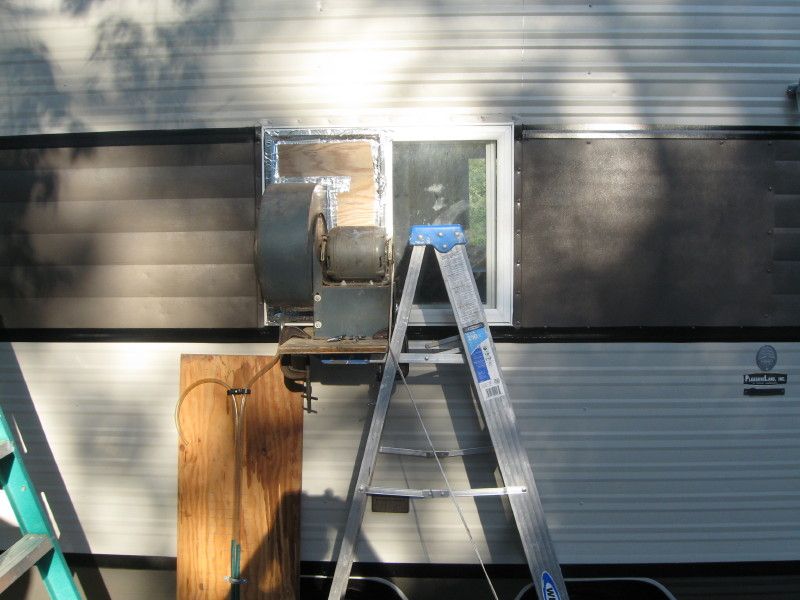
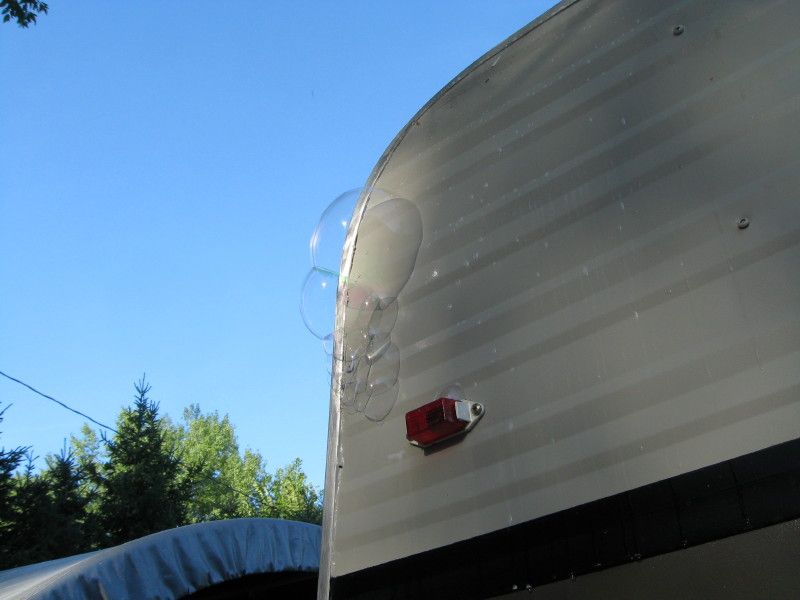
Finished one of the things I knew I had to do, a leak test. The commercial Sealtech system uses a blower inside the TT and they state a .6 inch pressure to uncover pinhole leaks.
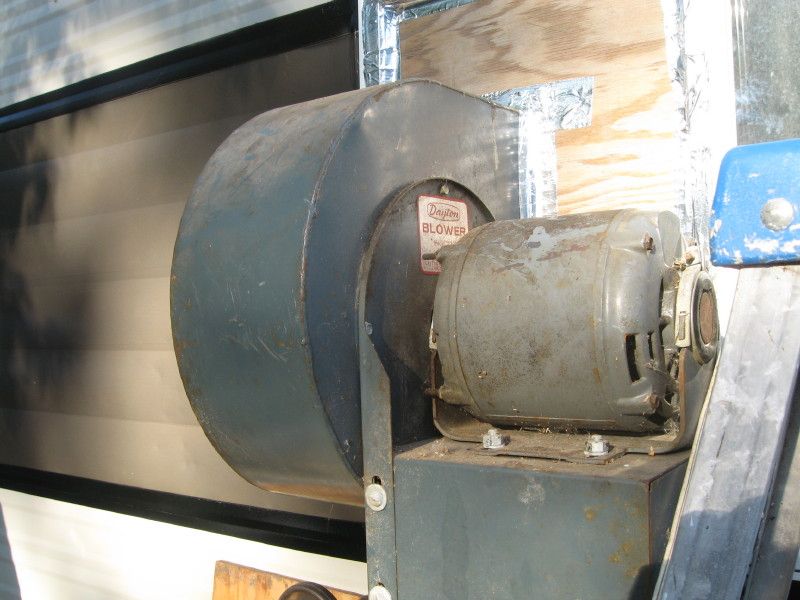
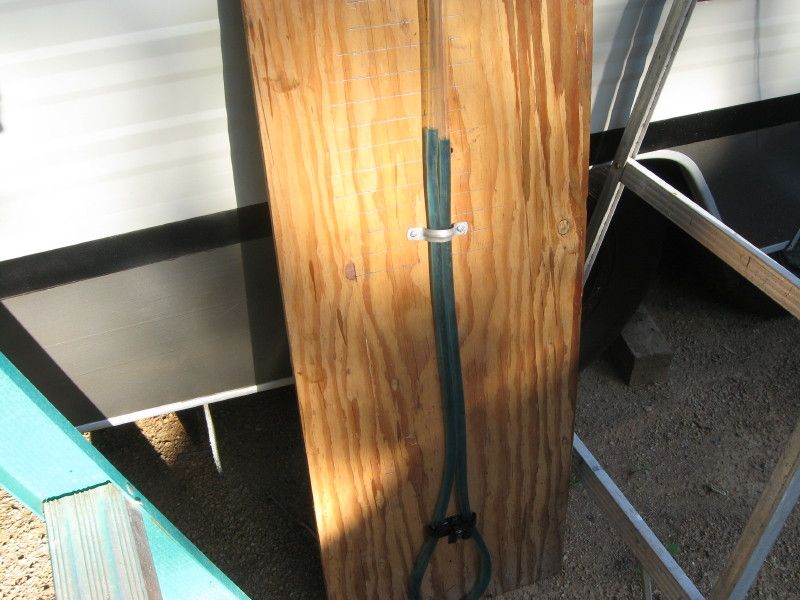
Here's what I did. Mounted a conventional forced air blower in a window and sealed the roof vents off, inside, with cardboard ad foam. I forgot to seal the furnace duct and thats probably a good thing since I had 1" of water column according to my DIY manometer.
The result: about 20-30 pinhole leaks, some I knew were there because of my caulking skills and some popped up. The good news is that all are in places whee I can recaulk and the Eternabond tape had the smallest of micro leaks along a tape juction. All of the rest of the roof is 100% sealed.
The testing rig:
Blower:
DIY Manometer:
A leak:
'03 F-250 4x4 CC
'71 Starcraft Wanderstar -- The Cowboy/Hilton
'71 Starcraft Wanderstar -- The Cowboy/Hilton
Options
- Mark as New
- Bookmark
- Subscribe
- Mute
- Subscribe to RSS Feed
- Permalink
- Report Inappropriate Content
Aug-05-2012 11:35 AM
JiminDenver wrote:Thanks Jim, it definitely is a labor of love and I'll never see any ROI, if I choose to sell it. If someone should inherit a TT from family or run acosss a vintage TT that needs major work, I hope this thread will give them some inspiration to know that it can be done and show one man's way of tackling things.
West
You have done one heck of a job with the Hilton. I have always thought of doing the same but after seeing what you have gone through, I now know there is just no way I would. Anyone even thinking of doing it should read this thread to know what they are getting into.
IME, the project has attained it's major goals: providing a home on wheels that is comfortable (beyond what I could buy), impoving upon the livability by increasing the R-value of walls, ceiling, and floor, improving the efficiency of the mechanical systems, and allows for all of that at a greatly decreased price from anything in it's size available (not factoring in labor).
I can't really convey how tight and secure this trailer feels while inside. The absence of outside noise, the structure's ability to moderate temperature, and just the overall feel are incredible, better than some very well built RV's. I can lay most of that off to the tight insulation and the double pane windows. Some of the credit has to go to Starcraft for being able to build a sturdy TT that has lasted 40 years. The steel bed framing,choice of axles, and the integrity of the wooden frames bespeak that. I have no doubt that if Starcraft had modern insulation and sealants when the Hilton was built, this project wouldn't have been necesary and I could be lounging in the essence of Avacado green, lol.
'03 F-250 4x4 CC
'71 Starcraft Wanderstar -- The Cowboy/Hilton
'71 Starcraft Wanderstar -- The Cowboy/Hilton
Options
- Mark as New
- Bookmark
- Subscribe
- Mute
- Subscribe to RSS Feed
- Permalink
- Report Inappropriate Content
Aug-04-2012 08:10 PM
West
You have done one heck of a job with the Hilton. I have always thought of doing the same but after seeing what you have gone through, I now know there is just no way I would. Anyone even thinking of doing it should read this thread to know what they are getting into.
You have done one heck of a job with the Hilton. I have always thought of doing the same but after seeing what you have gone through, I now know there is just no way I would. Anyone even thinking of doing it should read this thread to know what they are getting into.
2011 GulfStream Amerilite 25BH
2003 Ford Expedition with 435w tilting portable/ TS-MPPT-45
750w solar , TS-MPPT-60 on the trailer
675 Ah bank, Trip-lite 1250fc inverter
Sportsman 2200w inverter generator
2003 Ford Expedition with 435w tilting portable/ TS-MPPT-45
750w solar , TS-MPPT-60 on the trailer
675 Ah bank, Trip-lite 1250fc inverter
Sportsman 2200w inverter generator
Options
- Mark as New
- Bookmark
- Subscribe
- Mute
- Subscribe to RSS Feed
- Permalink
- Report Inappropriate Content
Aug-04-2012 05:01 PM
Thanks for the positives!
I've been getting some of the little things done before the Hilton's maiden voyage, next week.
Bumper was painted:
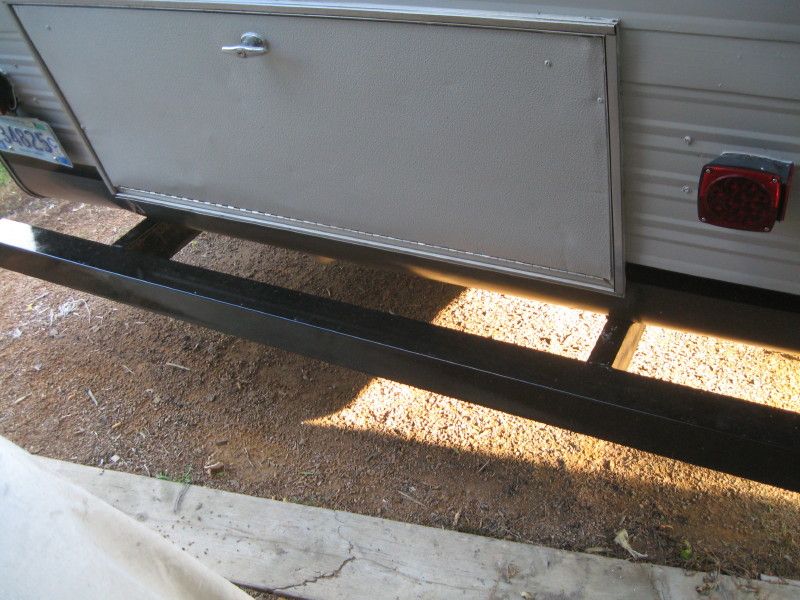
Breakaway switch installed and tested:
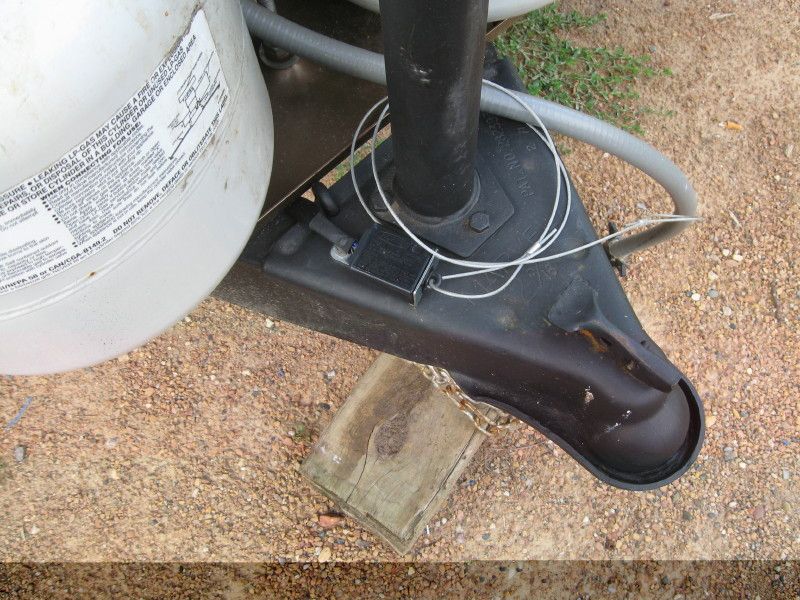
Table base mounted:
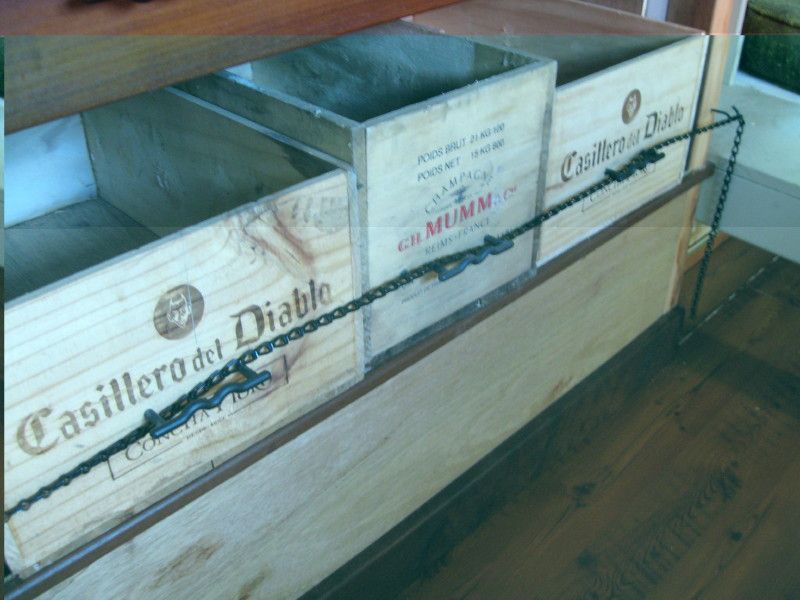
WBRD installed (Wine Box Restraining Device):
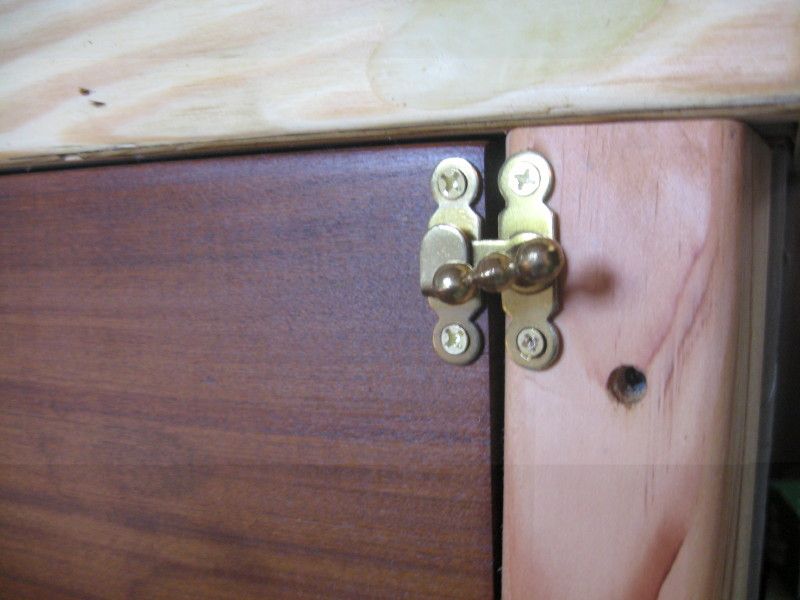
Drawer latch installed:
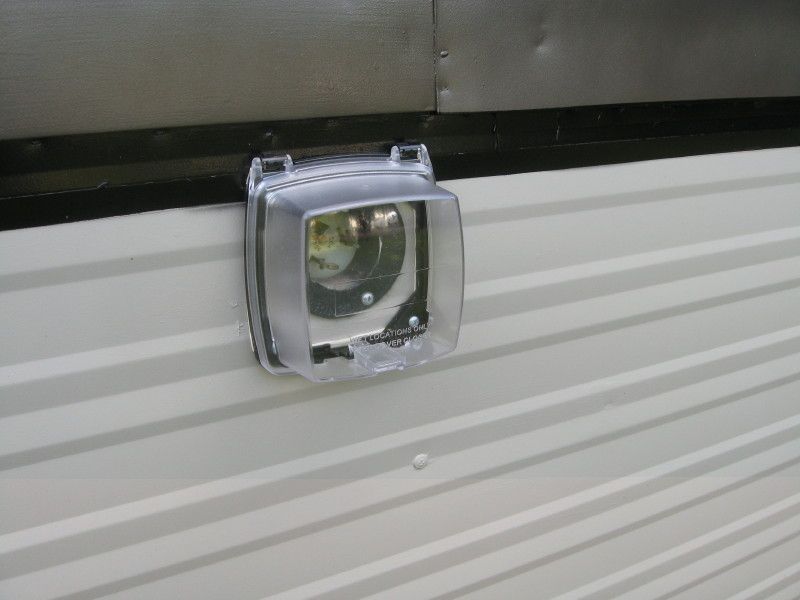
Power inlet cover installed:
I still have a couple of things to finish before the Hilton is ready for primetime ( A TV, a pair of speakers, and a 12v radio come to mind) but all is looking pretty good.
I've been getting some of the little things done before the Hilton's maiden voyage, next week.
Bumper was painted:
Breakaway switch installed and tested:
Table base mounted:
WBRD installed (Wine Box Restraining Device):
Drawer latch installed:
Power inlet cover installed:
I still have a couple of things to finish before the Hilton is ready for primetime ( A TV, a pair of speakers, and a 12v radio come to mind) but all is looking pretty good.
'03 F-250 4x4 CC
'71 Starcraft Wanderstar -- The Cowboy/Hilton
'71 Starcraft Wanderstar -- The Cowboy/Hilton
Options
- Mark as New
- Bookmark
- Subscribe
- Mute
- Subscribe to RSS Feed
- Permalink
- Report Inappropriate Content
Aug-03-2012 09:36 AM
Love the paint job! And the flooring is great. Looks good, easy care too
Options
- Mark as New
- Bookmark
- Subscribe
- Mute
- Subscribe to RSS Feed
- Permalink
- Report Inappropriate Content
Aug-02-2012 09:32 AM
This.is.awesome. I'm pretty sure you guys are all geniuses!
Great job, loved looking through all these pages of pictures.
Great job, loved looking through all these pages of pictures.
Me, DH, 2 rugrats
2016 GMS 3500 DRW (aka Benny) (sadly gone)
2012 GMC 3500 DRW (aka Bernie) (sadly gone...)
2013 Keystone Fuzion 342 (aka Bertha)(also sadly gone...)
2019 KZ Venom 4012TK (Large Marge the Buttercup Barge)
2020 GMC 3500 DRW (Homer)
2016 GMS 3500 DRW (aka Benny) (sadly gone)
2012 GMC 3500 DRW (aka Bernie) (sadly gone...)
2013 Keystone Fuzion 342 (aka Bertha)(also sadly gone...)
2019 KZ Venom 4012TK (Large Marge the Buttercup Barge)
2020 GMC 3500 DRW (Homer)
Options
- Mark as New
- Bookmark
- Subscribe
- Mute
- Subscribe to RSS Feed
- Permalink
- Report Inappropriate Content
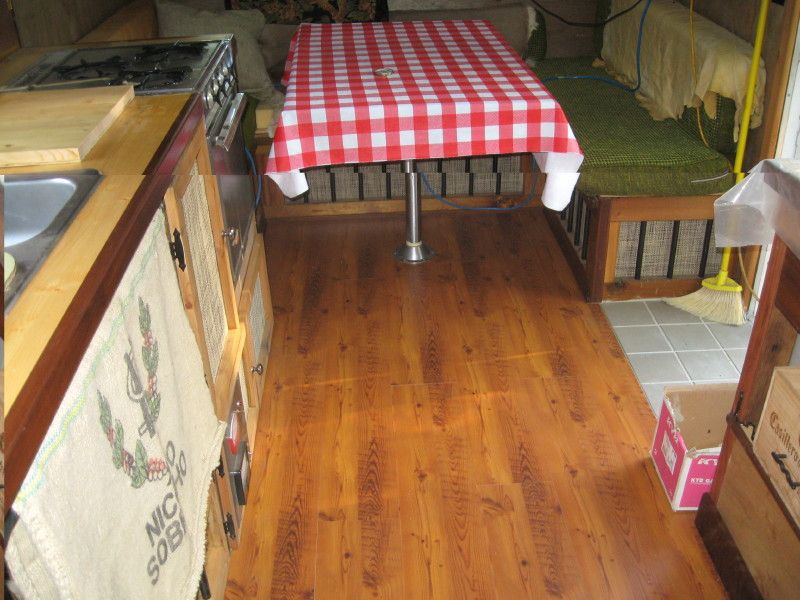
Jul-26-2012 02:13 PM
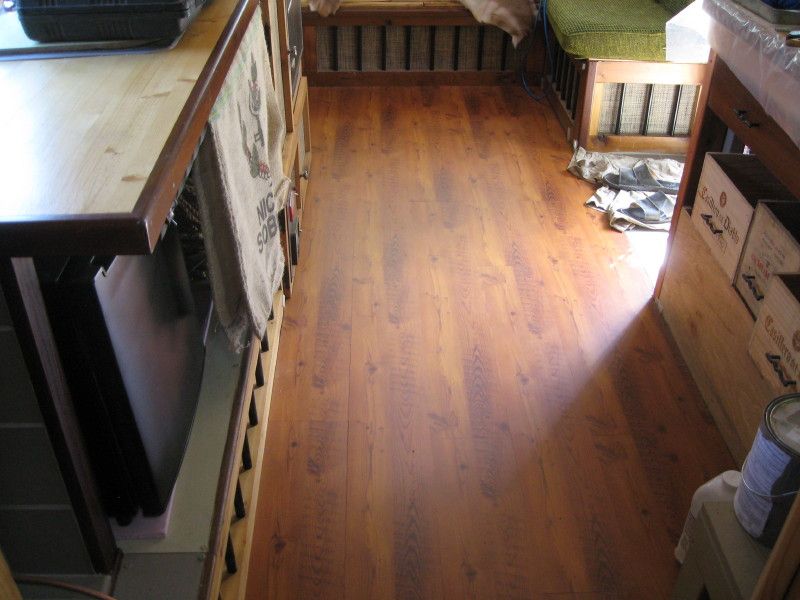
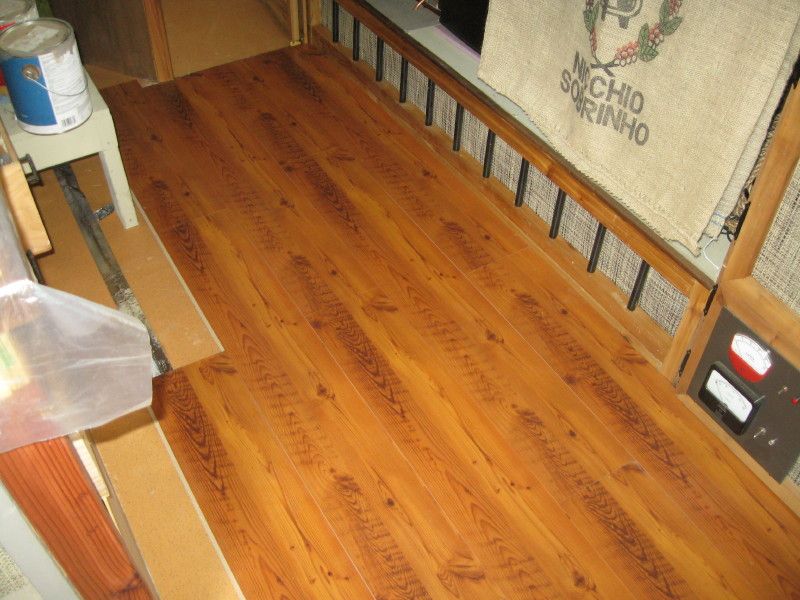
I finished the flooring, in spite of myself, lol. This wouldn't have been a job for a novice, too many cuts and too many angles. When I bought the flooring, only 60 ft^2 were available. I aksed fo any type of 8mm plank to fill my order of 65 ft.^2 but that seemed to be beyond the skill of the associates at LL so I took the 60 and left. I made it work, barely.
'03 F-250 4x4 CC
'71 Starcraft Wanderstar -- The Cowboy/Hilton
'71 Starcraft Wanderstar -- The Cowboy/Hilton
Options
- Mark as New
- Bookmark
- Subscribe
- Mute
- Subscribe to RSS Feed
- Permalink
- Report Inappropriate Content
Jul-25-2012 01:16 PM
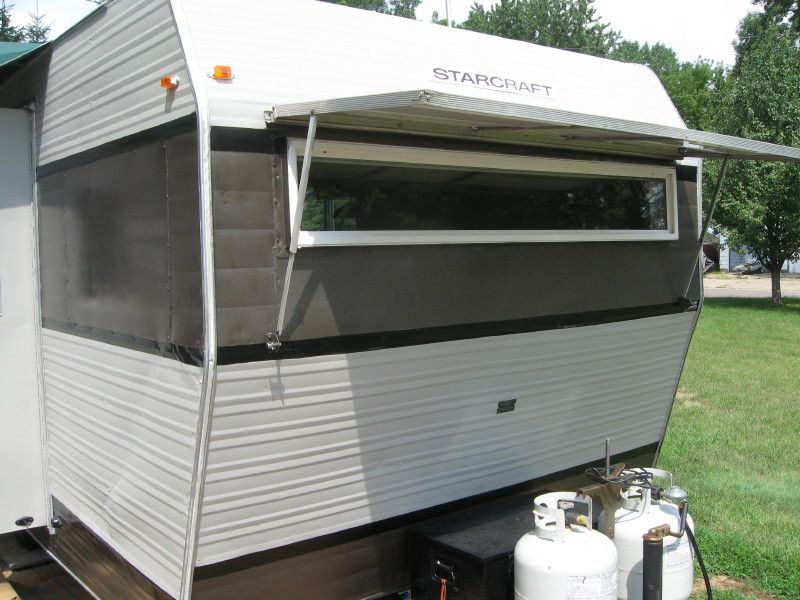
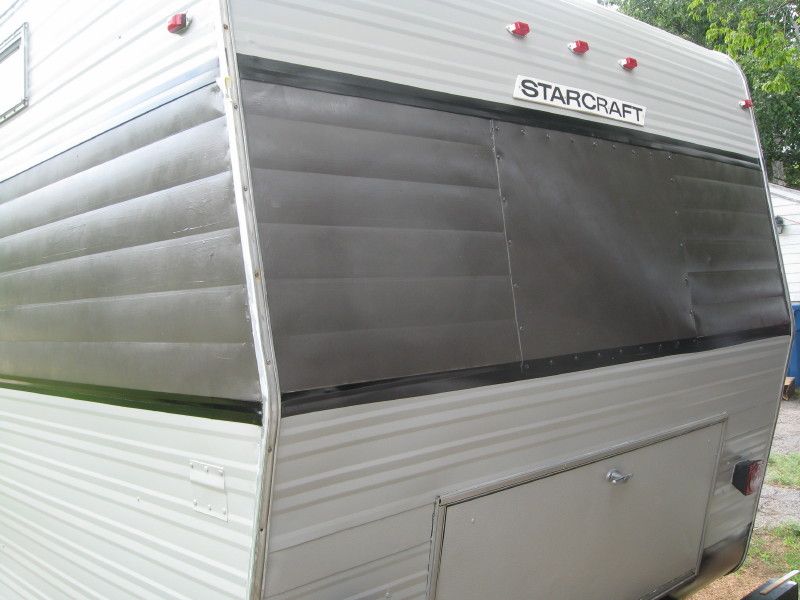
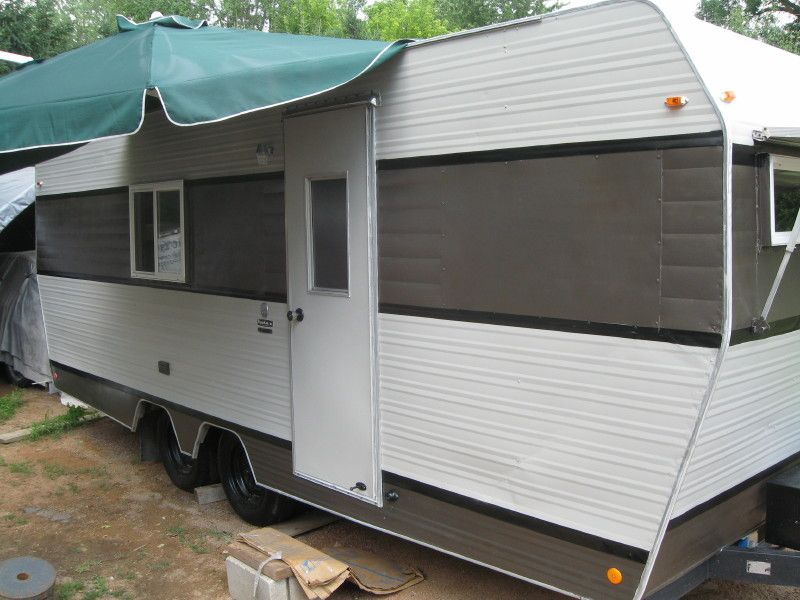
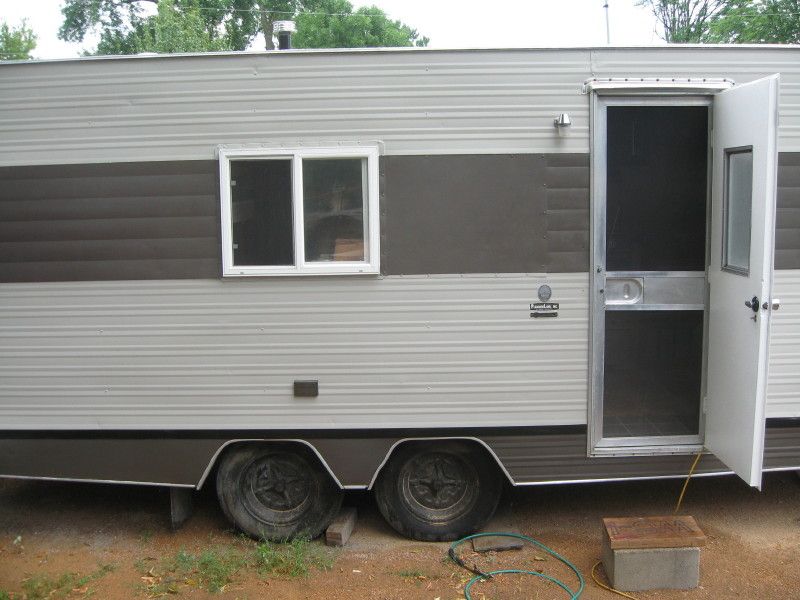
I finally finished the exterio painting and am still working on the last half pf the flooring. After I took these pictues, I forgot that I still have the plastic trim screw guards to install. I have a roll of black for that. The good news is that all the paint is on!
Front:
Back:
Passenger's side:
Driver's side:
Half completed flooring:
Front:
Back:
Passenger's side:
Driver's side:
Half completed flooring:
'03 F-250 4x4 CC
'71 Starcraft Wanderstar -- The Cowboy/Hilton
'71 Starcraft Wanderstar -- The Cowboy/Hilton
Options
- Mark as New
- Bookmark
- Subscribe
- Mute
- Subscribe to RSS Feed
- Permalink
- Report Inappropriate Content
Jul-21-2012 08:17 AM
Alohakeia wrote:
Could never forget the monkey..lol
Waiting to see the next step, brother
Btw, the name of your show could be "Trick My Trailer"
Catchy, yeah?
Real catchy!
Work has been getting in the way of finishing out the Hilton. I thought I would be posting up pics of the finished TT but still have a few things to get done.
I took the above advice and used a dark bronze color for the accent colors on the siding. The picture just doesn't do justice to the color, it fits like a glove. I will paint two additional satin black stripes on the center accent color, top and bottom. I've been letting the paint cure so I can tape over for the stripes. I am also getting the floor ready for the laminate flooring, filled any cracks, knots, and nail holes for a flat installation.
'03 F-250 4x4 CC
'71 Starcraft Wanderstar -- The Cowboy/Hilton
'71 Starcraft Wanderstar -- The Cowboy/Hilton


