- Good Sam Community
- Groups
- Travel Trailer Group
- Forum
- Re: Cool Mods - Thread restored 10/18/2012
- Subscribe to RSS Feed
- Mark Topic as New
- Mark Topic as Read
- Float this Topic for Current User
- Bookmark
- Subscribe
- Mute
- Printer Friendly Page
Cool Mods - Thread restored 10/18/2012
- Mark as New
- Bookmark
- Subscribe
- Mute
- Subscribe to RSS Feed
- Permalink
- Report Inappropriate Content
Jun-03-2007 01:48 PM
I had been wanting to add a 12-volt fan to the main living area anyway, so I decided to tackle both jobs today. A trip to Wal-Mart for two fans($8.48 each) and we're halfway there.
She picked the spot, and I got to work -
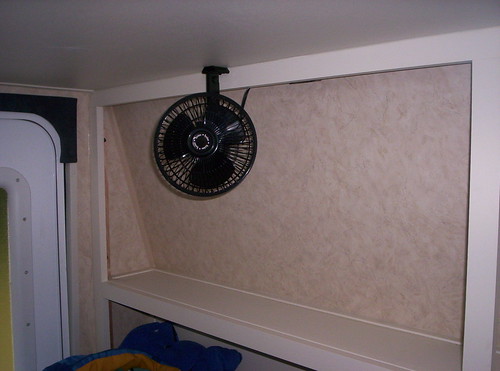
I picked up the power from her overhead light. All I have left is to install a short piece of wire cover and I'm done -
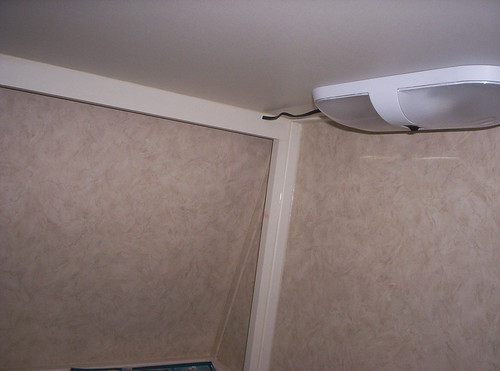
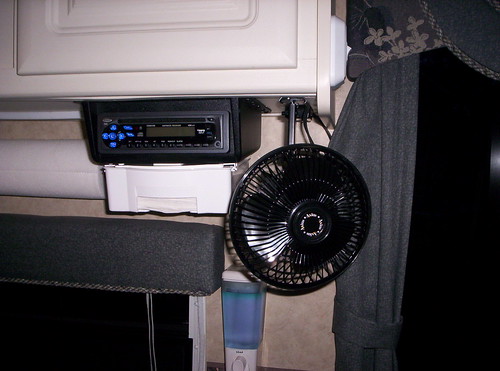
I added one in the main area -
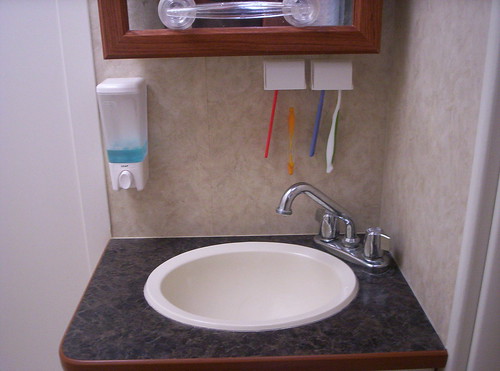
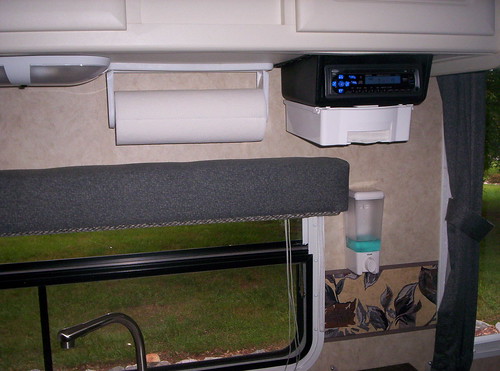
I dropped by Lowe's and found this cool soap dispenser. I also just installed these Pop-a-Toothbrush holders -
I added a sopa dispenser to the kitchen area as well. I also installed a Pop-a-Napkin under the radio -
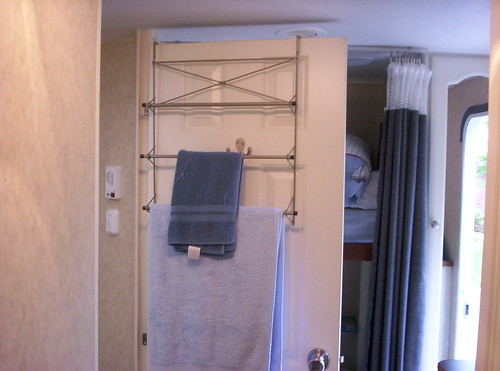
Here's an easy mod. I found this over the door towel rack at Walmart and it works great -
2005 Rockwood 2516G (sold)
2005 Max-Lite 24RS (sold)
2019 Rockwood 2608BS (sold)
2020 Grand Design 337RLS
2018 Chevy 2500HD
- Mark as New
- Bookmark
- Subscribe
- Mute
- Subscribe to RSS Feed
- Permalink
- Report Inappropriate Content
Apr-06-2015 09:48 PM
- Mark as New
- Bookmark
- Subscribe
- Mute
- Subscribe to RSS Feed
- Permalink
- Report Inappropriate Content
Apr-06-2015 08:09 PM
I built mine last year and maybe put more ideas into it than I should have, due to weight capacity…
I wanted a removable rack, with the ability to load my 6500 Watt Husky Generator, some firewood, and miscellaneous gear, along with my bikes. I built it to mount off two 2in hitches off the top of the bumper for extra height clearance. I added my spare tire to the bottom, and a hitch mount tucked into the back so I could add my Bicycle rack to the rack. I added tie down points throughout the sides and a D-Ring to the hitch to lock my bikes too. The Rack is 36” x 90” so I fit a lot on it!
To hold the Rack, I removed the stock welded on tube and added a new bumper. I used a 4” x 4” x 1/8” square tubing for the bumper and mounts. I made it mount to the frame about 1.5ft down the frame. I added a ½” plate inside the tube, drilled and tapped it, so then I drilled the frame and bolted it through. I also added a center support that bolted to the cross member. I trimmed the tubing and installed a 2” receiver and a D-Ring under the bumper. On the top I added two 2” hitch receivers with added gussets since it was only 1/8” tubing. I added almost 200 lbs to the rear… I might just be able to tow a boat off this rack…..
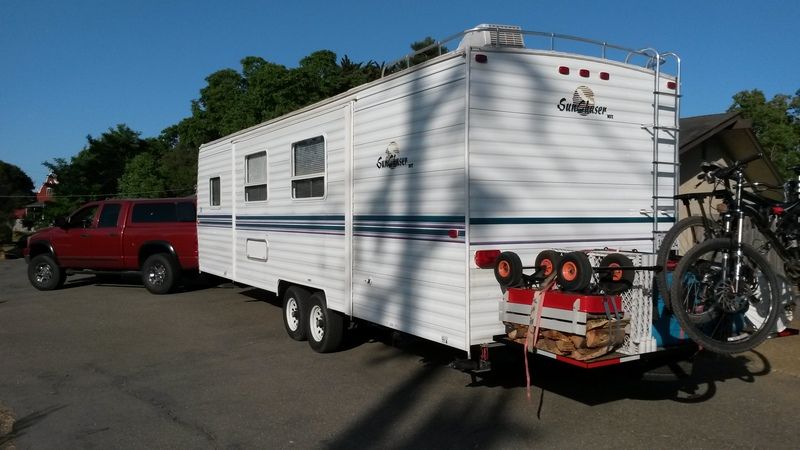
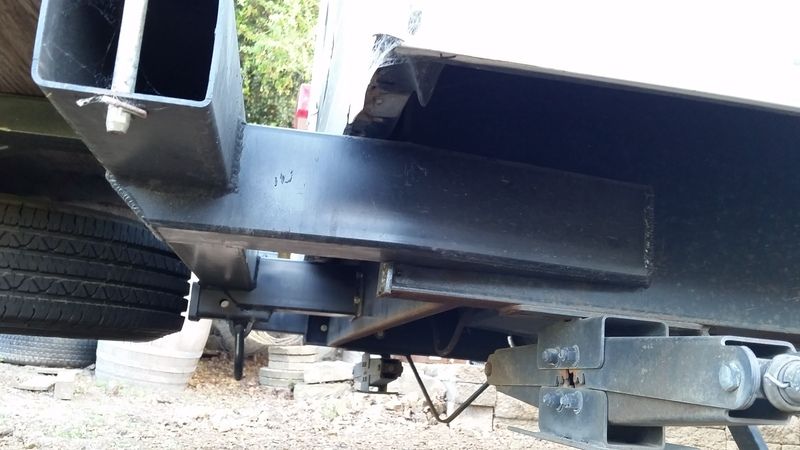
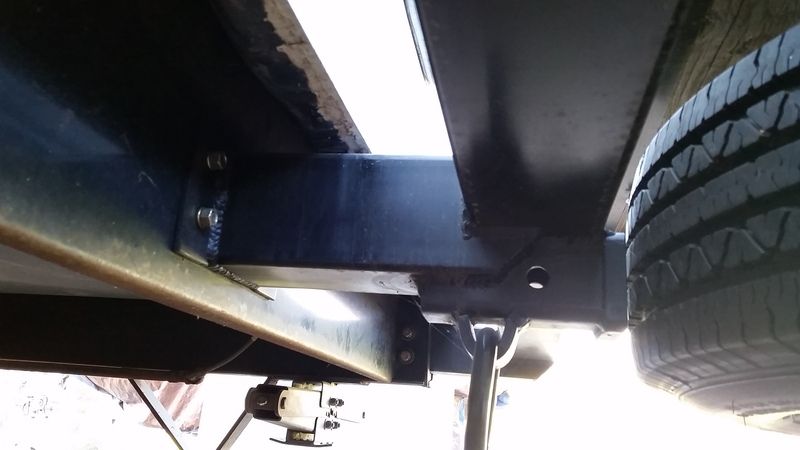
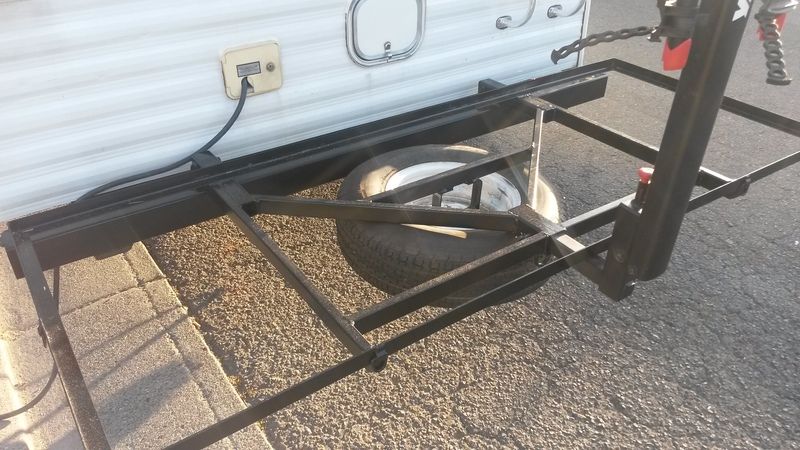
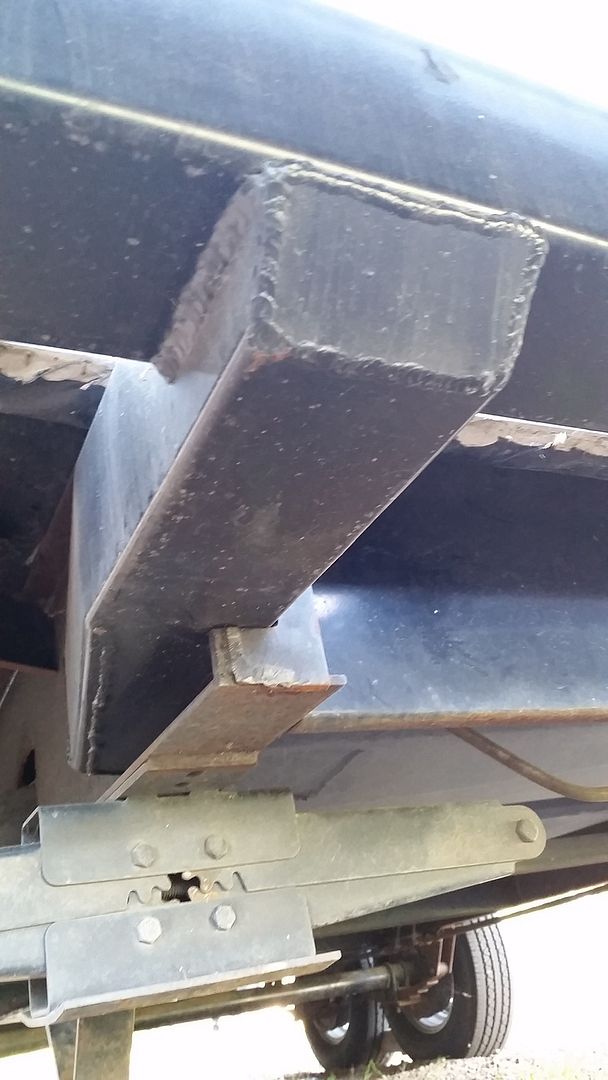
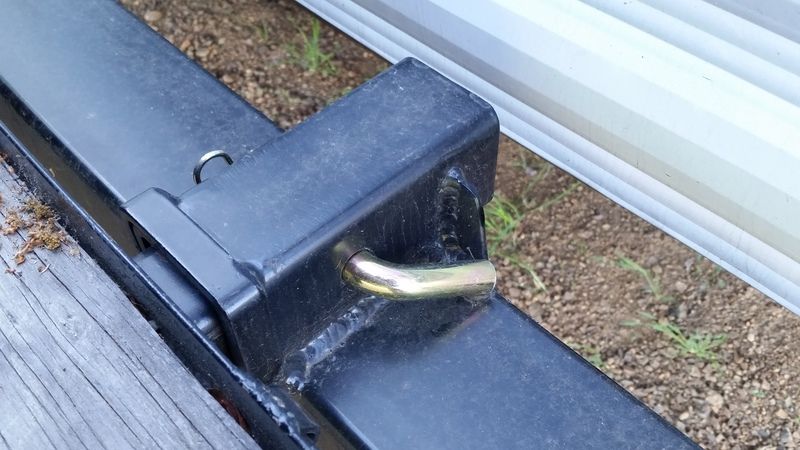
I am now in the process of adding my new Yamaha and enclosure to the rack.
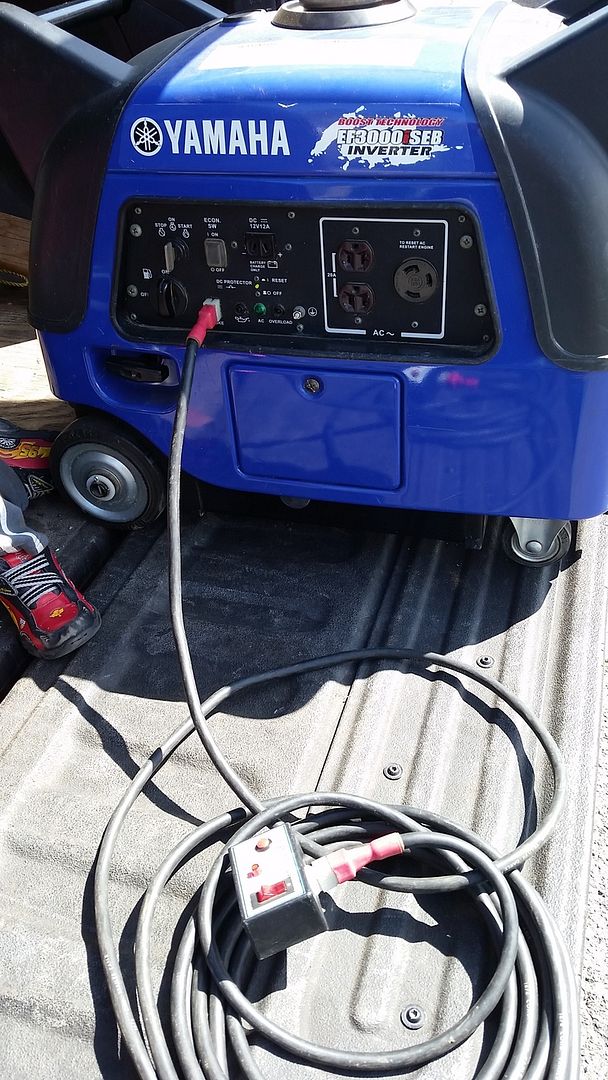
Happy Trails.
Joe Zeppe
2006 Dodge Ram 2500 4x4 Diesel Auto Quad Cab Short Bed, some mods
1999 Kit Sun Chaser 29ft Bunkhouse, LT tires & some (unique?) mods
Used, Beaten Hensley Arrow member 0001556 = old
- Mark as New
- Bookmark
- Subscribe
- Mute
- Subscribe to RSS Feed
- Permalink
- Report Inappropriate Content
Apr-05-2015 08:03 PM
Then I had another McGyver moment - why not add our existing Ecco Temp 5 On demand hot water heater to the TT to have endless hot water?
The new install works excellently. Last weekend we hosted 12 people showering (they are in tents) with no want for hot water all weekend. They did have to bring their own towels.
What we did-
1- Install a diverter tee to the stock incoming cold water supply pipe just before the stock HWH. This tee sends the cold water supply either to the on demand or to the stock heater, making the mod reversible.
2- Installed another (regular) tee just after the diverter tee to bring the water back from the on demand. Since the diverter tee will not allow backflow, the second tee doesn't need to be special.
3- Ran pex from the tees to the on demand heater at the rear of the TT, which hangs on the outside ladder, keeping the heater a few inches away from the trailer siding.
4- At the ends of the pipes outside are self shut off, brass, hose style quick connect fittings. These fittings also act as valves, preventing backflow, pipe drainage, and makes the mod reversible.
5- We made jumper hoses from the quick connect fittings to and from the on demand.
6- The on demand uses a typical 20 pound LP (high pressure) tank which also serves our outdoor fire pit. The TT has low pressure LP so we can't use the TT gas to run the on demand.
7- To keep the wind from blowing out the flame* on the on demand and add a rain shield, I installed a typical galvanized, off the shelf from home depot, 4x10" rectangle to 4" round galvanized duct, topped with a class B roof cap. These caps are designed to prevent pilot blow out. Our weekend was very windy and we had zero problems.
8- Dis-assembly is as simple as the quick connects for the 2 water hoses and the LP to the portable tank. We toss the whole thing in the rear storage compartment on the same corner.
9- To keep the fittings on the outside / underside of the TT clean, there is a short jumper hose which replaces the on demand while the TT is in transport or storage. It loops around the nearby bumper to keep it from sagging or pinching.
Counting the heater itself, we spent $286
The on demand is excellent at bringing hose water up to a much higher temperature and acts as a pre-heater to the stock HWH. The factory HWH is excellent at topping off the temperature to nearly scalding, which is how I like my showers. Use of cold water was necessary as we had endless, more-than-hot-enough water to take showers as long and as many as needed. There were times when people were in line using the shower one after another. We washed dishes at the same time. Everyone was happy.
*The Ecco Temp LP HWH's are battery powered, self igniting flame when they sense water flowing. However, when its windy, the flame can be blown out, shutting down the water heating but not the water flow. To restart the flame, either the water needs to be stopped and re-started OR the unit turned off and back on by means of the rocker switch on the bottom of the HWH. Thus the attention to wind is important as you're in the shower nekkid when the unit is running. This usually is a really bad time for the HWH to stop working. The addition of the HVAC adapter and the B vent cap eliminated the fear of the flame being blown out.
2014 Ram 2500 diesel 4x4
Guarded by 2 Jack Russells
- Mark as New
- Bookmark
- Subscribe
- Mute
- Subscribe to RSS Feed
- Permalink
- Report Inappropriate Content
Apr-05-2015 04:05 PM


Also got to test out my x-chocks, they do seem to take out a lot of the trailer jiggle!

And new stabilizer, overkill? probably but they also help a lot with the trailer movement.. and i got them on sale, so for $40/pair, i couldn't refuse (also would have had to remount the old ones with the new rear bumper, so it was convenient)

And my wife's FAVOURITE mod, Ikea had a sale on their kitchen stuff, they were clearing it out at 50%+off, so i picked up 3 cabinets and 9 drawers for around $50... turned this old useless "wardrobe" in to a very functional drawer set for clothes.


- Mark as New
- Bookmark
- Subscribe
- Mute
- Subscribe to RSS Feed
- Permalink
- Report Inappropriate Content
Apr-05-2015 04:00 PM


- Mark as New
- Bookmark
- Subscribe
- Mute
- Subscribe to RSS Feed
- Permalink
- Report Inappropriate Content
Apr-05-2015 11:25 AM

2002 Fleetwood Prowler 20N
2011 Jeep Grand Cherokee Overland
5.7L V8 Hemi w/Quadralift Air Suspension
- Mark as New
- Bookmark
- Subscribe
- Mute
- Subscribe to RSS Feed
- Permalink
- Report Inappropriate Content
Apr-03-2015 08:44 AM
- Mark as New
- Bookmark
- Subscribe
- Mute
- Subscribe to RSS Feed
- Permalink
- Report Inappropriate Content
Apr-02-2015 09:31 AM
T3rry1 wrote:chr$ wrote:yeah i used some clear gorilla tape to reseal, as well as a strip of the same gorilla tape along the whole length to seal it up, prevent it from lifting due to wind or moisture on the adhesive, etc..
I mounted mine the same way. I Cut the plastic, soldered two very thin wires to the pads, resealed with Dicor. I drilled a small hole behind it all and ran the wires to the porch light inside the cabinet behind the wall.
Gorilla tape is so much better than any other brand I've tried. I was once camping with both Gorilla and Duck brands of duct tape, and I quickly saw how much superior the Gorilla brand was. I keep a roll of both black and white tape in the trailer just in case. The underside of the trailer had some holes in it, and the black Gorilla tape is holding nicely.
I accept any and all advice you can give me, and I hope to be able to help in my limited capacity. 🙂
- Mark as New
- Bookmark
- Subscribe
- Mute
- Subscribe to RSS Feed
- Permalink
- Report Inappropriate Content
Apr-02-2015 09:26 AM
chr$ wrote:yeah i used some clear gorilla tape to reseal, as well as a strip of the same gorilla tape along the whole length to seal it up, prevent it from lifting due to wind or moisture on the adhesive, etc..
I mounted mine the same way. I Cut the plastic, soldered two very thin wires to the pads, resealed with Dicor. I drilled a small hole behind it all and ran the wires to the porch light inside the cabinet behind the wall.
- Mark as New
- Bookmark
- Subscribe
- Mute
- Subscribe to RSS Feed
- Permalink
- Report Inappropriate Content
Apr-01-2015 10:13 PM
1996 Safari Sahara Edition 35' Diesel Pusher. Just getting the Solar stuff started.
- Mark as New
- Bookmark
- Subscribe
- Mute
- Subscribe to RSS Feed
- Permalink
- Report Inappropriate Content
Apr-01-2015 05:37 PM
Jdizzle wrote:
How did you connect the wires to the LED strip? In the middle? Did you solder them?
yes and yes, you can either cut the strip at one of the cut spots and solder them back together with the wires in between, or just cut out a chunk of the epoxy on it and solder to the contact points... you oay also be able to use a ("solderless") strip connector, but i have never used them
- Mark as New
- Bookmark
- Subscribe
- Mute
- Subscribe to RSS Feed
- Permalink
- Report Inappropriate Content
Mar-31-2015 11:28 PM
Pics available as we go...
BigBlack F450 6.7
- Mark as New
- Bookmark
- Subscribe
- Mute
- Subscribe to RSS Feed
- Permalink
- Report Inappropriate Content
Mar-31-2015 04:36 PM
T3rry1 wrote:
I posted this in HTT because that;'s what this is, but it's not very active over there so i figured i'd throw it up here as well.
Hey all, first time poster, this is my 3rd trailer, first 2 were tent trailers, this is a Aerolite Cub C215.
First mod on all of my trailers is interior lighting, i replaced the stock bulbs with SMD Led panels, gives considerably more light, with less power usage.
Sorry no Before pic.
Next mod is a Flatscreen TV, i think this is a 26inch? it's wall mounted, i have the mount stiff enough that i can move enough, but loose enough that it just sits there without additional support while traveling.
it also has a built in DVD player, and USB, so no need for extra components, just needs a power cord, nice and clean.
And last is my exterior lighting, for this i used waterproof led light strip from eBay, tapped in to the exterior light (and removed the bulb from the orange light), so now this is controlled by the factory switch for the exterior light.
Cleaned it up with some white duct tape, and ran a strip of clear gorilla tape over the entire strip to try to keep it clean and secure (especially at highway speeds, not sure i'd trust the stock adhesive)
Lights up the campsite very well, without blinding you if you look at it.
Planned future mods, is LED strips in the outside storage, inside cupboards and a step light, all switch operated so they are only on when the respective door is open.
Also building a stabilizer setup, based off of rockeeze.. hope it works alright.
and i hope to implement some storage options, many of which i found on here.
Oh also a rear hitch for the bike rack, and for our paddle boat, my brother is a journeyman welder so we'll get it done right!
How did you connect the wires to the LED strip? In the middle? Did you solder them?
2002 Fleetwood Prowler 20N
2011 Jeep Grand Cherokee Overland
5.7L V8 Hemi w/Quadralift Air Suspension
- Mark as New
- Bookmark
- Subscribe
- Mute
- Subscribe to RSS Feed
- Permalink
- Report Inappropriate Content
Mar-31-2015 01:59 PM
1996 Safari Sahara Edition 35' Diesel Pusher. Just getting the Solar stuff started.
- Mark as New
- Bookmark
- Subscribe
- Mute
- Subscribe to RSS Feed
- Permalink
- Report Inappropriate Content
Mar-31-2015 01:50 PM
2018 Winnebago Minnie 2250DS


