Turn on suggestions
Auto-suggest helps you quickly narrow down your search results by suggesting possible matches as you type.
Showing results for
- Good Sam Community
- Groups
- Motorhome Group
- Forum
- Re: 84 Shasta Motorhome Rebuild/ Repair
Options
- Subscribe to RSS Feed
- Mark Topic as New
- Mark Topic as Read
- Float this Topic for Current User
- Bookmark
- Subscribe
- Mute
- Printer Friendly Page
84 Shasta Motorhome Rebuild/ Repair
Options
- Mark as New
- Bookmark
- Subscribe
- Mute
- Subscribe to RSS Feed
- Permalink
- Report Inappropriate Content
Jan-14-2013 04:42 PM
Hello all I'm new to this forum and after reading for 2 soild days of oldtrucker63 Dodge rebuild has really inspired me to share my project.
Here is go's....
In the begining there was a CL ad, a poorly taken care of motorhome and a dumb guy (me) willing to buy it! lol, here is what I ended up with:
1984 Shasta - unsure if there is a model name.
Built on a Ford E350 Club Van chassis powered by a 460 big block backed with a C6 transmission.
Has 103k miles and runs and drives like a champ! (except the 6 square tires)
I knew this was a project, well more like of a piece of******but have love for things like this and it turns out it was in better shape than I expected but was in serious need of repair.
The seller didn't really know much about it and had vey little to tell me. The asking price was 600.00 and I talked hime down to 400.00 and sight unseen me and my brother were off to bring it home. Well when we got there It seemed a little worse than I thought but the seller said "it fires right up and everything works......" (then the "except" part came in) but the fridge and "I can't get the genset to stay running annnnnnnd there is some impact damage to the overhead bunk, and I think one of the windows is broke. I'm thinking to myself your unsure of this? lol then the story comes out that he barrowed it to somebody and they hit a tree and his fix was a plastic tub lid and 2500 feet of blue painters tape lots of plastic and enough staples to buil a whole motorhome!! Well after walking around this thing I said sure I'll take it as that was my terms of the sight unseen 200.00 off the asking price deal we made on the phone. So I started it up and it fired right up and ran great!, then I started smelling gas and looked under and sure it was pouring all over the ground!! damn, not going to drive it home now. I made the deal anyways and he had no problem if it sat for a few days so I could fix it or get it towed. So I handed him the cash and got the paperwork and headed home.
The next day I dove back to the MH and looked into what was leaking, could not get the engine cover off due to the welded nut in the body was broke free and spun so I had to pop the rivits out of the clamp and deal with it later. The source of the leak was the accelerator pump no big deal, it was a Motorcraft version Holley and they have not changed that pump desigin in years so off with the carb and to the auto parts store. I got the pump, installed it and she was running again!! and good! prepaired it to run down the road and away I went. Had no problem this thing runs smoother than my late model vehicles. on the way home I stoped a Uhaul and filled the propane tank and made it all the way home and put in a long term parking spot in the yard, because I knew I had some work to do, lots of work to do!
Well that's the beginning, I will try to figure out how to post pic and will get a visual up!
Labels:
- Labels:
-
Class C
85 REPLIES 85
Options
- Mark as New
- Bookmark
- Subscribe
- Mute
- Subscribe to RSS Feed
- Permalink
- Report Inappropriate Content
Jun-20-2013 03:08 PM
tenbear wrote:
WOW! Great progress. You have come a long way. You must be gaining confidence.
Thanks, Im getting there. I'll feel much more confidence once the motorhome doesn't wobble like a wet noodle. lol
Options
- Mark as New
- Bookmark
- Subscribe
- Mute
- Subscribe to RSS Feed
- Permalink
- Report Inappropriate Content
Jun-20-2013 02:04 PM
Subscribed. 🙂
I've done a couple of camper rebuilds, but never a motorhome... I had a ton of fun doing them. This gets me excited and gives me the bug to buy another to remodel!
Great work you're doing!
I've done a couple of camper rebuilds, but never a motorhome... I had a ton of fun doing them. This gets me excited and gives me the bug to buy another to remodel!
Great work you're doing!
Options
- Mark as New
- Bookmark
- Subscribe
- Mute
- Subscribe to RSS Feed
- Permalink
- Report Inappropriate Content
Jun-20-2013 01:42 PM
I commend this fellow for his determination.
Options
- Mark as New
- Bookmark
- Subscribe
- Mute
- Subscribe to RSS Feed
- Permalink
- Report Inappropriate Content
Jun-20-2013 01:31 PM
WOW! Great progress. You have come a long way. You must be gaining confidence.
Class C, 2004/5 Four Winds Dutchman Express 28A, Chevy chassis
2010 Subaru Impreza Sedan
Camped in 45 states, 7 Provinces and 1 Territory
2010 Subaru Impreza Sedan
Camped in 45 states, 7 Provinces and 1 Territory
Options
- Mark as New
- Bookmark
- Subscribe
- Mute
- Subscribe to RSS Feed
- Permalink
- Report Inappropriate Content
Jun-20-2013 01:13 PM
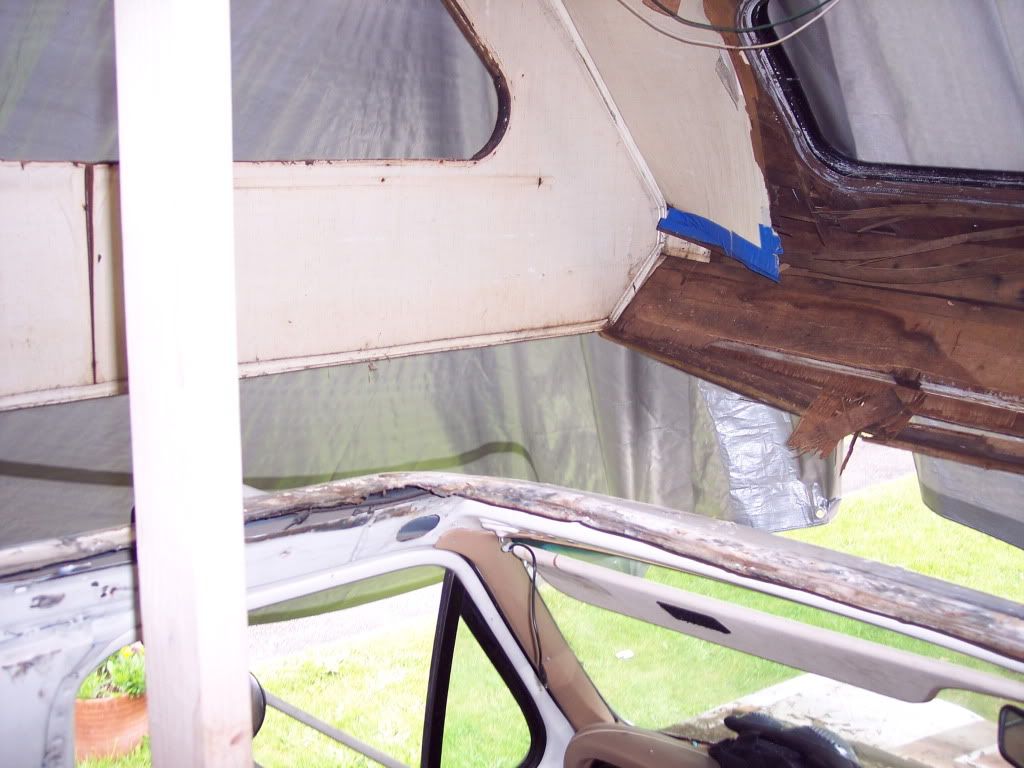
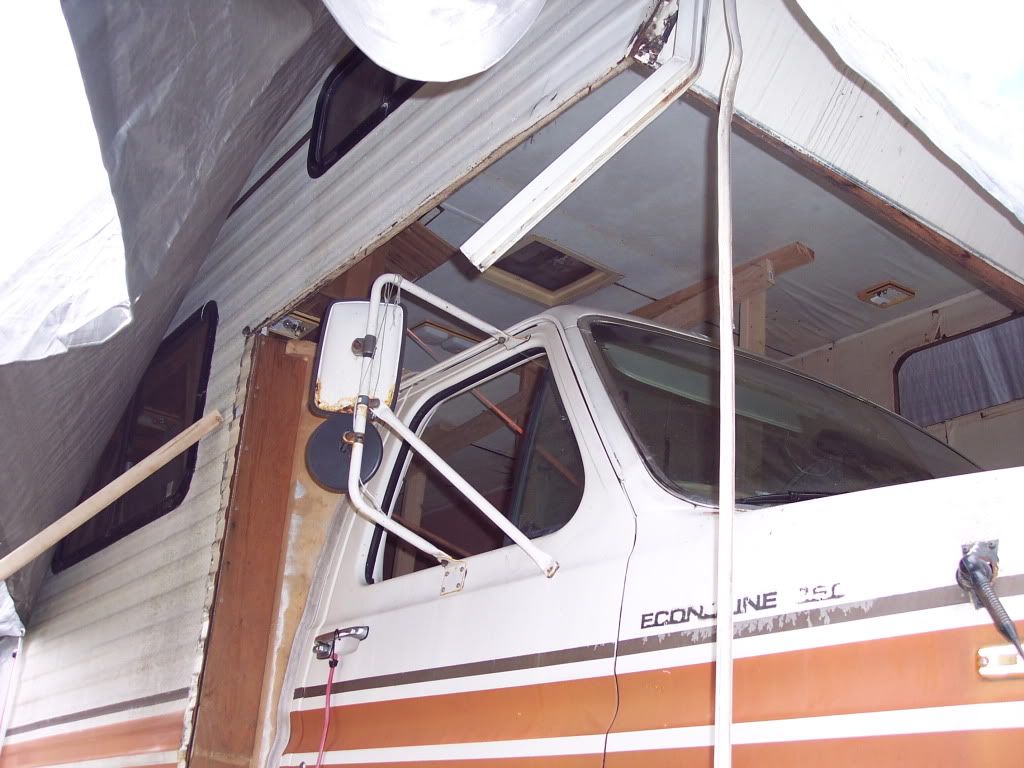
Well I got to the overhead bunk floor this past weekend, not done yet but I did remove the old floor and made a new one. I have to find some help to get the new one installed.
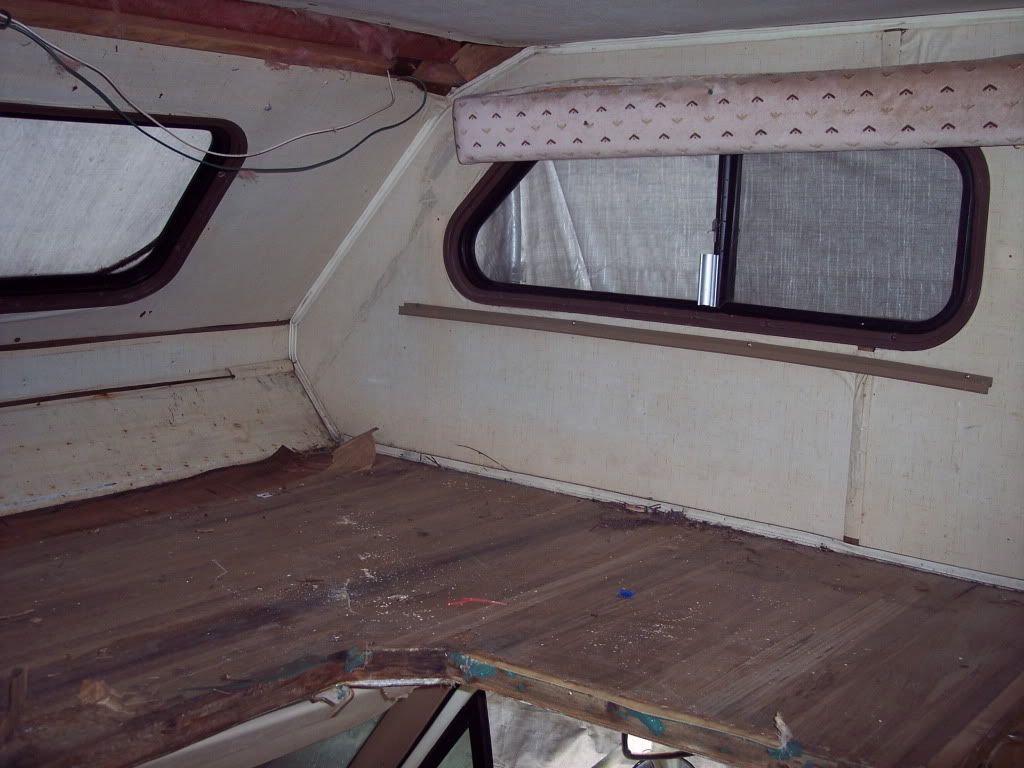
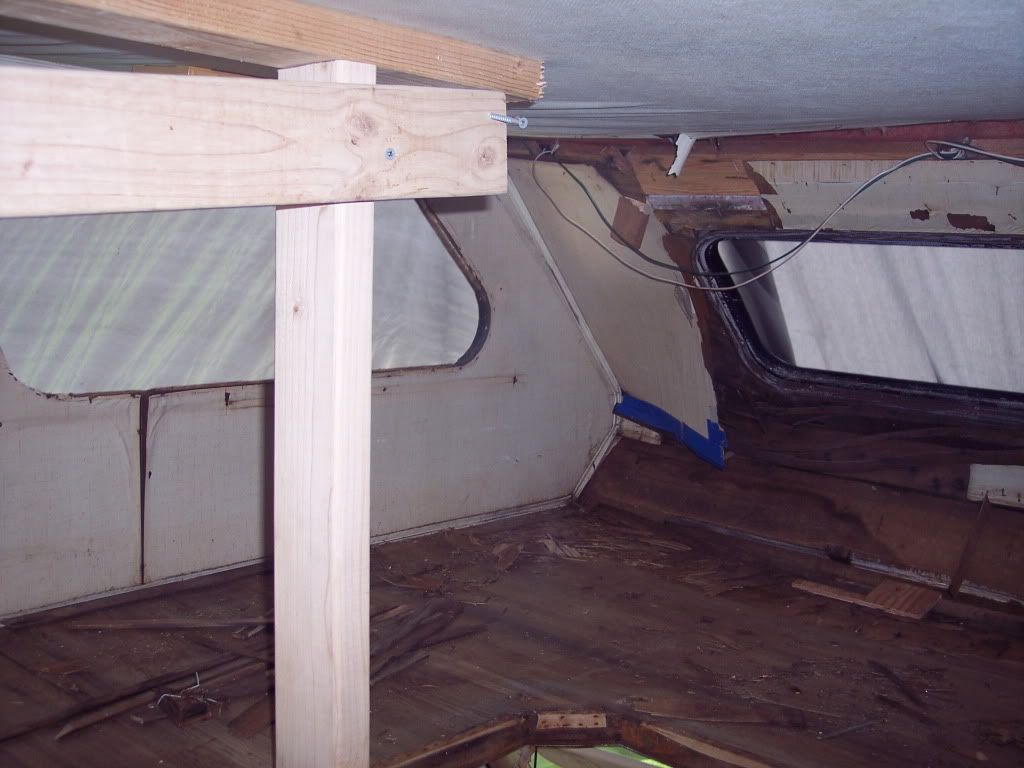
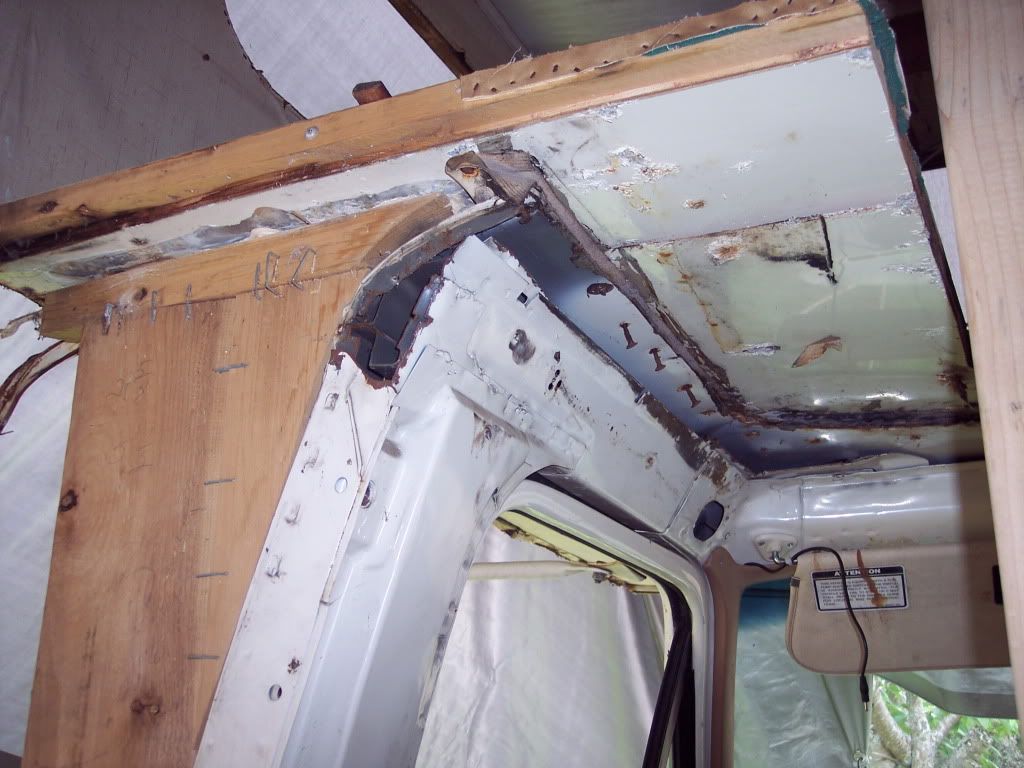
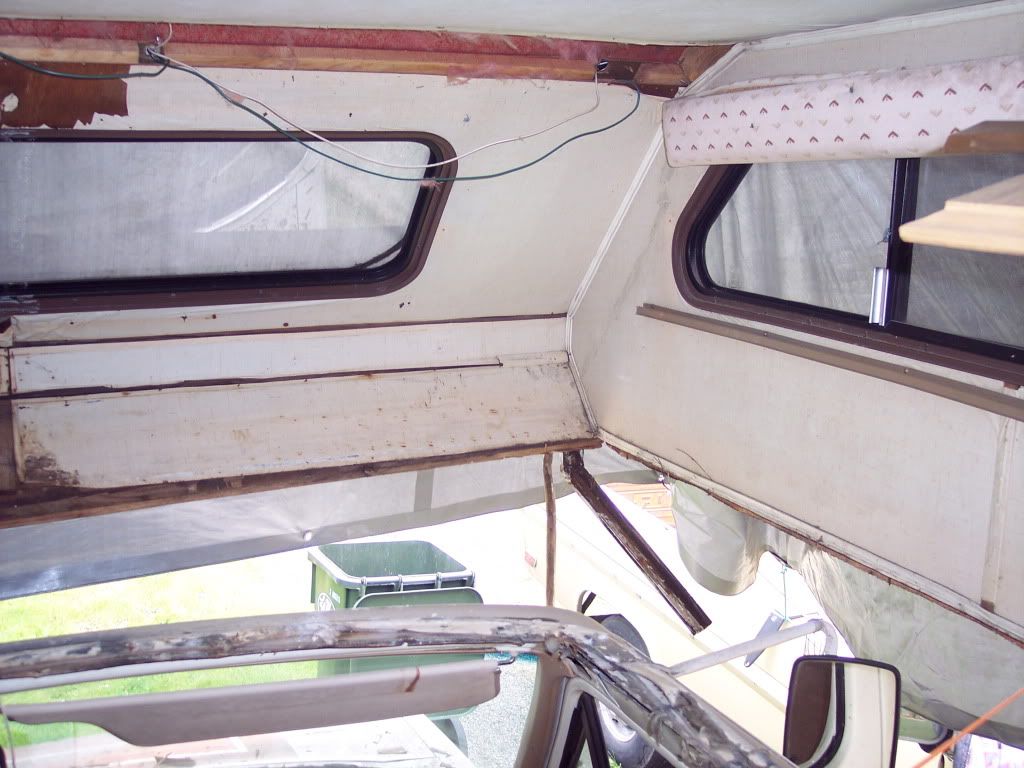
See all the screws that have rusted and backed out, When I was taking this apart there was only 3 or 4 screws actualy holding everything together and by that I mean van body squared and secured with the camper. I pulled one screw out on the left side and the camper seperated about a inch and when I started to pull floor away on the right side the camper racked itself to to right, good lord I though this thing was going to fold over lol I rushed to prop it up with 2x4's and ran a few ratchet strap from the right to the left. Then I tried to figure out why it did that:S I found that the right side corner that attaches the van body to camper only had two screws holding it together and of coarse I should have known better and should have cross-braced the van and camper body oh and not to mention I have nothing installed on the left side corner. I think it will be ok I'll just have to get creative to rack the van and camper bodies back square when I get the bunk floor in.
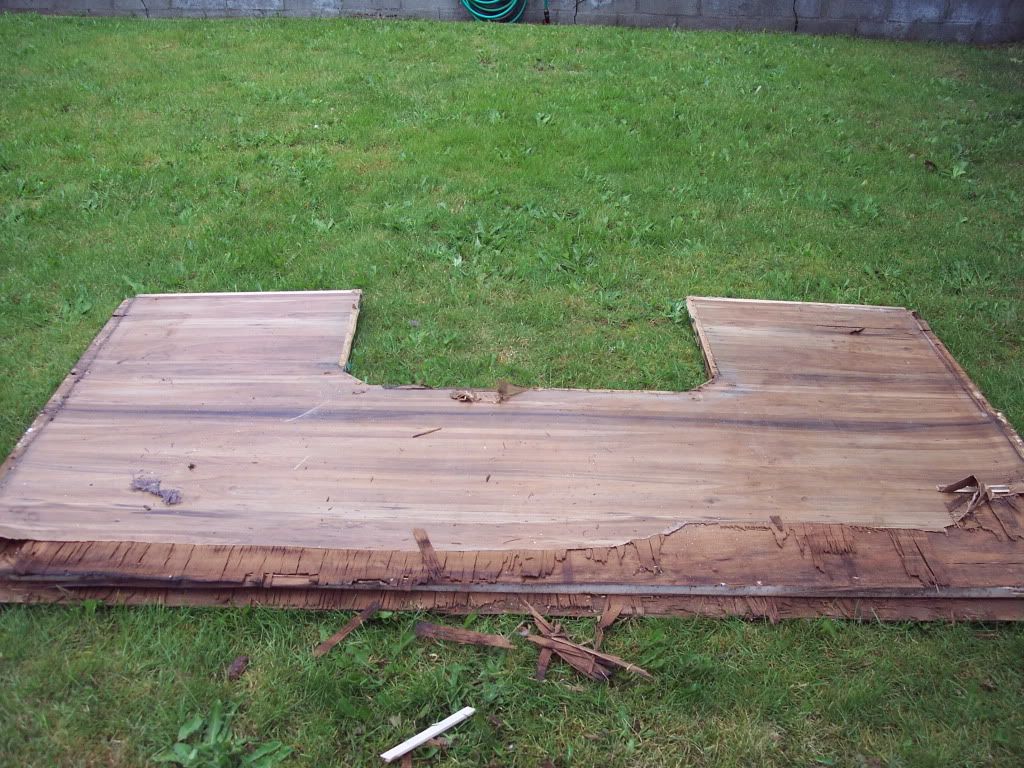
The old and rotten.
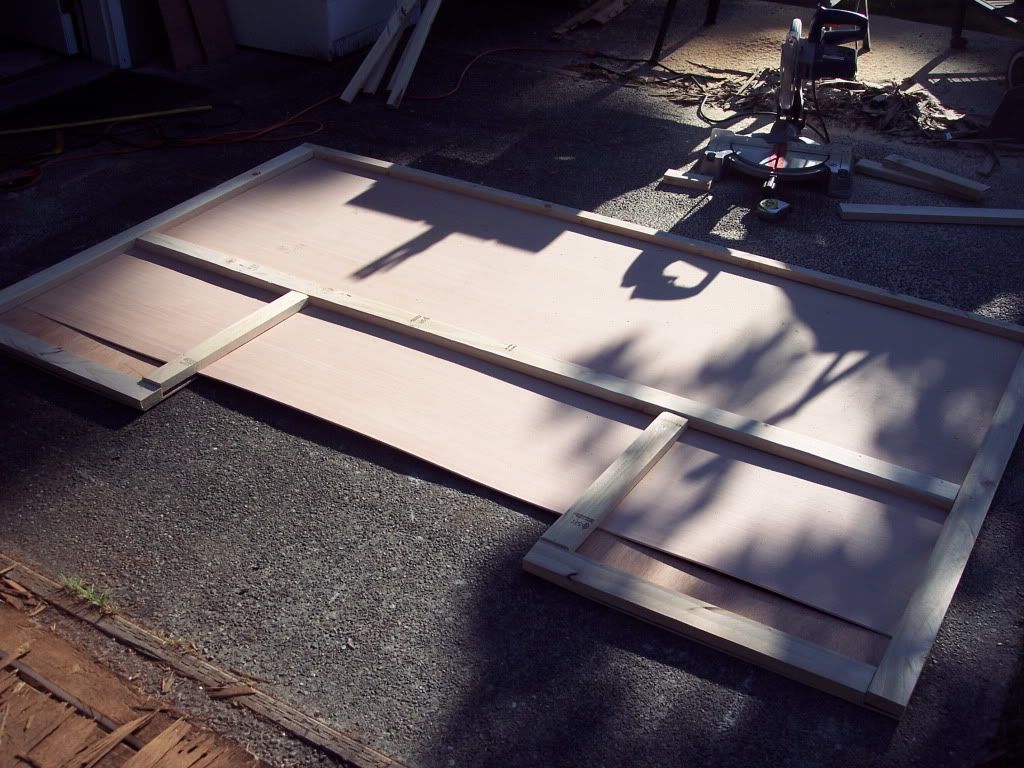
Laying some new frame, didn't get any pictures of the completed frame with the insulation installed, I was tring to beat the glue curing.

This is the finsished side that faces out, ugly but with some paint you won't know it onced looked like this. Would have been super sweet to have had new metal.

Inside side of floor, left the extra material there to give more strength until I get it installed, figured it wouldn't hurt!

LOL I walked around on this floor tring to get it compressed enough and these were the heaviest things I could find around the garage, it worked the floor is very strong and has very little flex.
Well that's where I'm at so far, hoping to get the floor back in and van and camper bodies all squared and secured this weekend, I hope this damn thing don't fall over til then!
See all the screws that have rusted and backed out, When I was taking this apart there was only 3 or 4 screws actualy holding everything together and by that I mean van body squared and secured with the camper. I pulled one screw out on the left side and the camper seperated about a inch and when I started to pull floor away on the right side the camper racked itself to to right, good lord I though this thing was going to fold over lol I rushed to prop it up with 2x4's and ran a few ratchet strap from the right to the left. Then I tried to figure out why it did that:S I found that the right side corner that attaches the van body to camper only had two screws holding it together and of coarse I should have known better and should have cross-braced the van and camper body oh and not to mention I have nothing installed on the left side corner. I think it will be ok I'll just have to get creative to rack the van and camper bodies back square when I get the bunk floor in.
The old and rotten.
Laying some new frame, didn't get any pictures of the completed frame with the insulation installed, I was tring to beat the glue curing.
This is the finsished side that faces out, ugly but with some paint you won't know it onced looked like this. Would have been super sweet to have had new metal.
Inside side of floor, left the extra material there to give more strength until I get it installed, figured it wouldn't hurt!
LOL I walked around on this floor tring to get it compressed enough and these were the heaviest things I could find around the garage, it worked the floor is very strong and has very little flex.
Well that's where I'm at so far, hoping to get the floor back in and van and camper bodies all squared and secured this weekend, I hope this damn thing don't fall over til then!
Options
- Mark as New
- Bookmark
- Subscribe
- Mute
- Subscribe to RSS Feed
- Permalink
- Report Inappropriate Content
Jun-06-2013 12:42 PM
Here is some progress on the left wall.
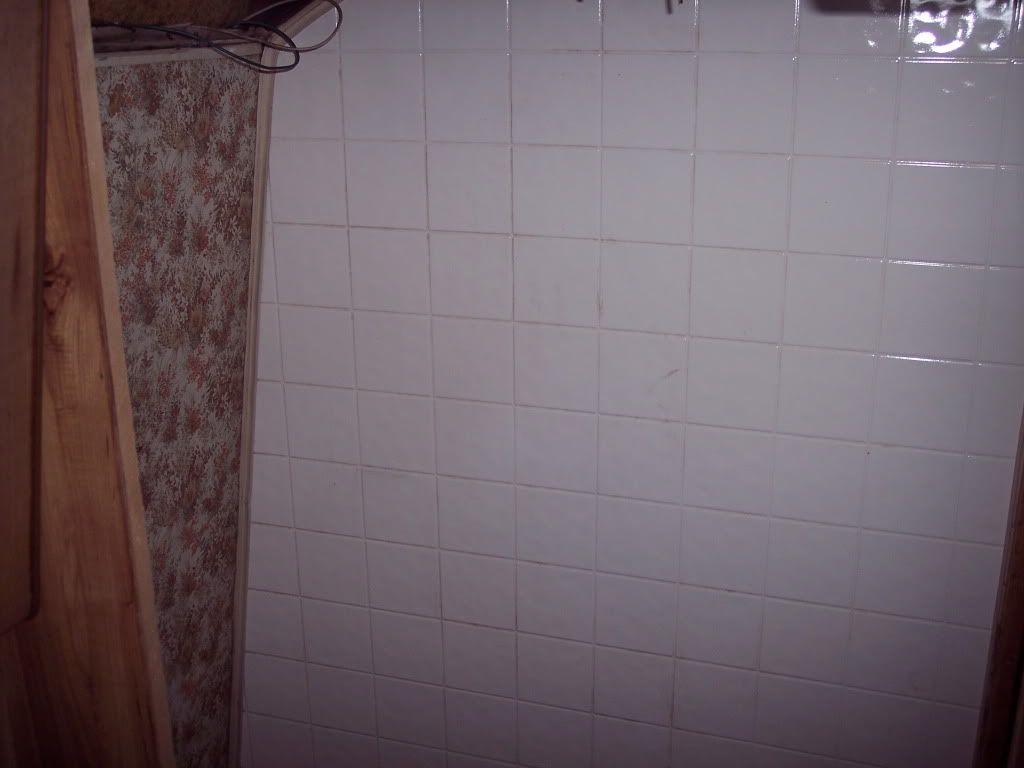
Started at the rear in the bathroom wall wich is the shower, used some fake tile board. Looks good however I know the key to this stuff being used is absolutly NO water leaks inside or out.
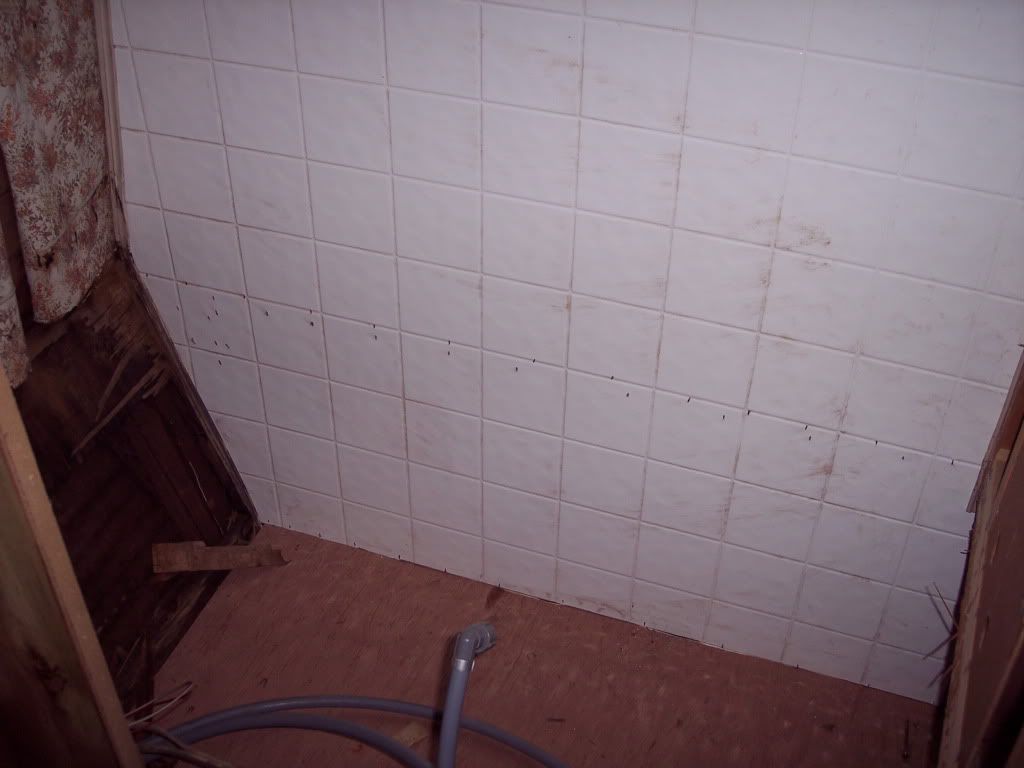
This was a fun panel to cut, I actualy cut the angles perfect the first time but shorted the width buy 2", oops what's the saying? messure once cut twice or was it messure once, cut then drive back to the hardware store and try to perfect the cut? lol
I can't paint a picture on how hard it was to get these panels hung without any help. Wall is starting to get stronger.
From the inside.
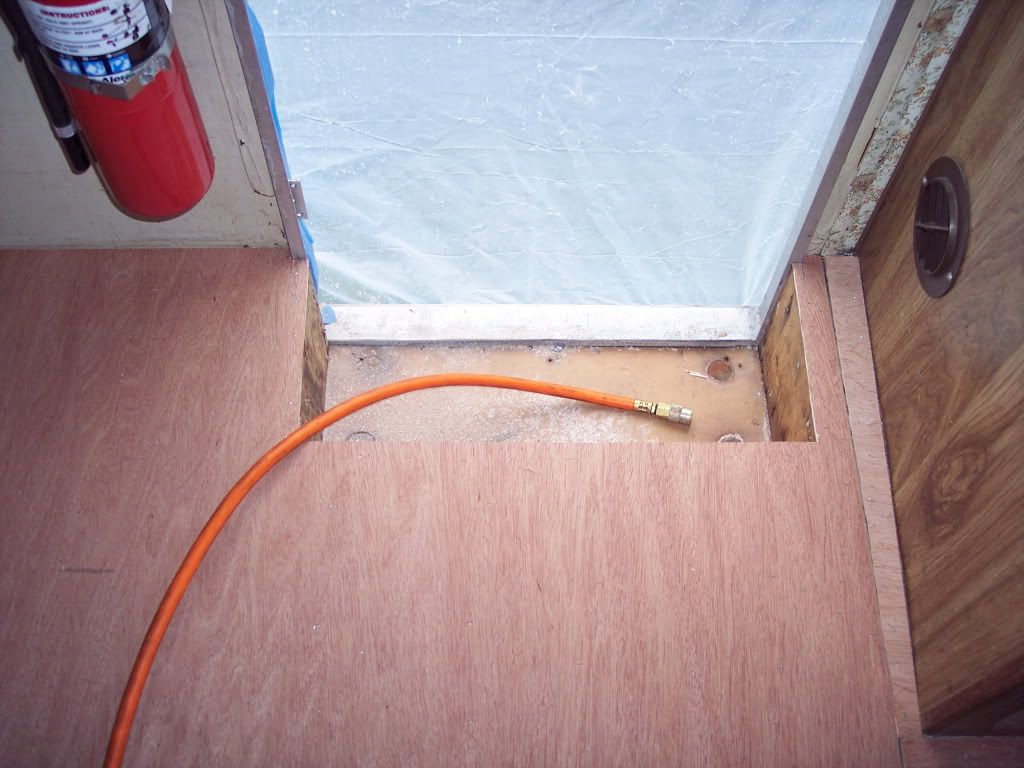
Got the floor bolted back down to the frame and drilled the holes for the LP lines and electrical. When I removed the plastic gromet from the LP line I found the line was almost rusted through where is sat in the gromet my MH has steel LP lines, I will inspect the other two lines for damage and replace them as needed with copper.
Left wheel well box, I salvaged this and replaced a few pieces of wood on it.
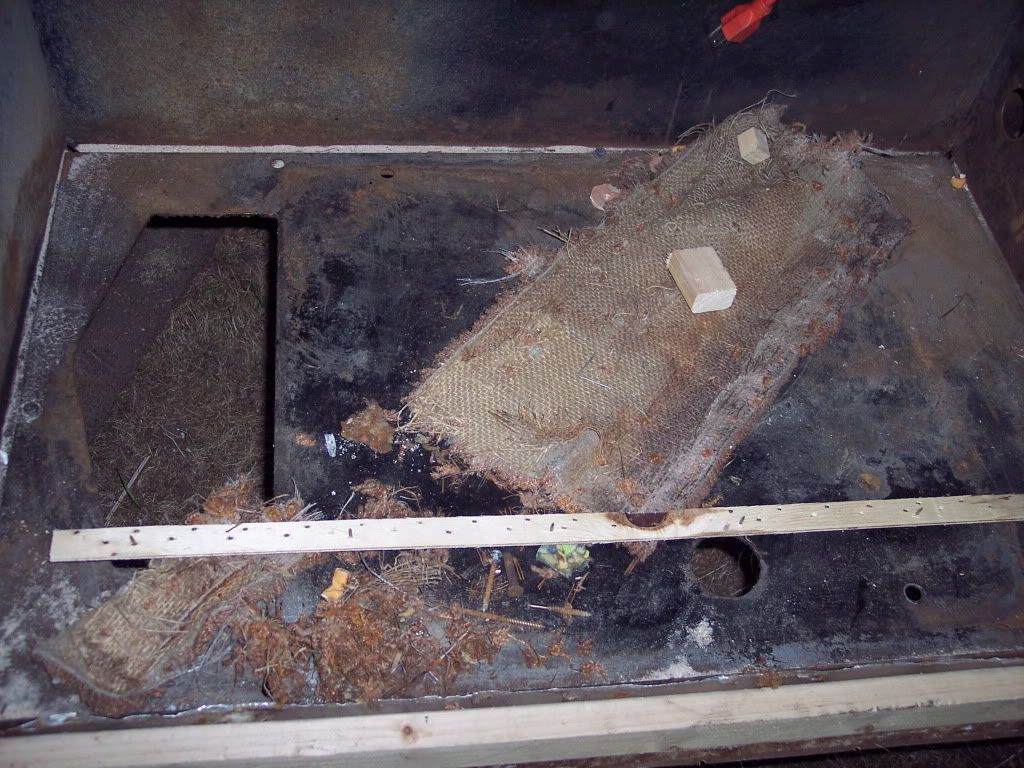
Look close at this picture I pulled about a thousand staples and some carpet and tack strips, I was at it for a bit!
Another shot of the electrical spilling everywhere, I swear it's growning in size everytime I see it.
I think at this point I've decided I'm going to start the repairs to the overhead bunk area because I'd like to have as much wall in as I can before installing the genset as I'm worried it's wieght is going to pull down on the side and I don't want to rack the panels I have already installed, well I guess I could support the box from the underside until the wall is done. There really is not much supporting this heavy thing I'm sure all combinded it's enough and I have no idea how the factory installed as it don't look like it would be easy at all to put in at a later date when it's all done, compartment opening is large enought but I think there would be some sore backs and a lot of scraped up parts on the way in. Any body ever done this maybe have a good idea? I cut the junk wall away and used a engine hoist and the floor lifted up a lot after I got it out. hummm.
Well that's all I got for now. When I do get to the outside panels and siding I plan to move the MH from the cove it's at now and would love to get a shot of the over picture, you can't even take in the size of the project in person where it sits.
Started at the rear in the bathroom wall wich is the shower, used some fake tile board. Looks good however I know the key to this stuff being used is absolutly NO water leaks inside or out.
This was a fun panel to cut, I actualy cut the angles perfect the first time but shorted the width buy 2", oops what's the saying? messure once cut twice or was it messure once, cut then drive back to the hardware store and try to perfect the cut? lol
I can't paint a picture on how hard it was to get these panels hung without any help. Wall is starting to get stronger.
From the inside.
Got the floor bolted back down to the frame and drilled the holes for the LP lines and electrical. When I removed the plastic gromet from the LP line I found the line was almost rusted through where is sat in the gromet my MH has steel LP lines, I will inspect the other two lines for damage and replace them as needed with copper.
Left wheel well box, I salvaged this and replaced a few pieces of wood on it.
Look close at this picture I pulled about a thousand staples and some carpet and tack strips, I was at it for a bit!
Another shot of the electrical spilling everywhere, I swear it's growning in size everytime I see it.
I think at this point I've decided I'm going to start the repairs to the overhead bunk area because I'd like to have as much wall in as I can before installing the genset as I'm worried it's wieght is going to pull down on the side and I don't want to rack the panels I have already installed, well I guess I could support the box from the underside until the wall is done. There really is not much supporting this heavy thing I'm sure all combinded it's enough and I have no idea how the factory installed as it don't look like it would be easy at all to put in at a later date when it's all done, compartment opening is large enought but I think there would be some sore backs and a lot of scraped up parts on the way in. Any body ever done this maybe have a good idea? I cut the junk wall away and used a engine hoist and the floor lifted up a lot after I got it out. hummm.
Well that's all I got for now. When I do get to the outside panels and siding I plan to move the MH from the cove it's at now and would love to get a shot of the over picture, you can't even take in the size of the project in person where it sits.
Options
- Mark as New
- Bookmark
- Subscribe
- Mute
- Subscribe to RSS Feed
- Permalink
- Report Inappropriate Content
Jun-05-2013 08:03 PM
Very impressive!
Options
- Mark as New
- Bookmark
- Subscribe
- Mute
- Subscribe to RSS Feed
- Permalink
- Report Inappropriate Content
Jun-05-2013 12:35 PM
mobjack68 wrote:
Hey Mud...thanks for sharing your progress. I appreciate the pics more than you would realize. I will be venturing down this road myself in a while.
Just a thought...is there any way to include pvc electrical conduit into any of the walls so wiring can be added internally if needed???
I am just running sims in my head and wondered if there were enough wall thickness...my thinking is to be able to run wires from the front to the back or the middle w/o too much trouble...am I over analyzing??? trying to include too many contingencies???
I know running them down under the floor and then back up is a solution....just trying to keep it a smidge cleaner..
thanks
Well my walls and most I'v seen are only 1" thick and you could run 1/2" conduit I don't know if that would be enough to run all the wires you needed, however I don't see any reson you couldn't run them in the wall you'd just have to remember there there when you blowing staples and screws through them lol I know that all to well I rebuilt the lower 2 foot of my slide in and junked the running light circuit somewhere and that brings us to it's much harder to make repairs if the wiring is in the wall. Now I'd be a fan of running wiring under motorhome and just bring it up where needed either put in loom or conduit. For me my wiring nest is only where the inverter/ closet is otherwise everything is run through the interior walls and cabnet bottoms you don't see any of it and I personaly don't have a problem with wiring running along the walls inside cabinets. with that said I don't like how the plumbing is run especially in the storage compartments I plan to run as much as I can along the outer wall and secure it with some sort of a clamp I will do this with any wiring as well because lets face it you would ruin your trip by braking the water nipple of you water heater and flooding the storage are that you worked so hard cramming all you gear in lol.
In my motorhome my favorite stupid thing the factory did was run the 3 wires from the supply side of the gen set through a sharp edge metal hole and just thrown under the dinnette seat and partialy run a screw through them when the put a cover over them between one seat and the other.... really?? 110v wiring through a vibrating sharp metal hole, how do these things pass any kind of saftey inspections or regulations?
But I'm going to make it as safe and fire free as I can.
Anyways I wish you luck with yours and feel free to follow mine and I'm always up for questions and thoughts I will be covering just about every area of repair. I have much much more photos of spacific thing I've done and would be more than happy to share if you interested in one spacific repair I've done, I'm not an expert but have done this a few times and love it, it's like working on a mini house 🙂
Options
- Mark as New
- Bookmark
- Subscribe
- Mute
- Subscribe to RSS Feed
- Permalink
- Report Inappropriate Content
Jun-05-2013 10:46 AM
Hey Mud...thanks for sharing your progress. I appreciate the pics more than you would realize. I will be venturing down this road myself in a while.
Just a thought...is there any way to include pvc electrical conduit into any of the walls so wiring can be added internally if needed???
I am just running sims in my head and wondered if there were enough wall thickness...my thinking is to be able to run wires from the front to the back or the middle w/o too much trouble...am I over analyzing??? trying to include too many contingencies???
I know running them down under the floor and then back up is a solution....just trying to keep it a smidge cleaner..
thanks
Options
- Mark as New
- Bookmark
- Subscribe
- Mute
- Subscribe to RSS Feed
- Permalink
- Report Inappropriate Content
Jun-05-2013 09:26 AM
tenbear wrote:
Looks good! You're making a lot of progress. I know what you mean by everything is not square. I've made a lot of shelves and very few of them were square. After the first one I started making a cardboard template before I cut the wood. Saved me some scrap wood, and maybe some grey hair.
I thoght about using some card board but I decided to just cut things a bit bigger and trim to fit, only screwed up a little bit here and there I did however junk a sheet of fake tile board in the bathroom area:S but will be able to use most of it in another area. I'll be the first to admit I'm not very good with a tape measure but I'm honing my skills every time I work on this project. The true test is going to be how well the sidding fits when I'm done, hope all my openings are close to where they should be, lol.
The more I work on this thing I feel like my camper was built using seconds and scaps by a Shasta employee..... wouldn't that be funny?
Options
- Mark as New
- Bookmark
- Subscribe
- Mute
- Subscribe to RSS Feed
- Permalink
- Report Inappropriate Content
Jun-05-2013 09:18 AM
magik235 wrote:
Outstanding progress
Thank you, wait until you see the wall it's coming together quite well, I forgot to bring my SD card with me to work today to uplaod the pictures. I got half the wall done and got the floor bolted back down to the frame of the van and got the holes drilled for LP line to water heater and electrical done. Still need to cut the holes for both fuel tank filler necks. Hoping to get back to it this Sunday.
Options
- Mark as New
- Bookmark
- Subscribe
- Mute
- Subscribe to RSS Feed
- Permalink
- Report Inappropriate Content
Jun-04-2013 04:08 PM
Outstanding progress
1993 Damon Challenger
http://www.rv.net/forum/index.cfm/fuseaction/thread/tid/26989746.cfm
http://www.rv.net/forum/index.cfm/fuseaction/thread/tid/26989746.cfm
Options
- Mark as New
- Bookmark
- Subscribe
- Mute
- Subscribe to RSS Feed
- Permalink
- Report Inappropriate Content
Jun-04-2013 01:07 PM
Looks good! You're making a lot of progress. I know what you mean by everything is not square. I've made a lot of shelves and very few of them were square. After the first one I started making a cardboard template before I cut the wood. Saved me some scrap wood, and maybe some grey hair.
Class C, 2004/5 Four Winds Dutchman Express 28A, Chevy chassis
2010 Subaru Impreza Sedan
Camped in 45 states, 7 Provinces and 1 Territory
2010 Subaru Impreza Sedan
Camped in 45 states, 7 Provinces and 1 Territory
Options
- Mark as New
- Bookmark
- Subscribe
- Mute
- Subscribe to RSS Feed
- Permalink
- Report Inappropriate Content
Jun-04-2013 12:46 PM
Well I got the floor all finished finaly! It was a rough job and not one part of this MH is square.. lol Check it out!
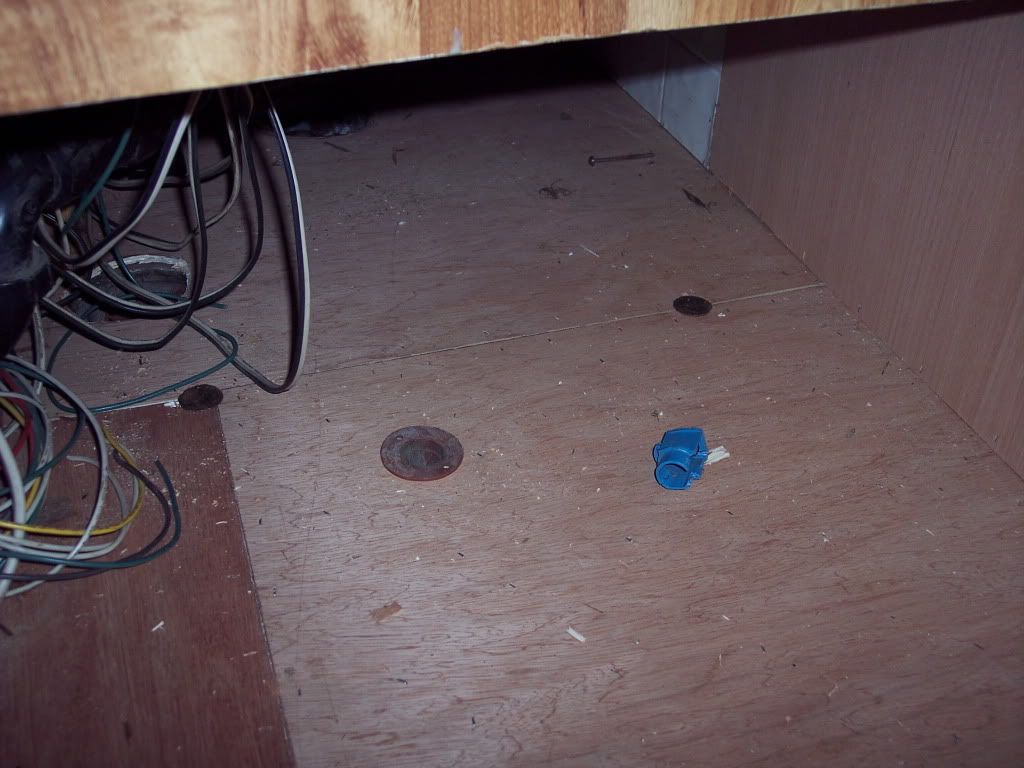
I originaly not going to do anything in this area but my perfection got the best of me and after clearing out the carpet under the inverter and moving plumbing and wiring around found it to be in rough shape so I tore it up and layed new floor.
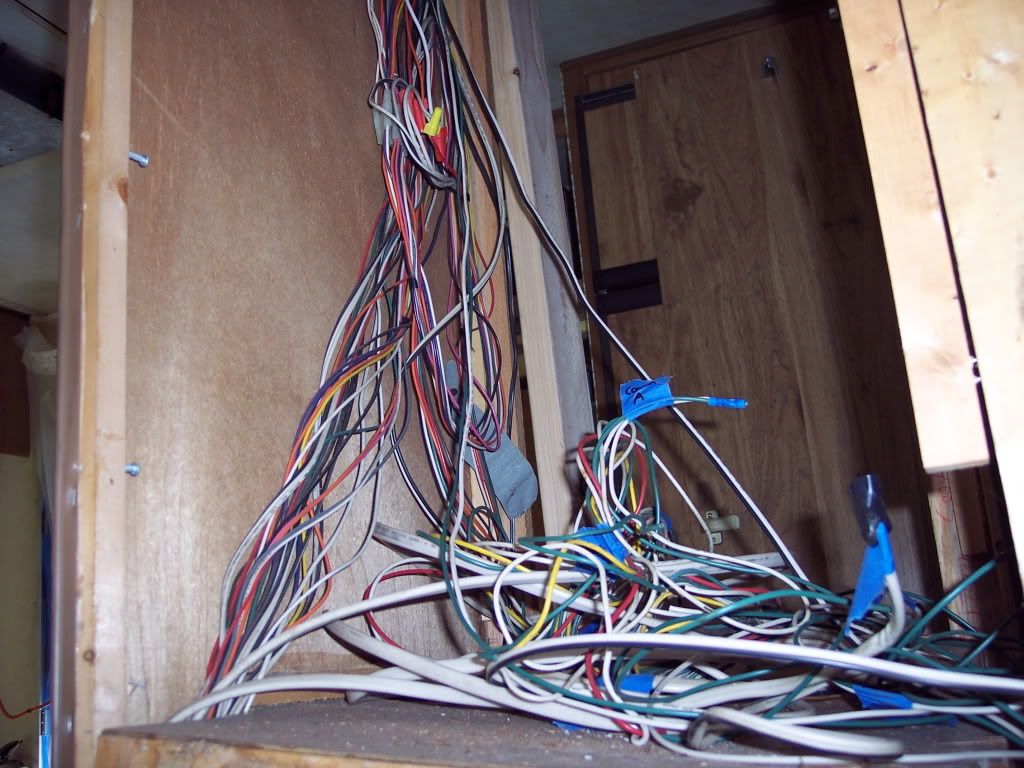
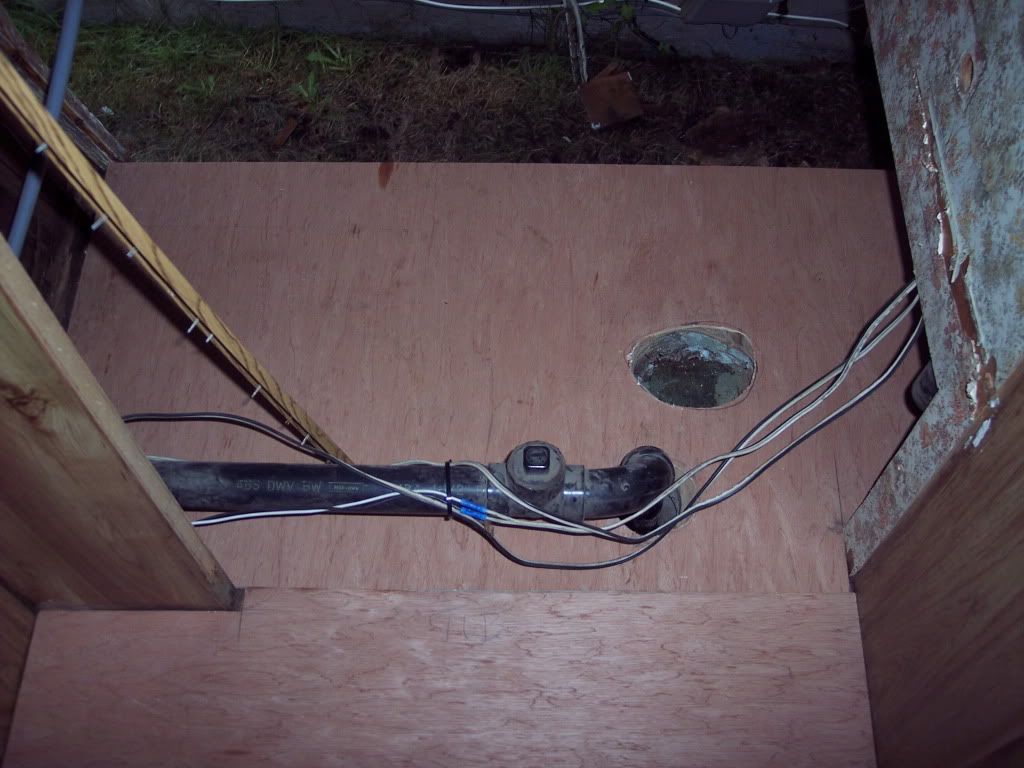
I painfully removed the wiring and plumbing, I labled the best I could I'm sure it's going to be fun putting all this back together 🙂
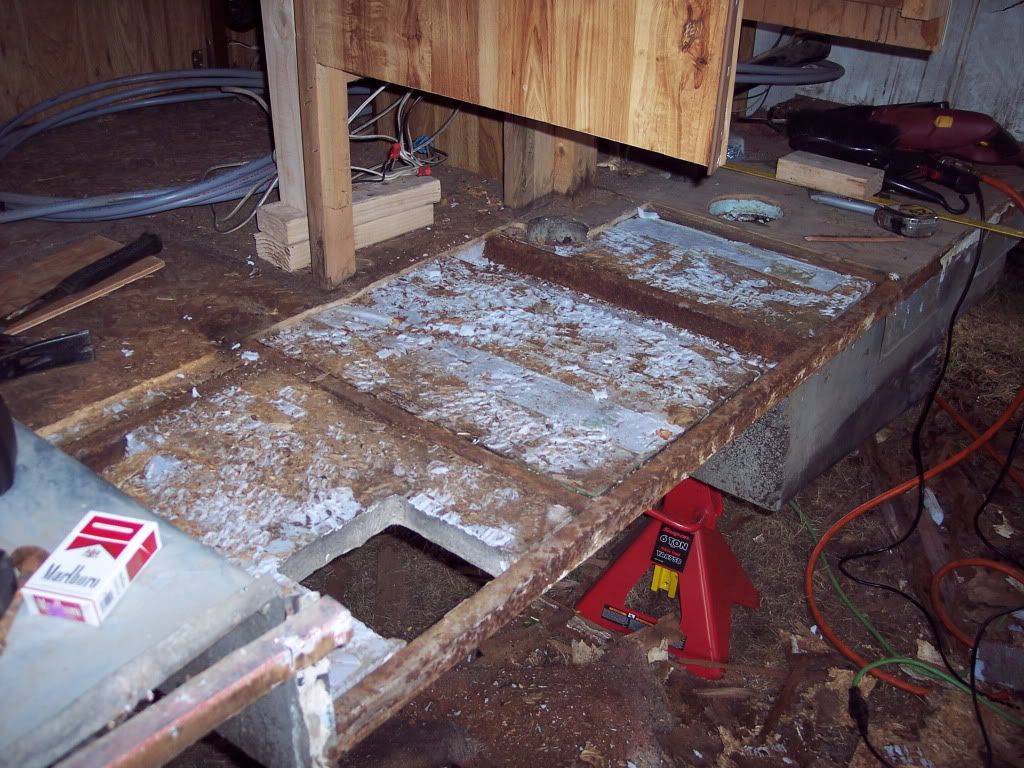
Got it all ready for some freash lumber, I was able to peal the wood free from the original foam, that make me happy I didn't want to buy another sheet of foam for a little section. The wood here for the most part turned to dust.
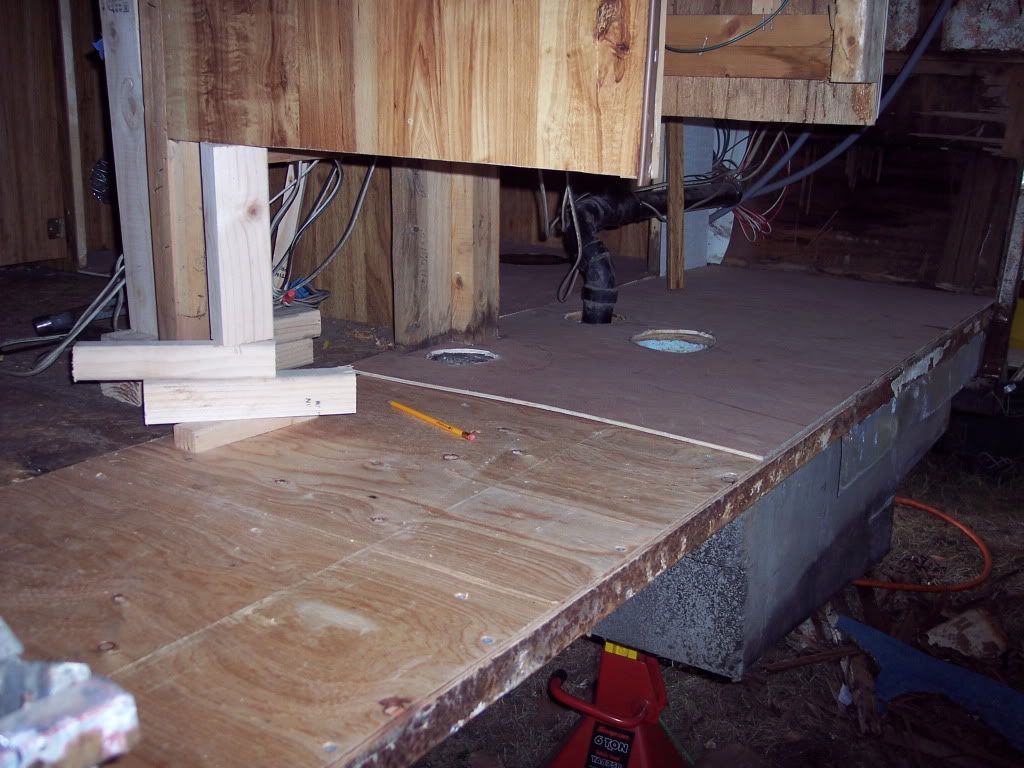
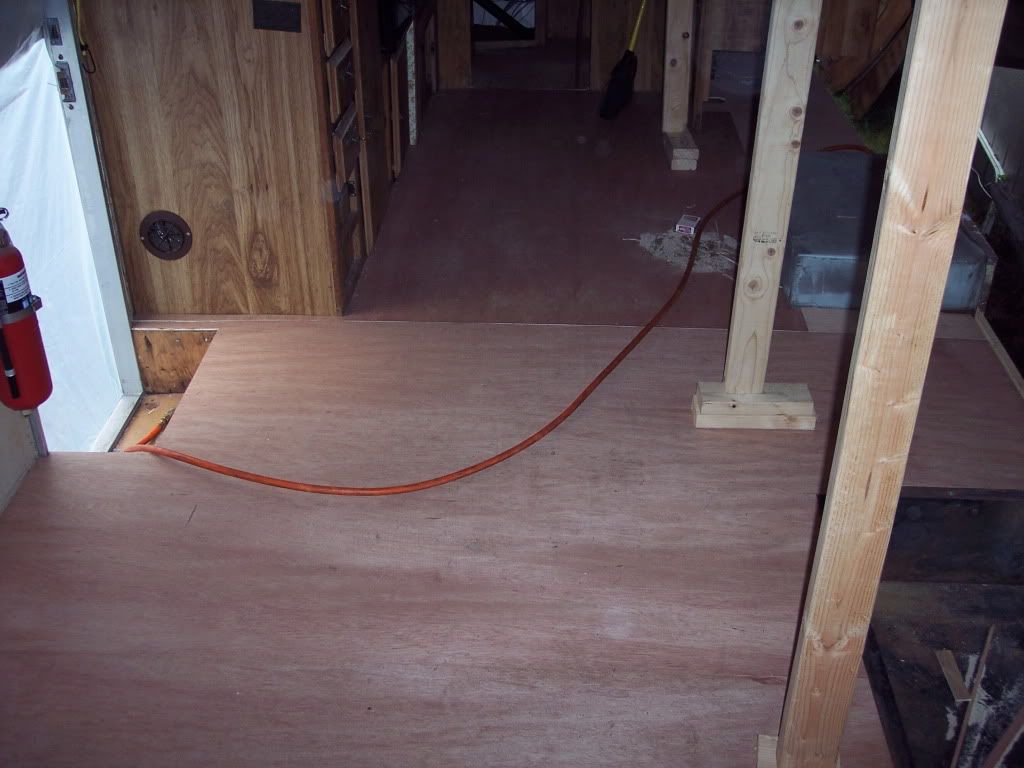
New wood layed down, I decided to install underlayment through the whole motor home to give a nice even freash surface and to stiffin up the floor, it worked!! but again hard to install as I had to go under and around things I didn't remove and nothing was square.
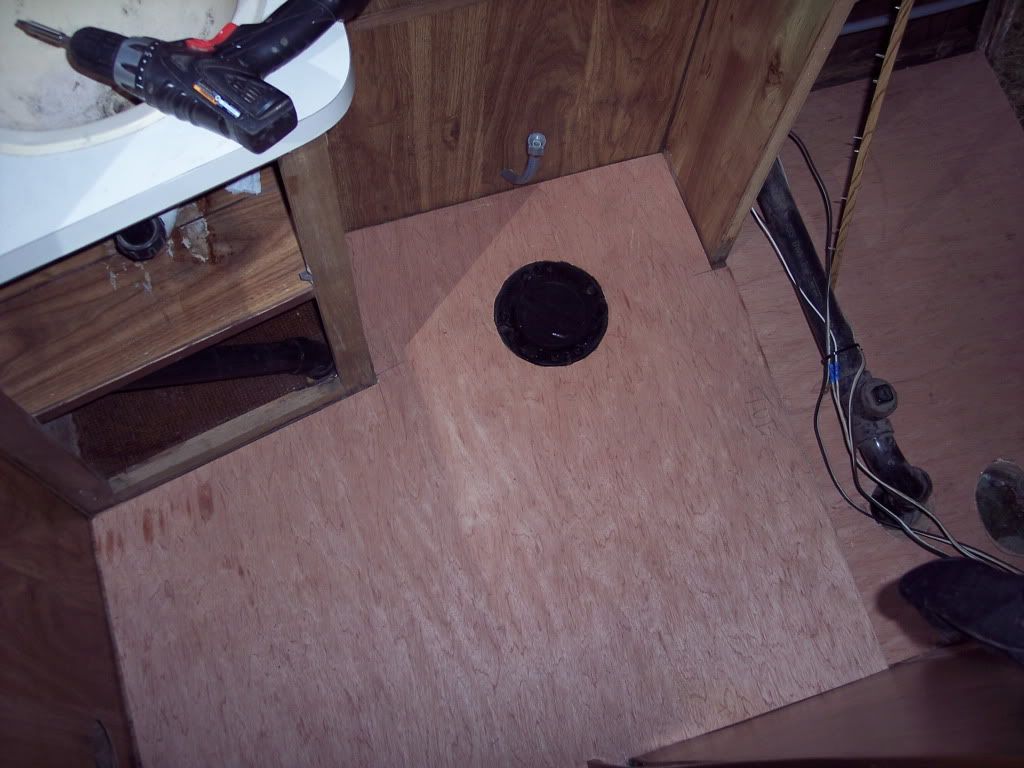
Bathroom floor, plan on laying vinyl floor in here even under the tub for that matter I'm going to lay vinyl in and under all cabnits and storage areas.
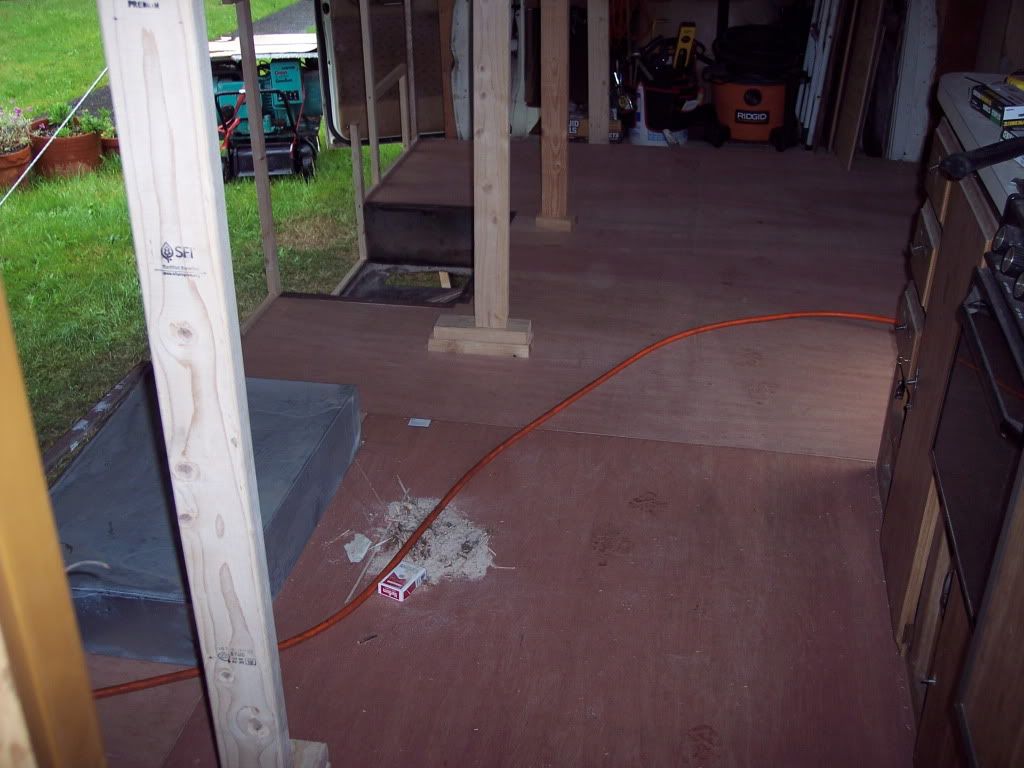
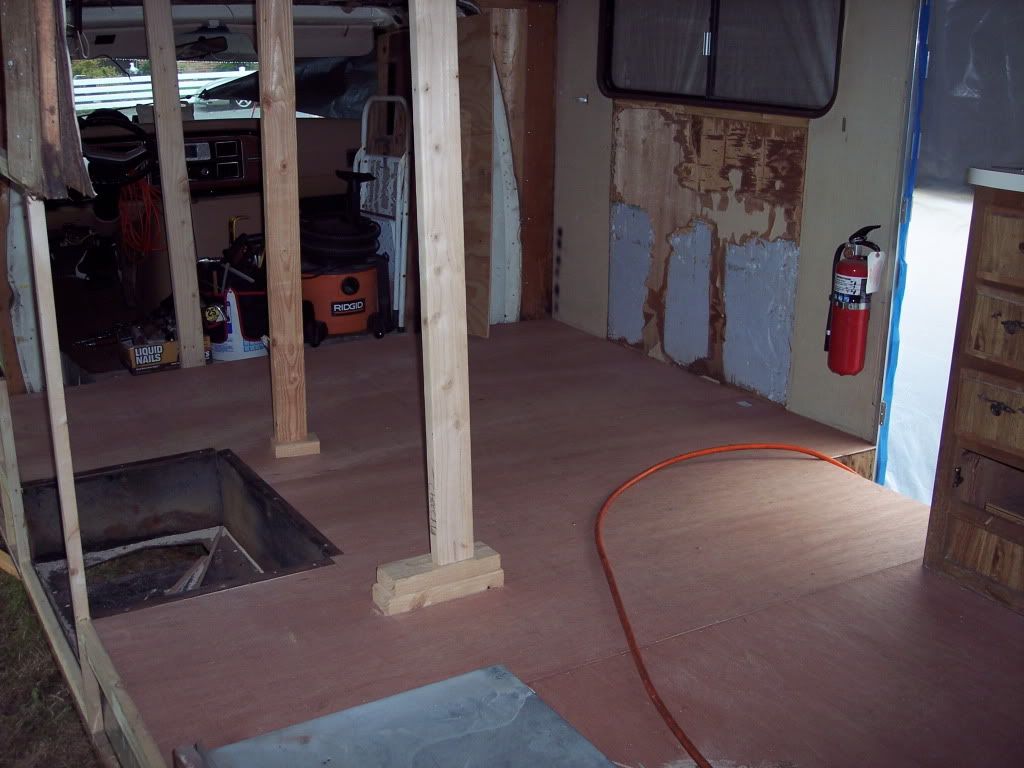
See what I mean, look at the wedge I had to put in next to the kitchen counter, lol wait tell you see the closet it's shaped like a piece of pie.
Well that's all for now.... moving onto the left wall starting at the bathroom and working my way forward since I need to install the inside paneling from the outside since I didn't remove this area's cabnets. I figure I will do the whole wall like this that way I can install any suports I need such as for the table mount cabnets etc.
Stay tuned!
I originaly not going to do anything in this area but my perfection got the best of me and after clearing out the carpet under the inverter and moving plumbing and wiring around found it to be in rough shape so I tore it up and layed new floor.
I painfully removed the wiring and plumbing, I labled the best I could I'm sure it's going to be fun putting all this back together 🙂
Got it all ready for some freash lumber, I was able to peal the wood free from the original foam, that make me happy I didn't want to buy another sheet of foam for a little section. The wood here for the most part turned to dust.
New wood layed down, I decided to install underlayment through the whole motor home to give a nice even freash surface and to stiffin up the floor, it worked!! but again hard to install as I had to go under and around things I didn't remove and nothing was square.
Bathroom floor, plan on laying vinyl floor in here even under the tub for that matter I'm going to lay vinyl in and under all cabnits and storage areas.
See what I mean, look at the wedge I had to put in next to the kitchen counter, lol wait tell you see the closet it's shaped like a piece of pie.
Well that's all for now.... moving onto the left wall starting at the bathroom and working my way forward since I need to install the inside paneling from the outside since I didn't remove this area's cabnets. I figure I will do the whole wall like this that way I can install any suports I need such as for the table mount cabnets etc.
Stay tuned!
Options
- Mark as New
- Bookmark
- Subscribe
- Mute
- Subscribe to RSS Feed
- Permalink
- Report Inappropriate Content
May-24-2013 12:31 PM
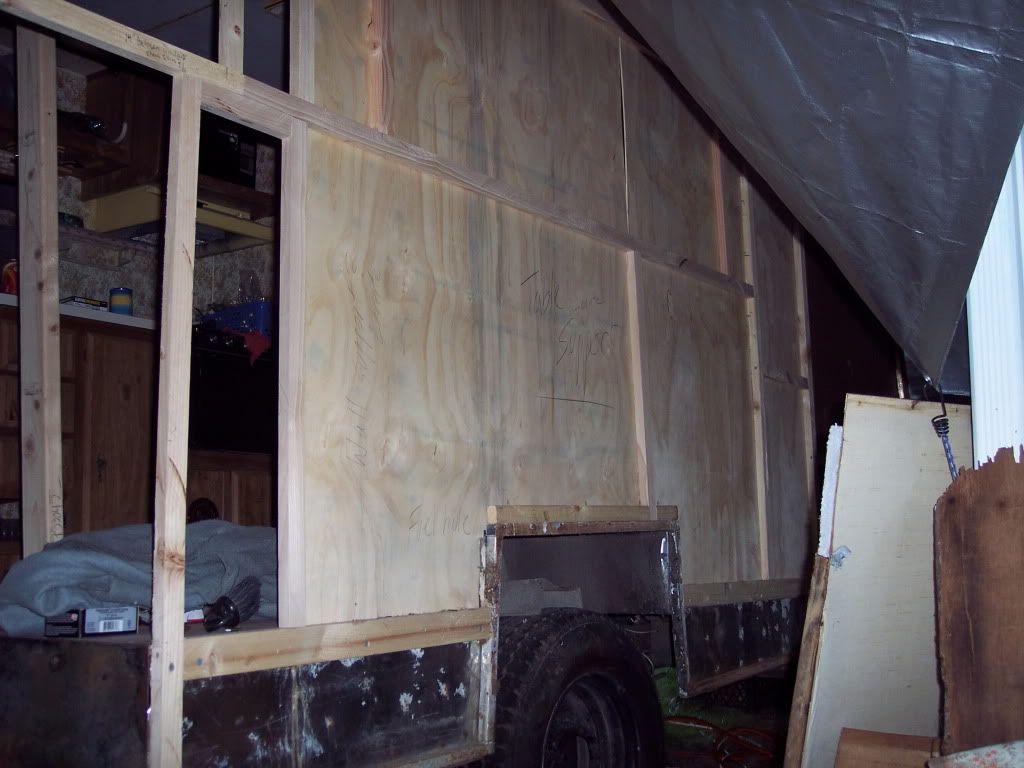
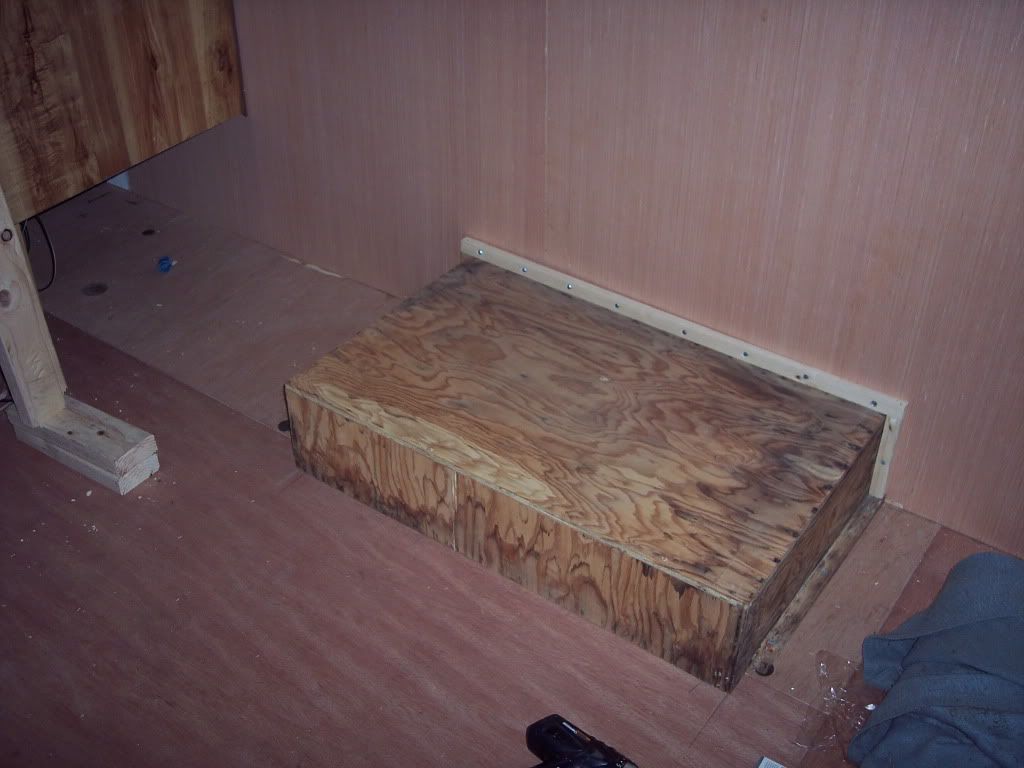
Got some work done on the left wal yesterday, Then got excited and kicked down the rest of the left wall wich was really ony being held up by the closet that's screwed to the wall.
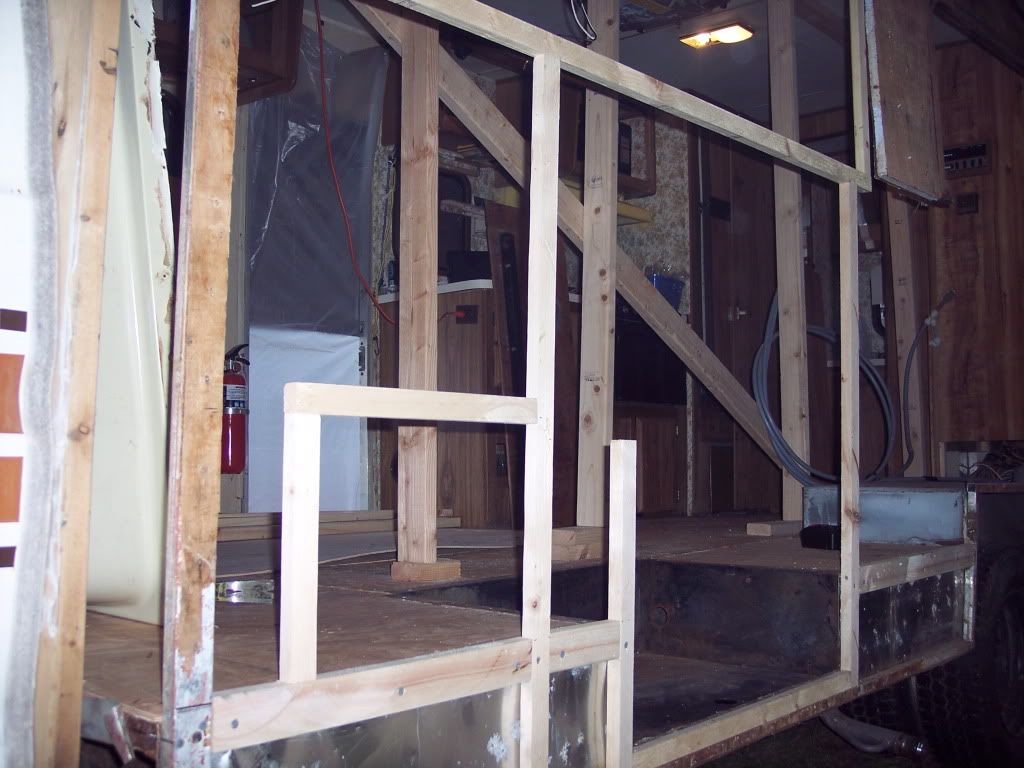
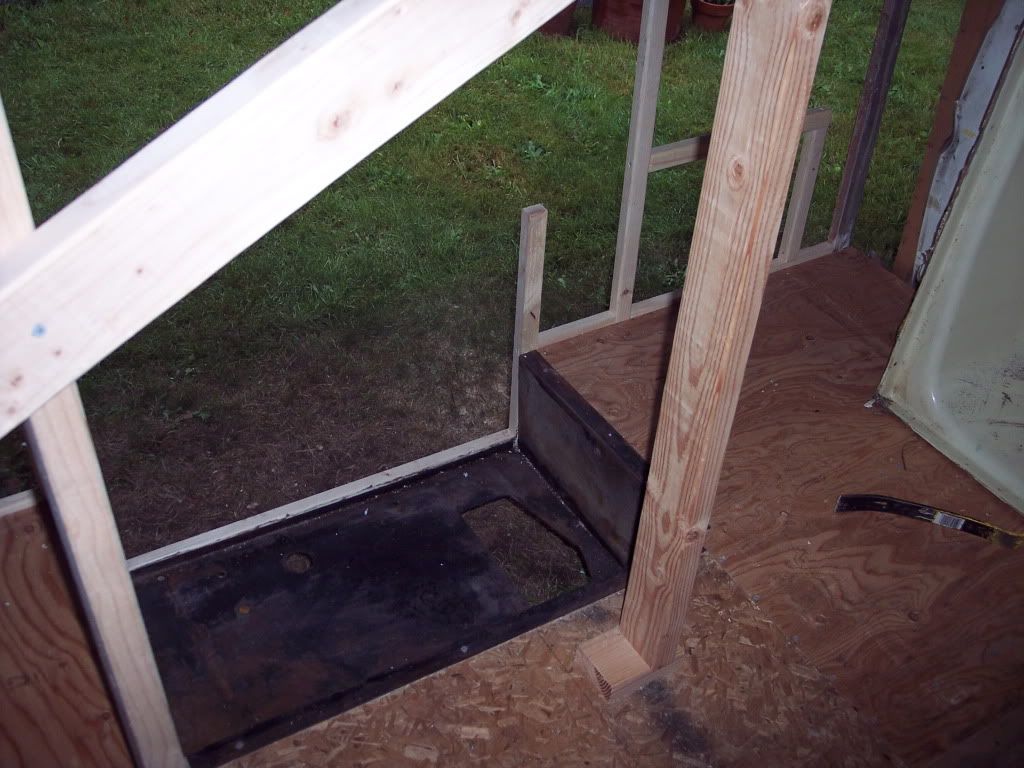
Notice I installed the genset tub. I left the top of that fram open until I put the genset back in, using a engine hoist :)an I'd like to get some wall sheeting up so the genset wieght don't pull down the wall.
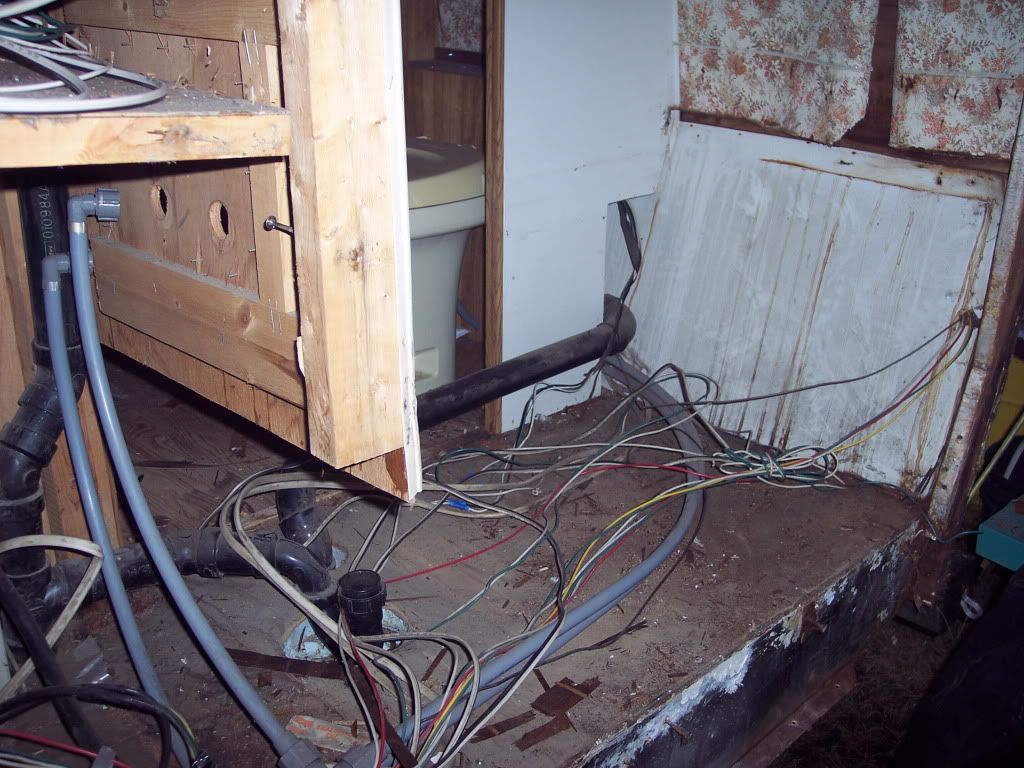
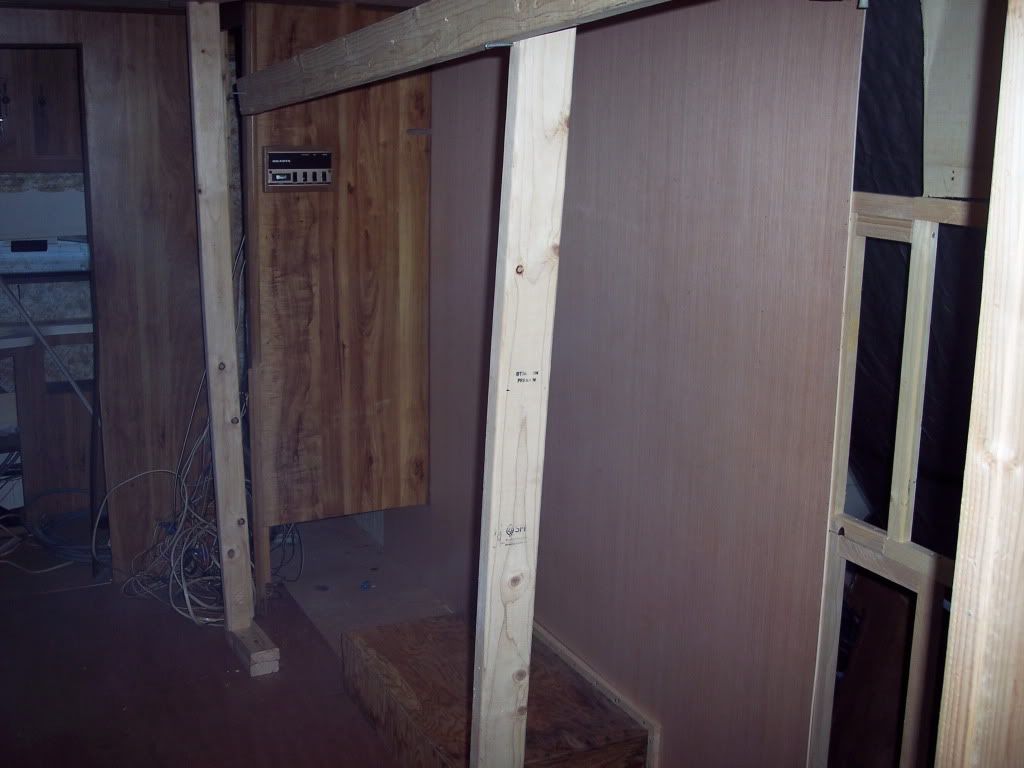
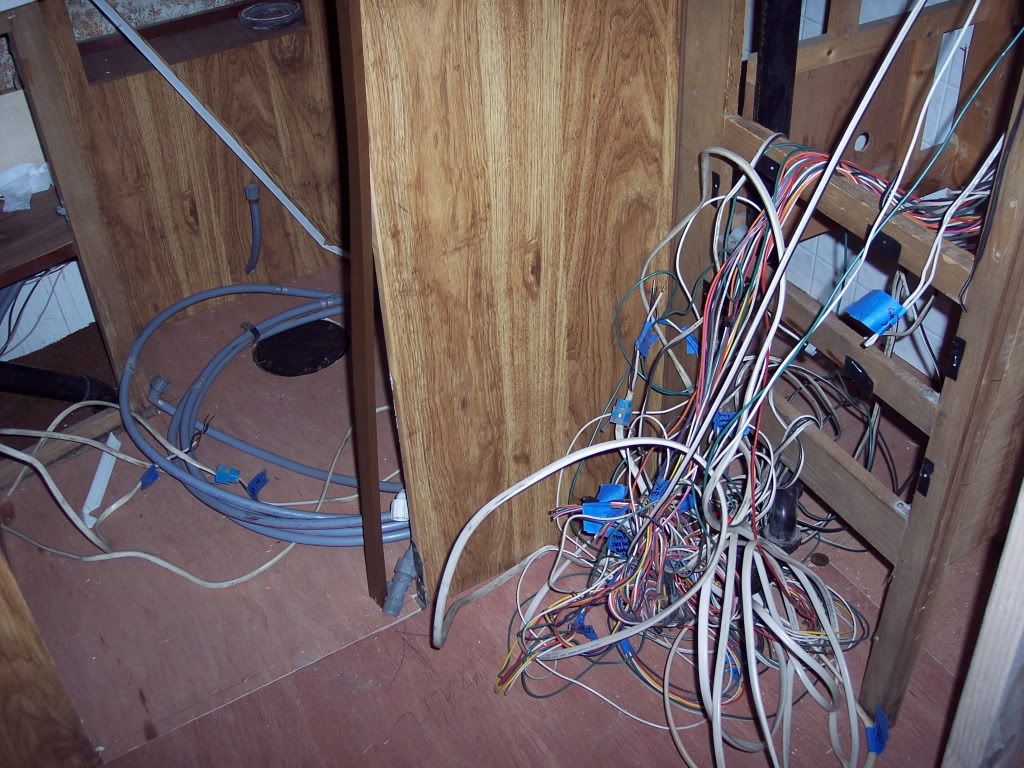
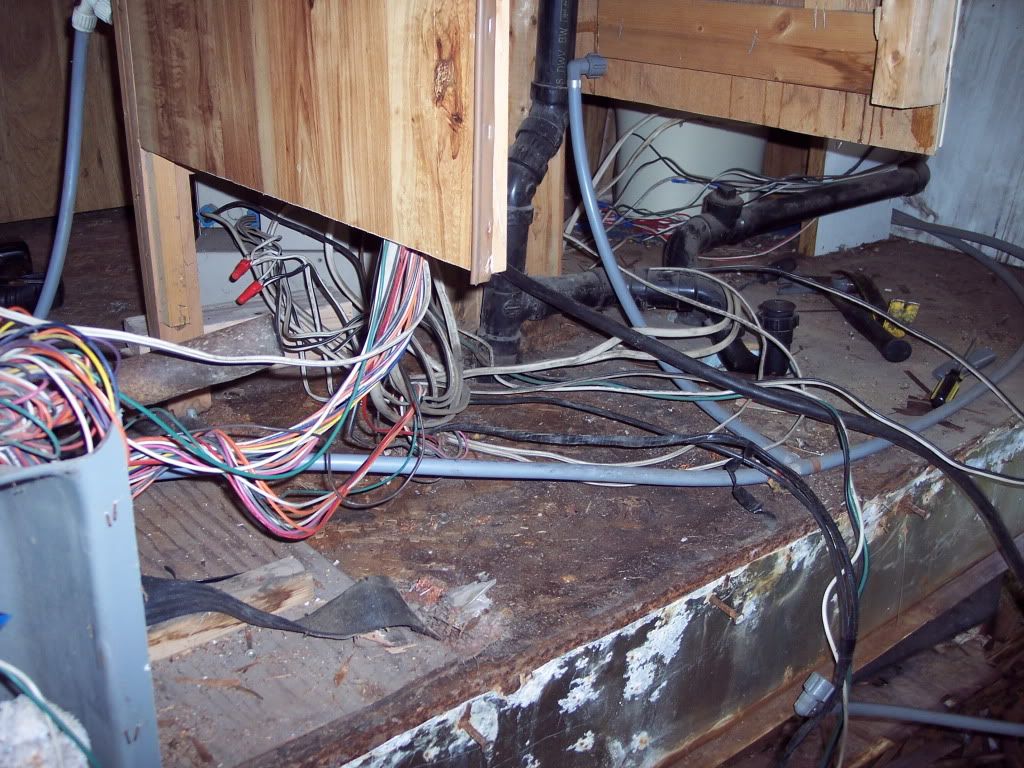
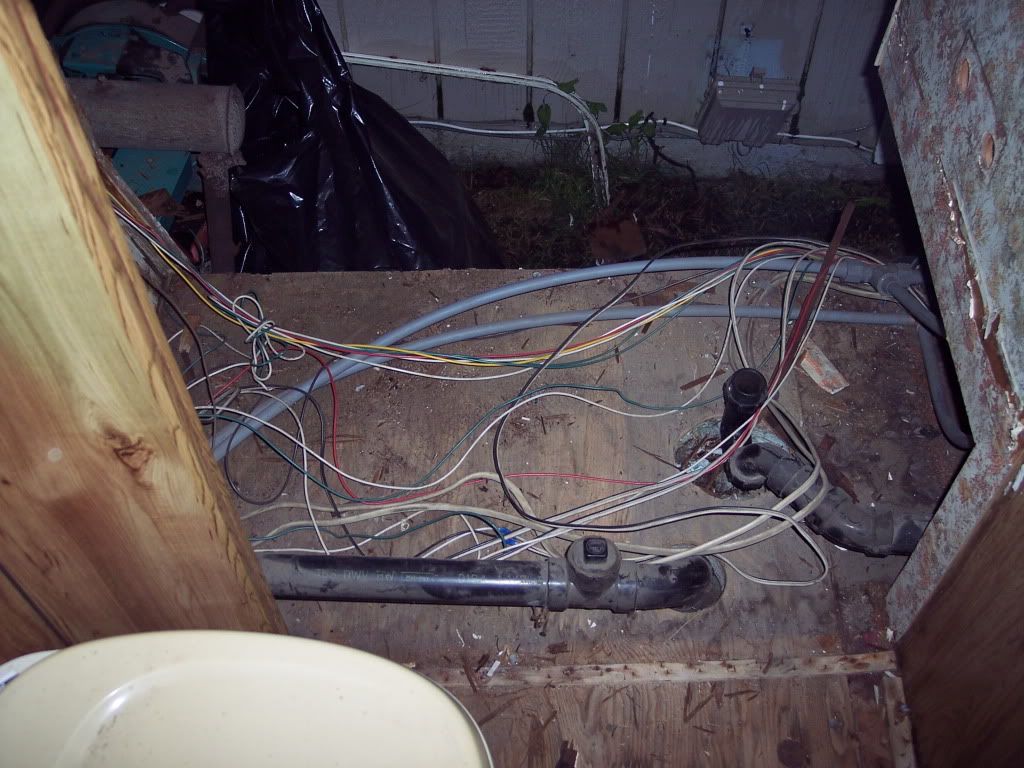
This is from the outside into bathroom were the tub sits, I may have to do some floor work, for sure need to cleen up the rats nest of wiring.
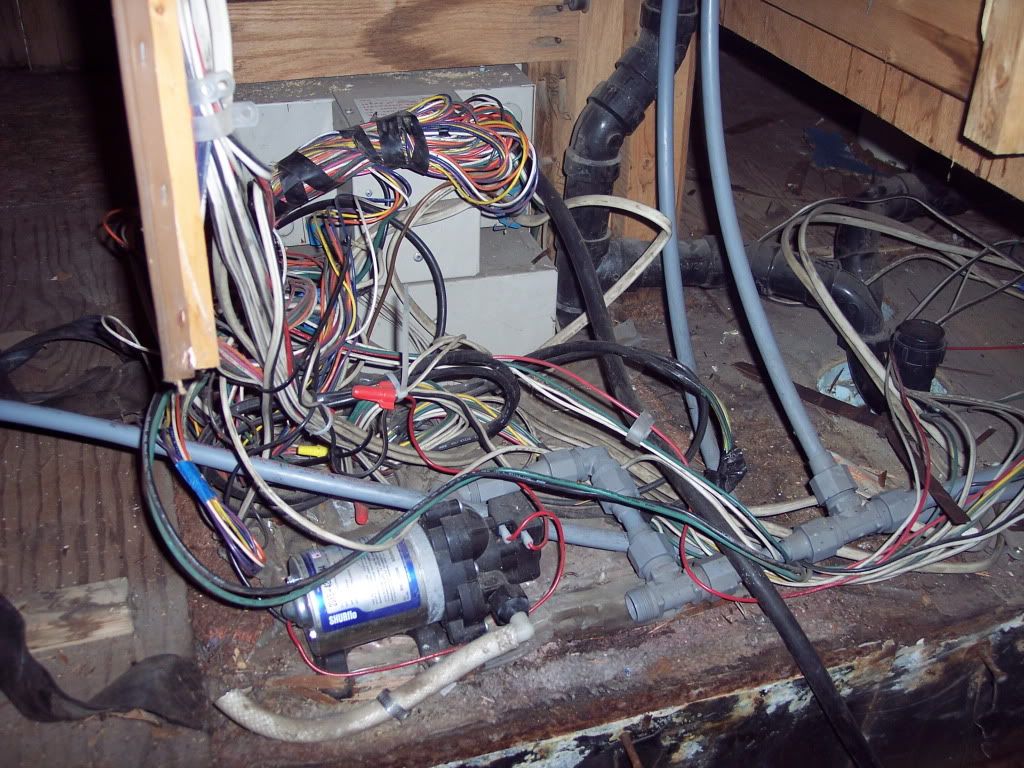
This if from the outside looking into/ under closet next to tub, this is where all the wiring, water pump and breaker panel is, what a big mess. I think I will have to do some floor work here, may just do a cover up. I will clean this wiring up, there is about 200 ft of extra that can be removed, i.e. the control panel harness etc.
From the inside where the tub sits.
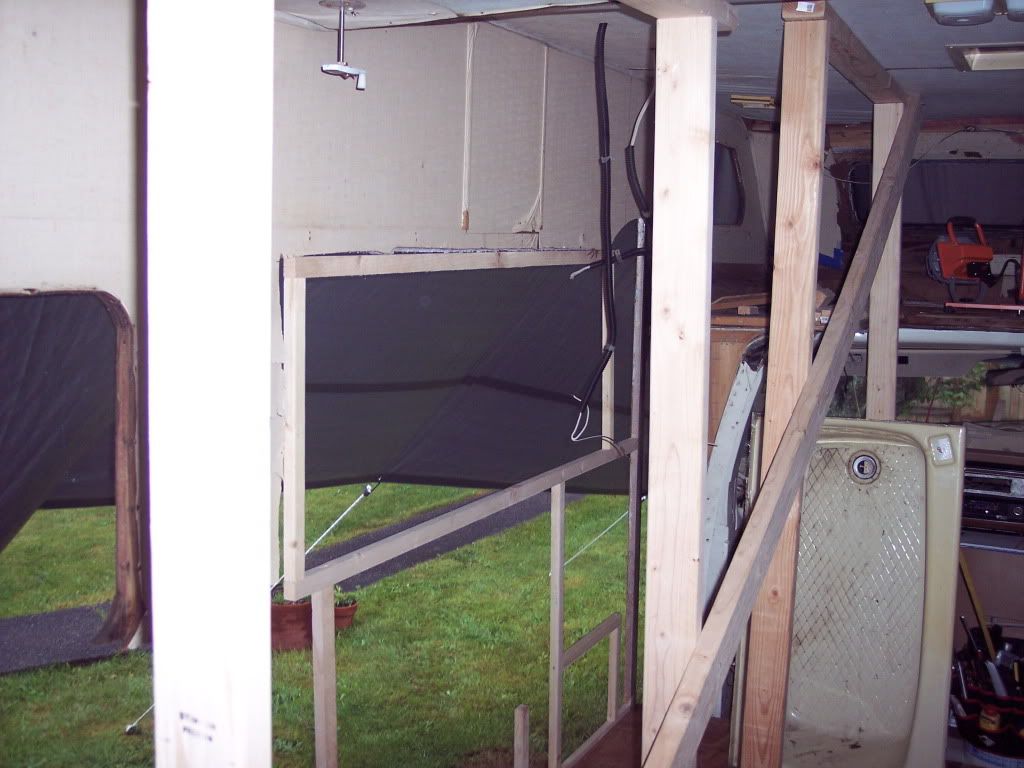
Left wall, to bad I can't get back far enough to give the "big picture"
Well I need to do some more repairs to the floor and have to hang interior first two panel a the back (bathroom and closet) before I can frame any section of that wall as I have no plans removing that section.
Well that's all for now, maybe next Memorial day I'll be in my RV???
Notice I installed the genset tub. I left the top of that fram open until I put the genset back in, using a engine hoist :)an I'd like to get some wall sheeting up so the genset wieght don't pull down the wall.
This is from the outside into bathroom were the tub sits, I may have to do some floor work, for sure need to cleen up the rats nest of wiring.
This if from the outside looking into/ under closet next to tub, this is where all the wiring, water pump and breaker panel is, what a big mess. I think I will have to do some floor work here, may just do a cover up. I will clean this wiring up, there is about 200 ft of extra that can be removed, i.e. the control panel harness etc.
From the inside where the tub sits.
Left wall, to bad I can't get back far enough to give the "big picture"
Well I need to do some more repairs to the floor and have to hang interior first two panel a the back (bathroom and closet) before I can frame any section of that wall as I have no plans removing that section.
Well that's all for now, maybe next Memorial day I'll be in my RV???


