Turn on suggestions
Auto-suggest helps you quickly narrow down your search results by suggesting possible matches as you type.
Showing results for
- Good Sam Community
- Groups
- Motorhome Group
- Forum
- Poly-Weld repair of “poly” water tank leak
Options
- Subscribe to RSS Feed
- Mark Topic as New
- Mark Topic as Read
- Float this Topic for Current User
- Bookmark
- Subscribe
- Mute
- Printer Friendly Page
Poly-Weld repair of “poly” water tank leak
Options
- Mark as New
- Bookmark
- Subscribe
- Mute
- Subscribe to RSS Feed
- Permalink
- Report Inappropriate Content
Jan-24-2016 12:39 PM
Last summer I noticed water dripping from the corner of my Class C. First I hoped it was dew from the roof. Then I hoped it was a plastic line from the tank. No, it was the tank. Time to get to work.
The 31-gallon tank is under the sofa. I removed the sofa by unscrewing 8 U-bolts and lifting it off. This was easier than expected. Then I unbolted the sofa frame from the floor. You can see the U-bolts and floor bolts here: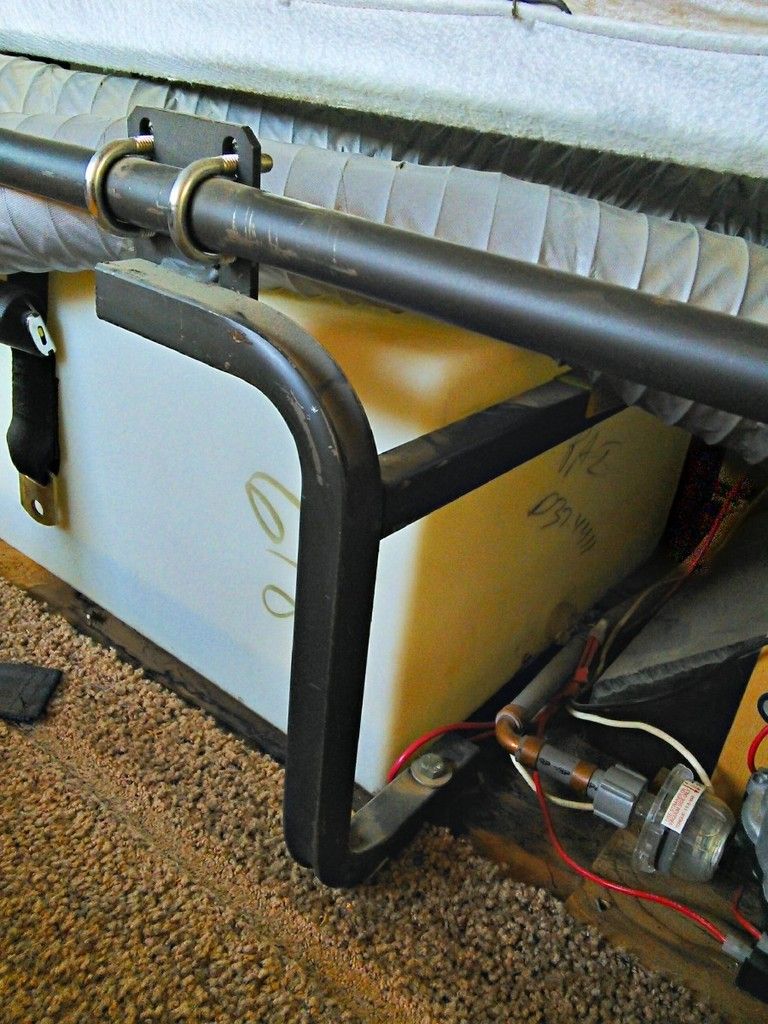
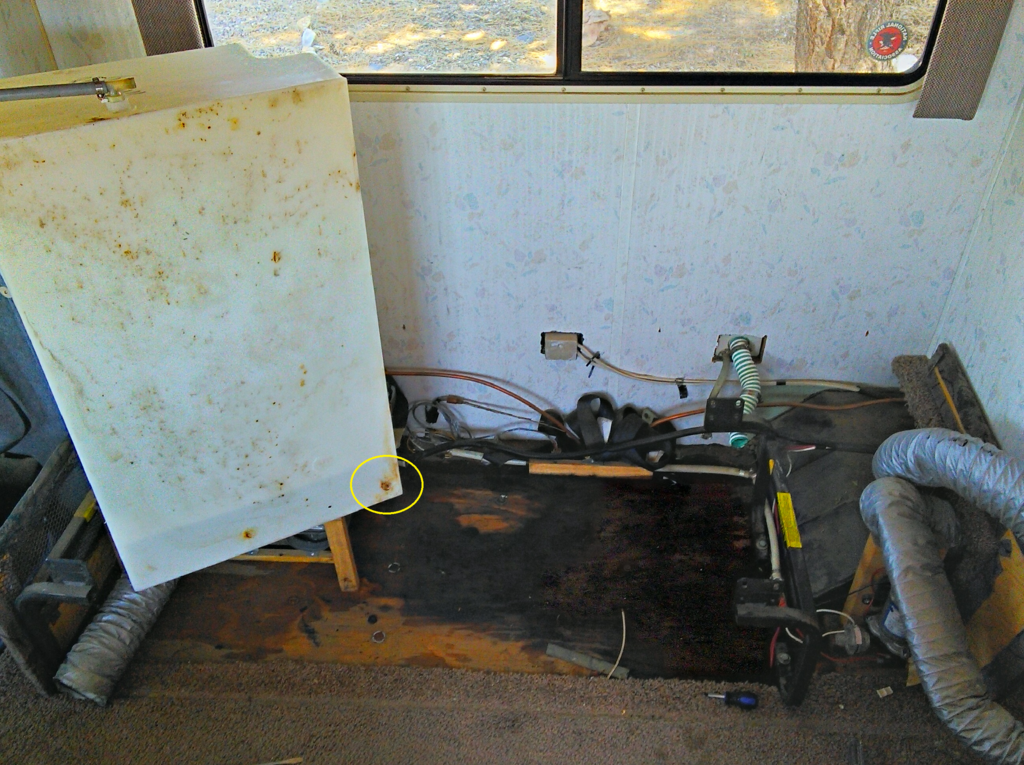
Now I could finally see what was going on. For 20 years, the tank had been sitting on the tops of carriage bolts protruding slightly from the floor. This had concentrated stress and a tiny almost invisible crack had developed at the point circled:
First I thought about replacing the whole tank, but it was $250. There are various tank repair kits, but if you read the fine print they typically say "Not recommended for use on polyethylene or polypropylene tanks". Well, that is most plastic tanks it seems. I’m sure these kits do work for some people, but be aware that there is not a true deep chemical bond with the plastic.
Next I thought about getting a plastic welder. Harbor Freight has one that gets good reviews.
By doing various web searches, I found TAP Poly-Weld. This appears to be the only adhesive available that really sticks to "poly" anything with a structural bond.
Working with a Poly-Weld is a little different from any other adhesive I have ever used. You have to “flame” the plastic with a torch to make it receptive to bonding as explained in the Instructions.
The process was straightforward:
And that was about it. After 20 hours I did a test fill and there was no leak.
This photo shows the Poly-Weld dispenser, my improvised flame spreader, and the repaired area at lower left: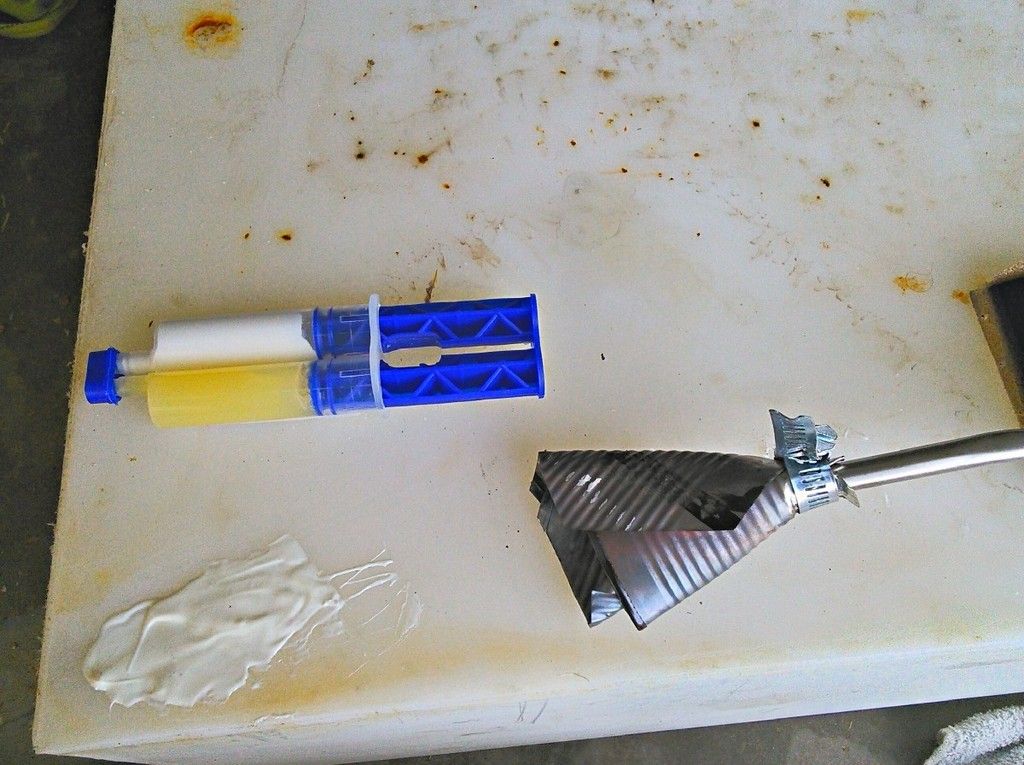
I drive a lot of rough roads, so I reinstalled the tank on top of a layer of closed-cell foam that Costco and other places sell as workshop floor mats. This foam is very firm but thick enough that the tank is completely protected from the carriage bolts underneath.
I also upgraded the belting around the tank that is supposed to hold it in place during an accident. A full tank weighs over 200 lbs. Unlike the seatbelts the single belt was connected with two deck screws! They had both pulled out years ago. I upgraded to two belts, each secured with 1/4 by 3-inch carriage bolts running through the floor: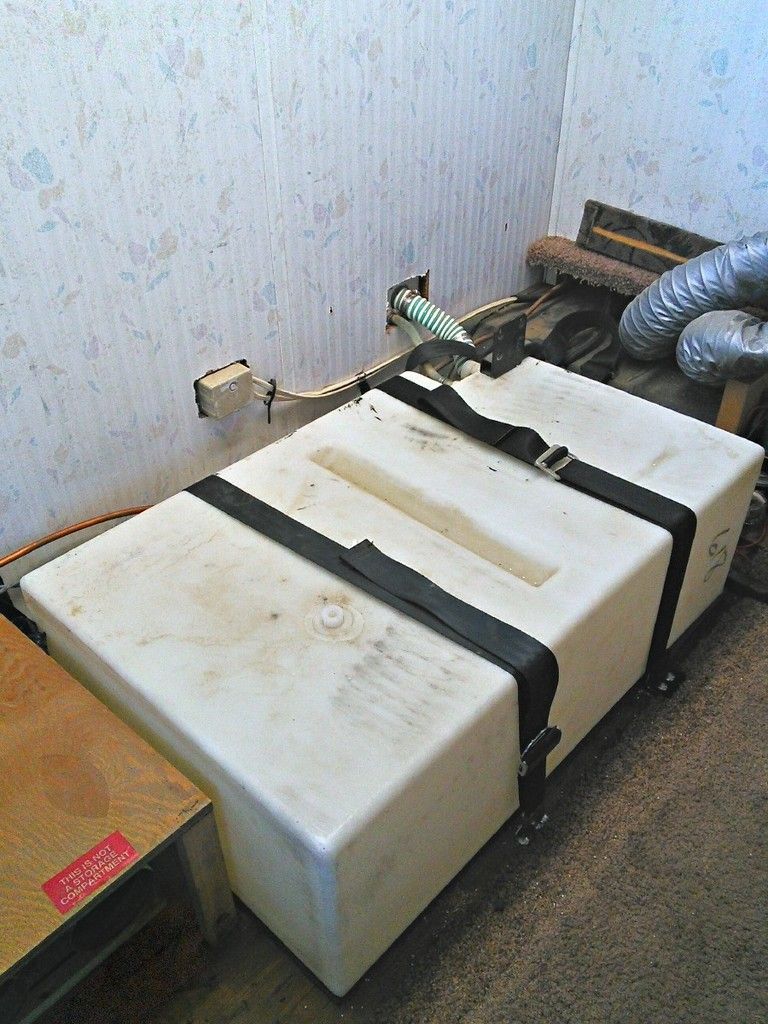
Be careful to check underneath before drilling through the floor.
It has been about 6 months and this project appears to be a successful repair.
The 31-gallon tank is under the sofa. I removed the sofa by unscrewing 8 U-bolts and lifting it off. This was easier than expected. Then I unbolted the sofa frame from the floor. You can see the U-bolts and floor bolts here:

Now I could finally see what was going on. For 20 years, the tank had been sitting on the tops of carriage bolts protruding slightly from the floor. This had concentrated stress and a tiny almost invisible crack had developed at the point circled:

First I thought about replacing the whole tank, but it was $250. There are various tank repair kits, but if you read the fine print they typically say "Not recommended for use on polyethylene or polypropylene tanks". Well, that is most plastic tanks it seems. I’m sure these kits do work for some people, but be aware that there is not a true deep chemical bond with the plastic.
Next I thought about getting a plastic welder. Harbor Freight has one that gets good reviews.
By doing various web searches, I found TAP Poly-Weld. This appears to be the only adhesive available that really sticks to "poly" anything with a structural bond.
Working with a Poly-Weld is a little different from any other adhesive I have ever used. You have to “flame” the plastic with a torch to make it receptive to bonding as explained in the Instructions.
The process was straightforward:
- Sanded the leak area with 60 grit sandpaper
- I could not find the flame spreader for my propane torch, so I made one out of a tin can held on with a hose clamp
- I ducked into the dark laundry room to adjust the flame length so only the “secondary flame” was coming out of the spreader
- Did five quick strokes of the flame over the leak area
- Tried a drop of water… it spread out instead of beaded up!
- Applied the Poly-Weld
And that was about it. After 20 hours I did a test fill and there was no leak.
This photo shows the Poly-Weld dispenser, my improvised flame spreader, and the repaired area at lower left:

I drive a lot of rough roads, so I reinstalled the tank on top of a layer of closed-cell foam that Costco and other places sell as workshop floor mats. This foam is very firm but thick enough that the tank is completely protected from the carriage bolts underneath.
I also upgraded the belting around the tank that is supposed to hold it in place during an accident. A full tank weighs over 200 lbs. Unlike the seatbelts the single belt was connected with two deck screws! They had both pulled out years ago. I upgraded to two belts, each secured with 1/4 by 3-inch carriage bolts running through the floor:

Be careful to check underneath before drilling through the floor.
It has been about 6 months and this project appears to be a successful repair.
Labels:
- Labels:
-
Class C
2 REPLIES 2
Options
- Mark as New
- Bookmark
- Subscribe
- Mute
- Subscribe to RSS Feed
- Permalink
- Report Inappropriate Content
Jan-24-2016 01:21 PM
You are most welcome. Hope it helps others. Amazing that somebody figured out how to bond to "poly".
Options
- Mark as New
- Bookmark
- Subscribe
- Mute
- Subscribe to RSS Feed
- Permalink
- Report Inappropriate Content
Jan-24-2016 01:01 PM
Great article. Thanks for posting.


