Turn on suggestions
Auto-suggest helps you quickly narrow down your search results by suggesting possible matches as you type.
Showing results for
- Good Sam Community
- Everything RV
- DIY Maintenance
- Noisy Range Hood Fan Replacement
Options
- Subscribe to RSS Feed
- Mark Topic as New
- Mark Topic as Read
- Float this Topic for Current User
- Bookmark
- Subscribe
- Mute
- Printer Friendly Page
Noisy Range Hood Fan Replacement
Options
- Mark as New
- Bookmark
- Subscribe
- Mute
- Subscribe to RSS Feed
- Permalink
- Report Inappropriate Content
May-01-2016 04:14 PM
Like most such fans, our Ventline fan was so noisy it was barely tolerable. We have looked at the FABULOUS fan but couldn't see spending quite that much. Somewhere in these forums (I'd give credit, but haven't been able to find the post) I saw the suggestion to use a big computer fan. After a quick Google search I found a likely candidate.
Here are photos of my fan replacement project. I used THIS FAN which is 180mm, or a little over 7". It easily opens the flapper. Only issue I had is that the fan is thick enough to keep the flapper from closing completely--but then it didn't close completely with the original fan, either. Sometime I'll find a piece of light aluminum or plastic angle and glue a piece to the flapper, but in the meantime it doesn't seem to be an issue.
This fan comes with a speed control and a jumper to replace the speed control. I installed the control--just took drilling one hole--but if I were doing it again I wouldn't bother.

The 180mm fan is almost big enough to cover the original opening--but not quite. Also, there were gaps in the panel separating the fan from the light compartment.
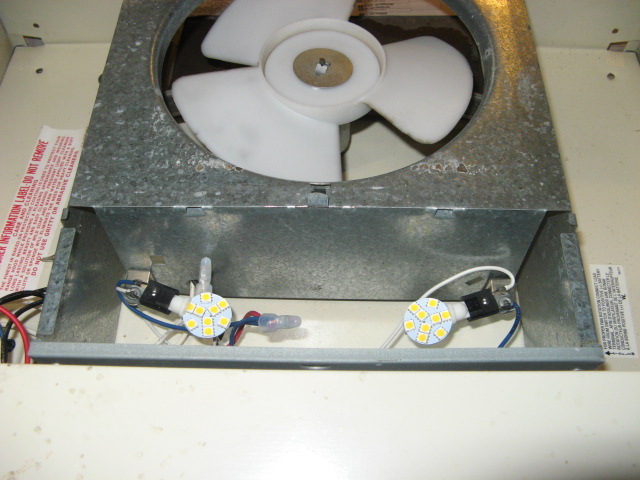
I didn't want air recirculating around the fan, so I cut fillers to seal the gaps and pop-riveted them in place...
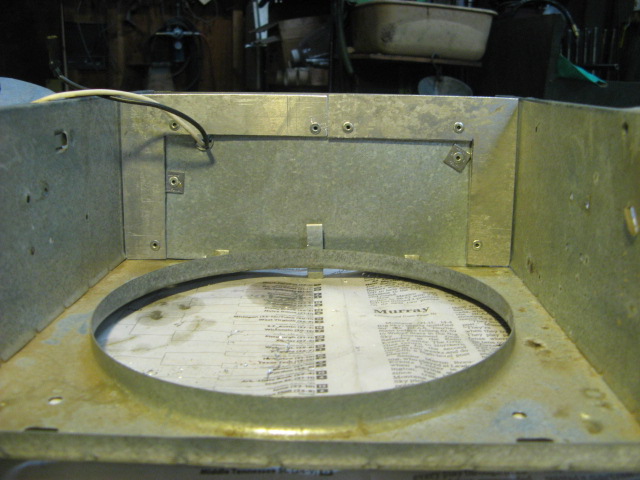
...and cut an adapter plate to seal the fan to the housing.
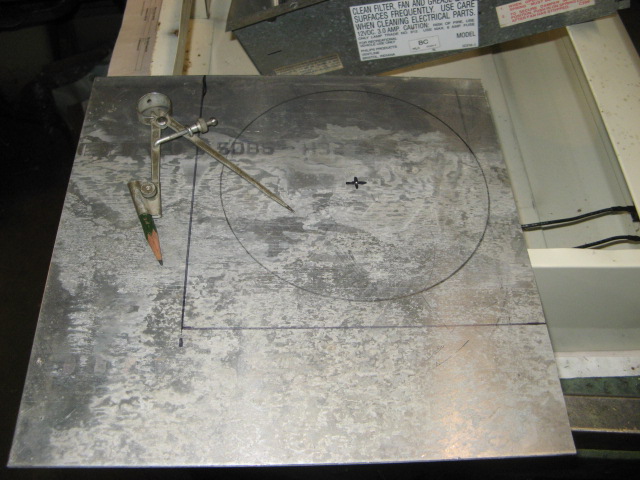
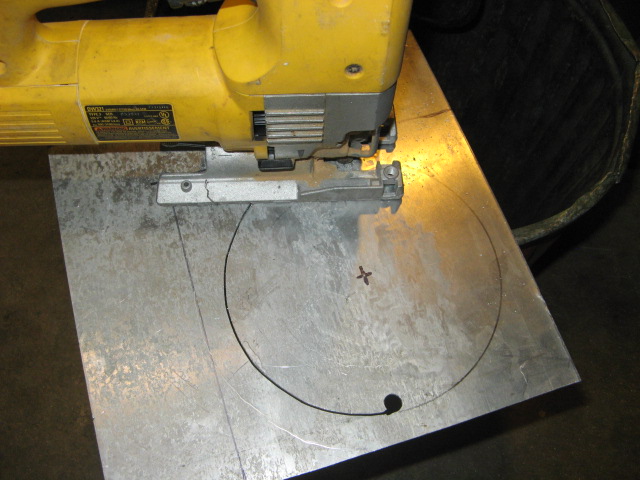
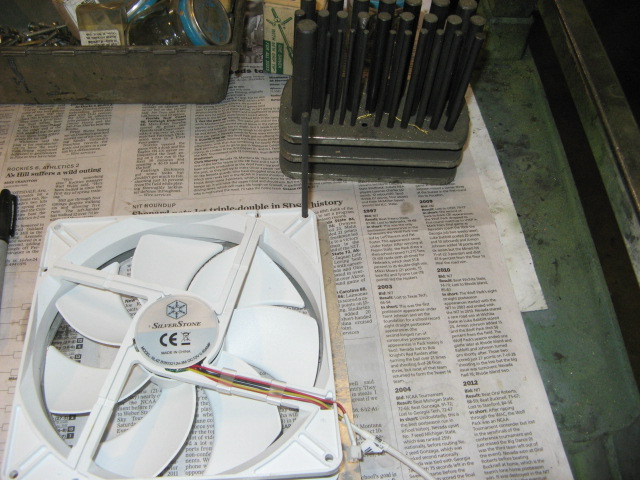
Transfer punches are handy but not essential for marking holes.
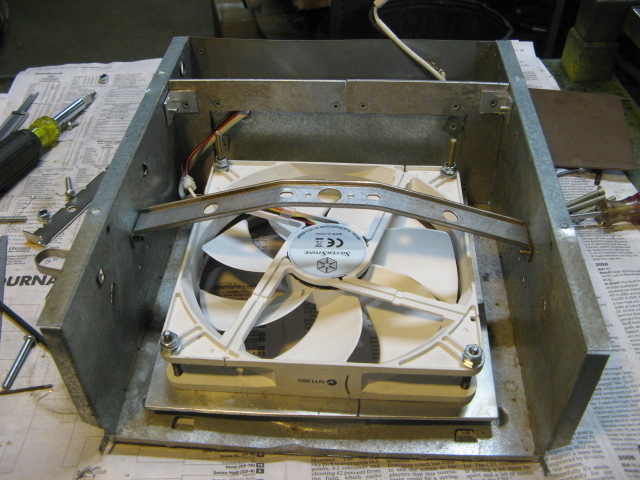
After installing the fan, I riveted the original fan support bracket back in to stiffen the case.
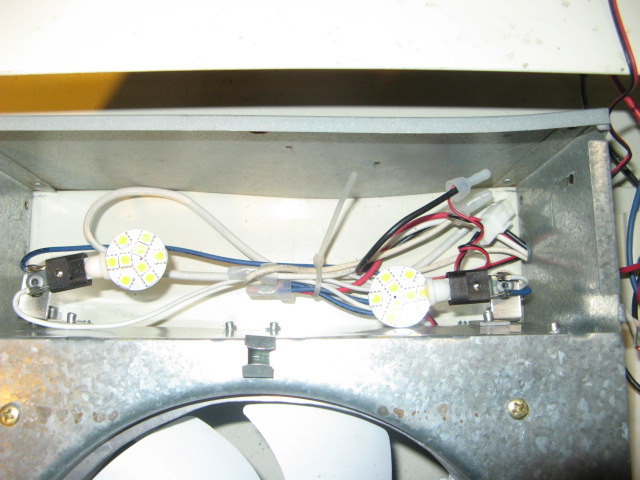
Route the wiring through the existing holes. If you are using the speed control, remember to run its cable through before you plug it into the fan harness.
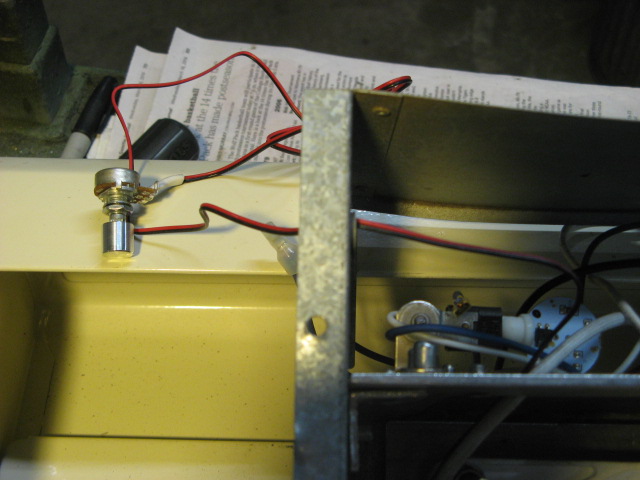
I used crimp connectors as the factory did to re-assemble the wiring.
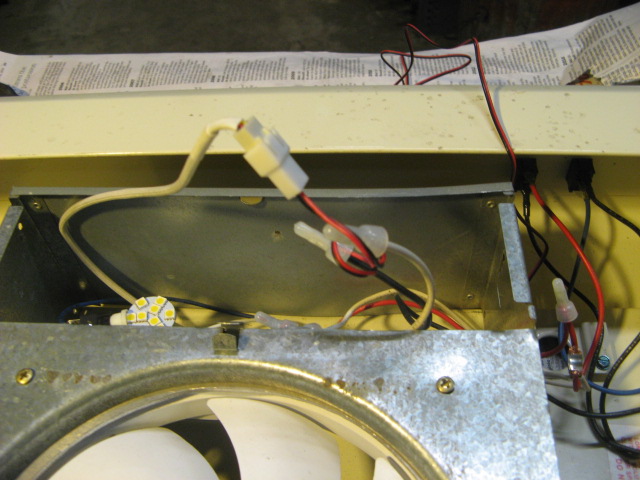
Tidy up the wiring with a couple of zipties.
Install the flap, mount the fan housing into the hood, and drill a hole in the hood face for the speed control if you're using it. My AFTER photos didn't come out. If I have occasion to take the hood down, I'll re-take them and attach to this post.
This fan is so quiet you can barely hear it.
Here are photos of my fan replacement project. I used THIS FAN which is 180mm, or a little over 7". It easily opens the flapper. Only issue I had is that the fan is thick enough to keep the flapper from closing completely--but then it didn't close completely with the original fan, either. Sometime I'll find a piece of light aluminum or plastic angle and glue a piece to the flapper, but in the meantime it doesn't seem to be an issue.
This fan comes with a speed control and a jumper to replace the speed control. I installed the control--just took drilling one hole--but if I were doing it again I wouldn't bother.

The 180mm fan is almost big enough to cover the original opening--but not quite. Also, there were gaps in the panel separating the fan from the light compartment.

I didn't want air recirculating around the fan, so I cut fillers to seal the gaps and pop-riveted them in place...

...and cut an adapter plate to seal the fan to the housing.


Transfer punches are handy but not essential for marking holes.

After installing the fan, I riveted the original fan support bracket back in to stiffen the case.

Route the wiring through the existing holes. If you are using the speed control, remember to run its cable through before you plug it into the fan harness.

I used crimp connectors as the factory did to re-assemble the wiring.

Tidy up the wiring with a couple of zipties.

Install the flap, mount the fan housing into the hood, and drill a hole in the hood face for the speed control if you're using it. My AFTER photos didn't come out. If I have occasion to take the hood down, I'll re-take them and attach to this post.
This fan is so quiet you can barely hear it.
3 REPLIES 3
Options
- Mark as New
- Bookmark
- Subscribe
- Mute
- Subscribe to RSS Feed
- Permalink
- Report Inappropriate Content
May-02-2016 01:21 PM
Soundguy, I see in your video that your mod works by reducing the fan speed. That wouldn't have helped me. The original fan moved less air than my replacement fan does at full speed. If the speed of the OE fan (mine, anyway) was reduced enough to make the noise tolerable I suspect it wouldn't move enough air to be effective.
I think the biggest factor is the number of blades--seven for the new fan vs. three for the old. The old motor by itself, without the blade mounted, is pretty quiet. The higher blade number is, to me, worth the work.
I think the biggest factor is the number of blades--seven for the new fan vs. three for the old. The old motor by itself, without the blade mounted, is pretty quiet. The higher blade number is, to me, worth the work.
Options
- Mark as New
- Bookmark
- Subscribe
- Mute
- Subscribe to RSS Feed
- Permalink
- Report Inappropriate Content
May-02-2016 04:26 AM
Great mod but way too much work for me. :R I instead chose the much simpler route of adding an inexpensive PWM Voltage Controller (2 pics, 1 video) that solved the noisy fan problem entirely. :B
2012 Silverado 1500 Crew Cab
2014 Coachmen Freedom Express 192RBS
2003 Fleetwood Yuma * 2008 K-Z Spree 240BH-LX
2007 TrailCruiser C21RBH * 2000 Fleetwood Santa Fe
1998 Jayco 10UD * 1969 Coleman CT380
2014 Coachmen Freedom Express 192RBS
2003 Fleetwood Yuma * 2008 K-Z Spree 240BH-LX
2007 TrailCruiser C21RBH * 2000 Fleetwood Santa Fe
1998 Jayco 10UD * 1969 Coleman CT380
Options
- Mark as New
- Bookmark
- Subscribe
- Mute
- Subscribe to RSS Feed
- Permalink
- Report Inappropriate Content
May-01-2016 05:45 PM
I used exactly the same fan, Joe. To install it, I just did a bit of tin knocking to square up the round opening for a better fit, and used nylon spacers and longer screws to mount it. This was the second coach I made th mod on, and I did use the speed control on the first one, but as ou said, it's not needed, and I didn't use it this time. Because the fan is so quiet, I also added a small red LED through an 1/8" hole I drilled in the front panel next to the switch so we won't forget to turn it off. All in all, a great mod!
Dutch
2001 GBM Landau 34' Class A
F53 chassis, Triton V10, TST TPMS
Bigfoot Automatic Leveling System
2011 Toyota RAV4 4WD/Remco pump
ReadyBrute Elite tow bar/Blue Ox baseplate
2001 GBM Landau 34' Class A
F53 chassis, Triton V10, TST TPMS
Bigfoot Automatic Leveling System
2011 Toyota RAV4 4WD/Remco pump
ReadyBrute Elite tow bar/Blue Ox baseplate


