- Good Sam Community
- Everything RV
- DIY Maintenance
- The Ultimate DIY thread - Ubuilding (Pics)
- Subscribe to RSS Feed
- Mark Topic as New
- Mark Topic as Read
- Float this Topic for Current User
- Bookmark
- Subscribe
- Mute
- Printer Friendly Page
The Ultimate DIY thread - Ubuilding (Pics)
- Mark as New
- Bookmark
- Subscribe
- Mute
- Subscribe to RSS Feed
- Permalink
- Report Inappropriate Content
Mar-04-2012 10:52 AM
There is another, albeit smaller, side to this whole RV thing - those crazy folks who build their own for whatever reason. Whether you've scratch-built it from the ground up, assembled a kit, or (like me) scrounge up appropriate frames and go from there: let's hear about it.
I'm on number three.
The first was simply a utility trailer that got an enclosed box for a fraction of the cost of the used toy haulers I was looking at. It was carrying mountain bikes and race gear, so the GVW didn't matter and all the commercially built units were overkill for what I needed. A guy my dad worked with had a dump trailer he didn't need anymore...and so it began.
Number two was a more adventurous project. I started with a tent trailer deck and built a steel stud frame and sheathed it, first in OSB then in 1/4" ply when that failed dismally. I camped the trailer as a bare shell a few times, but the noise when the wind blew wasn't conducive to a good night's sleep. It's still on my 'ideas' pile, but it wold have to be FAR more rigid than that 'technology demonstrator' was.
Those two were pre-internet and pre-digital (for me at least) so there are pics but they are in a box in the basement and haven't seen the light of day in a long time...lost at sea.
Then I got a great deal on a 24' 1977 Dodge C..."had I known then what I know now..." nuff said.
That was how I found this forum.
A couple other projects and work since then and now I'm at a stage in my life where I want to go back to school and get the education I should have gotten years ago. Part of that 5 year strategy is staying in a trailer to keep my accommodation costs down....the rub is that I drive a compact pickup and don't have said trailer.
For this boatbuilder, the solution was a cinch...
My principal build requirements have been low build cost, low towing weight, four season (no canvas) and a permanent bed.
So far, I am building to all of those except for a minor concession in the bed - it will convert to form one side of the dinette.
I started with a tent trailer - $50 on craigslist. Once the body was off, the build could begin:
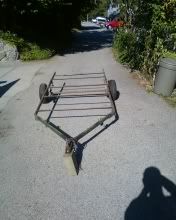
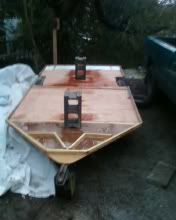
The deck is a sandwich of 3/8 ply, 1" foam, and 1/8 doorskin on top to provide some puncture resistance. At the moment, I'm sheathing the top of the deck in epoxy and 6oz cloth (pics to follow). The body will be foam and epoxy and will be shaped like a horse trailer - the head will be u in the nose and the bed will be in the back with a slide out in the back wall for a footwell. I will have to fab the (manual) slideout mechanism. My plan is to use heavy duty drawer slides, but any insight there is appreciated.
This is the completed but not yet glassed deck:
 .
.For the appliances, I scrounged up a free camper on craigslist. For the cost of a case of beer and the dump fees ($60), I got a stove/oven, two way fridge, lantern, windows, and a bunch of other bits. I still have to replace the heating element in the fridge (works great on gas) and the furnace valve body was beyond my desire to fix it, but otherwise everything works great and just needs to be cleaned up a bit.
Today, I'll be glassing the rest of the deck and next weekend I'll start assembling the cabinet carcasses and bulkheads. I was going to get the shell done first (the way you build a house) but the overhang off the back will be easier to build if I have the bed framing in place first. All will be built with 1" foam and then glassed. I haven't decided to make a weight concession with the galley countertop and dinette table and go with 3/4" ply or to use foam with an upper skin of 1/4" ply. Either way, they will be small enough that I can make both from the leftovers.
That's my build to date...let's hear about yours !
- Mark as New
- Bookmark
- Subscribe
- Mute
- Subscribe to RSS Feed
- Permalink
- Report Inappropriate Content
Sep-27-2014 08:30 AM
Besides, the fishing's been FAR too good this summer 🙂
Earlier this year I got frustrated with the lack of work space at the house so the shell is now in smaller pieces stored under the deck until we move, probably in the new year. I wanted to glass bigger panels than it's currently in, but this is a workable solution given the space I have. I'll pull them out one at a time, glass them and put them back into storage. Some of the corners may not hold their angles exactly, but I can fix that as I'm glassing them all together later. One of the great things about composites is the flexibility to rejoin the panels however I need to without losing structural strength, so I'm not too worried about it.
I have enough of a shape now that I won't need the 1X4 formers anymore. As I was pulling them out, I was actually surprised at just how much room there was inside. I mean, of course it'll fill up quick as I start building up the inside but I think that pushing the side wall out was worth the extra work to pick up the extra width. I don't have the storage space that those (square) corners would normally give, but the whole point of this build is to leave the junk (and its weight) at home.
I wasn't really happy with the way the sandwich floor came out, so I cut it up and took it to the dump. I have the dimensions from it so I can rebuild it easily enough. I think I'll use 1/4" marine ply for the upper and lower skins and 2" foam for the core. Despite being encapsulated in epoxy, using the luan was a mistake made in the name of cost, as was using EPS (white) foam instead of XPS (pink or blue) for the core. Fortunately, my work situation now means I don't have to make such deep compromises.
I'm back onto using the appliances again despite the space they take up and I think I just found (this past week) a local source for the cartridge heater the fridge needs. I've also got a local plastics guy who's going to make up a replacement window for the cracked one in the marine hatch that I'm using for the vent/window in the head. Because it's on the forward slope of the nose, a glass window there wouldn't survive the first logging road. Using the hatch means I won't need a stone shield for towing. I'll get him to make up a spare as well, just in case...
I'm moving away from using the windows I salvaged in favor of tinted frame-less windows. The cedar frames for the skylight windows went together pretty well (though they're not finished yet either) - so I may do something similar and use the top-hinged rear windows from a full size van since they are flat. Instead of having them kick out an inch or so at the bottom, I'll use hinges in the top holes that will let me open them right up as an awning window. I don't know that I'll be able to get hinges that will mate directly to the holes in the glass, so I'll use the regular round inserts that the factory hinges screw to and run a strip of aluminum bar stock across the inside that I can tap for whatever hinges I want to use.
I'm sure I rambled about it a few pages back, but I've got my solar panels up on the roof of the house and feed them into a 100 A*h deep cycle. From there it's into an inverter to run the espresso machine in the kitchen. I've been doing that as a tester for over a year now. I brought my load tester home from work last week and the battery still has its original capacity. Even at my latitude and with out grey coastal winters, the solar works well enough that I will put those panels on the roof instead of using that space for skylights (there's not enough roof area to do both).
I've been spending most of my spare time this summer fishing and now we're getting into my favorite season for camping - I'm actually leaving in a couple hours for the first trip of the year - but I will be back onto the build soon and I'll resume here when I do.
Again, thanks for sharing your interest in the project and for following along. It's been a long road so far but I still think it's be the best option for my vehicle and for how I like to camp, which tells me I must be on the right track...
- Mark as New
- Bookmark
- Subscribe
- Mute
- Subscribe to RSS Feed
- Permalink
- Report Inappropriate Content
Sep-25-2014 09:59 PM
mcoonan wrote:
Found this build but what happened next?
X2
This is a really novel design and I hope Lefty was able to complete it.
'71 Starcraft Wanderstar -- The Cowboy/Hilton
- Mark as New
- Bookmark
- Subscribe
- Mute
- Subscribe to RSS Feed
- Permalink
- Report Inappropriate Content
Sep-25-2014 02:42 PM
1976, 77 or 78 Coachman Cadet 19 1/2
Previous TT:
2005 Cherokee 28DD
1984 Scamp 16
- Mark as New
- Bookmark
- Subscribe
- Mute
- Subscribe to RSS Feed
- Permalink
- Report Inappropriate Content
Jun-03-2013 12:20 PM
I did a check check and it led me to one of these:

It seems to be a new production of an old design. It needs a 2"+ wall thickness, but I can build that up on the inside if need be or probably cut down the flange. This one's 110V AC but I ought to be able to change either the motor or the fan assembly to 12V easily enough. The important thing is that the whole thing is a wall mount - I could probably use just about anything as a hood because it doesn't need a fan. Hmmm...time to get creative - I have an old gold pan downstairs I don't use much anymore 🙂
You've definitely given me some food for thought if the passive flapper idea doesn't work. One could put a pin switch on the door in series with the fan switch so both switches need to close for the fan to run, but it would still leave the switch on the face for convenience while cooking.
Still, it would be cool to rebuild and use a vintage piece if I can...at least now I have a direction to look in.
In other news, I just got back from the wrecker's. I went in search of four scissor jacks to use as stabilizers. They had them, but not with all four having the same size hex head so I left my name and they'll give me a shout when they put a set together. In the meantime, I need to beef up the floor where I'll be mounting them. Because the underside of my floor is ply with the steel framing dividing it into a grid, I figure I'll fit a piece of 3/4" ply into the 'grid square' where each jack will mount. That ought to transfer the loading to the floor without point loading.
I also looked for 4-on-100mm and found that, while that's a really common size for imports, the hub center is 55mm instead of the 65mm I need. That would also give me a 13"X5" road wheels that would be easier to get tires for than the 13" trailer wheels I was planning on.
- Mark as New
- Bookmark
- Subscribe
- Mute
- Subscribe to RSS Feed
- Permalink
- Report Inappropriate Content
Jun-03-2013 11:26 AM
The moter & fan was on the inside wall the cover on the outside wall.
The switch was a type that was closed when the cover was closed.The
cover had a chain like some lights use.The kind with little balls
with pins between the balls.The inside frame had a slot for the chain
to sit in.To use you lifted the chain & the cover being spring loaded
the fan turned on.Cut a hole wire up & you got it.
- Mark as New
- Bookmark
- Subscribe
- Mute
- Subscribe to RSS Feed
- Permalink
- Report Inappropriate Content
May-26-2013 09:11 PM
If I'm dumbing it down or going too much into the minutiae, let me know - I just put down what I'd want to know if someone were trying to show me how to do it. I think most people's reticence about glassing is just lack of experience with it. It's like everything in life I guess: the more you do it, the easier it gets.
Thanks for linking to your exhaust vent. With that flapper weighing so little, do you still get a decent seal on the weatherstrip with the spring ?
I guess the real question is: how much difference does it make ? As long as it's mostly closed, that ought to make more difference than the last little bit.
You've definitely got me thinking though: maybe doing the same thing except in a round duct. The hinge line would be slightly above the horizontal center of the flapper: that ought to negate the need for a spring since it'll be bottom heavy (like an HVAC flapper). I figure a PC fan will give me the CFMs I need on less current and when it gets full of crud I can replace it cheaply enough...though the filter ought to catch most of it.
I've got the inside of the wall/ceiling panel glassed now. You can't really see much in the pic since the glass is so clear, but here the side laying on the table is glassed up to where the vertical piece of blue foam starts. You'll see the addition of fairing compound along the center seam and in the corners: you can see the white vs the yellowish of the spray foam.
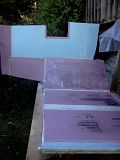
To do the ceiling (blue) I rotated the piece after that glass had hardened and stood it up so that the blue would now be horizontal. I blocked the wall up so it was 90 degrees to the table and ran a couple drywall screws in so it couldn't slide around. I faired the corner fillets with some more compound and glassed that surface too.
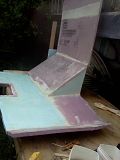
I'm working the next couple days so when I get back to it I'll flip it over and start fairing the outside. Once it's all glassed, it's back onto the trailer to be glassed into place and the curb side wall is structurally complete. Yay!
- Mark as New
- Bookmark
- Subscribe
- Mute
- Subscribe to RSS Feed
- Permalink
- Report Inappropriate Content
May-26-2013 08:41 PM
Pictures of my range vent redo start on: This page. I abandoned the cable idea because I found there were two latches on the outside that keep the flapper closed in the Winter. Unlatched, the spring keeps the flapper shut unless the fan is on.
Thanks for the details on the use of the epoxy and resin with the layup. This kind of info is like gold to me. I actually have some experience with glass and working on boats but your knowledge and skill is way above my paygrade.
'71 Starcraft Wanderstar -- The Cowboy/Hilton
- Mark as New
- Bookmark
- Subscribe
- Mute
- Subscribe to RSS Feed
- Permalink
- Report Inappropriate Content
May-25-2013 07:41 AM
recycler wrote:
...thinking of making a video for my photobucket account so i can show and explain how i built my camper..
That's a film I'd wait in line to see ! I've been thinking about doing that so I have a visual reference of what still needs to be done but, alas, I can't walk all the way around the trailer far enough away to film it and I can't move it right now because it's blocked up level. Not that I couldn't block it again, but I don't want to because the structure isn't done to the point where it's self supporting yet.
And yeah, glassing sure ain't the cheapest way to build, but it's a good one. I love that I have almost no wood in the structure itself and what is there is encapsulated in epoxy. If flies get perfectly preserved in amber for tens of millions of years then the cedar and fir I'm using ought to outlast me at least, right ?
And after that, who cares ? :B
Thx for that Paul, that's exactly what I was wondering. Both my old moho and the camper I got this hood from just had a louvered vent that was always open. I was thinking that something like those dryer vents with the flaps would be about right - good to know I'm on the right track. I'm trying to avoid buying RV-specific stuff because I can get marine stuff inexpensively on my business account but that's one of those things where I'll just buy a solution.
Thx for following along on this long, loooong road guys.
- Mark as New
- Bookmark
- Subscribe
- Mute
- Subscribe to RSS Feed
- Permalink
- Report Inappropriate Content
May-25-2013 07:19 AM
DeadeyeLefty wrote:
Question here for winter campers: do you find that the range hood is a source of drafts ? With a 3" square duct directly outside, it seems like it would sink cold air right into the trailer.
I'm thinking of something like a dryer vent, but one doesn't normally see anything like that on RVs (just louvered covers) so it can't be that big an issue....right ?
The duct for the range hood has a hinged flap which is opened by the air flow when you turn on the fan.
When the fan is not running, gravity holds it closed.
Extra Class Ham Radio operator - K9ERG (since 1956)
Retired Electronics Engineer and Antenna Designer
Was a campground host at IBSP (2006-2010) - now retired.
Single - Full-timer
2005 Four Winds 29Q
2011 2500HD 6.0L GMC Denali (Gasser)
- Mark as New
- Bookmark
- Subscribe
- Mute
- Subscribe to RSS Feed
- Permalink
- Report Inappropriate Content
May-25-2013 07:04 AM
- Mark as New
- Bookmark
- Subscribe
- Mute
- Subscribe to RSS Feed
- Permalink
- Report Inappropriate Content
May-24-2013 11:00 PM
First up, the furnace.
This is a unit made by now-defunct Flame Master in Edmonton so forget about finding any kind of info for it. (I think) the process has given me a pretty good feel for what makes these things tick.
The patient (click on pics for bigger):
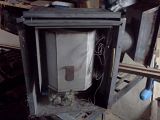
The problem was no fire: I had only a miniscule amount of gas flow and even that was intermittent. The ducting on this is all wrong for my build and I think it would be overkill in my little trailer anyway but I had the thing, I had the bench clear, so why not dive in and see if I could get it going...
I could go into a long tale of what I checked and what I found, but the end result was that the orifice for the pilot flame was plugged solid. I soaked it in mineral spirits for a day or so, blew it out, now it runs great.
This video is with the bottom plate removed for testing. The Tcouple is sitting in place just to hold the valve open (again, just for testing).
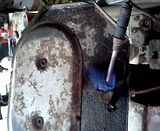
I have a few more pix so if anyone's interested in them or the steps I went through, just ask.
Now, to get back on track:
I haven't been too happy with trying to shoehorn the stove/oven in and I've been thinking pretty critically about how I'll be using the trailer. Given that some of my favorite spots get stupidly hot during the summer 🙂 I like the option of being able to take the cooking outside of where we sleep. To that end, I have remodeled the galley a little bit to make space for a two burner stove rather than the three-burner-plus-oven hob over the water tank. That will give me a bit of storage below and will save me probably 50 lbs...even with half a dozen canisters rolling around. So it looks like I'll be trying out one of those Coleman ovens when it comes time for the breakfast bikkies !

I still need to get rid of the heat and humidity of cooking and it didn't make sense to use the range hood since it goes with the stove. Besides, I can do better than a squirrel cage and an incandescent lamp with my 12V...like a PC fan and fluorescent or LED cooktop lighting. As it is, the range hood I have is meant for a vertical wall where mine needs to hit an angled wall section. I could just extend the ducting, but then it would be proud of the edge of the counter: an ergonomic no-no. The solution: Bah, I'll just make one !
First I had to make up a pattern for the end plates. Mostly I just needed the angle from the sidewall to the canted upper portion where it meets the roof (which I could get with a T-bevel and a few measurements) but I thought I'd detail a neat trick for pattern making:
Start with a sheet of 1/8" doorskin ($5-10) and rip it into 1" strips. I use a bit of the stuff so I always have scraps to rip for patterns, then 'repurpose' them into stir sticks for resin. Add a hot glue gun and you're off to the races.
This is where I'm starting - I want the range hood to start at the corner where the sidewall meets the upper section and go up from there.
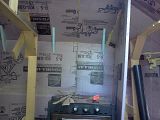
I laid in the first strip, glued to the temporary foam gusset in the back, leveled it across the bulkhead to establish the bottom line and glued in the front.
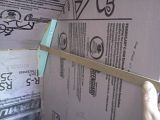
Keep following the contours you want to match by gluing in more 'sticks' and presto: one robust, ready-to-trace pattern that matches exactly.
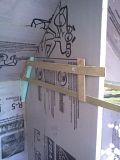
The finished pattern, cleaned up and ready for action.
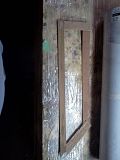
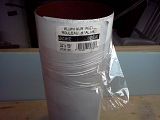
I picked up 5' of roll flashing and that's as far as I've gotten with it so far.
My plan is to make up the two ends (sides) and pop rivet them to the top. I will seal the whole thing (though I haven't yet decided with what - prob just SikaFlex) and will make it so that the end plates don't show the rivets, since they will be visible but the top won't.
Question here for winter campers: do you find that the range hood is a source of drafts ? With a 3" square duct directly outside, it seems like it would sink cold air right into the trailer.
I'm thinking of something like a dryer vent, but one doesn't normally see anything like that on RVs (just louvered covers) so it can't be that big an issue....right ?
I'd much rather have the duct protrude an eighth or so and cover it with a clamshell.

I've also been working on the door frame, having lined it with cedar and glassed the outer face. Being only a couple inches wide, the inner face will get glassed with the inside wall when I join it all together but I a bit of extra cloth on the outside won't be a bad thing. I may have to rip the door down a little as I build the glass up, but I allowed for that when I was making the door. This is the frame as cut out of the wall for glassing with the door wedged in.
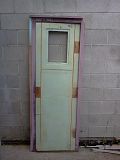
And laid out on the bench with the fir threshold clamped down. Once I got it all square, I ran drywall screws through the underside of the bench (1/2" ply) and into the foam to hold it. No fuss, no muss, no clamps to work around nor screws to pull as you go.....just remember to pull them before trying to flip it over to do the other side ! 🙂
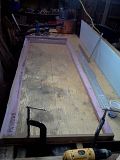
Then I let in the blocks and glued them with PU glue. Once that had hardened, I glued in the cedar strips (the actual wood jamb) with thickened epoxy. I wrapped the outside edge of the door in packing tape so the epoxy wouldn't stick to it and used it to hold the strips in place until the epoxy set up.
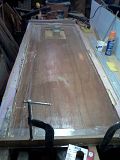
The 'rough opening' in the foam wall was just that: I needed it tight enough that I could use the door to plug the hole and a bit of a taper to the opening so the door would wedge tight. Of course, I want the finished jamb to be square so it meant I would inevitably have some material to replace. Being that this is a structural component, I filled it with a high density mix of resin, wood flour, and cabosil so that the filler would be of similar density (at least) to the wood.
Styrene based resins do this too, but epoxies generate quite a bit of heat while they're curing. I filled the deep gaps in three separate 'pours' to keep the heat from building up.
Here is the first fill on the biggest gap - you can see the amount of bevel I put on the foam to get a decent seal.
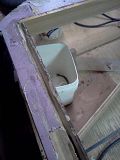
The cedar block in the pic is the uppermost (of three) hard points for securing the door hinges. You can see why I wanted to match or exceed the density of the wood between the jamb and the blocking - a lighter fairing compound wouldn't survive under the compression of a screw as the door is repeatedly opened and closed.
I have a pic of the finished product but, because the glass is clear, it doesn't look all that different from the first pic of it leaning against the wall...
That's it for now, this weekend's project (and into next week) is the next wall panel. This is the last (yay!) panel on the right (curb) side. Because it incorporates the door jamb, it has a couple funny angles on it: nothing that's impossible to glass by any means but it makes it fun to glass.
I got the panel blocked up on the table and fastened down so I can take out the temporary gussets for glassing and not have to worry about the angles changing on me. I also sanded them and got spray foam into the inside corners so I can get in there tomorrow with a drum sander on the drill and give them a rounded fillet. Then I'll skim it with putty and the glass will go on.
Here's a teaser of the panel on the bench. I'm looking forward to glassing it: flat square panels are just boring !
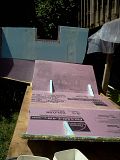
And here's the gaping hole it came from
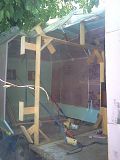
Since the roof is glassed from the back up to where this panel starts, it made sense to incorporate the roof into this panel. I'll do the same with its mates on the other side. You can see on each side of the roof vent (square half-opening on the top) I've staggered the seam so they don't line up. I don't know that it'll make a huge difference but it certainly isn't going to hurt...even if it is asymmetrical 🙂
I'll post up as the panel progresses. In the meantime, know anyone who needs a complete set of RV appliances (all working) ?
Just kidding, I'm saving them for the next build......
- Mark as New
- Bookmark
- Subscribe
- Mute
- Subscribe to RSS Feed
- Permalink
- Report Inappropriate Content
Mar-25-2013 08:16 AM
- Mark as New
- Bookmark
- Subscribe
- Mute
- Subscribe to RSS Feed
- Permalink
- Report Inappropriate Content
Mar-25-2013 07:04 AM
I'll probably leave that decision open until I'm actually installing the counter, because I'm also thinking about running a 'waistband' of matching trim at that height all around the trailer...maybe making it thick like a chair rail and routing the back side to use it as a wire chase.
It's funny because (like westend alluded to) it's almost like juggling plates right now - I'm trying to make progress without the materials to work on the shell for a while longer but at the same time I'm trying to avoid boxing myself into a corner.
I don't know if it shows up in the pics, but when I was cutting the rabbet in the fir edging I discovered a wobble in my table saw so the cut isn't straight...making the gap uneven. That's what I need to work on next weekend. This weekend was clearing out the shop so I have some space to take it apart, lol. Hopefully I'll get 'er licked and be back on the build right away, but it needs to be corrected before I cut the edging with it.
Yesterday I cut the hole for the little manual water pump after opening it to check the diaphragm and change the throw of the arm so there would be no conflict should I go with a thicker backsplash (wire chase & water tank vent). Now I just need to seal up the pump and that's checked off the list. It had originally been sealed with butyl tape but I'll be using SikaFlex. I also measured up some 6" and some 4" PVC sewer pipe I have laying around, so they may become an underslung 14 gal grey water tank to free up inside storage space.
Until I get the table saw squared up, this week's project is to make up the templates for the wheel well panels (1/4" ply backed with foam and the outside sealed with bed liner or undercoat ) and the vertical bed supports/locker dividers (1" foam with luan facing, tabbed into place).
I'll be using luan strips and a hot glue gun to make stick patterns more quickly and accurately than using a tick stick: I'll be sure to put up some pics of the process.
- Mark as New
- Bookmark
- Subscribe
- Mute
- Subscribe to RSS Feed
- Permalink
- Report Inappropriate Content
Mar-25-2013 06:10 AM
Looking good! Were you going to put a radius on the exposed corners of the counter top?
- Mark as New
- Bookmark
- Subscribe
- Mute
- Subscribe to RSS Feed
- Permalink
- Report Inappropriate Content
Mar-25-2013 06:00 AM


